单元测试用的包:junit-4.1.jar
本质上就是提供了一个方便且功能强大的接口,省去了你写main方法的麻烦。
package JunitPractice;

public class Calculator {
    public int add(int x,int y){
        return x+y;
    }
    public int divide(int x,int y){
        return x/y;
    }
    public static void main(String[] args) {
        int z=new Calculator().add(3, 5);
        System.out.println(z);
    }

}
然后写个junit的例子
package JunitTest;
import JunitPractice.Calculator;
import org.junit.After;
import org.junit.Assert;
import org.junit.Before;
import org.junit.Test;
import static org.junit.Assert.*;
public class CalculatorTest {
@Before
public void setUp() throws Exception {
System.out.println("method called before...");
}
@After
public void tearDown() throws Exception {
System.out.println("method called after...");
}
@Test
public void add() throws Exception {
Calculator cal=new Calculator();
int result=cal.add(2,3);
System.out.println("run here");
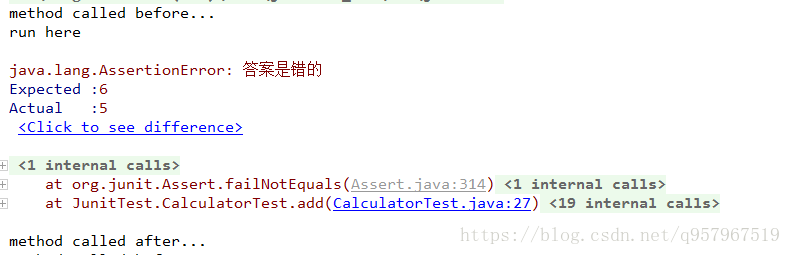
Assert.assertEquals("答案是错的",6,result);
System.out.println("run end");
}
@Test
public void divide() throws Exception {
}
}其中@before是在测试方法前调用的,@after是测试方法后调用的,这两个方法不管测试方法是否报错是否发生异常,都会执行。另外,before和after是方法级的,意思是这俩方法会在所有的@Test方法运行时都会执行。
测试方法就是个简单的计算,如果断言结果是错的,就会发生异常中断,assert后面的方法将不会执行。