版权声明:本文为博主原创文章,未经博主允许不得转载。 https://blog.csdn.net/liyuali2012/article/details/78595360
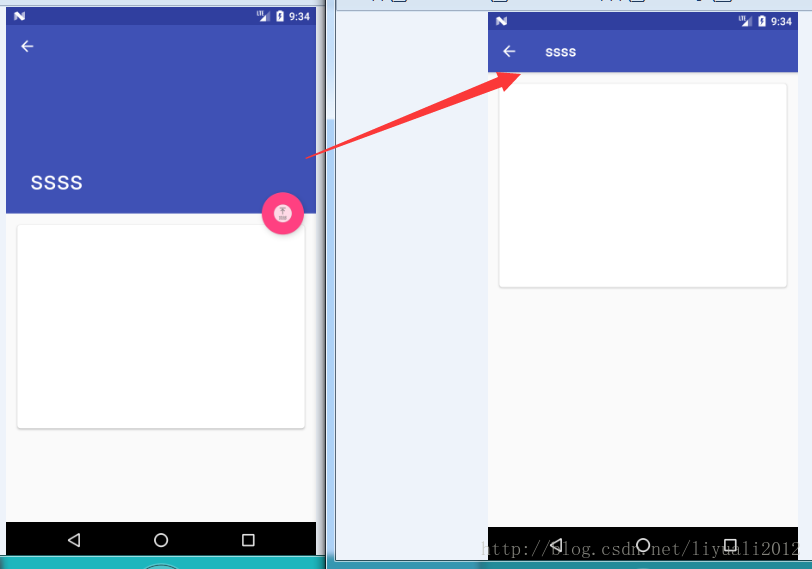
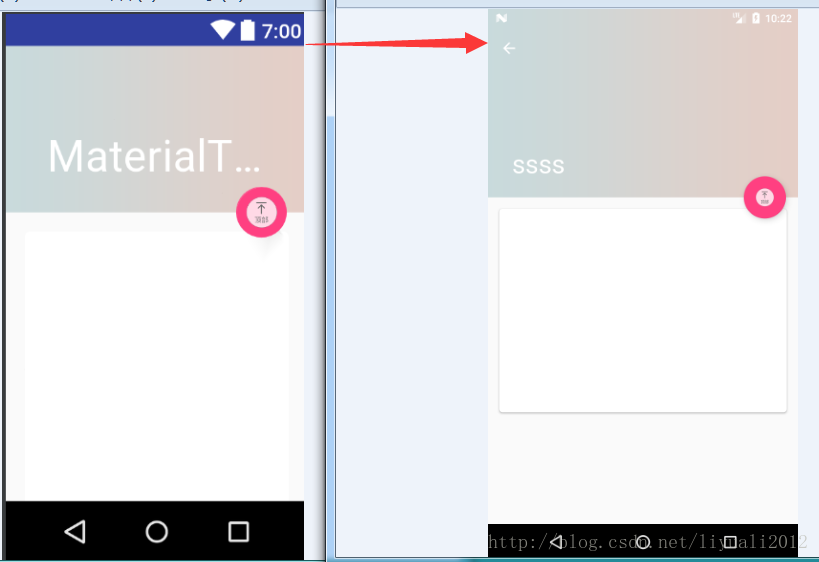
效果图
build.gradle
首先要添加依赖
dependencies {
    compile 'com.android.support:appcompat-v7:25.3.1'
    compile 'com.android.support:design:25.3.1'
    compile 'com.android.support:cardview-v7:25.3.1'

    compile 'com.jakewharton:butterknife:8.1.0'
    annotationProcessor 'com.jakewharton:butterknife-compiler:8.1.0'
}
设置appTheme
    <!-- Base application theme. -->
    <style name="AppTheme" parent="Theme.AppCompat.Light.NoActionBar">
        <!-- Customize your theme here. -->
        <item name="colorPrimary">@color/colorPrimary</item>
        <item name="colorPrimaryDark">@color/colorPrimaryDark</item>
        <item name="colorAccent">@color/colorAccent</item>
    </style>
布局文件
<?xml version="1.0" encoding="utf-8"?>
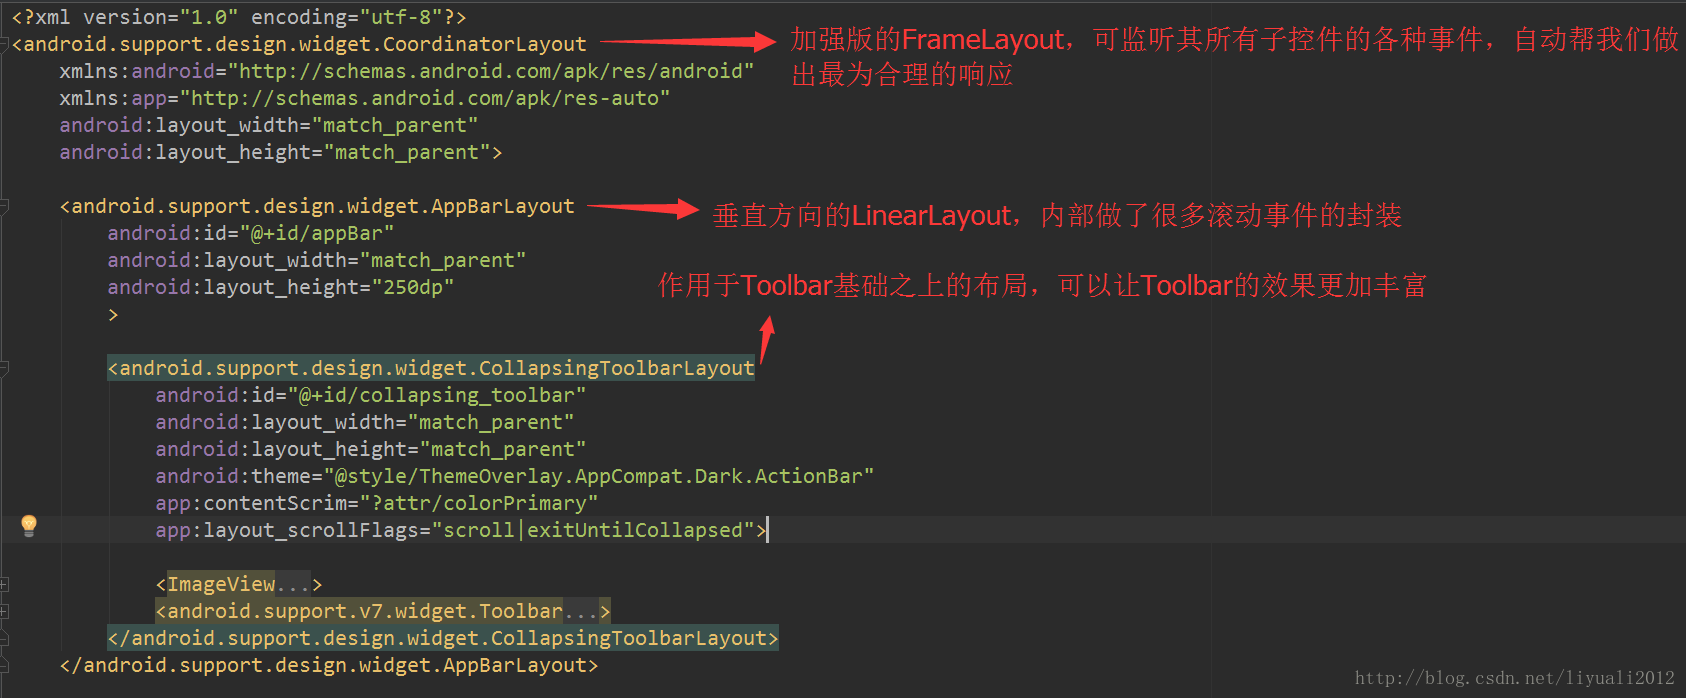
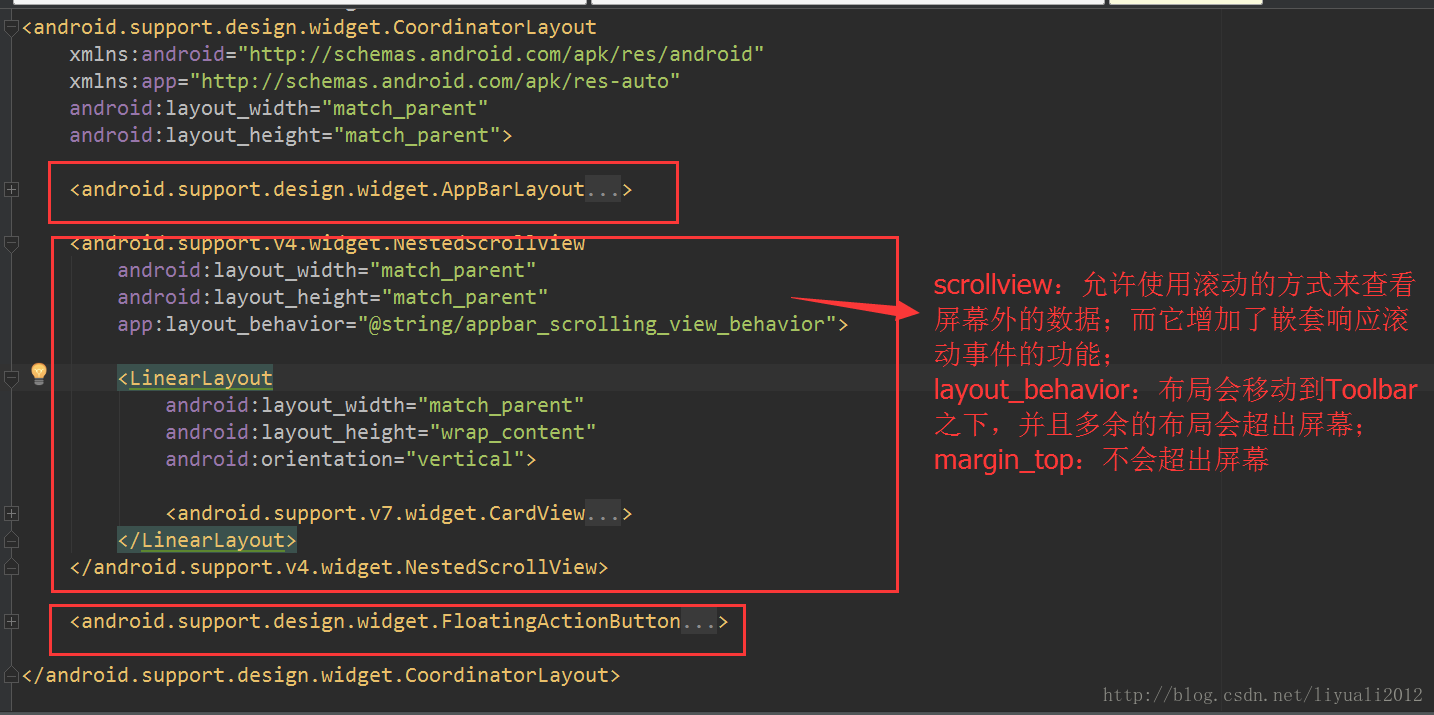
<android.support.design.widget.CoordinatorLayout
xmlns:android="http://schemas.android.com/apk/res/android"
xmlns:app="http://schemas.android.com/apk/res-auto"
android:layout_width="match_parent"
android:layout_height="match_parent">
<android.support.design.widget.AppBarLayout
android:id="@+id/appBar"
android:layout_width="match_parent"
android:layout_height="250dp"
>
<android.support.design.widget.CollapsingToolbarLayout
android:id="@+id/collapsing_toolbar"
android:layout_width="match_parent"
android:layout_height="match_parent"
android:theme="@style/ThemeOverlay.AppCompat.Dark.ActionBar"
app:contentScrim="?attr/colorPrimary"
app:layout_scrollFlags="scroll|exitUntilCollapsed">
<ImageView
android:id="@+id/image_view"
android:layout_width="match_parent"
android:layout_height="match_parent"
android:scaleType="centerCrop"
app:layout_collapseMode="parallax"
>
</ImageView>
<android.support.v7.widget.Toolbar
android:id="@+id/toolbar"
android:layout_width="match_parent"
android:layout_height="?attr/actionBarSize"
android:scaleType="centerCrop"
app:layout_collapseMode="pin"
></android.support.v7.widget.Toolbar>
</android.support.design.widget.CollapsingToolbarLayout>
</android.support.design.widget.AppBarLayout>
<android.support.v4.widget.NestedScrollView
android:layout_width="match_parent"
android:layout_height="match_parent"
app:layout_behavior="@string/appbar_scrolling_view_behavior">
<LinearLayout
android:layout_width="match_parent"
android:layout_height="wrap_content"
android:orientation="vertical">
<android.support.v7.widget.CardView
android:layout_width="match_parent"
android:layout_height="wrap_content"
android:layout_margin="15dp"
app:cardCornerRadius="4dp"
>
<TextView
android:id="@+id/content_text"
android:layout_width="match_parent"
android:layout_height="250dp"
android:layout_margin="10dp"/>
</android.support.v7.widget.CardView>
</LinearLayout>
</android.support.v4.widget.NestedScrollView>
<android.support.design.widget.FloatingActionButton
android:layout_width="wrap_content"
android:layout_height="wrap_content"
android:layout_margin="16dp"
android:src="@mipmap/totop"
app:layout_anchor="@id/appBar"
app:layout_anchorGravity="bottom|end"
/>
</android.support.design.widget.CoordinatorLayout>
记忆
Activity.java
public class FruitActivity extends AppCompatActivity {

    @BindView(R.id.image_view)
    ImageView imageView;
    @BindView(R.id.toolbar)
    Toolbar toolbar;
    @BindView(R.id.collapsing_toolbar)
    CollapsingToolbarLayout collapsingToolbar;
    @BindView(R.id.appBar)
    AppBarLayout appBar;
    @BindView(R.id.content_text)
    TextView contentText;

    @Override
    protected void onCreate(Bundle savedInstanceState) {
        super.onCreate(savedInstanceState);
        setContentView(R.layout.activity_fruit);
        ButterKnife.bind(this);

        setSupportActionBar(toolbar);
        ActionBar actionBar = getSupportActionBar();
        if (actionBar != null) {
            actionBar.setDisplayHomeAsUpEnabled(true);
        }
        collapsingToolbar.setTitle("ssss");
    }

    @Override
    public boolean onOptionsItemSelected(MenuItem item) {
        switch (item.getItemId()) {
            case android.R.id.home:
                finish();
                return true;
            default:
                break;
        }
        return super.onOptionsItemSelected(item);
    }
}

沉浸式状态栏
之前觉得很难,因为没有一劳永逸的解决方式,网上一搜整个布局都要改太麻烦,原来是我不知道5.0新出的design,理解了就明白了。这么高大上的东西才学会,,,,倒也不晚。慢慢融汇贯通。
分两步:
- 借助android:fitsSystemWindows:
设置为true,就表示该控件会出现在系统状态栏里,而且该控件的所有父布局都设置上这个属性。 状态栏颜色设置为透明色
新建文件
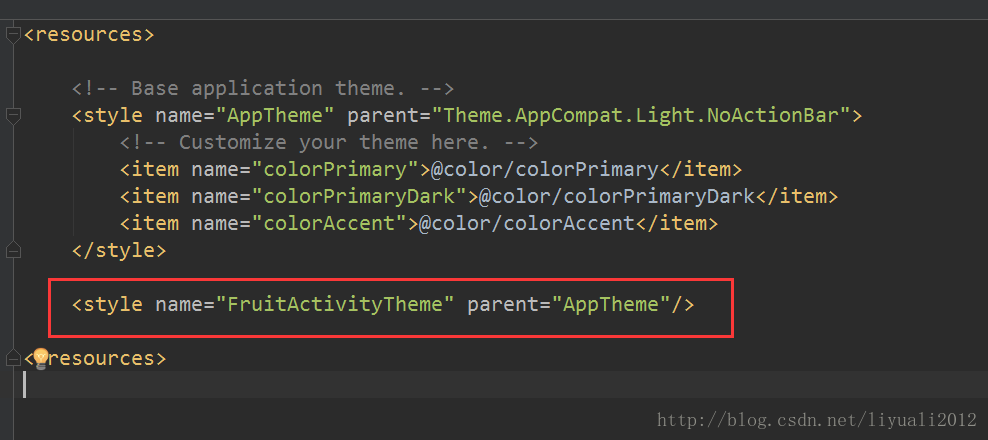
修改原来的style文件

修改注册文件

好了,大功告成!!!