Centos7 安装mysql自动化运维平台
体验地址(forked from 烂泥行天下/archer)
角色 账号 密码
管理员 archer archer
工程师 engineer archer
审核人 auditor archer
DBA dba archer
码云地址(forked from 烂泥行天下/archer)
https://gitee.com/jiaminxu/archer
docker 地址分别如下
https://dev.aliyun.com/detail.html?spm=5176.1972343.2.12.7b475aaaLiCfMf&repoId=142093
https://dev.aliyun.com/detail.html?spm=5176.1972343.2.38.XtXtLh&repoId=142147
1 安装docker
yum install -y yum-utils device-mapper-persistent-data lvm2
yum-config-manager --add-repo http://mirrors.aliyun.com/docker-ce/linux/centos/docker-ce.repo
yum makecache fast
yum -y install docker-ce
service docker start
2 pull 所需镜像
docker pull registry.cn-hangzhou.aliyuncs.com/lihuanhuan/archer
docker pull registry.cn-hangzhou.aliyuncs.com/lihuanhuan/inception
下载完之后 docker images 查看镜像

3 创建配置文件/etc/inc.cnf
| cat >>/etc/inc.cnf<<EOF [inception] inception_support_charset=utf8,utf8mb4 EOF |
指定配置文件和端口启动
docker run --name inception -v /etc/inc.cnf:/etc/inc.cnf -p 6669:6669 -dti registry.cn-hangzhou.aliyuncs.com/lihuanhuan/inception

4 安装mysql5.7(个人喜好)
因为自己有写脚本 所以安装了mysql5.7.12
安装完毕之后 创建django初始化的settings.py
红色标注为需要根据自身服务器修改的地方 如果出现报错 注意配置中间是否有多余空行
| # -*- coding: UTF-8 -*- """ Generated by 'django-admin startproject' using Django 1.8.17. For more information on this file, see For the full list of settings and their values, see # Build paths inside the project like this: os.path.join(BASE_DIR, ...) pymysql.install_as_MySQLdb() BASE_DIR = os.path.dirname(os.path.dirname(os.path.abspath(__file__))) # Quick-start development settings - unsuitable for production # SECURITY WARNING: keep the secret key used in production secret! # SECURITY WARNING: don't run with debug turned on in production! ALLOWED_HOSTS = ['*'] # 解决nginx部署跳转404 # Application definition INSTALLED_APPS = ( MIDDLEWARE_CLASSES = ( ROOT_URLCONF = 'archer.urls' TEMPLATES = [ WSGI_APPLICATION = 'archer.wsgi.application' # Internationalization LANGUAGE_CODE = 'zh-hans' TIME_ZONE = 'Asia/Shanghai' USE_I18N = True USE_TZ = False # 时间格式化 # Static files (CSS, JavaScript, Images) STATIC_URL = '/static/' # 扩展django admin里users字段用到,指定了sql/models.py里的class users ###############以下部分需要用户根据自己环境自行修改################### # session 设置 # Database # 该项目本身的mysql数据库地址 # inception组件所在的地址 # 查看回滚SQL时候会用到,这里要告诉archer去哪个mysql里读取inception备份的回滚信息和SQL. # 账户登录失败锁定时间(秒) # LDAP AUTHENTICATION_BACKENDS = ( # if use self signed certificate, Remove AUTH_LDAP_GLOBAL_OPTIONS annotations AUTH_LDAP_BIND_DN = "cn=xx,dc=xx,dc=xx" # AUTH_LDAP_MIRROR_GROUPS = True # 直接把ldap的组复制到django一份,和AUTH_LDAP_FIND_GROUP_PERMS互斥.用户每次登录会根据ldap来更新数据库的组关系 # 开启以下配置注释,可以帮助调试ldap集成 # 是否开启邮件提醒功能:发起SQL上线后会发送邮件提醒审核人审核,执行完毕会发送给DBA. on是开,off是关,配置为其他值均会被archer认为不开启邮件功能 # 是否开启SQL查询功能,关闭会隐藏菜单和相关功能 # 当inception语法树打印失败时在线查询的结果控制,建议修改inception变量inception_enable_select_star=OFF,否则select * 会报错 # 是否开启动态脱敏查询,采取正则遍历处理结果集的方式,会影响部分查询效率 # 管理员在线查询的结果集限制 # 是否开启慢日志管理,关闭会隐藏菜单和相关功能 # sqladvisor的路径配置,如'/opt/SQLAdvisor/sqladvisor/sqladvisor',''代表关闭,隐藏菜单和相关功能 # 是否开启AliYunRDS管理 |
docker run --name archer -v /etc/settings.py:/opt/archer/archer/settings.py -e NGINX_PORT=9123 -p 9123:9123 -dti registry.cn-hangzhou.aliyuncs.com/lihuanhuan/archer:latest
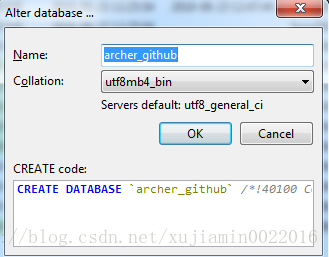
5 创建一个archer_github的数据库
我用的编码格式utf8mb4_bin
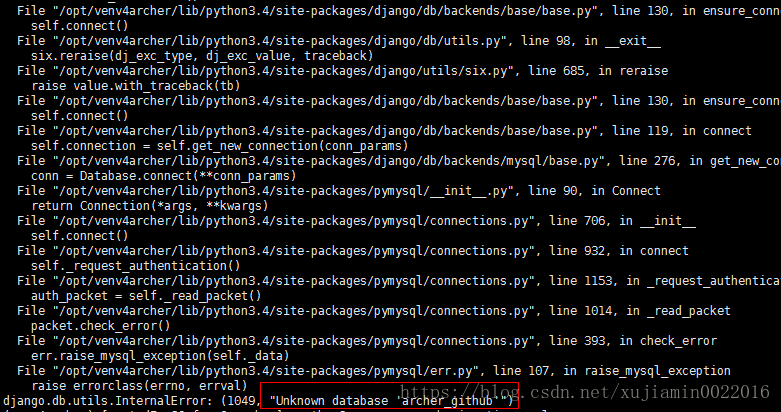
不创建数据库 初始化会报如下错误
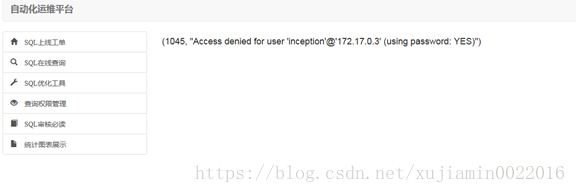
在mysql中执行如下sql 否则回滚sql时 会提示inception账号的一系列问题哦
grant all privileges on *.* to 'inception'@'%' identified by 'inception' with grant option;
flush privileges;
创建完数据库之后 运行容器
docker run --name archer -v /etc/settings.py:/opt/archer/archer/settings.py -e NGINX_PORT=9123 -p 9123:9123 -dti registry.cn-hangzhou.aliyuncs.com/lihuanhuan/archer:latest

6 进入容器 执行初始化命令
docker exec -ti archer /bin/bash
cd /opt/archer
source /opt/venv4archer/bin/activate
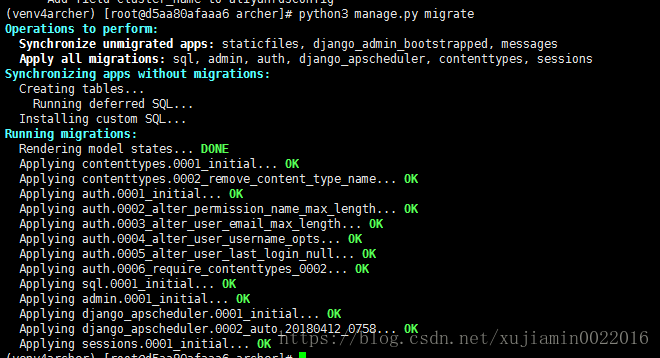
python3 manage.py makemigrations sql

python3 manage.py migrate
创建管理员账号
python3 manage.py createsuperuser
创建完毕 查看容器状态
docker ps -a

7 关闭防火墙或添加防火墙规则访问


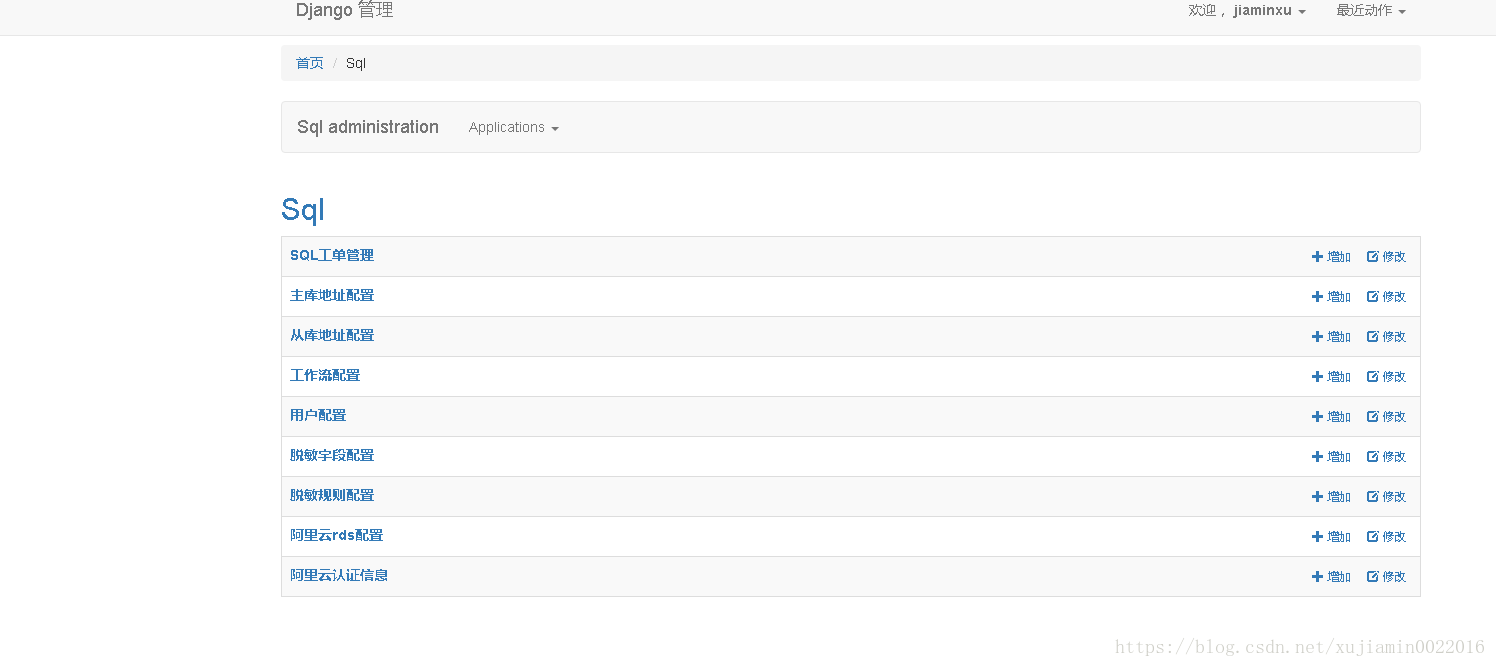
至此mysql自动化运维平台已经搭建完毕 配置方面请根据个人需求配置。
最后记录一下zip包安装的坑
使用zip包安装Incption 最后踩坑 还装了个阉割版。就当记录一下 万一以后不用docker 安装呢
zip包参考
https://blog.csdn.net/thundermeng/article/details/51097832
大致有如下坑
| Flask 必须安装0.9版本之下 否则会报错
其次需要做下图中的注释和修改 否则django 初始化会报找不到._compat
|


阉割版来辣 点进去还报错 我凑。

如果需要加入阿里云RDS修改配置文件settings.py

重启archer 的docker服务 就可以了