-
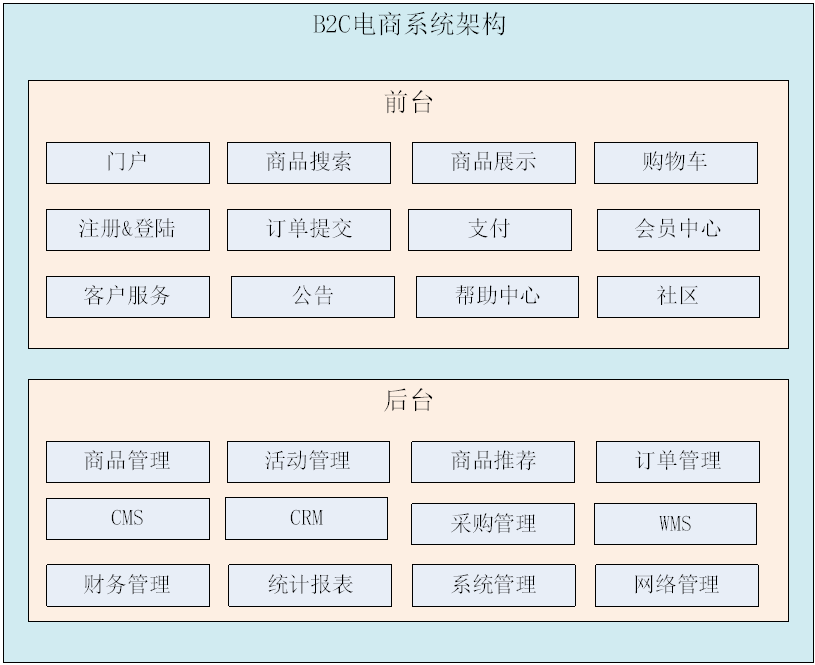
功能架构
-
系统功能图
-
-
功能描述后台管理系统:管理商品、订单、类目、商品规格属性、用户管理以及内容发布等功能。前台系统:用户可以在前台系统中进行注册、登录、浏览商品、首页、下单等操作。会员系统:用户可以在该系统中查询已下的订单、收藏的商品、我的优惠券、团购等信息。订单系统:提供下单、查询订单、修改订单状态、定时处理订单。搜索系统:提供商品的搜索功能。单点登录系统:为多个系统之间提供用户登录凭证以及查询登录用户的信息。
-
技术架构
-
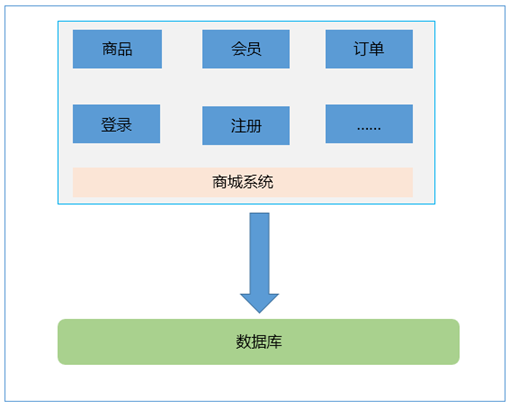
传统架构
-
思考:有什么问题?
-
模块之间耦合度太高,其中一个升级其他都得升级
-
开发困难,各个团队开发最后都要整合一起
-
系统的扩展性差4、不能灵活的进行分布式部署。
-
分布式系统架构
-
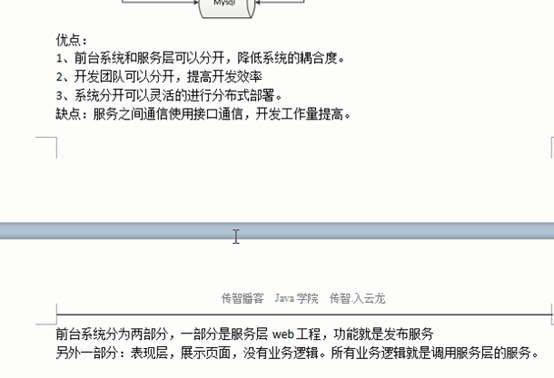
 分布式架构:把系统按照模块拆分成多个子系统。优点:
-
把模块拆分,使用接口通信,降低模块之间的耦合度。
-
把项目拆分成若干个子项目,不同的团队负责不同的子项目。
-
增加功能时只需要再增加一个子项目,调用其他系统的接口就可以。
-
可以灵活的进行分布式部署。
缺点:系统之间交互需要使用远程通信,接口开发增加工作量。
-
人员配置产品经理:3人,确定需求以及给出产品原型图。项目经理:1人,项目管理。前端团队:5人,根据产品经理给出的原型制作静态页面。后端团队:20人,实现产品功能。测试团队:5人,测试所有的功能。运维团队:3人,项目的发布以及维护。
-
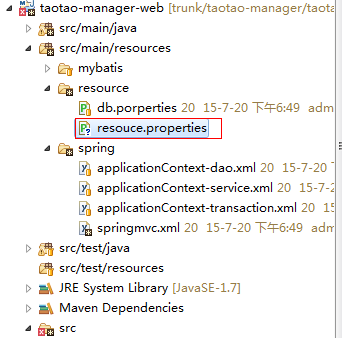
后台管理系统工程结构
-
maven管理的好处1、项目构建。Maven定义了软件开发的整套流程体系,并进行了封装,开发人员只需要指定项目的构建流程,无需针对每个流程编写自己的构建脚本。 2、依赖管理。除了项目构建,Maven最核心的功能是软件包的依赖管理,能够自动分析项目所需要的依赖软件包,并到Maven中心仓库去下载。
-
A)管理依赖的jar包
B)管理工程之间的依赖关系。
C)工程继承,聚合,依赖
-
Maven本地仓库在当前系统用户的文件夹下。例如当前用户是Administrator那么本地仓库就是在C:\Users\Administrator\.m2目录下。只需要用老师提供的.m2覆盖本地的就可以。
Maven插件使用eclipse mars自带maven插件。只需要统一开发环境。
-
依赖管理传统工程结构:
Maven管理的工程结构:
不使用maven:工程部署时需要手动复制jar包。完成工程构建。非常繁琐。使用maven进行工程构建:使用maven可以实现一步构建。
-
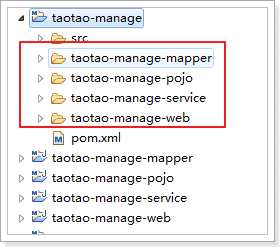
后台管理系统的工程结构


 继承:
继承:  依赖:
依赖: 后台管理系统工程结构:taotao-parent -- 管理依赖jar包的版本,全局,公司级别|--taotao-common --- 通用组件、工具类|--taotao-manage -- 后台系统
|--com.taotao.manage.web
|--com.taotao.manage.service
|--com.taotao.manage.mapper
|--com.taotao.manage.pojo
-
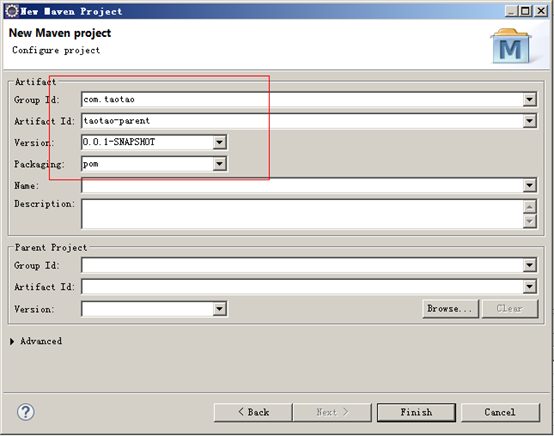
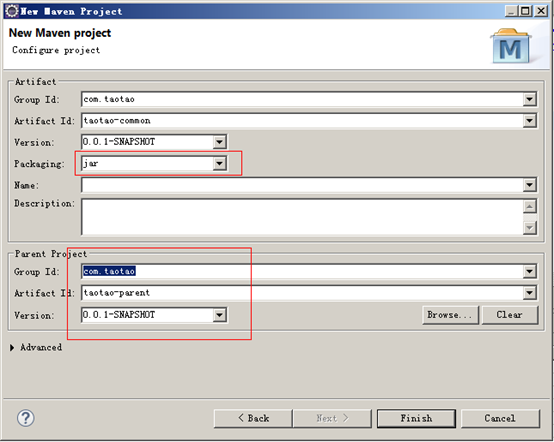
创建taotao-parent
-
创建maven工程
-
-
修改pom文件
<project xmlns="http://maven.apache.org/POM/4.0.0" xmlns:xsi="http://www.w3.org/2001/XMLSchema-instance"
xsi:schemaLocation="http://maven.apache.org/POM/4.0.0 http://maven.apache.org/xsd/maven-4.0.0.xsd">
<modelVersion>4.0.0</modelVersion>
<groupId>com.taotao</groupId>
<artifactId>taotao-parent</artifactId>
<version>0.0.1-SNAPSHOT</version>
<packaging>pom</packaging>
<!-- 集中定义依赖版本号 -->
<properties>
<junit.version>4.12</junit.version>
<spring.version>4.1.3.RELEASE</spring.version>
<mybatis.version>3.2.8</mybatis.version>
<mybatis.spring.version>1.2.2</mybatis.spring.version>
<mybatis.paginator.version>1.2.15</mybatis.paginator.version>
<mysql.version>5.1.32</mysql.version>
<slf4j.version>1.6.4</slf4j.version>
<jackson.version>2.4.2</jackson.version>
<druid.version>1.0.9</druid.version>
<httpclient.version>4.3.5</httpclient.version>
<jstl.version>1.2</jstl.version>
<servlet-api.version>2.5</servlet-api.version>
<jsp-api.version>2.0</jsp-api.version>
<joda-time.version>2.5</joda-time.version>
<commons-lang3.version>3.3.2</commons-lang3.version>
<commons-io.version>1.3.2</commons-io.version>
<commons-net.version>3.3</commons-net.version>
<pagehelper.version>3.4.2-fix</pagehelper.version>
<jsqlparser.version>0.9.1</jsqlparser.version>
<commons-fileupload.version>1.3.1</commons-fileupload.version>
<jedis.version>2.7.2</jedis.version>
<solrj.version>4.10.3</solrj.version>
</properties>
<dependencyManagement>
<dependencies>
<!-- 时间操作组件 -->
<dependency>
<groupId>joda-time</groupId>
<artifactId>joda-time</artifactId>
<version>${joda-time.version}</version>
</dependency>
<!-- Apache工具组件 -->
<dependency>
<groupId>org.apache.commons</groupId>
<artifactId>commons-lang3</artifactId>
<version>${commons-lang3.version}</version>
</dependency>
<dependency>
<groupId>org.apache.commons</groupId>
<artifactId>commons-io</artifactId>
<version>${commons-io.version}</version>
</dependency>
<dependency>
<groupId>commons-net</groupId>
<artifactId>commons-net</artifactId>
<version>${commons-net.version}</version>
</dependency>
<!-- Jackson Json处理工具包 -->
<dependency>
<groupId>com.fasterxml.jackson.core</groupId>
<artifactId>jackson-databind</artifactId>
<version>${jackson.version}</version>
</dependency>
<!-- httpclient -->
<dependency>
<groupId>org.apache.httpcomponents</groupId>
<artifactId>httpclient</artifactId>
<version>${httpclient.version}</version>
</dependency>
<!-- 单元测试 -->
<dependency>
<groupId>junit</groupId>
<artifactId>junit</artifactId>
<version>${junit.version}</version>
<scope>test</scope>
</dependency>
<!-- 日志处理 -->
<dependency>
<groupId>org.slf4j</groupId>
<artifactId>slf4j-log4j12</artifactId>
<version>${slf4j.version}</version>
</dependency>
<!-- Mybatis -->
<dependency>
<groupId>org.mybatis</groupId>
<artifactId>mybatis</artifactId>
<version>${mybatis.version}</version>
</dependency>
<dependency>
<groupId>org.mybatis</groupId>
<artifactId>mybatis-spring</artifactId>
<version>${mybatis.spring.version}</version>
</dependency>
<dependency>
<groupId>com.github.miemiedev</groupId>
<artifactId>mybatis-paginator</artifactId>
<version>${mybatis.paginator.version}</version>
</dependency>
<dependency>
<groupId>com.github.pagehelper</groupId>
<artifactId>pagehelper</artifactId>
<version>${pagehelper.version}</version>
</dependency>
<!-- MySql -->
<dependency>
<groupId>mysql</groupId>
<artifactId>mysql-connector-java</artifactId>
<version>${mysql.version}</version>
</dependency>
<!-- 连接池 -->
<dependency>
<groupId>com.alibaba</groupId>
<artifactId>druid</artifactId>
<version>${druid.version}</version>
</dependency>
<!-- Spring -->
<dependency>
<groupId>org.springframework</groupId>
<artifactId>spring-context</artifactId>
<version>${spring.version}</version>
</dependency>
<dependency>
<groupId>org.springframework</groupId>
<artifactId>spring-beans</artifactId>
<version>${spring.version}</version>
</dependency>
<dependency>
<groupId>org.springframework</groupId>
<artifactId>spring-webmvc</artifactId>
<version>${spring.version}</version>
</dependency>
<dependency>
<groupId>org.springframework</groupId>
<artifactId>spring-jdbc</artifactId>
<version>${spring.version}</version>
</dependency>
<dependency>
<groupId>org.springframework</groupId>
<artifactId>spring-aspects</artifactId>
<version>${spring.version}</version>
</dependency>
<!-- JSP相关 -->
<dependency>
<groupId>jstl</groupId>
<artifactId>jstl</artifactId>
<version>${jstl.version}</version>
</dependency>
<dependency>
<groupId>javax.servlet</groupId>
<artifactId>servlet-api</artifactId>
<version>${servlet-api.version}</version>
<scope>provided</scope>
</dependency>
<dependency>
<groupId>javax.servlet</groupId>
<artifactId>jsp-api</artifactId>
<version>${jsp-api.version}</version>
<scope>provided</scope>
</dependency>
<!-- 文件上传组件 -->
<dependency>
<groupId>commons-fileupload</groupId>
<artifactId>commons-fileupload</artifactId>
<version>${commons-fileupload.version}</version>
</dependency>
<!-- Redis客户端 -->
<dependency>
<groupId>redis.clients</groupId>
<artifactId>jedis</artifactId>
<version>${jedis.version}</version>
</dependency>
<!-- solr客户端 -->
<dependency>
<groupId>org.apache.solr</groupId>
<artifactId>solr-solrj</artifactId>
<version>${solrj.version}</version>
</dependency>
</dependencies>
</dependencyManagement>
<build>
<finalName>${project.artifactId}</finalName>
<plugins>
<!-- 资源文件拷贝插件 -->
<plugin>
<groupId>org.apache.maven.plugins</groupId>
<artifactId>maven-resources-plugin</artifactId>
<version>2.7</version>
<configuration>
<encoding>UTF-8</encoding>
</configuration>
</plugin>
<!-- java编译插件 -->
<plugin>
<groupId>org.apache.maven.plugins</groupId>
<artifactId>maven-compiler-plugin</artifactId>
<version>3.2</version>
<configuration>
<source>1.7</source>
<target>1.7</target>
<encoding>UTF-8</encoding>
</configuration>
</plugin>
</plugins>
<pluginManagement>
<plugins>
<!-- 配置Tomcat插件 -->
<plugin>
<groupId>org.apache.tomcat.maven</groupId>
<artifactId>tomcat7-maven-plugin</artifactId>
<version>2.2</version>
</plugin>
</plugins>
</pluginManagement>
</build></project>
-
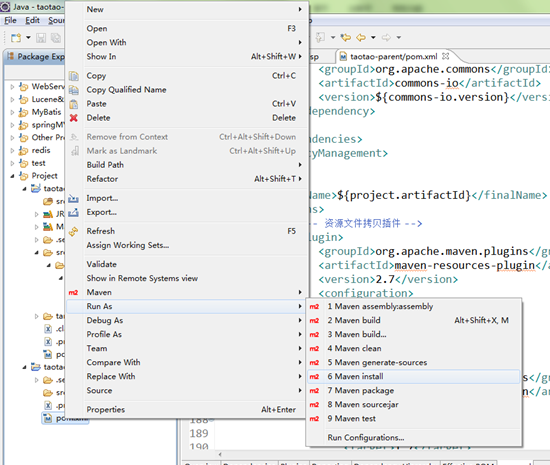
将taotao-parent安装到本地仓库。

-
taotao-common
-
创建工程
-
修改pom文件修改taotao-common工程的pom文件,在文件中添加对taotao-parent的继承。
-
<project xmlns="http://maven.apache.org/POM/4.0.0" xmlns:xsi="http://www.w3.org/2001/XMLSchema-instance" xsi:schemaLocation="http://maven.apache.org/POM/4.0.0 http://maven.apache.org/xsd/maven-4.0.0.xsd">
<modelVersion>4.0.0</modelVersion>
<parent>
<groupId>com.taotao</groupId>
<artifactId>taotao-parent</artifactId>
<version>0.0.1-SNAPSHOT</version>
</parent>
<groupId>com.taotao</groupId>
<artifactId>taotao-common</artifactId>
<version>0.0.1-SNAPSHOT</version></project><!-- jar包的依赖 -->
<dependencies>
<!-- 时间操作组件 -->
<dependency>
<groupId>joda-time</groupId>
<artifactId>joda-time</artifactId>
</dependency>
<!-- Apache工具组件 -->
<dependency>
<groupId>org.apache.commons</groupId>
<artifactId>commons-lang3</artifactId>
</dependency>
<dependency>
<groupId>org.apache.commons</groupId>
<artifactId>commons-io</artifactId>
</dependency>
<dependency>
<groupId>commons-net</groupId>
<artifactId>commons-net</artifactId>
</dependency>
<!-- Jackson Json处理工具包 -->
<dependency>
<groupId>com.fasterxml.jackson.core</groupId>
<artifactId>jackson-databind</artifactId>
</dependency>
<!-- httpclient -->
<dependency>
<groupId>org.apache.httpcomponents</groupId>
<artifactId>httpclient</artifactId>
</dependency>
<!-- 单元测试 -->
<dependency>
<groupId>junit</groupId>
<artifactId>junit</artifactId>
<scope>test</scope>
</dependency>
<!-- 日志处理 -->
<dependency>
<groupId>org.slf4j</groupId>
<artifactId>slf4j-log4j12</artifactId>
</dependency>
<dependency>
<groupId>javax.servlet</groupId>
<artifactId>servlet-api</artifactId>
<scope>provided</scope>
</dependency>
<dependency>
<groupId>javax.servlet</groupId>
<artifactId>jsp-api</artifactId>
<scope>provided</scope>
</dependency>
</dependencies>
-
更新工程工程点击右键→maven→update Project Configuration
-
taotao-manage
-
创建taotao-manager
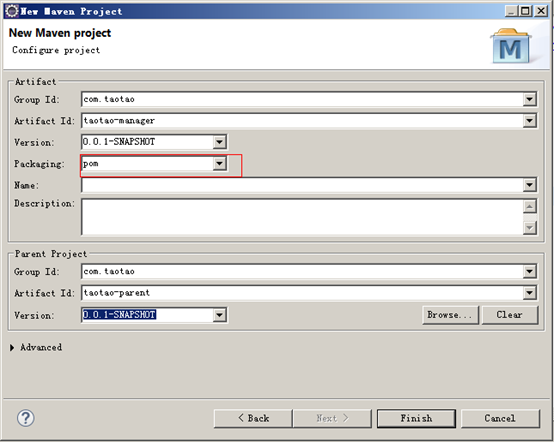 修改pom文件:
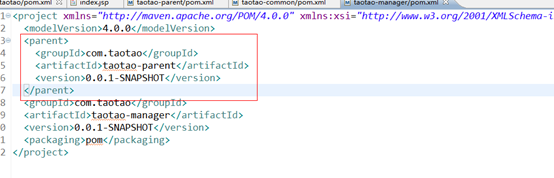
-
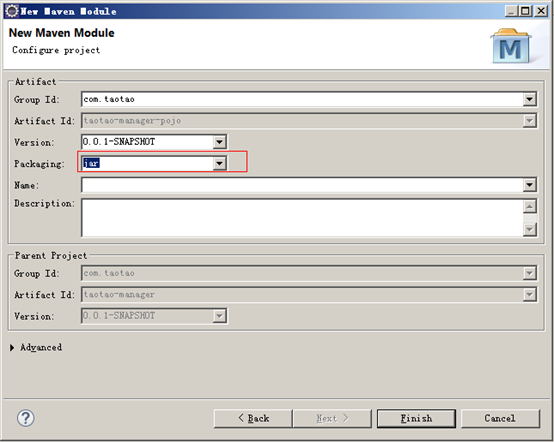
taotao-manage-pojo

-
-
Taotao-manager-mapper
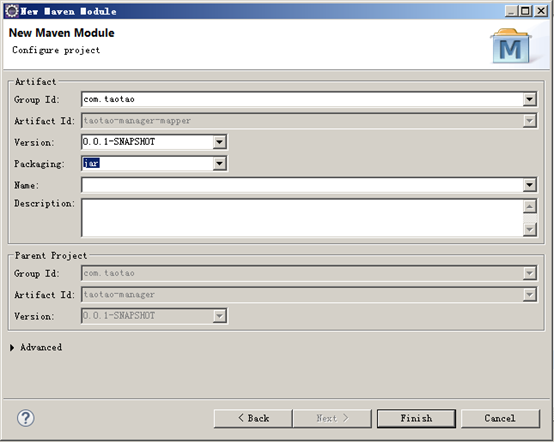
-
Taotao-manager-service

-
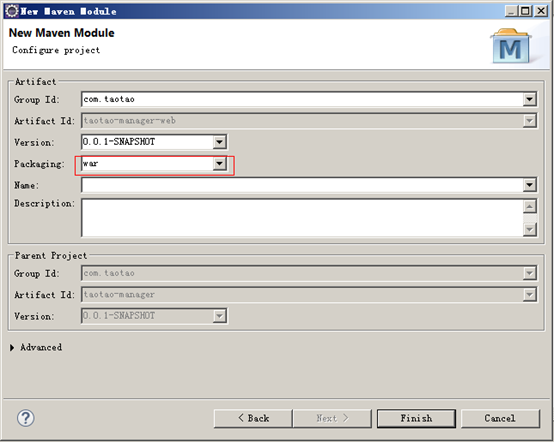
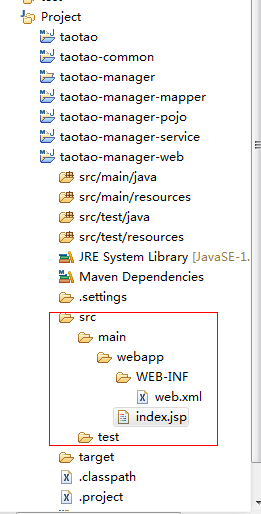
Taotao-manager-web
-
配置工程:
-
Web.xml
<?xml version="1.0" encoding="UTF-8"?><web-app xmlns:xsi="http://www.w3.org/2001/XMLSchema-instance"
xmlns="http://java.sun.com/xml/ns/javaee" xmlns:web="http://java.sun.com/xml/ns/javaee/web-app_2_5.xsd"
xsi:schemaLocation="http://java.sun.com/xml/ns/javaee http://java.sun.com/xml/ns/javaee/web-app_2_5.xsd"
id="taotao" version="2.5">
<display-name>taotao-manager</display-name>
<welcome-file-list>
<welcome-file>index.html</welcome-file>
<welcome-file>index.htm</welcome-file>
<welcome-file>index.jsp</welcome-file>
<welcome-file>default.html</welcome-file>
<welcome-file>default.htm</welcome-file>
<welcome-file>default.jsp</welcome-file>
</welcome-file-list>
</web-app>
-
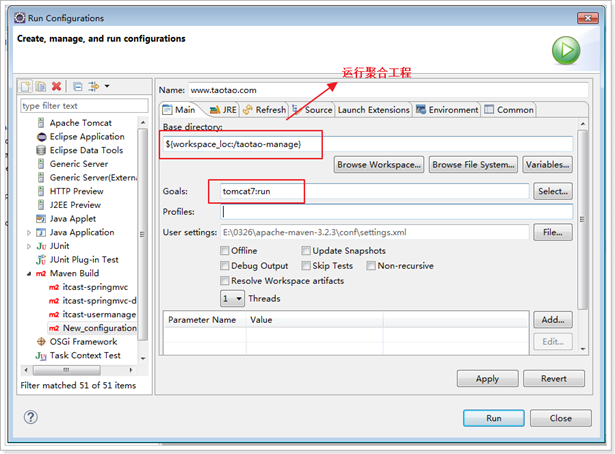
配置tomcat插件运行web工程需要添加一个tomcat插件。插件必须添加到taotao-manager工程中。因为taotao-manager是聚合工程。在运行时需要把子工程聚合到一起才能运行。
<build>
<plugins>
<!-- 配置Tomcat插件 -->
<plugin>
<groupId>org.apache.tomcat.maven</groupId>
<artifactId>tomcat7-maven-plugin</artifactId>
<version>2.2</version>
<configuration>
<port>8080</port>
<path>/</path>
</configuration>
</plugin>
</plugins>
</build>
启动tomcat命令:tomcat7:run
-
taotao-manage子模块依赖关系
依赖关系:web è serviceservice è mappermapper è pojo
-
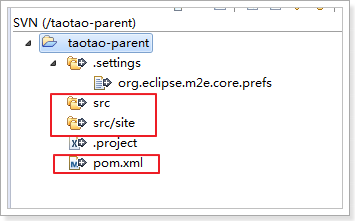
提交代码到SVN
-
提交代码
-
注意:提交到SVN的Maven项目,只提交src和pom.xml
-
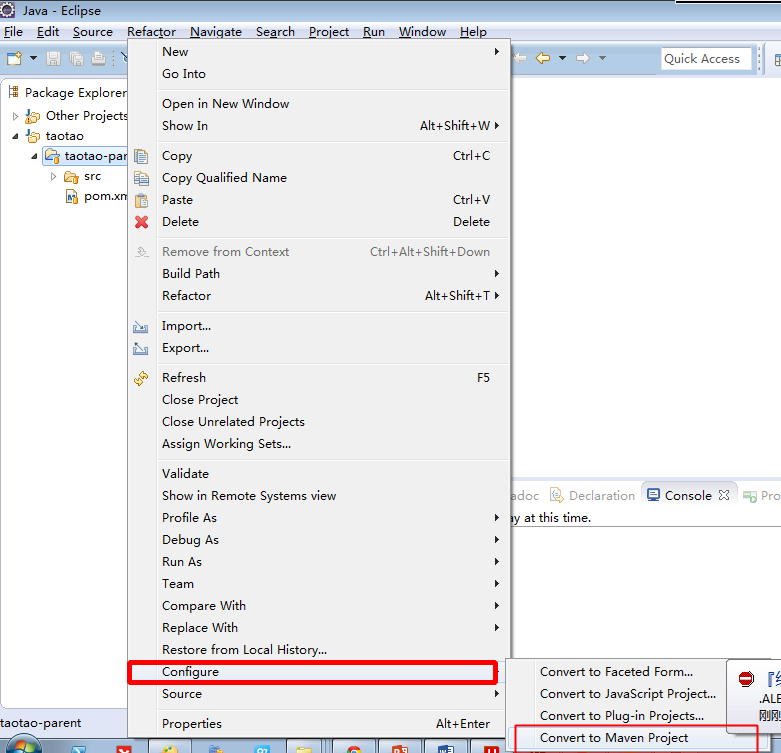
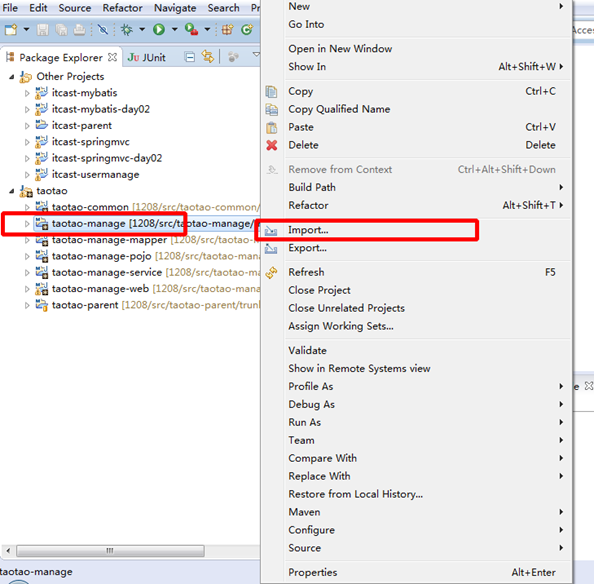
从SVN检出项目
-
从trunk检出项目,并且重命名项目名称
-
转化为maven项目
-
聚合项目中子项目需要从父工程中【导入】,选择 【已经存在的maven项目】,不能从SVN再次检出子项目

淘淘商城
-
SSM框架整合
-
后台系统所用的技术框架:Spring + SpringMVC + Mybatis前端:EasyUI数据库:mysql
-
创建数据库1、安装mysql数据库2、在mysql中创建一个taotao数据库3、导入数据库脚本。
-
-
Mybatis逆向工程执行逆向工程使用官方网站的mapper自动生成工具mybatis-generator-core-1.3.2来生成po类和mapper映射文件。
-
整合思路
-
-
Dao层:mybatis整合spring,通过spring管理SqlSessionFactory、mapper代理对象。需要mybatis和spring的整合包。
整合内容
对应工程
Pojo
Taotao-mangaer-pojo
Mapper映射文件
Taotao-mangaer-mapper
Mapper接口
Taotao-mangaer-mapper
sqlmapConfig.xml
Taotao-manager-web
applicationContext-dao.xml
Taotao-manager-web
-
Service层:所有的实现类都放到spring容器中管理。由spring创建数据库连接池,并有spring管理实务。
整合内容
对应工程
Service接口及实现类
Taotao-mangaer-service
applicationContext-service.xml
Taotao-manager-web
applicationContext-trans.xml
Taotao-manager-web
-
表现层:Springmvc整合spring框架,由springmvc管理controller。
整合内容
对应工程
springmvc.xml
Taotao-manager-web
Controller
Taotao-manager-web
-
Dao整合
-
创建SqlMapConfig.xml配置文件
-
<?xml version="1.0" encoding="UTF-8" ?><!DOCTYPE configuration
PUBLIC "-//mybatis.org//DTD Config 3.0//EN"
"http://mybatis.org/dtd/mybatis-3-config.dtd"><configuration>
</configuration>
-
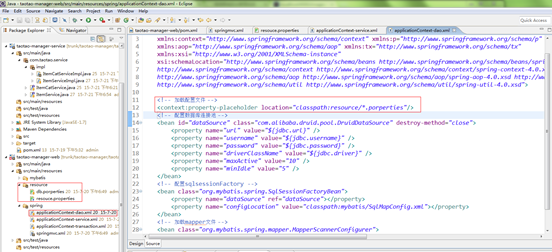
Spring整合mybatis创建applicationContext-dao.xml
<beans xmlns="http://www.springframework.org/schema/beans"
xmlns:context="http://www.springframework.org/schema/context" xmlns:p="http://www.springframework.org/schema/p"
xmlns:aop="http://www.springframework.org/schema/aop" xmlns:tx="http://www.springframework.org/schema/tx"
xmlns:xsi="http://www.w3.org/2001/XMLSchema-instance"
xsi:schemaLocation="http://www.springframework.org/schema/beans http://www.springframework.org/schema/beans/spring-beans-4.0.xsd
http://www.springframework.org/schema/context http://www.springframework.org/schema/context/spring-context-4.0.xsd
http://www.springframework.org/schema/aop http://www.springframework.org/schema/aop/spring-aop-4.0.xsd http://www.springframework.org/schema/tx http://www.springframework.org/schema/tx/spring-tx-4.0.xsd
http://www.springframework.org/schema/util http://www.springframework.org/schema/util/spring-util-4.0.xsd">
<!-- 数据库连接池 -->
<!-- 加载配置文件 -->
<context:property-placeholder location="classpath:properties/*.properties" />
<!-- 数据库连接池 -->
<bean id="dataSource" class="com.alibaba.druid.pool.DruidDataSource"
destroy-method="close">
<property name="url" value="${jdbc.url}" />
<property name="username" value="${jdbc.username}" />
<property name="password" value="${jdbc.password}" />
<property name="driverClassName" value="${jdbc.driver}" />
<property name="maxActive" value="10" />
<property name="minIdle" value="5" />
</bean>
<!-- 让spring管理sqlsessionfactory 使用mybatis和spring整合包中的 -->
<bean id="sqlSessionFactory" class="org.mybatis.spring.SqlSessionFactoryBean">
<!-- 数据库连接池 -->
<property name="dataSource" ref="dataSource" />
<!-- 加载mybatis的全局配置文件 -->
<property name="configLocation" value="classpath:mybatis/SqlMapConfig.xml" />
</bean>
<bean class="org.mybatis.spring.mapper.MapperScannerConfigurer">
<property name="basePackage" value="com.taotao.mapper" />
</bean></beans>
db.properties
jdbc.driver=com.mysql.jdbc.Driverjdbc.url=jdbc:mysql://localhost:3306/taotao?characterEncoding=utf-8jdbc.username=rootjdbc.password=root
备注:Druid是目前最好的数据库连接池,在功能、性能、扩展性方面,都超过其他数据库连接池,包括DBCP、C3P0、BoneCP、Proxool、JBoss DataSource。Druid已经在阿里巴巴部署了超过600个应用,经过多年多生产环境大规模部署的严苛考验。
-
Service整合
-
管理Service实现类
-
<beans xmlns="http://www.springframework.org/schema/beans"
xmlns:context="http://www.springframework.org/schema/context" xmlns:p="http://www.springframework.org/schema/p"
xmlns:aop="http://www.springframework.org/schema/aop" xmlns:tx="http://www.springframework.org/schema/tx"
xmlns:xsi="http://www.w3.org/2001/XMLSchema-instance"
xsi:schemaLocation="http://www.springframework.org/schema/beans http://www.springframework.org/schema/beans/spring-beans-4.0.xsd
http://www.springframework.org/schema/context http://www.springframework.org/schema/context/spring-context-4.0.xsd
http://www.springframework.org/schema/aop http://www.springframework.org/schema/aop/spring-aop-4.0.xsd http://www.springframework.org/schema/tx http://www.springframework.org/schema/tx/spring-tx-4.0.xsd
http://www.springframework.org/schema/util http://www.springframework.org/schema/util/spring-util-4.0.xsd">
<context:component-scan base-package="com.taotao.service"/>
</beans>
-
事务管理创建applicationContext-trans.xml
<beans xmlns="http://www.springframework.org/schema/beans"
xmlns:context="http://www.springframework.org/schema/context" xmlns:p="http://www.springframework.org/schema/p"
xmlns:aop="http://www.springframework.org/schema/aop" xmlns:tx="http://www.springframework.org/schema/tx"
xmlns:xsi="http://www.w3.org/2001/XMLSchema-instance"
xsi:schemaLocation="http://www.springframework.org/schema/beans http://www.springframework.org/schema/beans/spring-beans-4.0.xsd
http://www.springframework.org/schema/context http://www.springframework.org/schema/context/spring-context-4.0.xsd
http://www.springframework.org/schema/aop http://www.springframework.org/schema/aop/spring-aop-4.0.xsd http://www.springframework.org/schema/tx http://www.springframework.org/schema/tx/spring-tx-4.0.xsd
http://www.springframework.org/schema/util http://www.springframework.org/schema/util/spring-util-4.0.xsd">
<!-- 事务管理器 -->
<bean id="transactionManager"
class="org.springframework.jdbc.datasource.DataSourceTransactionManager">
<!-- 数据源 -->
<property name="dataSource" ref="dataSource" />
</bean>
<!-- 通知 -->
<tx:advice id="txAdvice" transaction-manager="transactionManager">
<tx:attributes>
<!-- 传播行为 -->
<tx:method name="save*" propagation="REQUIRED" />
<tx:method name="insert*" propagation="REQUIRED" />
<tx:method name="add*" propagation="REQUIRED" />
<tx:method name="create*" propagation="REQUIRED" />
<tx:method name="delete*" propagation="REQUIRED" />
<tx:method name="update*" propagation="REQUIRED" />
<tx:method name="find*" propagation="SUPPORTS" read-only="true" />
<tx:method name="select*" propagation="SUPPORTS" read-only="true" />
<tx:method name="get*" propagation="SUPPORTS" read-only="true" />
</tx:attributes>
</tx:advice>
<!-- 切面 -->
<aop:config>
<aop:advisor advice-ref="txAdvice"
pointcut="execution(* com.taotao.service.*.*(..))" />
</aop:config></beans>
-
表现层整合
-
Springmvc.xml
-
<?xml version="1.0" encoding="UTF-8"?><beans xmlns="http://www.springframework.org/schema/beans"
xmlns:xsi="http://www.w3.org/2001/XMLSchema-instance" xmlns:p="http://www.springframework.org/schema/p"
xmlns:context="http://www.springframework.org/schema/context"
xmlns:mvc="http://www.springframework.org/schema/mvc"
xsi:schemaLocation="http://www.springframework.org/schema/beans http://www.springframework.org/schema/beans/spring-beans.xsd
http://www.springframework.org/schema/mvc http://www.springframework.org/schema/mvc/spring-mvc-4.0.xsd
http://www.springframework.org/schema/context http://www.springframework.org/schema/context/spring-context.xsd">
<context:component-scan base-package="com.taotao.controller" />
<mvc:annotation-driven />
<bean
class="org.springframework.web.servlet.view.InternalResourceViewResolver">
<property name="prefix" value="/WEB-INF/jsp/" />
<property name="suffix" value=".jsp" />
</bean></beans>
-
web.xml
<?xml version="1.0" encoding="UTF-8"?><web-app xmlns:xsi="http://www.w3.org/2001/XMLSchema-instance"
xmlns="http://java.sun.com/xml/ns/javaee" xmlns:web="http://java.sun.com/xml/ns/javaee/web-app_2_5.xsd"
xsi:schemaLocation="http://java.sun.com/xml/ns/javaee http://java.sun.com/xml/ns/javaee/web-app_2_5.xsd"
id="WebApp_ID" version="2.5">
<display-name>taotao-manager-web</display-name>
<welcome-file-list>
<welcome-file>login.html</welcome-file>
</welcome-file-list>
<!-- 加载spring容器 -->
<context-param>
<param-name>contextConfigLocation</param-name>
<param-value>classpath:spring/applicationContext*.xml</param-value>
</context-param>
<listener>
<listener-class>org.springframework.web.context.ContextLoaderListener</listener-class>
</listener>
<!-- 解决post乱码 -->
<filter>
<filter-name>CharacterEncodingFilter</filter-name>
<filter-class>org.springframework.web.filter.CharacterEncodingFilter</filter-class>
<init-param>
<param-name>encoding</param-name>
<param-value>utf-8</param-value>
</init-param>
<!-- <init-param>
<param-name>forceEncoding</param-name>
<param-value>true</param-value>
</init-param> -->
</filter>
<filter-mapping>
<filter-name>CharacterEncodingFilter</filter-name>
<url-pattern>/*</url-pattern>
</filter-mapping>
<!-- springmvc的前端控制器 -->
<servlet>
<servlet-name>taotao-manager</servlet-name>
<servlet-class>org.springframework.web.servlet.DispatcherServlet</servlet-class>
<!-- contextConfigLocation不是必须的, 如果不配置contextConfigLocation, springmvc的配置文件默认在:WEB-INF/servlet的name+"-servlet.xml" -->
<init-param>
<param-name>contextConfigLocation</param-name>
<param-value>classpath:spring/springmvc.xml</param-value>
</init-param>
<load-on-startup>1</load-on-startup>
</servlet>
<servlet-mapping>
<servlet-name>taotao-manager</servlet-name>
<url-pattern>/</url-pattern>
</servlet-mapping></web-app>
-
整合静态页面静态页面位置:02.第二天(三大框架整合,后台系统搭建)\01.参考资料\后台管理系统静态页面
 使用方法:把静态页面添加到taotao-manager-web工程中的WEB-INF下:
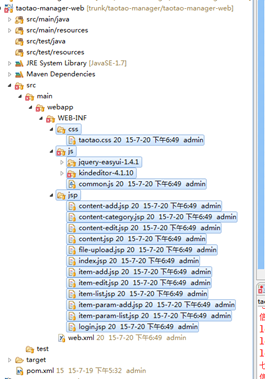 由于在web.xml中定义的url拦截形式为"/"表示拦截所有的url请求,包括静态资源例如css、js等。所以需要在springmvc.xml中添加资源映射标签:
<mvc:resources location="/WEB-INF/js/" mapping="/js/**"/>
<mvc:resources location="/WEB-INF/css/" mapping="/css/**"/>
-
修改taotao-manager-mapper的pom文件在pom文件中添加如下内容:

<!-- 如果不添加此节点mybatis的mapper.xml文件都会被漏掉。 -->
<build>
<resources>
<resource>
<directory>src/main/java</directory>
<includes>
<include>**/*.properties</include>
<include>**/*.xml</include>
</includes>
<filtering>false</filtering>
</resource>
</resources>
</build>
-
整合测试根据商品id查询商品信息。
//TbItem item = itemMapper.selectByPrimaryKey(itemId);
//添加查询条件
TbItemExample example = new TbItemExample();
Criteria criteria = example.createCriteria();
criteria.andIdEqualTo(itemId);
List<TbItem> list = itemMapper.selectByExample(example);
if (list != null && list.size() > 0) {
TbItem item = list.get(0);
return item;
}
return null;
}
@Autowired
private ItemService itemService;
@RequestMapping("/item/{itemId}")
@ResponseBody
public TbItem getItemById(@PathVariable Long itemId) {
TbItem tbItem = itemService.getItemById(itemId);
return tbItem;
}
-
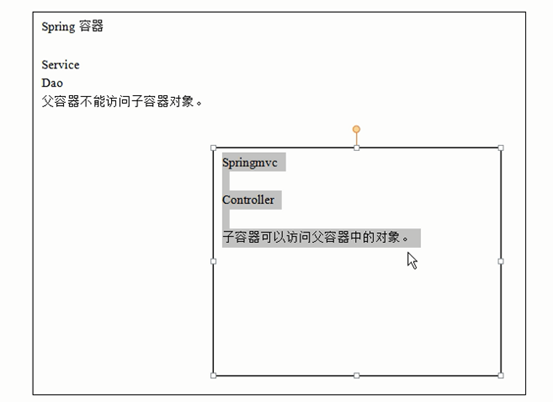
子容器与父容器的关系(为什么每个层都各自定义自己的扫描对象)
-
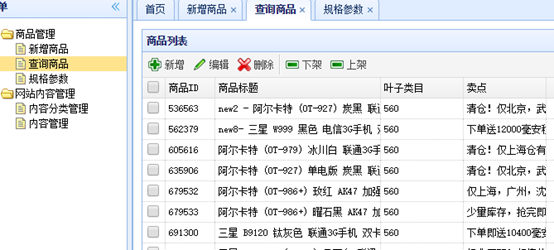
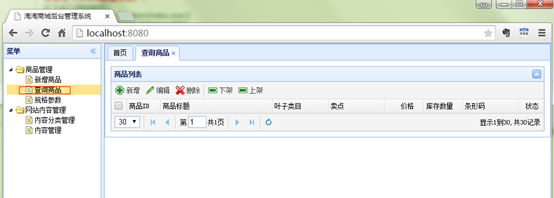
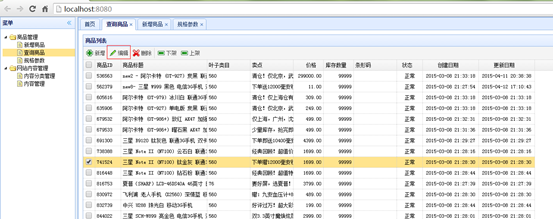
商品列表查询
-
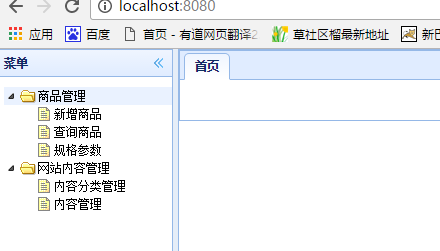
主页面显示
-
/**
* 打开首页
*/
@RequestMapping("/")
public String showIndex() {
return "index";
}
-
页面显示
<li>
<span>商品管理</span>
<ul>
<li data-options="attributes:{'url':'item-add'}">新增商品</li>
<li data-options="attributes:{'url':'item-list'}">查询商品</li>
<li data-options="attributes:{'url':'item-param-list'}">规格参数</li>
</ul>
</li>
@RequestMapping("/{a}")
public String showpage(@PathVariable String a) {
return a;
}
-
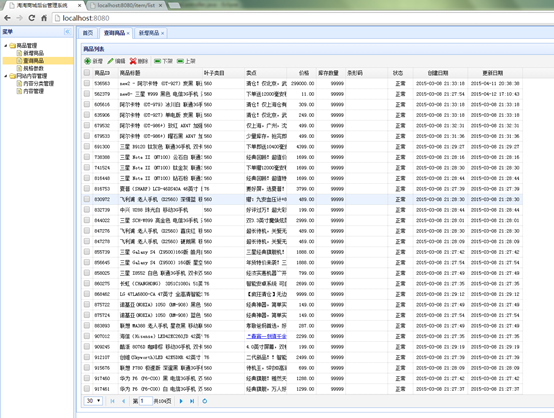
商品列表页面
 对应的jsp为:item-list.jsp
请求的url:
/item/list请求的参数:
page=1&rows=30
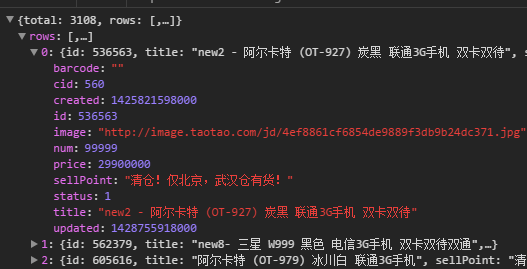
 响应的json数据格式:
 Easyui中datagrid控件要求的数据格式为:
{total:"2",rows:[{"id":"1","name","张三"},{"id":"2","name","李四"}]}

-
Mybatis分页插件 - PageHelper说明如果你也在用Mybatis,建议尝试该分页插件,这个一定是最方便使用的分页插件。该插件目前支持Oracle,Mysql,MariaDB,SQLite,Hsqldb,PostgreSQL六种数据库分页。
-
使用方法第一步:在Mybatis配置xml中配置拦截器插件:<plugins>
<!-- com.github.pagehelper为PageHelper类所在包名 -->
<plugin interceptor="com.github.pagehelper.PageHelper">
<!-- 设置数据库类型 Oracle,Mysql,MariaDB,SQLite,Hsqldb,PostgreSQL六种数据库-->
<property name="dialect" value="mysql"/>
</plugin></plugins>第二步:在代码中使用1、设置分页信息:
//获取第1页,
10条内容,默认查询总数count
PageHelper.startPage(1, 10);
//紧跟着的第一个select方法会被分页
List<Country> list = countryMapper.selectIf(1);2、取分页信息
//分页后,实际返回的结果list类型是Page<E>,如果想取出分页信息,需要强制转换为Page<E>,
Page<Country> listCountry = (Page<Country>)list;
listCountry.getTotal();
-
-
取分页信息的第二种方法 //获取第1页,10条内容,默认查询总数countPageHelper.startPage(1, 10);List<Country> list = countryMapper.selectAll();//用PageInfo对结果进行包装PageInfo page = new PageInfo(list);//测试PageInfo全部属性//PageInfo包含了非常全面的分页属性assertEquals(1, page.getPageNum());assertEquals(10, page.getPageSize());assertEquals(1, page.getStartRow());assertEquals(10, page.getEndRow());assertEquals(183, page.getTotal());assertEquals(19, page.getPages());assertEquals(1, page.getFirstPage());assertEquals(8, page.getLastPage());assertEquals(true, page.isFirstPage());assertEquals(false, page.isLastPage());assertEquals(false, page.isHasPreviousPage());assertEquals(true, page.isHasNextPage());
-
分页测试
@Test
public void testPageHelper() {
//创建一个spring容器
ApplicationContext applicationContext = new ClassPathXmlApplicationContext("classpath:spring/applicationContext-*.xml");
//从spring容器中获得Mapper的代理对象
TbItemMapper mapper = applicationContext.getBean(TbItemMapper.class);
//执行查询,并分页
TbItemExample example = new TbItemExample();
//分页处理
PageHelper.startPage(2, 10);
List<TbItem> list = mapper.selectByExample(example);
//取商品列表
for (TbItem tbItem : list) {
System.out.println(tbItem.getTitle());
}
//取分页信息
PageInfo<TbItem> pageInfo = new PageInfo<>(list);
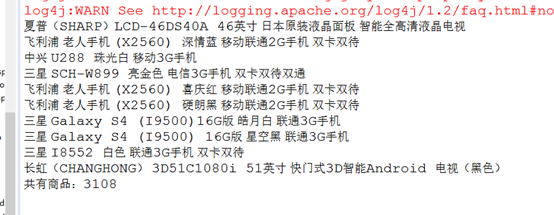
long total = pageInfo.getTotal();
System.out.println("共有商品:"+ total);
}
-
Mapper使用逆向工程生成的mapper文件。
-
响应的json数据格式EasyUIResult
public class EasyUIResult {
private Integer total;
private List<?> rows;
public EasyUIResult(Integer total, List<?> rows) {
this.total = total;
this.rows = rows;
}
public EasyUIResult(Long total, List<?> rows) {
this.total = total.intValue();
this.rows = rows;
}
public Integer getTotal() {
return total;
}
public void setTotal(Integer total) {
this.total = total;
}
public List<?> getRows() {
return rows;
}
public void setRows(List<?> rows) {
this.rows = rows;
}
}
-
Service
@Override
public EUDataGridResult getItemList(int page, int rows) {
//查询商品列表
TbItemExample example = new TbItemExample();
//分页处理
PageHelper.startPage(page, rows);
List<TbItem> list = itemMapper.selectByExample(example);
//创建一个返回值对象
EUDataGridResult result = new EUDataGridResult();
result.setRows(list);
//取记录总条数
PageInfo<TbItem> pageInfo = new PageInfo<>(list);
result.setTotal(pageInfo.getTotal());
return result;
}
-
EUDataGridResult
public class EUDataGridResult {
private long total;
private List<?> rows;
public long getTotal() {
return total;
}
public void setTotal(long total) {
this.total = total;
}
public List<?> getRows() {
return rows;
}
public void setRows(List<?> rows) {
this.rows = rows;
}
-
Controller
@Controller@RequestMapping("/item")public class ItemController {
@Autowired
private ItemService itemService;
@RequestMapping("/list")
//设置相应的内容为json数据
@ResponseBody
public EasyUIResult getItemlist(@RequestParam(defaultValue="1")Integer page,
@RequestParam(defaultValue="30")Integer rows) throws Exception {
//查询商品列表
EasyUIResult result = itemService.getItemList(page, rows);
return result;
}}
-
item-list.jsp
<table class="easyui-datagrid" id="itemList" title="商品列表"
data-options="singleSelect:false,collapsible:true,pagination:true,url:'/item/list',method:'get',pageSize:30,toolbar:toolbar">
<thead>
<tr>
<th data-options="field:'ck',checkbox:true"></th>
<th data-options="field:'id',width:60">商品ID</th>
<th data-options="field:'title',width:200">商品标题</th>
<th data-options="field:'cid',width:100">叶子类目</th>
<th data-options="field:'sellPoint',width:100">卖点</th>
<th data-options="field:'price',width:70,align:'right',formatter:TAOTAO.formatPrice">价格</th>
<th data-options="field:'num',width:70,align:'right'">库存数量</th>
<th data-options="field:'barcode',width:100">条形码</th>
<th data-options="field:'status',width:60,align:'center',formatter:TAOTAO.formatItemStatus">状态</th>
<th data-options="field:'created',width:130,align:'center',formatter:TAOTAO.formatDateTime">创建日期</th>
<th data-options="field:'updated',width:130,align:'center',formatter:TAOTAO.formatDateTime">更新日期</th>
</tr>
</thead></table>
-
TbItem
public class TbItem {
private Long id;
private String title;
private String sellPoint;
private Long price;
private Integer num;
private String barcode;
private String image;
private Long cid;
private Byte status;
private Date created;
private Date updated;
-
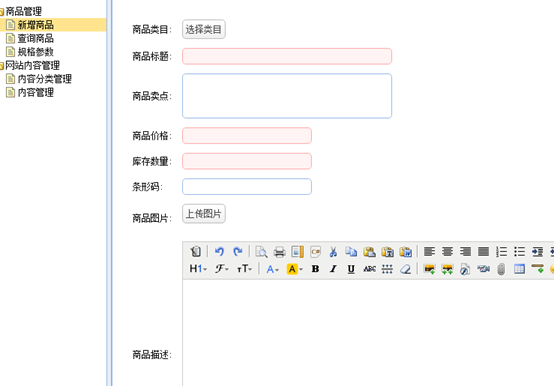
实现商品类目选择功能
-
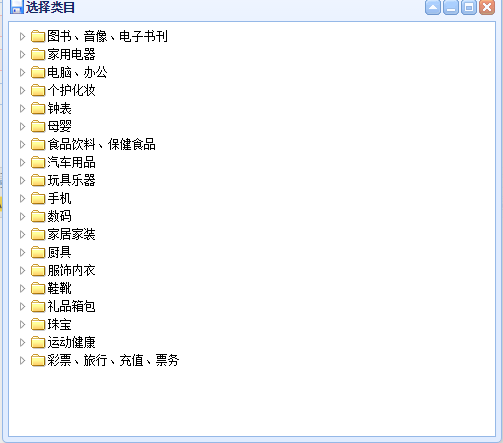
需求在商品添加页面,点击"选择类目"显示商品类目列表:

-
-
实现步骤:
-
按钮添加点击事件,弹出窗口,加载数据显示tree
-
将选择类目的组件封装起来,通过TT.iniit()初始化,最终调用initItemCat()方法进行初始化
-
创建数据库、以及tb _item_cat表,初始化数据
-
编写Controller、Service、Mapper
-
EasyUI tree数据结构
数据结构中必须包含:Id:节点idText:节点名称State:如果不是叶子节点就是close,叶子节点就是open。Close的节点点击后会在此发送请求查询子项目。
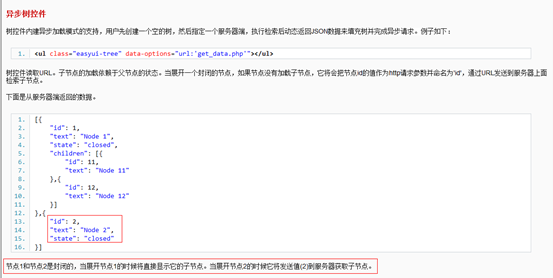
可以根据parentid查询分类列表。
<a href="javascript:void(0)" class="easyui-linkbutton selectItemCat">选择类目</a>
// 初始化选择类目组件
initItemCat : function(data){
$(".selectItemCat").each(function(i,e){
var _ele = $(e);
if(data && data.cid){
_ele.after("<span style='margin-left:10px;'>"+data.cid+"</span>");
}else{
_ele.after("<span style='margin-left:10px;'></span>");
}
_ele.unbind('click').click(function(){
$("<div>").css({padding:"5px"}).html("<ul>")
.window({
width:'500',
height:"450",
modal:true,
closed:true,
iconCls:'icon-save',
title:'选择类目',
onOpen : function(){
var _win = this;
$("ul",_win).tree({
url:'/item/cat/list',
animate:true,
onClick : function(node){
if($(this).tree("isLeaf",node.target)){
// 填写到cid中
_ele.parent().find("[name=cid]").val(node.id);
_ele.next().text(node.text).attr("cid",node.id);
$(_win).window('close');
if(data && data.fun){
data.fun.call(this,node);
}
}
}
});
},
onClose : function(){
$(this).window("destroy");
}
}).window('open');
});
});
},
-
Mapper使用逆向工程生成的mapper文件。
-
Service
public List<EUTreeNode> getCatList(long parentId) {
//创建查询条件
TbItemCatExample example = new TbItemCatExample();
Criteria criteria = example.createCriteria();
criteria.andParentIdEqualTo(parentId);
//根据条件查询
List<TbItemCat> list = itemCatMapper.selectByExample(example);
List<EUTreeNode> resultList = new ArrayList<>();
//把列表转换成treeNodelist
for (TbItemCat tbItemCat : list) {
EUTreeNode node = new EUTreeNode();
node.setId(tbItemCat.getId());
node.setText(tbItemCat.getName());
node.setState(tbItemCat.getIsParent()?"closed":"open");
resultList.add(node);
//返回结果
return resultList;
}
-
Controller
@Controller@RequestMapping("/item/cat")public class ItemCatController {
@Autowired
private ItemCatService itemCatService;
@RequestMapping("/list")
@ResponseBody
private List<EUTreeNode> getCatList(@RequestParam(value="id",defaultValue="0")Long parentId) {
List<EUTreeNode> list = itemCatService.getCatList(parentId);
return list;
}}
-
图片上传
-
图片服务器
-
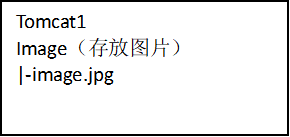
传统项目中的图片管理传统项目中,可以在web项目中添加一个文件夹,来存放上传的图片。例如在工程的根目录WebRoot下创建一个images文件夹。把图片存放在此文件夹中就可以直接使用在工程中引用。优点:引用方便,便于管理缺点:
-
-
-
-
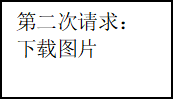
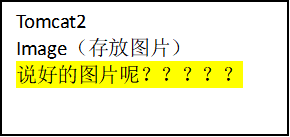
如果是分布式环境图片引用会出现问题。
-
图片的下载会给服务器增加额外的压力

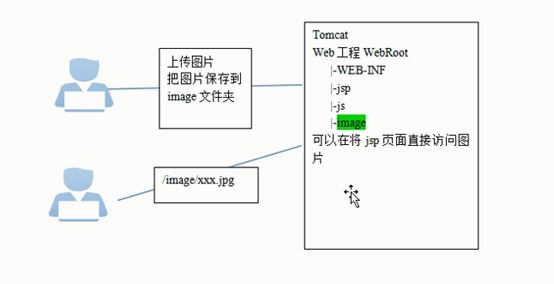
传统图片管理方式在分布式环境中的问题:


-
分布式环境的图片管理

分布式环境一般都有一个专门的图片服务器存放图片。我们使用虚拟机搭建一个专门的服务器来存放图片。在此服务器上安装一个nginx来提供http服务,安装一个ftp服务器来提供图片上传服务。
-
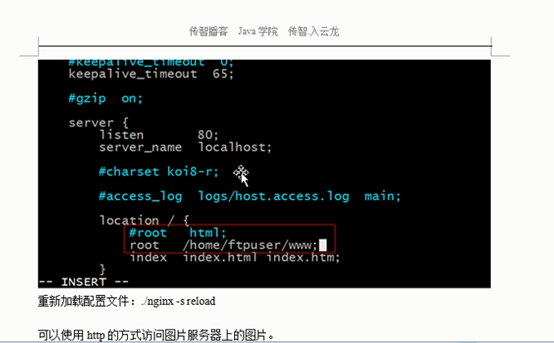
搭建图片服务器
第一步:安装vsftpd提供ftp服务详见:vsftpd安装手册.doc第二步:安装nginx提供http服务详见:nginx安装手册.doc
-
测试图片服务器
-
ftp服务测试。
-
-
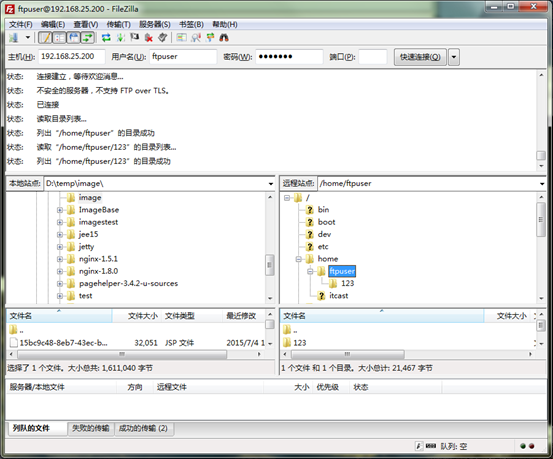
使用ftp客户端
-
使用java程序ftp可以需要依赖commons-net-3.3.jar包。
public void testFtpClient() throws Exception {
//创建一个FtpClient对象
FTPClient ftpClient = new FTPClient();
//创建ftp连接。默认是21端口
ftpClient.connect("192.168.0.101", 21);
//登录ftp服务器,使用用户名和密码
ftpClient.login("ftpuser", "123456");
//上传文件。
//读取本地文件
FileInputStream inputStream = new FileInputStream(new File("D:\\images\\01.jpg"));
//设置上传的路径
ftpClient.changeWorkingDirectory("/home/ftpuser/www/images");
//修改上传文件的格式
ftpClient.setFileType(FTP.BINARY_FILE_TYPE);
//第一个参数:服务器端文档名
//第二个参数:上传文档的inputStream
ftpClient.storeFile("hello1.jpg", inputStream);
//关闭连接
ftpClient.logout();
}
-
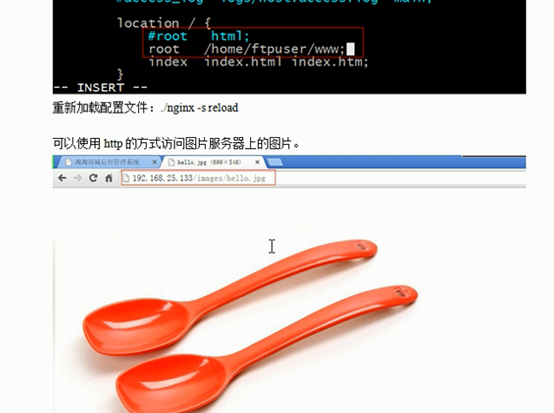
http服务测试
-
浏览器测试
-
工具类
-
-
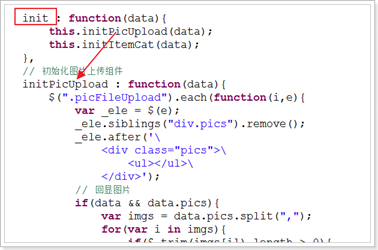
SpringMVC中实现图片上传上传思路:第一步:导入common-fileupload的依赖
<!-- 文件上传组件 -->
<dependency>
<groupId>commons-fileupload</groupId>
<artifactId>commons-fileupload</artifactId>
</dependency>
第二步:在SpringMVC配置文件中添加文件上传解析器
<!-- 定义文件上传解析器 -->
<bean id="multipartResolver"
class="org.springframework.web.multipart.commons.CommonsMultipartResolver">
<!-- 设定默认编码 -->
<property name="defaultEncoding" value="UTF-8"></property>
<!-- 设定文件上传的最大值5MB,5*1024*1024 -->
<property name="maxUploadSize" value="5242880"></property>
</bean>
-
Service实现
-
获取资源配置文件的内容第一步:创建资源配置文件
FILI_UPLOAD_PATH=D:/temp/imagestest/webapps/imagesIMAGE_BASE_URL=http://localhost:9000/images
第二步:在Spring(taotao-manage-servlet.xml)容器中加载资源文件
第二步:在Service中获取资源配置:
@Value("${FILI_UPLOAD_PATH}")
private String FILI_UPLOAD_PATH;
@Value("${IMAGE_BASE_URL}")
private String IMAGE_BASE_URL;
-
图片名生成策略时间+随机数:
/**
* 图片名生成
*/
public static String genImageName() {
//取当前时间的长整形值包含毫秒
long millis = System.currentTimeMillis();
//long millis = System.nanoTime();
//加上三位随机数
Random random = new Random();
int end3 = random.nextInt(999);
//如果不足三位前面补0
String str = millis + String.format("%03d", end3);
return str;
}
使用UUID:
UUID.randomUUID();
-
Service实现
#FTP相关配置#FTP的ip地址FTP_ADDRESS=192.168.0.101FTP_PORT=21FTP_USERNAME=ftpuserFTP_PASSWORD=123456FTP_BASE_PATH=/home/ftpuser/www/images#图片服务器的相关配置#图片服务器的基础urlIMAGE_BASE_URL=http://192.168.0.101/images
public class PictureServiceImpl implements PictureService {
@Value("${FTP_ADDRESS}")
private String FTP_ADDRESS;
@Value("${FTP_PORT}")
private Integer FTP_PORT;
@Value("${FTP_USERNAME}")
private String FTP_USERNAME;
@Value("${FTP_PASSWORD}")
private String FTP_PASSWORD;
@Value("${FTP_BASE_PATH}")
private String FTP_BASE_PATH;
@Value("${IMAGE_BASE_URL}")
private String IMAGE_BASE_URL;
@Override
public Map uploadPicture(MultipartFile uploadFile) {
Map resultMap = new HashMap<>();
try {
//生成一个新的文件名
//取原始文件名
String oldName = uploadFile.getOriginalFilename();
//生成新文件名
//UUID.randomUUID();
String newName = IDUtils.genImageName();
newName = newName + oldName.substring(oldName.lastIndexOf("."));
//图片上传
String imagePath = new DateTime().toString("/yyyy/MM/dd");
boolean result = FtpUtil.uploadFile(FTP_ADDRESS, FTP_PORT, FTP_USERNAME, FTP_PASSWORD,
FTP_BASE_PATH, imagePath, newName, uploadFile.getInputStream());
//返回结果
if(!result) {
resultMap.put("error", 1);
resultMap.put("message", "文件上传失败");
return resultMap;
}
resultMap.put("error", 0);
resultMap.put("url", IMAGE_BASE_URL + imagePath + "/" + newName);
return resultMap;
} catch (Exception e) {
resultMap.put("error", 1);
resultMap.put("message", "文件上传发生异常");
return resultMap;
}
}
}
-
Controller实现
@Controller@RequestMapping("/pic")public class PictureController {
@Autowired
private PictureService pictureService;
@RequestMapping("/upload")
@ResponseBody
public PictureResult uploda(MultipartFile uploadFile) throws Exception {
//调用service上传图片
PictureResult pictureResult = pictureService.uploadFile(uploadFile);
//返回上传结果
return pictureResult;
}}
@Autowired
private PictureService pictureService;
@RequestMapping("/pic/upload")
@ResponseBody
public String pictureUpload(MultipartFile uploadFile) {
Map result = pictureService.uploadPicture(uploadFile);
//为了保证功能的兼容性,需要把Result转换成json格式的字符串。
String json = JsonUtils.objectToJson(result);
/**
* 将对象转换成json字符串。
* <p>Title: pojoToJson</p>
* <p>Description: </p>
* @param data
* @return
*/
public static String objectToJson(Object data) {
try {
String string = MAPPER.writeValueAsString(data);
return string;
} catch (JsonProcessingException e) {
e.printStackTrace();
}
return null;
}
return json;
}}
-
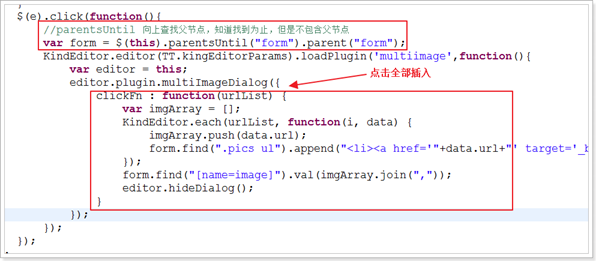
前端JS实现图片上传
-
Js实现逻辑

KindEditor 4.x 文档http://kindeditor.net/doc.php上传图片使用kindeditor的上传组件实现。
-
上传图片请求url:
-
返回值参考文档:http://kindeditor.net/docs/upload.html
返回格式(JSON)
//成功时{
"error" : 0,
"url" : "http://www.example.com/path/to/file.ext"}//失败时{
"error" : 1,
"message" : "错误信息"}
返回值数据类型:
public class PictureResult {
/**
* 上传图片返回值,成功:0 失败:1
*/
private Integer error;
/**
* 回显图片使用的url
*/
private String url;
/**
* 错误时的错误消息
*/}
-
kindeditor(富文本编辑器)的使用
-
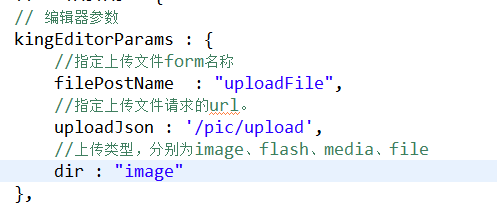
kindeditor的使用过程:1、导入js:

-
2、定义多行文本(不可见、给定name)
 3、调用TT.createEditor
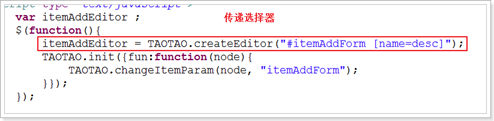
 4、效果
4、效果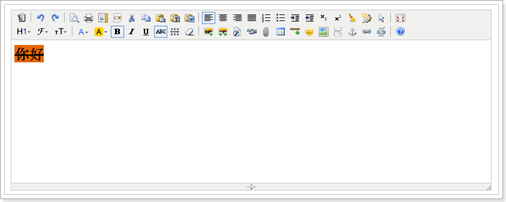
-
取文本编辑器中的内容将编辑器的内容设置到原来的textarea控件里。editor.sync();
-
提交的路径
$.post("/item/save",$("#itemAddForm").serialize(), function(data){
if(data.status == 200){
$.messager.alert('提示','新增商品成功!');
}
});
-
新增商品实现
-
js编写逻辑
-
//提交表单
function submitForm(){
//有效性验证
if(!$('#itemAddForm').form('validate')){
$.messager.alert('提示','表单还未填写完成!');
return ;
}
//取商品价格,单位为"分"
$("#itemAddForm [name=price]").val(eval($("#itemAddForm [name=priceView]").val()) * 100);
//同步文本框中的商品描述
itemAddEditor.sync();
//取商品的规格
/*
var paramJson = [];
$("#itemAddForm .params li").each(function(i,e){
var trs = $(e).find("tr");
var group = trs.eq(0).text();
var ps = [];
for(var i = 1;i<trs.length;i++){
var tr = trs.eq(i);
ps.push({
"k" : $.trim(tr.find("td").eq(0).find("span").text()),
"v" : $.trim(tr.find("input").val())
});
}
paramJson.push({
"group" : group,
"params": ps
});
});
//把json对象转换成字符串
paramJson = JSON.stringify(paramJson);
$("#itemAddForm [name=itemParams]").val(paramJson);
*/
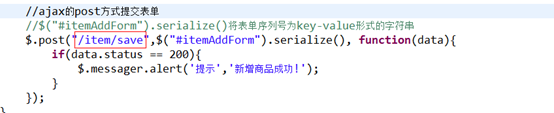
//ajax的post方式提交表单
//$("#itemAddForm").serialize()将表单序列号为key-value形式的字符串
$.post("/item/save",$("#itemAddForm").serialize(), function(data){
if(data.status == 200){
$.messager.alert('提示','新增商品成功!');
}
});
}
-
提交请求的数据格式$("#itemAddForm").serialize()将表单序列号为key-value形式的字符串以post 的形式将表单的内容提交。
请求的url:/item/save
返回的结果:淘淘自定义返回结果:
-
-
状态码
-
响应的消息
-
响应的数据
/**
* 淘淘商城自定义响应结构
*/public class TaotaoResult {
// 定义jackson对象
private static final ObjectMapper MAPPER = new ObjectMapper();
// 响应业务状态
private Integer status;
// 响应消息
private String msg;
// 响应中的数据
private Object data;
public static TaotaoResult build(Integer status, String msg, Object data) {
return new TaotaoResult(status, msg, data);
}
public static TaotaoResult ok(Object data) {
return new TaotaoResult(data);
}
public static TaotaoResult ok() {
return new TaotaoResult(null);
}
public TaotaoResult() {
}
public static TaotaoResult build(Integer status, String msg) {
return new TaotaoResult(status, msg, null);
}
public TaotaoResult(Integer status, String msg, Object data) {
this.status = status;
this.msg = msg;
this.data = data;
}
public TaotaoResult(Object data) {
this.status = 200;
this.msg = "OK";
this.data = data;
}
// public Boolean isOK() {// return this.status == 200;// }
public Integer getStatus() {
return status;
}
public void setStatus(Integer status) {
this.status = status;
}
public String getMsg() {
return msg;
}
public void setMsg(String msg) {
this.msg = msg;
}
public Object getData() {
return data;
}
public void setData(Object data) {
this.data = data;
}
/**
* 将json结果集转化为TaotaoResult对象
*
* @param jsonData json数据
* @param clazz TaotaoResult中的object类型
* @return
*/
public static TaotaoResult formatToPojo(String jsonData, Class<?> clazz) {
try {
if (clazz == null) {
return MAPPER.readValue(jsonData, TaotaoResult.class);
}
JsonNode jsonNode = MAPPER.readTree(jsonData);
JsonNode data = jsonNode.get("data");
Object obj = null;
if (clazz != null) {
if (data.isObject()) {
obj = MAPPER.readValue(data.traverse(), clazz);
} else if (data.isTextual()) {
obj = MAPPER.readValue(data.asText(), clazz);
}
}
return build(jsonNode.get("status").intValue(), jsonNode.get("msg").asText(), obj);
} catch (Exception e) {
return null;
}
}
/**
* 没有object对象的转化
*
* @param json
* @return
*/
public static TaotaoResult format(String json) {
try {
return MAPPER.readValue(json, TaotaoResult.class);
} catch (Exception e) {
e.printStackTrace();
}
return null;
}
/**
* Object是集合转化
*
* @param jsonData json数据
* @param clazz 集合中的类型
* @return
*/
public static TaotaoResult formatToList(String jsonData, Class<?> clazz) {
try {
JsonNode jsonNode = MAPPER.readTree(jsonData);
JsonNode data = jsonNode.get("data");
Object obj = null;
if (data.isArray() && data.size() > 0) {
obj = MAPPER.readValue(data.traverse(),
MAPPER.getTypeFactory().constructCollectionType(List.class, clazz));
}
return build(jsonNode.get("status").intValue(), jsonNode.get("msg").asText(), obj);
} catch (Exception e) {
return null;
}
}
}
-
获得商品id临时主键生成策略:
/**
* 商品id生成
*/
public static long genItemId() {
//取当前时间的长整形值包含毫秒
long millis = System.currentTimeMillis();
//long millis = System.nanoTime();
//加上两位随机数
Random random = new Random();
int end2 = random.nextInt(99);
//如果不足两位前面补0
String str = millis + String.format("%02d", end2);
long id = new Long(str);
return id;
}
-
ItemServiceImpl调用mapper的insert方法添加商品信息
@Override
public void saveItem(TbItem item, String desc, String itemParams) throws Exception {
Date date = new Date();
//获得商品id
long id = IDUtils.genItemId();
//添加商品信息
item.setId(id);
//商品状态,1-正常,2-下架,3-删除
item.setStatus((byte) 1);
item.setCreated(date);
item.setUpdated(date);
itemMapper.insert(item);
//添加商品描述
//创建TbItemDesc对象
TbItemDesc itemDesc = new TbItemDesc();
//获得一个商品id
itemDesc.setItemId(id);
itemDesc.setItemDesc(desc);
itemDesc.setCreated(date);
itemDesc.setUpdated(date);
//插入数据
itemDescMapper.insert(itemDesc);
}
-
Controller实现
@RequestMapping("/save")@ResponseBody
public TaotaoResult saveItem(TbItem item, String desc) throws Exception {
//添加商品信息
itemService.saveItem(item, desc, null);
return TaotaoResult.ok();
}
-
课后作业完成商品修改功能。
-
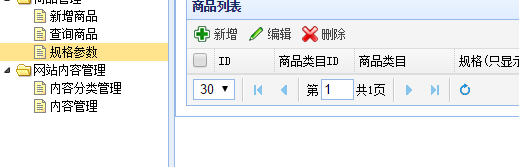
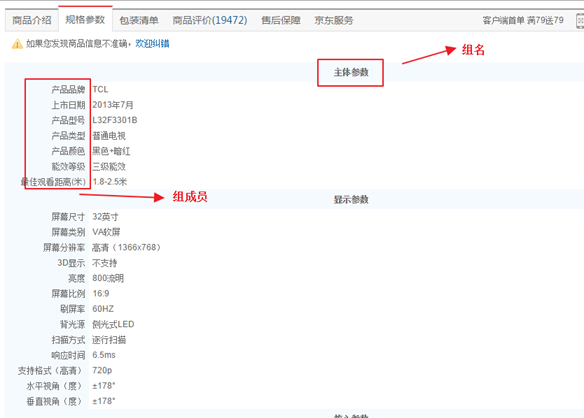
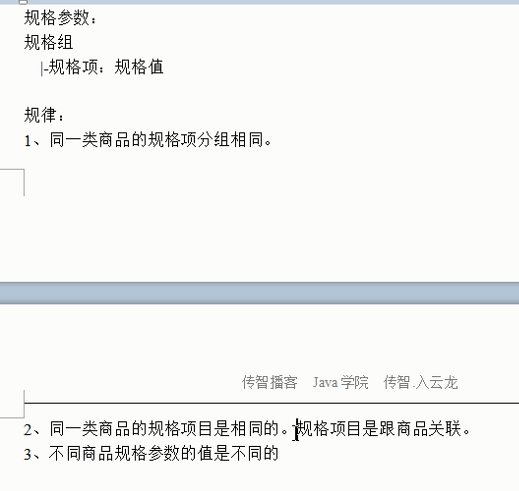
什么是商品规格参数规格参数:
-
商品规格参数和类目关系
 商品规格参数的模板是和商品类目关联的,不同的类目拥有不同的商品规格参数模板。
商品规格参数是和商品数据关联的,不同的商品拥有不同的商品规格参数数据。
-
实现思路
-
方案一使用二维表来维护规格数据。表一:规格组信息
-
列名
类型
长度
可以null
键
说明
Id
Int
否
P
主键(自增长)
group_name
varchar
20
否
规格分组名称
item_cat_id
Int
否
F
商品分类id(外键)
表二:规格项信息
列名
类型
长度
可以null
键
说明
Id
Int
否
P
主键(自增长)
param_name
varchar
20
否
规格项目名称
group_id
Int
否
F
规格分组id(外键)
表三:商品规格信息
列名
类型
长度
可以null
键
说明
item_id
Int
否
P
商品id(联合主键)
param_id
varchar
否
P
规格项id(联合主键)
param_value
varchar
500
否
规格信息
问题:1、需要创建的表比较多,表和表之间的关系复杂,查询时需要大量的关联。查询效率低。2、如果展示的规格组或者是规格项需要调整实现麻烦,需要添加排序列。3、维护不方便,如果删除某个规格分组信息,则所有与之相关的商品的规格信息都发生变化。
解决方案:使用模板的方式来解决。
-
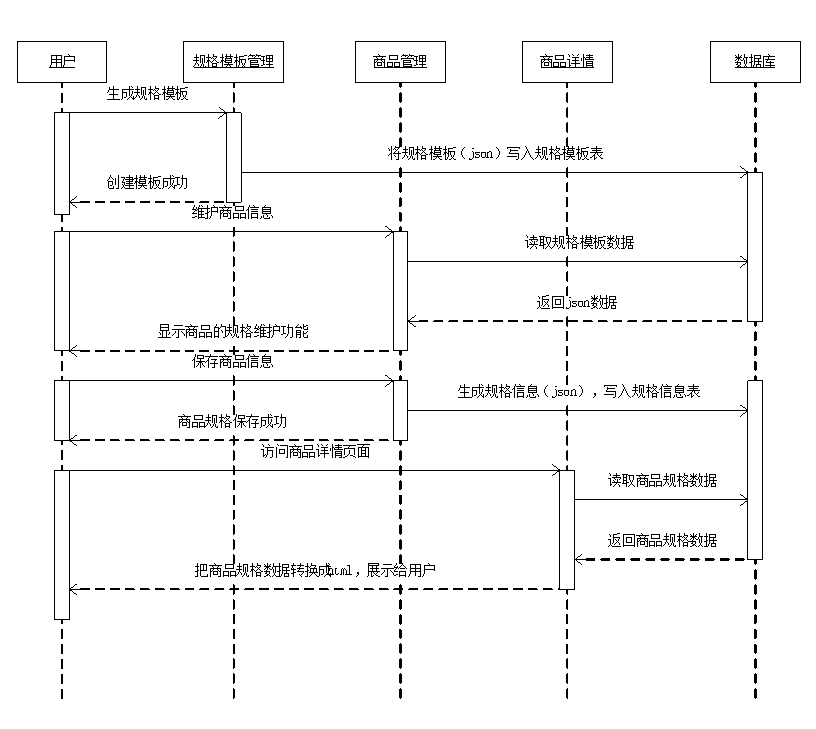
方案二使用一种动态的方法描述参数模板,每个商品分类对应一个参数模板。添加商品信息时,根据规格参数模板生成规格参数录入项。保存商品时将规格参数生成一个字符串保存到数据库中。展示商品详情时,从数据库中取出规格参数信息,转换成html展示给用户。
如何设计一种动态结构的数据结构?
-
xml
-
Json结论:使用json来实现模板以及规格参数数据。实现流程:
-
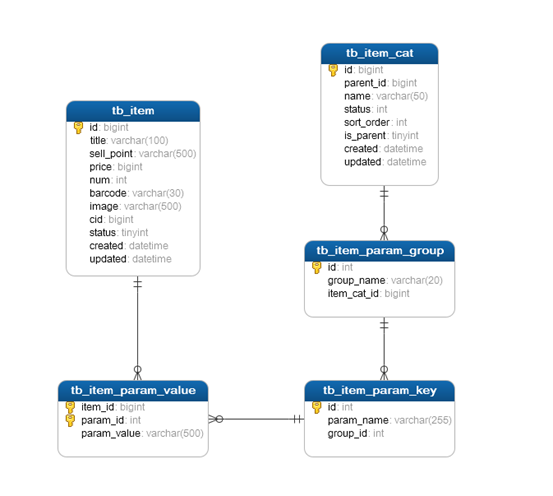
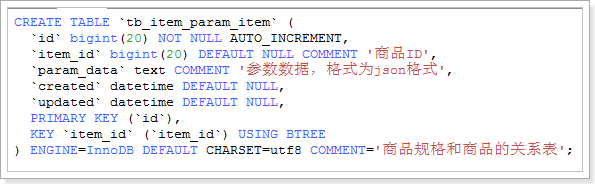
规格参数相关表模板表:
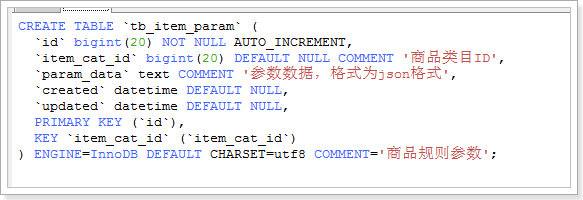
-
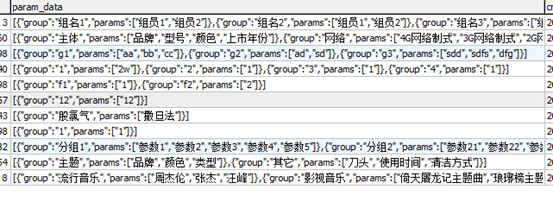
数据表:
-
模板格式[
{
"group": "主体", //组名称
"params": [ // 记录规格成员
"品牌",
"型号",
"颜色",
"上市年份",
"上市月份"
]},{
"group": "网络", //组名称
"params": [ // 记录规格成员
"4G",
"3G,
"2G"
]}
]
-
生成的规格数据格式[
{
"group": "主体",
"params": [
{
"k": "品牌",
"v": "苹果(Apple)"
},
{
"k": "型号",
"v": "iPhone 6 A1589"
},
{
"k": "智能机",
"v": "是 "
}
]
}]
-
相关页面
-
选择类目(它怎么不用实现也能用呢)
<html><head><meta http-equiv="Content-Type" content="text/html; charset=UTF-8"><title>淘淘商城后台管理系统</title><link rel="stylesheet" type="text/css" href="js/jquery-easyui-1.4.1/themes/default/easyui.css" /><link rel="stylesheet" type="text/css" href="js/jquery-easyui-1.4.1/themes/icon.css" /><link rel="stylesheet" type="text/css" href="css/taotao.css" /><script type="text/javascript" src="js/jquery-easyui-1.4.1/jquery.min.js"></script><script type="text/javascript" src="js/jquery-easyui-1.4.1/jquery.easyui.min.js"></script><script type="text/javascript" src="js/jquery-easyui-1.4.1/locale/easyui-lang-zh_CN.js"></script><script type="text/javascript" src="js/common.js"></script><style type="text/css">
.content {
padding: 10px 10px 10px 10px;
}</style></head><body class="easyui-layout">
<div data-options="region:'west',title:'菜单',split:true" style="width:180px;">
<ul id="menu" class="easyui-tree" style="margin-top: 10px;margin-left: 5px;">
<li>
<span>商品管理</span>
<ul>
<li data-options="attributes:{'url':'item-add'}">新增商品</li>
<li data-options="attributes:{'url':'item-list'}">查询商品</li>
<li data-options="attributes:{'url':'item-param-list'}">规格参数</li>
</ul>
<table cellpadding="5">
<tr>
<td>商品类目:</td>
<td>
<a href="javascript:void(0)" class="easyui-linkbutton selectItemCat">选择类目</a>
<input type="hidden" name="cid" style="width: 280px;"></input>
</td>
</tr>
// 初始化选择类目组件
initItemCat : function(data){
$(".selectItemCat").each(function(i,e){
var _ele = $(e);
if(data && data.cid){
_ele.after("<span style='margin-left:10px;'>"+data.cid+"</span>");
}else{
_ele.after("<span style='margin-left:10px;'></span>");
}
_ele.unbind('click').click(function(){
$("<div>").css({padding:"5px"}).html("<ul>")
.window({
width:'500',
height:"450",
modal:true,
closed:true,
iconCls:'icon-save',
title:'选择类目',
onOpen : function(){
var _win = this;
$("ul",_win).tree({
url:'/item/cat/list',
animate:true,
onClick : function(node){
if($(this).tree("isLeaf",node.target)){
// 填写到cid中
_ele.parent().find("[name=cid]").val(node.id);
_ele.next().text(node.text).attr("cid",node.id);
$(_win).window('close');
if(data && data.fun){
data.fun.call(this,node);
}
}
}
});
},
onClose : function(){
$(this).window("destroy");
}
}).window('open');
});
});
},
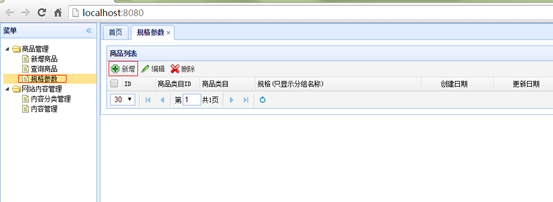
<table class="easyui-datagrid" id="itemParamList" title="商品列表"
data-options="singleSelect:false,collapsible:true,pagination:true,url:'/item/param/list',method:'get',pageSize:30,toolbar:itemParamListToolbar">
<thead>
<tr>
<th data-options="field:'ck',checkbox:true"></th>
<th data-options="field:'id',width:60">ID</th>
<th data-options="field:'itemCatId',width:80">商品类目ID</th>
<th data-options="field:'itemCatName',width:100">商品类目</th>
<th data-options="field:'paramData',width:300,formatter:formatItemParamData">规格(只显示分组名称)</th>
<th data-options="field:'created',width:130,align:'center',formatter:TAOTAO.formatDateTime">创建日期</th>
<th data-options="field:'updated',width:130,align:'center',formatter:TAOTAO.formatDateTime">更新日期</th>
</tr>
</thead></table><div id="itemEditWindow" class="easyui-window" title="编辑商品" data-options="modal:true,closed:true,iconCls:'icon-save',href:'/item-edit'" style="width:80%;height:80%;padding:10px;"></div>var itemParamListToolbar = [{
text:'新增',
iconCls:'icon-add',
handler:function(){
TAOTAO.createWindow({
url : "/item-param-add",
});
}
<table cellpadding="5" style="margin-left: 30px" id="itemParamAddTable" class="itemParam">
<tr>
<td>商品类目:</td>
<td><a href="javascript:void(0)" class="easyui-linkbutton selectItemCat">选择类目</a>
<input type="hidden" name="cid" style="width: 280px;"></input>
</td>
</tr>
-
规格参数模板添加
-
查询商品分类是否有模板
-
-
请求url:
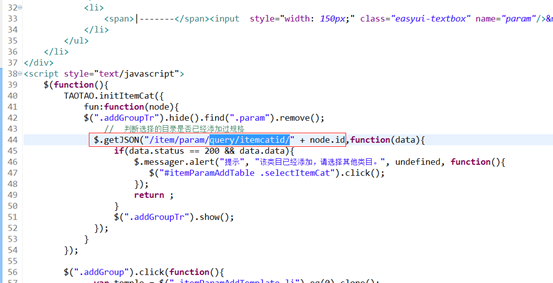
$(".addGroupTr").hide().find(".param").remove();
// 判断选择的目录是否已经添加过规格
$.getJSON("/item/param/query/itemcatid/" + node.id,function(data){
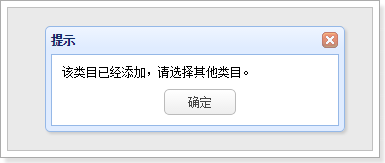
if(data.status == 200 && data.data){
$.messager.alert("提示", "该类目已经添加,请选择其他类目。", undefined, function(){
$("#itemParamAddTable .selectItemCat").click();
});
return ;
}
$(".addGroupTr").show();
});
}
});
-
返回值:TaotaoResult
-
Mapper使用逆向工程生成的mapper文件
-
Service
@Autowired
private TbItemParamMapper itemParamMapper;
@Override
public TaotaoResult getItemParamByCid(long cid) {
TbItemParamExample example = new TbItemParamExample();
Criteria criteria = example.createCriteria();
criteria.andItemCatIdEqualTo(cid);
List<TbItemParam> list = itemParamMapper.selectByExampleWithBLOBs(example);
//判断是否查询到结果
if (list != null && list.size() > 0) {
return TaotaoResult.ok(list.get(0));
}
return TaotaoResult.ok();
}
-
Controller
@RequestMapping("/item/param")public class ItemParamController {
@Autowired
private ItemParamService itemParamService;
@RequestMapping("/query/itemcatid/{itemCatId}")
@ResponseBody
public TaotaoResult getItemParamByCid(@PathVariable Long itemCatId) {
TaotaoResult result = itemParamService.getItemParamByCid(itemCatId);
return result;
}
-
Jsp
$(function(){
TAOTAO.initItemCat({
fun:function(node){
$(".addGroupTr").hide().find(".param").remove();
// 判断选择的目录是否已经添加过规格
$.getJSON("/item/param/query/itemcatid/" + node.id,function(data){
if(data.status == 200 && data.data){
$.messager.alert("提示", "该类目已经添加,请选择其他类目。", undefined, function(){
$("#itemParamAddTable .selectItemCat").click();
});
return ;
}
$(".addGroupTr").show();
});
}
});
-
前端JS实现用户选择商品类目 è 根据类目判断模板是否存在 è 不存在,让用户新建模板
存在:
 不存在:
不存在: 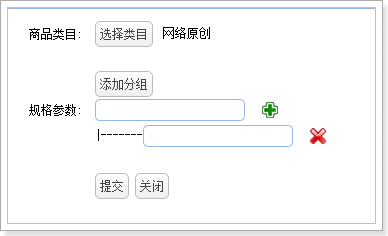
-
提交实现:
-
前台js
-
请求url
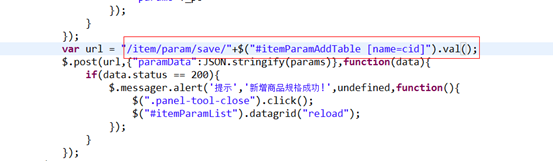
var url = "/item/param/save/"+$("#itemParamAddTable [name=cid]").val();
$.post(url,{"paramData":JSON.stringify(params)},function(data){
if(data.status == 200){
$.messager.alert('提示','新增商品规格成功!',undefined,function(){
$(".panel-tool-close").click();
$("#itemParamList").datagrid("reload");
});
}
});
});
-
响应的数据TaotaoResult
-
Mapper略
-
Service
@Override
public TaotaoResult insertItemParam(TbItemParam itemParam) {
//补全pojo
itemParam.setCreated(new Date());
itemParam.setUpdated(new Date());
//插入到规格参数模板表
itemParamMapper.insert(itemParam);
return TaotaoResult.ok();
}
-
Controller
@RequestMapping("/save/{cid}")
@ResponseBody
public TaotaoResult insertItemParam(@PathVariable Long cid, String paramData) {
//创建pojo对象
TbItemParam itemParam = new TbItemParam();
itemParam.setItemCatId(cid);
itemParam.setParamData(paramData);
TaotaoResult result = itemParamService.insertItemParam(itemParam);
return result;
}}
-
新增商品套用模板生成数据新增商品 è 选择类目 è 查找类目所对应的模板 è 生成表单

-
选择类目执行逻辑
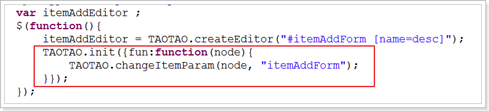
script type="text/javascript">
var itemAddEditor ;
//页面初始化完毕后执行此方法
$(function(){
//创建富文本编辑器
//itemAddEditor = TAOTAO.createEditor("#itemAddForm [name=desc]");
itemAddEditor = KindEditor.create("#itemAddForm [name=desc]", TT.kingEditorParams);
//初始化类目选择和图片上传器
TAOTAO.init({fun:function(node){
//根据商品的分类id取商品的规格模板,生成规格信息。第四天内容。
TAOTAO.changeItemParam(node, "itemAddForm");
}});
});
// 初始化选择类目组件
initItemCat : function(data){
$(".selectItemCat").each(function(i,e){
var _ele = $(e);
if(data && data.cid){
_ele.after("<span style='margin-left:10px;'>"+data.cid+"</span>");
}else{
_ele.after("<span style='margin-left:10px;'></span>");
}
_ele.unbind('click').click(function(){
$("<div>").css({padding:"5px"}).html("<ul>")
.window({
width:'500',
height:"450",
modal:true,
closed:true,
iconCls:'icon-save',
title:'选择类目',
onOpen : function(){
var _win = this;
$("ul",_win).tree({
url:'/item/cat/list',
animate:true,
onClick : function(node){
if($(this).tree("isLeaf",node.target)){
// 填写到cid中
_ele.parent().find("[name=cid]").val(node.id);
_ele.next().text(node.text).attr("cid",node.id);
$(_win).window('close');
if(data && data.fun){
data.fun.call(this,node);
}
}
}
});
},
onClose : function(){
$(this).window("destroy");
}
}).window('open');
});
});
},
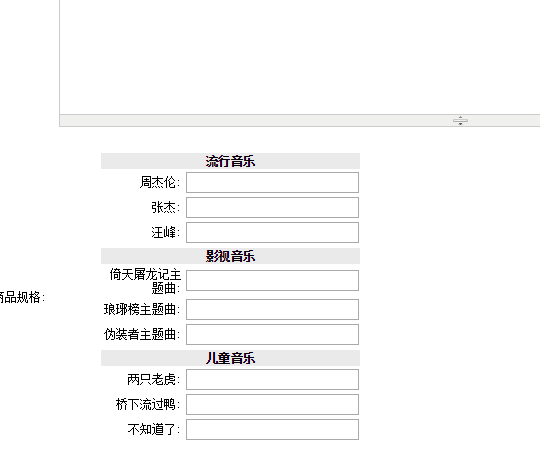
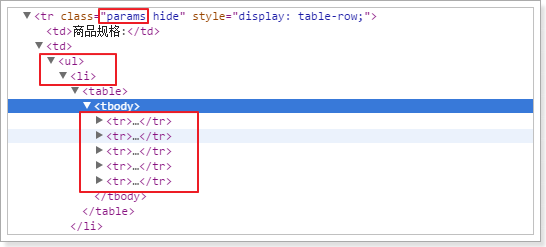
changeItemParam : function(node,formId){
$.getJSON("/item/param/query/itemcatid/" + node.id,function(data){
if(data.status == 200 && data.data){
$("#"+formId+" .params").show();
var paramData = JSON.parse(data.data.paramData);
var html = "<ul>";
for(var i in paramData){
var pd = paramData[i];
html+="<li><table>";
html+="<tr><td colspan=\"2\" class=\"group\">"+pd.group+"</td></tr>";
for(var j in pd.params){
var ps = pd.params[j];
html+="<tr><td class=\"param\"><span>"+ps+"</span>: </td><td><input autocomplete=\"off\" type=\"text\"/></td></tr>";
}
html+="</li></table>";
}
html+= "</ul>";
$("#"+formId+" .params td").eq(1).html(html);
}else{
$("#"+formId+" .params").hide();
$("#"+formId+" .params td").eq(1).empty();
}
});
},

-
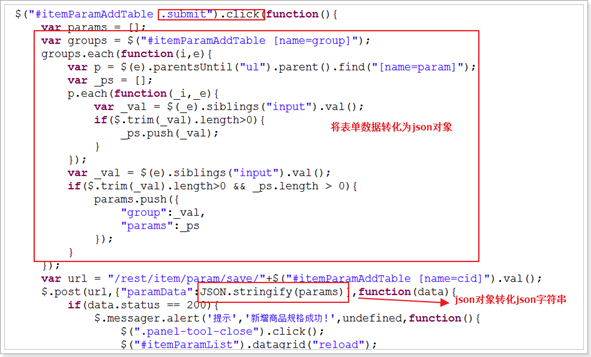
点击提交,将表单转化json数据

-
提交商品规格数据
-
请求的url
-
响应的数据格式TaotaoResult
-
-
Controller由于此操作是在商品添加时同时提交所以,只需要修改商品添加controller即可。

-
Service在ItemServiceImpl的saveItem方法中添加插入规格数据的逻辑:
@Override
public void saveItem(TbItem item, String desc, String itemParams) throws Exception {
Date date = new Date();
//获得商品id
long id = IDUtils.genItemId();
//添加商品信息
item.setId(id);
//商品状态,1-正常,2-下架,3-删除
item.setStatus((byte) 1);
item.setCreated(date);
item.setUpdated(date);
itemMapper.insert(item);
//添加商品描述
//创建TbItemDesc对象
TbItemDesc itemDesc = new TbItemDesc();
//获得一个商品id
itemDesc.setItemId(id);
itemDesc.setItemDesc(desc);
itemDesc.setCreated(date);
itemDesc.setUpdated(date);
//插入数据
itemDescMapper.insert(itemDesc);
//添加商品规格
TbItemParamItem itemParamItem = new TbItemParamItem();
itemParamItem.setItemId(id);
itemParamItem.setParamData(itemParams);
itemParamItem.setCreated(date);
itemParamItem.setUpdated(date);
itemParamItemMapper.insert(itemParamItem);
}
-
展示规格参数
-
Service
-
/**
* 添加规格参数
* <p>Title: insertItemParamItem</p>
* <p>Description: </p>
* @param itemId
* @param itemParam
* @return
*/
private TaotaoResult insertItemParamItem(Long itemId, String itemParam) {
//创建一个pojo
TbItemParamItem itemParamItem = new TbItemParamItem();
itemParamItem.setItemId(itemId);
itemParamItem.setParamData(itemParam);
itemParamItem.setCreated(new Date());
itemParamItem.setUpdated(new Date());
//向表中插入数据
itemParamItemMapper.insert(itemParamItem);
return TaotaoResult.ok();
}@Override
public TaotaoResult createItem(TbItem item, String desc, String itemParam) throws Exception {
//item补全
//生成商品ID
Long itemId = IDUtils.genItemId();
item.setId(itemId);
// '商品状态,1-正常,2-下架,3-删除',
item.setStatus((byte) 1);
item.setCreated(new Date());
item.setUpdated(new Date());
//插入到数据库
itemMapper.insert(item);
//添加商品描述信息
TaotaoResult result = insertItemDesc(itemId, desc);
if (result.getStatus() != 200) {
throw new Exception();
}
//添加规格参数
result = insertItemParamItem(itemId, itemParam);
if (result.getStatus() != 200) {
throw new Exception();
}
return TaotaoResult.ok();
}
-
Controller
@RequestMapping(value="/item/save", method=RequestMethod.POST)
@ResponseBody
private TaotaoResult createItem(TbItem item, String desc, String itemParams) throws Exception {
TaotaoResult result = itemService.createItem(item, desc, itemParams);
return result;
}
-
Jsp
<input type="hidden" name="itemParams"/>
-
规格参数列表
@Controllerpublic class ItemParamItemController {
@Autowired
private ItemParamItemService itemParamItemService;
@RequestMapping("/showitem/{itemId}")
public String showItemParam(@PathVariable Long itemId, Model model) {
String string = itemParamItemService.getItemParamByItemId(itemId);
model.addAttribute("itemParam", string);
return "item";
}}
@Servicepublic class ItemParamItemServiceImpl implements ItemParamItemService {
@Autowired
private TbItemParamItemMapper itemParamItemMapper;
@Override
public String getItemParamByItemId(Long itemId) {
//根据商品id查询规格参数
TbItemParamItemExample example = new TbItemParamItemExample();
Criteria criteria = example.createCriteria();
criteria.andItemIdEqualTo(itemId);
//执行查询
List<TbItemParamItem> list = itemParamItemMapper.selectByExampleWithBLOBs(example);
if (list == null || list.size() == 0) {
return "";
}
//取规格参数信息
TbItemParamItem itemParamItem = list.get(0);
String paramData = itemParamItem.getParamData();
//生成html
// 把规格参数json数据转换成java对象
List<Map> jsonList = JsonUtils.jsonToList(paramData, Map.class);
StringBuffer sb = new StringBuffer();
sb.append("<table cellpadding=\"0\" cellspacing=\"1\" width=\"100%\" border=\"1\" class=\"Ptable\">\n");
sb.append(" <tbody>\n");
for(Map m1:jsonList) {
sb.append(" <tr>\n");
sb.append(" <th class=\"tdTitle\" colspan=\"2\">"+m1.get("group")+"</th>\n");
sb.append(" </tr>\n");
List<Map> list2 = (List<Map>) m1.get("params");
for(Map m2:list2) {
sb.append(" <tr>\n");
sb.append(" <td class=\"tdTitle\">"+m2.get("k")+"</td>\n");
sb.append(" <td>"+m2.get("v")+"</td>\n");
sb.append(" </tr>\n");
}
}
sb.append(" </tbody>\n");
sb.append("</table>");
return sb.toString();
}
</head><body>${itemParam}</body></html>

-
课程计划
-
完成前台系统的搭建
-
淘淘商城首页的实现
-
商品分类展示首页图片:
 分类展示图片:
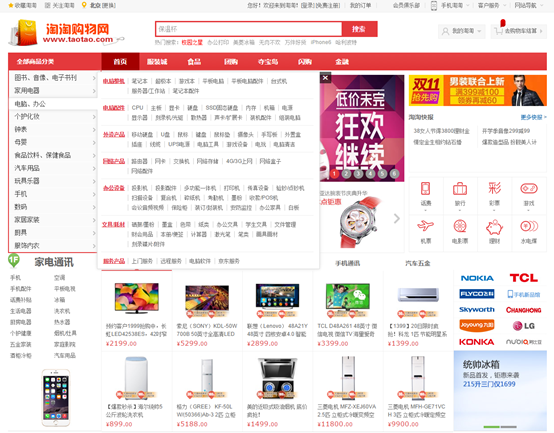
-
前台系统系统架构
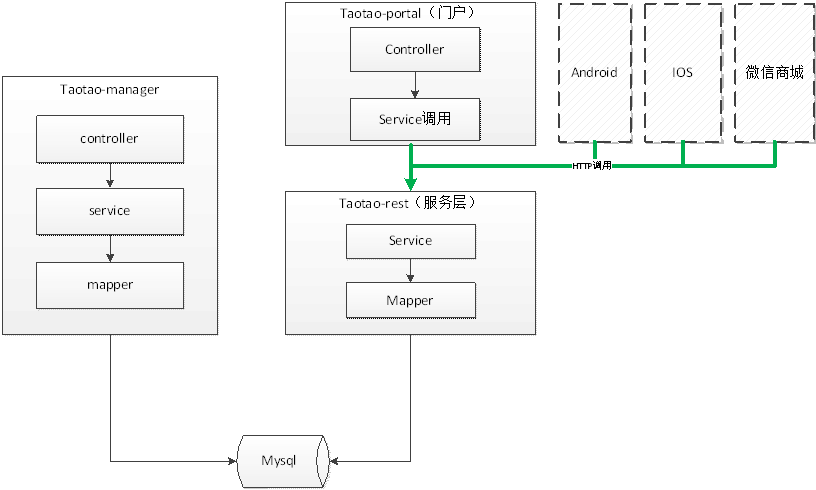
 在互联网系统开发当中,我们一般都是采用了分层的方式来架构系统,但是为什么我们需要分层进行架构呢?采用分层架构有利于系统的维护,系统的扩展。这其实就是系统的可维护性和可扩展性。分层就是按照功能把系统切分细分,细分之后就能分布式部署,就能引入伸缩性,就能提高性能。好处:
-
-
-
基于soa理念将服务层抽出对外提供服务
-
可以实现灵活的分布式部署
-
搭建服务系统服务形式:对外提供rest形式的服务,供其他系统调用。使用http协议传递json数据。
-
使用的技术1、Mybatis2、spring3、springmvc
-
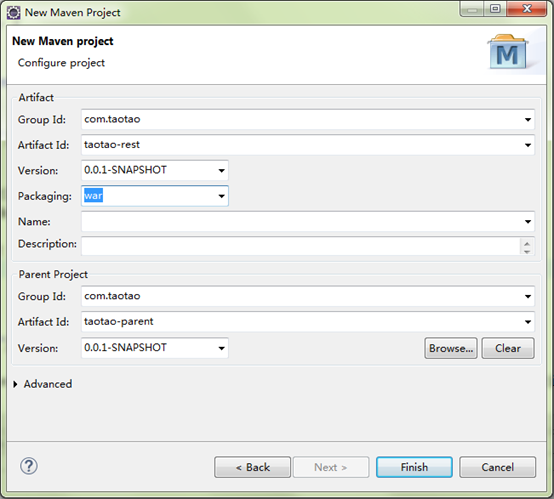
创建maven工程
-
添加一个web.xml文件
-
<?xml version="1.0" encoding="UTF-8"?><web-app xmlns:xsi="http://www.w3.org/2001/XMLSchema-instance"
xmlns="http://java.sun.com/xml/ns/javaee" xmlns:web="http://java.sun.com/xml/ns/javaee/web-app_2_5.xsd"
xsi:schemaLocation="http://java.sun.com/xml/ns/javaee http://java.sun.com/xml/ns/javaee/web-app_2_5.xsd"
id="taotao" version="2.5">
<display-name>taotao-rest</display-name>
<welcome-file-list>
<welcome-file>index.html</welcome-file>
</welcome-file-list>
</web-app>
-
Pom文件
<project xmlns="http://maven.apache.org/POM/4.0.0" xmlns:xsi="http://www.w3.org/2001/XMLSchema-instance"
xsi:schemaLocation="http://maven.apache.org/POM/4.0.0 http://maven.apache.org/xsd/maven-4.0.0.xsd">
<modelVersion>4.0.0</modelVersion>
<parent>
<groupId>com.taotao</groupId>
<artifactId>taotao-parent</artifactId>
<version>0.0.1-SNAPSHOT</version>
</parent>
<groupId>com.taotao</groupId>
<artifactId>taotao-rest</artifactId>
<version>0.0.1-SNAPSHOT</version>
<packaging>war</packaging>
<dependencies>
<!-- 依赖taotao-manager-mapper工程 -->
<dependency>
<groupId>com.taotao</groupId>
<artifactId>taotao-manager-mapper</artifactId>
<version>0.0.1-SNAPSHOT</version>
</dependency>
<!-- MySql -->
<dependency>
<groupId>mysql</groupId>
<artifactId>mysql-connector-java</artifactId>
</dependency>
<!-- 连接池 -->
<dependency>
<groupId>com.alibaba</groupId>
<artifactId>druid</artifactId>
</dependency>
<!-- Spring -->
<dependency>
<groupId>org.springframework</groupId>
<artifactId>spring-context</artifactId>
</dependency>
<dependency>
<groupId>org.springframework</groupId>
<artifactId>spring-beans</artifactId>
</dependency>
<dependency>
<groupId>org.springframework</groupId>
<artifactId>spring-webmvc</artifactId>
</dependency>
<dependency>
<groupId>org.springframework</groupId>
<artifactId>spring-jdbc</artifactId>
</dependency>
<dependency>
<groupId>org.springframework</groupId>
<artifactId>spring-aspects</artifactId>
</dependency>
<dependency>
<groupId>javax.servlet</groupId>
<artifactId>servlet-api</artifactId>
<scope>provided</scope>
</dependency>
</dependencies>
<build>
<plugins>
<!-- 配置Tomcat插件 -->
<plugin>
<groupId>org.apache.tomcat.maven</groupId>
<artifactId>tomcat7-maven-plugin</artifactId>
<configuration>
<port>8081</port>
<path>/</path>
</configuration>
</plugin>
</plugins>
</build></project>
-
整合ssm参考taotao-manager的整合过程。
-
搭建门户系统
-
什么是门户?广义上的门户就是将各种应用系统、数据资源和互联网资源集成到一个信息管理平台之上,并以统一的用户界面提供给用户,并建立企业对客户、企业对内部员工和企业对企业的信息通道。简单来说就是网站的入口。
-
-
所使用技术Srping + SpringMVC JS + CSS
门户系统不直接调用数据库,而是通过服务系统提供的接口获取数据。电商、互联网行业开发都是面向服务开发。
-
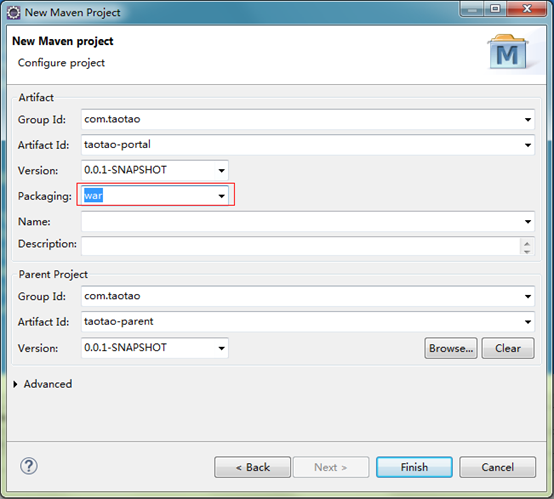
创建maven工程
-
Pom文件
<project xmlns="http://maven.apache.org/POM/4.0.0" xmlns:xsi="http://www.w3.org/2001/XMLSchema-instance"
xsi:schemaLocation="http://maven.apache.org/POM/4.0.0 http://maven.apache.org/xsd/maven-4.0.0.xsd">
<modelVersion>4.0.0</modelVersion>
<parent>
<groupId>com.taotao</groupId>
<artifactId>taotao-parent</artifactId>
<version>0.0.1-SNAPSHOT</version>
</parent>
<groupId>com.taotao</groupId>
<artifactId>taotao-portal</artifactId>
<version>0.0.1-SNAPSHOT</version>
<packaging>war</packaging>
<dependencies>
<dependency>
<groupId>com.taotao</groupId>
<artifactId>taotao-common</artifactId>
<version>0.0.1-SNAPSHOT</version>
</dependency>
<!-- Spring -->
<dependency>
<groupId>org.springframework</groupId>
<artifactId>spring-context</artifactId>
</dependency>
<dependency>
<groupId>org.springframework</groupId>
<artifactId>spring-beans</artifactId>
</dependency>
<dependency>
<groupId>org.springframework</groupId>
<artifactId>spring-webmvc</artifactId>
</dependency>
<dependency>
<groupId>org.springframework</groupId>
<artifactId>spring-jdbc</artifactId>
</dependency>
<dependency>
<groupId>org.springframework</groupId>
<artifactId>spring-aspects</artifactId>
</dependency>
<!-- JSP相关 -->
<dependency>
<groupId>jstl</groupId>
<artifactId>jstl</artifactId>
</dependency>
<dependency>
<groupId>javax.servlet</groupId>
<artifactId>servlet-api</artifactId>
</dependency>
<dependency>
<groupId>javax.servlet</groupId>
<artifactId>jsp-api</artifactId>
<scope>provided</scope>
</dependency>
<!-- 文件上传组件 -->
<dependency>
<groupId>commons-fileupload</groupId>
<artifactId>commons-fileupload</artifactId>
</dependency>
<!-- Redis客户端 -->
<dependency>
<groupId>redis.clients</groupId>
<artifactId>jedis</artifactId>
</dependency>
<!-- solr客户端 -->
<dependency>
<groupId>org.apache.solr</groupId>
<artifactId>solr-solrj</artifactId>
</dependency>
</dependencies>
<build>
<plugins>
<!-- 配置Tomcat插件 -->
<plugin>
<groupId>org.apache.tomcat.maven</groupId>
<artifactId>tomcat7-maven-plugin</artifactId>
<configuration>
<port>8082</port>
<path>/</path>
</configuration>
</plugin>
</plugins>
</build></project>
-
配置文件
-
Web.xml
-
<?xml version="1.0" encoding="UTF-8"?><web-app xmlns:xsi="http://www.w3.org/2001/XMLSchema-instance"
xmlns="http://java.sun.com/xml/ns/javaee" xmlns:web="http://java.sun.com/xml/ns/javaee/web-app_2_5.xsd"
xsi:schemaLocation="http://java.sun.com/xml/ns/javaee http://java.sun.com/xml/ns/javaee/web-app_2_5.xsd"
id="taotao" version="2.5">
<display-name>taotao-portal</display-name>
<welcome-file-list>
<welcome-file>index.html</welcome-file>
</welcome-file-list>
<!-- 加载spring容器 -->
<context-param>
<param-name>contextConfigLocation</param-name>
<param-value>classpath:spring/applicationContext*.xml</param-value>
</context-param>
<listener>
<listener-class>org.springframework.web.context.ContextLoaderListener</listener-class>
</listener>
<!-- 解决post乱码 -->
<filter>
<filter-name>CharacterEncodingFilter</filter-name>
<filter-class>org.springframework.web.filter.CharacterEncodingFilter</filter-class>
<init-param>
<param-name>encoding</param-name>
<param-value>utf-8</param-value>
</init-param>
<!-- <init-param>
<param-name>forceEncoding</param-name>
<param-value>true</param-value>
</init-param> -->
</filter>
<filter-mapping>
<filter-name>CharacterEncodingFilter</filter-name>
<url-pattern>/*</url-pattern>
</filter-mapping>
<!-- springmvc的前端控制器 -->
<servlet>
<servlet-name>taotao-protal</servlet-name>
<servlet-class>org.springframework.web.servlet.DispatcherServlet</servlet-class>
<!-- contextConfigLocation不是必须的, 如果不配置contextConfigLocation, springmvc的配置文件默认在:WEB-INF/servlet的name+"-servlet.xml" -->
<init-param>
<param-name>contextConfigLocation</param-name>
<param-value>classpath:spring/springmvc.xml</param-value>
</init-param>
<load-on-startup>1</load-on-startup>
</servlet>
<servlet-mapping>
<servlet-name>taotao-protal</servlet-name>
<!-- 做伪静态,做搜索引擎优化(SEO) -->
<url-pattern>*.html</url-pattern>
</servlet-mapping></web-app>
-
Springmvc.xml
<?xml version="1.0" encoding="UTF-8"?><beans xmlns="http://www.springframework.org/schema/beans"
xmlns:xsi="http://www.w3.org/2001/XMLSchema-instance" xmlns:p="http://www.springframework.org/schema/p"
xmlns:context="http://www.springframework.org/schema/context"
xmlns:mvc="http://www.springframework.org/schema/mvc"
xsi:schemaLocation="http://www.springframework.org/schema/beans http://www.springframework.org/schema/beans/spring-beans.xsd
http://www.springframework.org/schema/mvc http://www.springframework.org/schema/mvc/spring-mvc-4.0.xsd
http://www.springframework.org/schema/context http://www.springframework.org/schema/context/spring-context.xsd">
<context:component-scan base-package="com.taotao.portal.controller"></context:component-scan>
<mvc:annotation-driven/>
<bean class="org.springframework.web.servlet.view.InternalResourceViewResolver">
<property name="prefix" value="/WEB-INF/jsp/" />
<property name="suffix" value=".jsp" />
</bean>
</beans>
-
applicationContext-service.xml
<?xml version="1.0" encoding="UTF-8"?><beans xmlns="http://www.springframework.org/schema/beans"
xmlns:context="http://www.springframework.org/schema/context" xmlns:p="http://www.springframework.org/schema/p"
xmlns:aop="http://www.springframework.org/schema/aop" xmlns:tx="http://www.springframework.org/schema/tx"
xmlns:xsi="http://www.w3.org/2001/XMLSchema-instance"
xsi:schemaLocation="http://www.springframework.org/schema/beans http://www.springframework.org/schema/beans/spring-beans-4.0.xsd
http://www.springframework.org/schema/context http://www.springframework.org/schema/context/spring-context-4.0.xsd
http://www.springframework.org/schema/aop http://www.springframework.org/schema/aop/spring-aop-4.0.xsd http://www.springframework.org/schema/tx http://www.springframework.org/schema/tx/spring-tx-4.0.xsd
http://www.springframework.org/schema/util http://www.springframework.org/schema/util/spring-util-4.0.xsd">
<!-- 加载配置文件 -->
<context:property-placeholder location="classpath:resource/*.properties"/>
<context:component-scan base-package="com.taotao.portal.service"/>
</beans>
-
添加静态页面
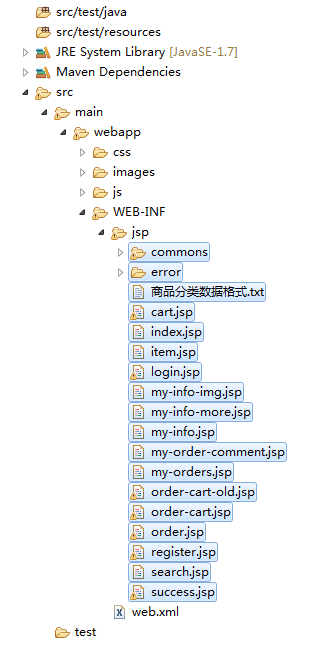
-
显示欢迎页Controller
@Controllerpublic class PageController {
@RequestMapping("/index")
public String showIndex() throws Exception {
return "index";
}
}
-
启动portal系统
-
首页商品类目展示流程


 浏览器
浏览器 -
Taotao-rest发布服务
-
需求
-
请求的url

-
-
http://127.0.0.1:8081/rest/itemcat/all
-
响应的数据格式
-
跨域问题使用json数据测试。如果ajax请求的是同一个工程中taotao-portal的json数据没有问题,可以直接显示出来。如果请求的是taotao-rest工程中json数据,会发生错误。
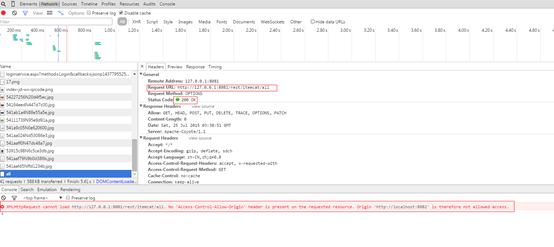 跨域问题:浏览器一个安全的限制,不允许js跨域请求资源,
 www.taotao.com è manage.taotao.com 跨域
www.taotao.com è www.taotao.com 非跨域
www.taotao.com è www.taotao.com:8081 跨域
如何解决跨域问题:使用jsonp来解决跨域问题。
jsonp的原理:浏览器在js请求中,是允许通过script标签的src跨域请求,可以在请求的结果中添加回调方法名,在请求页面中定义方法,既可获取到跨域请求的数据。


-
静态数据演示
//URL_Serv: "http://localhost:8082/category.json",
function() {
//使用jsonp来实现跨域请求
$.getJSONP(this.URL_Serv, category.getDataService);
//直接使用ajax请求json数据
/*$.getJSON(this.URL_Serv, function(json){
category.getDataService(json);
});*/
getDataService: function(a) {
var b = [], c = this;
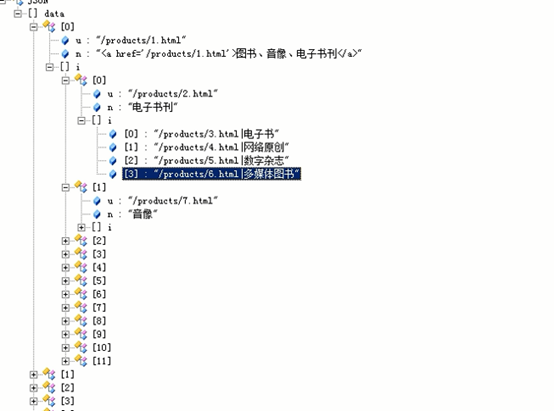
$.each(a.data, function(a) {
this.index = a, "l" == this.t && (this.i = c.FN_RefactorJSON(this.i, 7)), b.push(c.renderItem(this, a))
});
category.getDataService({"data":
-
服务实现
-
对应数据格式创建pojo类:
-
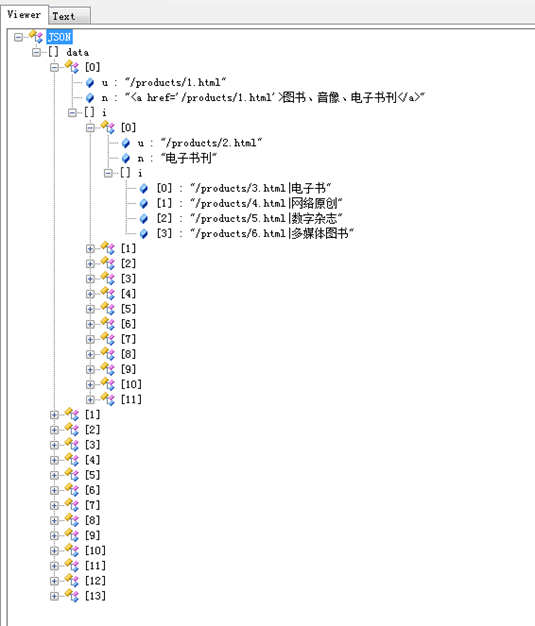
public class ItemCat {
//转换成json数据时使用u作为key
@JsonProperty("u")
private String url;
@JsonProperty("n")
private String name;
@JsonProperty("i")
private List<?> item;}
-
返回值POJO:
/**
* 查询分类列表返回值
* <p>Title: ItemCatResult</p>
* <p>Description: </p>
* <p>Company: www.itcast.com</p>
* @author 入云龙
* @date 2015年7月24日下午6:35:59
* @version 1.0
*/public class ItemCatResult {
private List<?> data;
public List<?> getData() {
return data;
}
public void setData(List<?> data) {
this.data = data;
}
}
-
Service
@Servicepublic class ItemCatServiceImpl implements ItemCatService {
@Autowired
private TbItemCatMapper itemCatMapper;
@Override
public CatResult getItemCatList() {
CatResult catResult = new CatResult();
//查询分类列表
catResult.setData(getCatList(0));
return catResult;
}
/**
* 查询分类列表
* <p>Title: getCatList</p>
* <p>Description: </p>
* @param parentId
* @return
*/
private List<?> getCatList(long parentId) {
//创建查询条件
TbItemCatExample example = new TbItemCatExample();
Criteria criteria = example.createCriteria();
criteria.andParentIdEqualTo(parentId);
//执行查询
List<TbItemCat> list = itemCatMapper.selectByExample(example);
//返回值list
List resultList = new ArrayList<>();
//向list中添加节点
int count = 0;
for (TbItemCat tbItemCat : list) {
//判断是否为父节点
if (tbItemCat.getIsParent()) {
CatNode catNode = new CatNode();
if (parentId == 0) {
catNode.setName("<a href='/products/"+tbItemCat.getId()+".html'>"+tbItemCat.getName()+"</a>");
} else {
catNode.setName(tbItemCat.getName());
}
catNode.setUrl("/products/"+tbItemCat.getId()+".html");
catNode.setItem(getCatList(tbItemCat.getId()));
resultList.add(catNode);
count ++;
//第一层只取14条记录
if (parentId == 0 && count >=14) {
break;
}
//如果是叶子节点
} else {
resultList.add("/products/"+tbItemCat.getId()+".html|" + tbItemCat.getName());
}
}
return resultList;
}
-
Controller要返回json数据,还需要使用回调方法把json数据包装起来。所以需要controller添加回调支持,不能直接返回一个ItemCatResult对象。
-
方法一:使用MappingJacksonValue对象包装返回结果,并设置jsonp的回调方法。
@Controllerpublic class ItemCatController {
@Autowired
private ItemCatService itemCatService;
@RequestMapping(value="/itemcat/list",
produces=MediaType.APPLICATION_JSON_VALUE + ";charset=utf-8")
@ResponseBody
public String getItemCatList(String callback) {
CatResult catResult = itemCatService.getItemCatList();
//把pojo转换成字符串
String json = JsonUtils.objectToJson(catResult);
//拼装返回值
String result = callback + "(" + json + ");";
return result;
}
-
方法二先把ItemCatResult对象转换成json字符串,然后使用字符串拼接的方法拼装成jsonp格式的数据。需要设置相应结果的MediaType。
@RequestMapping(value="/all", produces=MediaType.APPLICATION_JSON_VALUE + ";charset=utf-8")
@ResponseBody
public String queryAll(String callback) throws Exception {
//查询分类列表
ItemCatResult result = itemCatService.queryAllCategory();
//把对象转换成json数据
String jsonResult = JsonUtils.objectToJson(result);
//拼接字符串
String resultStr = callback + "(" + jsonResult + ");";
return resultStr;
}
-
页面实现
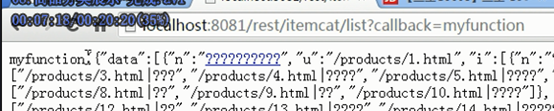
URL_Serv: "http://localhost:8081/rest/itemcat/list?callback=category.getDataService",
getDataService: function(a) {
var b = [], c = this;
$.each(a.data, function(a) {
this.index = a, "l" == this.t && (this.i = c.FN_RefactorJSON(this.i, 7)), b.push(c.renderItem(this, a))
});
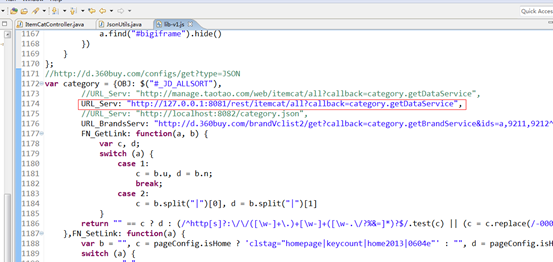 页面效果:
页面效果: 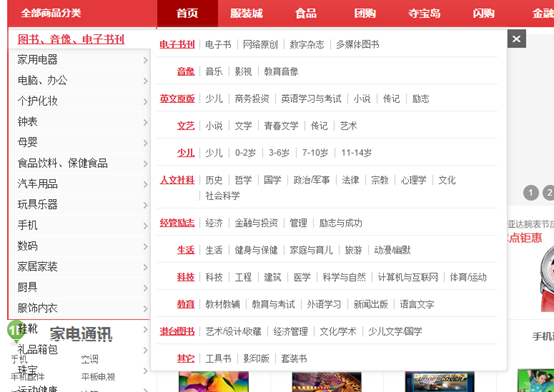
-
附录:Maven执行跳过测试:mvn clean install -DskipTests
-
首页的动态实现分析网站的首页的实现必须是动态的,可以在后台管理维护。
-
CMS -- 内容管理系统思路:
-
分析每个模块的共性
-
链接
-
图片
-
标题
-
子标题
-
-
使用两张表来管理
-
内容分类表,管理内容的大分类
-
内容表,存储每个分类下的明细信息内容。
-
首页大广告的展示流程
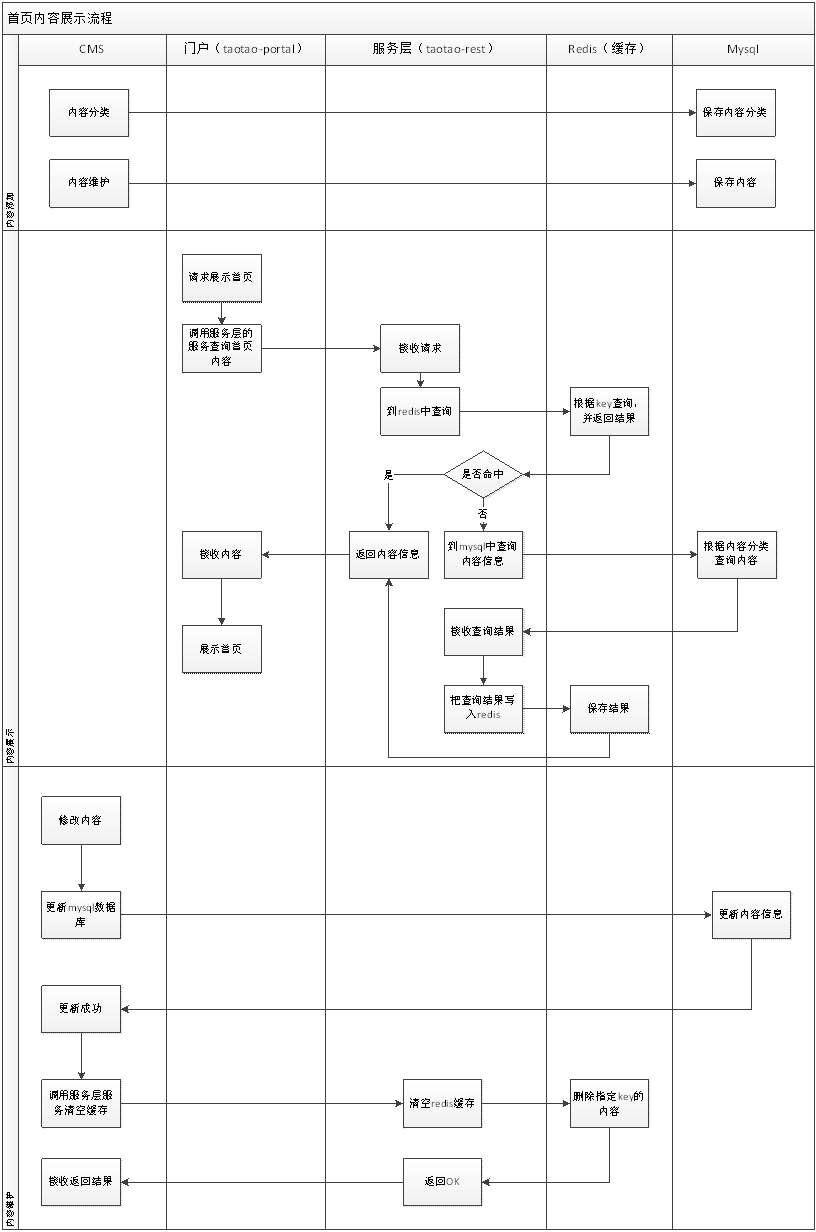
-
-
CMS 内容管理系统
-
需求分析(演示功能)内容列表新增节点。。。。
-
-
数据库设计需要一张表存储内容数据:字段:标题、url、子标题、image、内容分类id等等需要一张表存储内容的分类信息,树形结构的表。内容分类表:
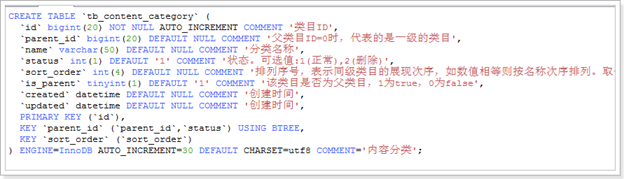
内容表:
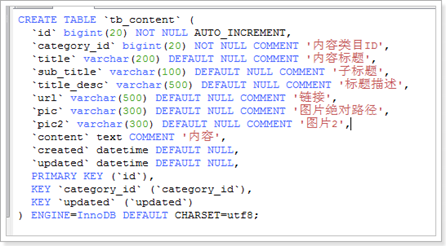
-
内容分类列表内容分类管理实际上是一个树形结构的管理,新增子节点、重命名、删除(级联删除所有的子节点)
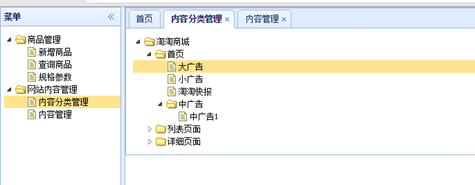
-
分析查询内容分类列表,返回一个分类列表。请求的url:/content/category/list响应的数据格式:
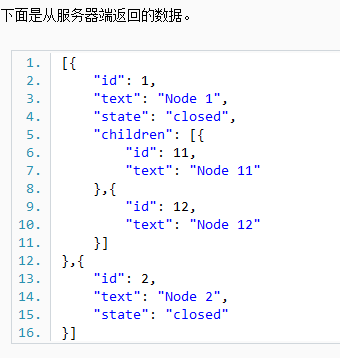 必须包含id、text、state三个节点。
-
-
Pojo定义对应返回结果的数据类型定义一个pojo类,其中包含三个属性id、text、state。
public class EasyUITreeNode {
private Integer id;
private String text;
private String state;}
-
Mapper使用逆向工程生成的mapper映射文件和mapper接口文件。
-
Service
@Servicepublic class ContentCategoryServiceImpl implements ContentCategoryService {
@Autowired
private TbContentCategoryMapper contentCategoryMapper;
@Override
public List<EasyUITreeNode> getContentCategoryList(long parentid) throws Exception {
//根据parentid查询内容分类列表
TbContentCategoryExample example = new TbContentCategoryExample();
Criteria criteria = example.createCriteria();
criteria.andParentIdEqualTo(parentid);
List<TbContentCategory> list = contentCategoryMapper.selectByExample(example);
List<EasyUITreeNode> resultList = new ArrayList<>();
for (TbContentCategory tbContentCategory : list) {
EasyUITreeNode node = new EasyUITreeNode();
node.setId(tbContentCategory.getId());
node.setText(tbContentCategory.getName());
//判断是否是父节点
if (tbContentCategory.getIsParent()) {
node.setState("closed");
} else {
node.setState("open");
}
resultList.add(node);
}
return resultList;
}
}
-
Controller
@Controller@RequestMapping("/content/category")public class ContentCategoryController {
@Autowired
private ContentCategoryService contentCategoryService;
@RequestMapping("/list")
@ResponseBody
public List<EasyUITreeNode> getContentCategoryList(@RequestParam(value="id", defaultValue="0")long parentid) throws Exception {
List<EasyUITreeNode> list = contentCategoryService.getContentCategoryList(parentid);
return list;
}}
-
Jsp页面
$("#contentCategory").tree({
url : '/content/category/list',
animate: true,
method : "GET",
onContextMenu: function(e,node){
e.preventDefault();
$(this).tree('select',node.target);
$('#contentCategoryMenu').menu('show',{
left: e.pageX,
top: e.pageY
});
},
onAfterEdit : function(node){
var _tree = $(this);
if(node.id == 0){
// 新增节点
$.post("/content/category/create",{parentId:node.parentId,name:node.text},function(data){
if(data.status == 200){
_tree.tree("update",{
target : node.target,
id : data.data.id
});
}else{
$.messager.alert('提示','创建'+node.text+' 分类失败!');
}
});
}else{
$.post("/content/category/update",{id:node.id,name:node.text});
}
}
});});
-
新增子节点
-
需求请求的url:/content/category/create请求的参数:
-
parentId:父节点id
Name:新节点的名称返回的数据格式:TaotaoResult
-
Mapper使用逆向工程生成的mapper文件。添加主键返回:
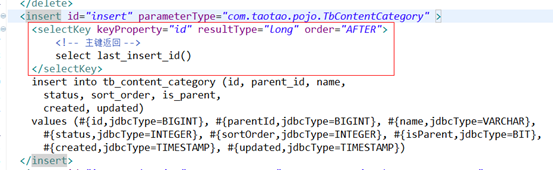
-
Service
@Override
public TaotaoResult addNode(long parentid, String name) throws Exception {
Date date = new Date();
//添加一个新节点
//创建一个节点对象
TbContentCategory node = new TbContentCategory();
node.setName(name);
node.setParentId(parentid);
node.setIsParent(false);
node.setCreated(date);
node.setUpdated(date);
node.setSortOrder(1);
//状态。可选值:1(正常),2(删除)
node.setStatus(1);
//插入新节点。需要返回主键
contentCategoryMapper.insert(node);
//判断如果父节点的isparent不是true修改为true
//取父节点的内容
TbContentCategory parentNode = contentCategoryMapper.selectByPrimaryKey(parentid);
if (!parentNode.getIsParent()) {
parentNode.setIsParent(true);
contentCategoryMapper.updateByPrimaryKey(parentNode);
}
//把新节点返回
return TaotaoResult.ok(node);
}
-
Controller
onAfterEdit : function(node){
var _tree = $(this);
if(node.id == 0){
// 新增节点
$.post("/content/category/create",{parentId:node.parentId,name:node.text},function(data){
if(data.status == 200){
_tree.tree("update",{
target : node.target,
id : data.data.id
});
}else{
$.messager.alert('提示','创建'+node.text+' 分类失败!');
}
});
}else{
$.post("/content/category/update",{id:node.id,name:node.text});
}
}
});
@RequestMapping("/create")
@ResponseBody
public TaotaoResult addNode(Long parentId, String name) throws Exception {
TaotaoResult result = contentCategoryService.addNode(parentId, name);
return result;
}
-
Jsp
-
重命名节点课后作业
-
删除节点课后作业
-
内容列表
-
需求请求的url:/content/query/list响应的数据格式:EasyUIResult
-
-
Mapper使用逆向生成的mapper文件。
-
Service
@Servicepublic class ContentServiceImpl implements ContentService {
@Autowired
private TbContentMapper contentMapper;
@Override
public EasyUIResult getContentList(long catId, Integer page, Integer rows) throws Exception {
//根据category_id查询内容列表
TbContentExample example = new TbContentExample();
Criteria criteria = example.createCriteria();
criteria.andCategoryIdEqualTo(catId);
//分页处理
PageHelper.startPage(page, rows);
List<TbContent> list = contentMapper.selectByExampleWithBLOBs(example);
//取分页信息
PageInfo<TbContent> pageInfo = new PageInfo<>(list);
EasyUIResult result = new EasyUIResult(pageInfo.getTotal(), list);
return result;
}
}
-
Controller
@Controller@RequestMapping("/content")public class ContentController {
@Autowired
private ContentService contentService;
@RequestMapping("/query/list")
@ResponseBody
public EasyUIResult getContentList(Long categoryId, Integer page, Integer rows) throws Exception {
EasyUIResult result = contentService.getContentList(categoryId, page, rows);
return result;
}}
-
添加内容
-
需求
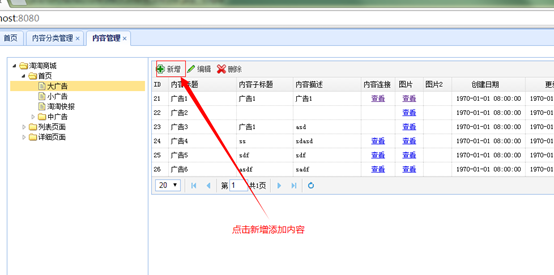 点击新增按钮,打开content-add.jsp
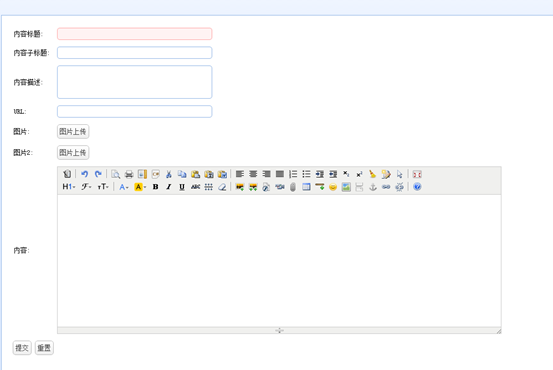
-
点击提交按钮,使用ajax把表单中的数据提交给服务器。1、请求的url:/content/save
-
-
请求的参数表单中的数据
-
响应的数据格式
TaotaoResult
-
Mapper创建一个添加内容的mapper文件,实现向tb_content表中添加数据的功能。使用逆向工程生成。
-
Service
@Override
public TaotaoResult addContent(TbContent content) throws Exception {
//把图片信息保存至数据库
content.setCreated(new Date());
content.setUpdated(new Date());
//把内容信息添加到数据库
contentMapper.insert(content);
return TaotaoResult.ok();
}
-
Controller
@RequestMapping("/save")
@ResponseBody
public TaotaoResult addContent(TbContent content) throws Exception {
TaotaoResult result = contentService.addContent(content);
return result;
}
-
修改内容课后作业
-
删除内容课后作业
-
首页大广告方案前端系统获取后端系统提供的接口,如何获取?
-
方案1jsonp跨域请求
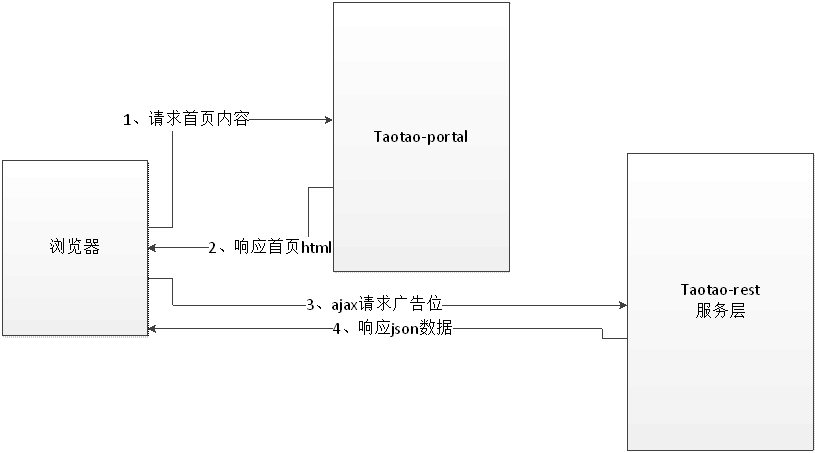
优点:
-
效率高,没有通过后台中转
-
减少内网的带宽开销
缺点:网页中无内容,不利于搜索引擎优化。
-
方案二通过后台java代码调用服务层
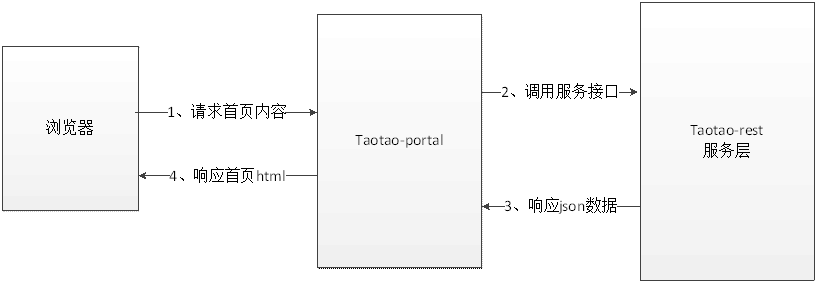 优点:
优点: -
网页中内容是变化的有利于搜索引擎优化缺点:
-
接口调用经过后台中转,效率较低,事实上可以忽略不计。
-
Httpclient
-
什么是httpclient
-
HTTP 协议可能是现在 Internet 上使用得最多、最重要的协议了,越来越多的 Java 应用程序需要直接通过 HTTP 协议来访问网络资源。虽然在 JDK 的 java net包中已经提供了访问 HTTP 协议的基本功能,但是对于大部分应用程序来说,JDK 库本身提供的功能还不够丰富和灵活。HttpClient 是 Apache Jakarta Common 下的子项目,用来提供高效的、最新的、功能丰富的支持 HTTP 协议的客户端编程工具包,并且它支持 HTTP 协议最新的版本和建议。
下载地址:-
功能介绍
以下列出的是 HttpClient 提供的主要的功能,要知道更多详细的功能可以参见 HttpClient 的主页。
(1)实现了所有 HTTP 的方法(GET,POST,PUT,HEAD 等)
(2)支持自动转向
(3)支持 HTTPS 协议
(4)支持代理服务器等
-
导入依赖
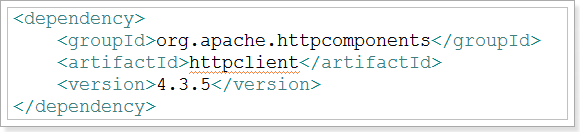
-
执行GET请求
public class DoGET {
public static void main(String[] args) throws Exception {
// 创建Httpclient对象
CloseableHttpClient httpclient = HttpClients.createDefault();
// 创建http GET请求
HttpGet httpGet = new HttpGet("http://www.baidu.com/");
CloseableHttpResponse response = null;
try {
// 执行请求
response = httpclient.execute(httpGet);
// 判断返回状态是否为200
if (response.getStatusLine().getStatusCode() == 200) {
String content = EntityUtils.toString(response.getEntity(), "UTF-8");
System.out.println("内容长度:" + content.length());// FileUtils.writeStringToFile(new File("C:\\baidu.html"), content);
}
} finally {
if (response != null) {
response.close();
}
httpclient.close();
}
}
}
-
执行GET带参数
public class DoGETParam {
public static void main(String[] args) throws Exception {
// 创建Httpclient对象
CloseableHttpClient httpclient = HttpClients.createDefault();
// 定义请求的参数
URI uri = new URIBuilder("http://www.baidu.com/s").setParameter("wd", "java").build();
System.out.println(uri);
// 创建http GET请求
HttpGet httpGet = new HttpGet(uri);
CloseableHttpResponse response = null;
try {
// 执行请求
response = httpclient.execute(httpGet);
// 判断返回状态是否为200
if (response.getStatusLine().getStatusCode() == 200) {
String content = EntityUtils.toString(response.getEntity(), "UTF-8");
System.out.println(content);
}
} finally {
if (response != null) {
response.close();
}
httpclient.close();
}
}
}
-
执行post请求
@RequestMapping(value="/httpclient/post", method=RequestMethod.POST,
produces=MediaType.TEXT_PLAIN_VALUE+";charset=utf-8")
@ResponseBody
public String testPost(String username, String password) {
String result = "username:" + username + "\tpassword:" + password;
System.out.println(result);
return "username:" + username + ",password:" + password;
}
public void doPost() throws Exception {
CloseableHttpClient httpClient = HttpClients.createDefault();
//创建一个post对象
HttpPost post = new HttpPost("http://localhost:8082/httpclient/post.action");
//执行post请求
CloseableHttpResponse response = httpClient.execute(post);
String string = EntityUtils.toString(response.getEntity());
System.out.println(string);
response.close();
httpClient.close();
}
-
带参数的post请求
@RequestMapping(value="/httpclient/post", method=RequestMethod.POST,
produces=MediaType.TEXT_PLAIN_VALUE+";charset=utf-8")
@ResponseBody
public String testPost(String username, String password) {
String result = "username:" + username + "\tpassword:" + password;
System.out.println(result);
return "username:" + username + ",password:" + password;
}}
@Test
public void doPostWithParam() throws Exception{
CloseableHttpClient httpClient = HttpClients.createDefault();
//创建一个post对象
HttpPost post = new HttpPost("http://localhost:8082/httpclient/post.action");
//创建一个Entity。模拟一个表单
List<NameValuePair> kvList = new ArrayList<>();
kvList.add(new BasicNameValuePair("username", "张三"));
kvList.add(new BasicNameValuePair("password", "123"));
//包装成一个Entity对象
StringEntity entity = new UrlEncodedFormEntity(kvList, "utf-8");
//设置请求的内容
post.setEntity(entity);
//执行post请求
CloseableHttpResponse response = httpClient.execute(post);
String string = EntityUtils.toString(response.getEntity());
System.out.println(string);
response.close();
httpClient.close();
}
-
封装HttpClient通用工具类
public class HttpClientUtil {
public static String doGet(String url, Map<String, String> param) {
// 创建Httpclient对象
CloseableHttpClient httpclient = HttpClients.createDefault();
String resultString = "";
CloseableHttpResponse response = null;
try {
// 创建uri
URIBuilder builder = new URIBuilder(url);
if (param != null) {
for (String key : param.keySet()) {
builder.addParameter(key, param.get(key));
}
}
URI uri = builder.build();
// 创建http GET请求
HttpGet httpGet = new HttpGet(uri);
// 执行请求
response = httpclient.execute(httpGet);
// 判断返回状态是否为200
if (response.getStatusLine().getStatusCode() == 200) {
resultString = EntityUtils.toString(response.getEntity(), "UTF-8");
}
} catch (Exception e) {
e.printStackTrace();
} finally {
try {
if (response != null) {
response.close();
}
httpclient.close();
} catch (IOException e) {
e.printStackTrace();
}
}
return resultString;
}
public static String doGet(String url) {
return doGet(url, null);
}
public static String doPost(String url, Map<String, String> param) {
// 创建Httpclient对象
CloseableHttpClient httpClient = HttpClients.createDefault();
CloseableHttpResponse response = null;
String resultString = "";
try {
// 创建Http Post请求
HttpPost httpPost = new HttpPost(url);
// 创建参数列表
if (param != null) {
List<NameValuePair> paramList = new ArrayList<>();
for (String key : param.keySet()) {
paramList.add(new BasicNameValuePair(key, param.get(key)));
}
// 模拟表单
UrlEncodedFormEntity entity = new UrlEncodedFormEntity(paramList);
httpPost.setEntity(entity);
}
// 执行http请求
response = httpClient.execute(httpPost);
resultString = EntityUtils.toString(response.getEntity(), "utf-8");
} catch (Exception e) {
e.printStackTrace();
} finally {
try {
response.close();
} catch (IOException e) {
// TODO Auto-generated catch block
e.printStackTrace();
}
}
return resultString;
}
public static String doPost(String url) {
return doPost(url, null);
}}
-
实现大广告位
-
需求分析在首页展示大广告位需要一个json数据来实现。 index.jsp
 var data = ${ad1};只需要生成此格式的json数据就可以了:
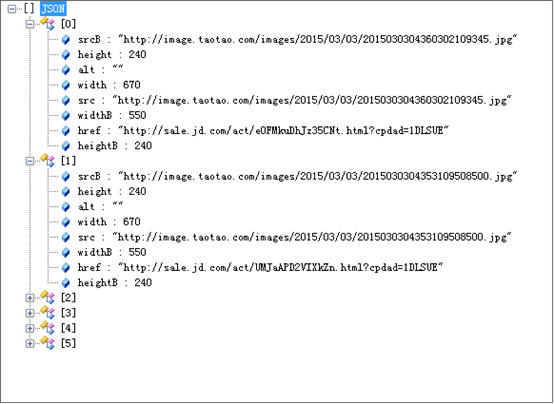
-
Jsp
-
var data = ${ad1};
-
IndexController
public class IndexController {
@Autowired
private ContentService contentService;
@RequestMapping("/index")
public String showIndex(Model model) {
String adJson = contentService.getContentList();
model.addAttribute("ad1", adJson);
return "index";
}
-
ContentServiceImpl
@Servicepublic class ContentServiceImpl implements ContentService {
@Value("${REST_BASE_URL}")
private String REST_BASE_URL;
@Value("${REST_INDEX_AD_URL}")
private String REST_INDEX_AD_URL;
@Override
public String getContentList() {
//调用服务层的服务
String result = HttpClientUtil.doGet(REST_BASE_URL + REST_INDEX_AD_URL);
//把字符串转换成TaotaoResult
try {
TaotaoResult taotaoResult = TaotaoResult.formatToList(result, TbContent.class);
//取内容列表
List<TbContent> list = (List<TbContent>) taotaoResult.getData();

List<Map> resultList = new ArrayList<>();
//创建一个jsp页码要求的pojo列表
for (TbContent tbContent : list) {
Map map = new HashMap<>();
map.put("src", tbContent.getPic());
map.put("height", 240);
map.put("width", 670);
map.put("srcB", tbContent.getPic2());
map.put("widthB", 550);
map.put("heightB", 240);
map.put("href", tbContent.getUrl());
map.put("alt", tbContent.getSubTitle());
resultList.add(map);
}
return JsonUtils.objectToJson(resultList);
} catch (Exception e) {
e.printStackTrace();
}
return null;
}
-
Resource.properties
#服务层属性定义#基础urlREST_BASE_URL=http://localhost:8081/rest#首页大广告位REST_INDEX_AD_URL=/content/list/104
-
需求根据内容的分类ID查询内容列表。请求的url:/rest/content/category/{cid}参数:categoryId响应的数据格式:TaoTaoResult
-
Mapper创建一可以根据分类id查询内容列表的mapper。使用逆向工程生成的mapper即可。
-
Service
@Servicepublic class ContentServiceImpl implements ContentService {
@Autowired
private TbContentMapper contentMapper;
@Override
public TaotaoResult getContentList(long cid) throws Exception {
TbContentExample example = new TbContentExample();
//添加条件
Criteria criteria = example.createCriteria();
criteria.andCategoryIdEqualTo(cid);
List<TbContent> list = contentMapper.selectByExample(example);
return TaotaoResult.ok(list);
}
}
-
Controller
@Controller@RequestMapping("/content")public class ContentController {
@Autowired
private ContentService contentService;
@RequestMapping("/list/{contentCategoryId}")
@ResponseBody
public TaotaoResult getContentList(@PathVariable Long contentCategoryId) {
try {
List<TbContent> list = contentService.getContentList(contentCategoryId);
return TaotaoResult.ok(list);
} catch (Exception e) {
e.printStackTrace();
return TaotaoResult.build(500, ExceptionUtil.getStackTrace(e));
}
}}
-
Jsp页面
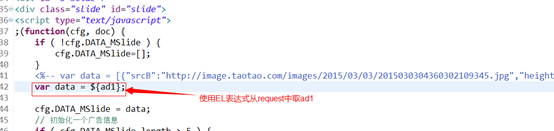
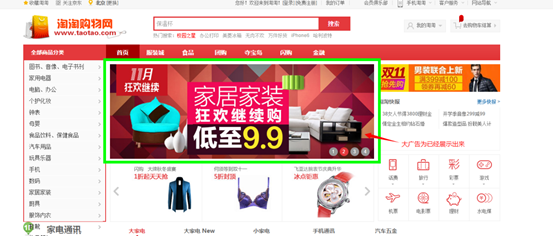
-
课程计划
-
Redis服务搭建
-
为功能添加缓存功能
-
redis介绍
-
什么是redis
-
Redis是用C语言开发的一个开源的高性能键值对(key-value)数据库。它通过提供多种键值数据类型来适应不同场景下的存储需求,目前为止Redis支持的键值数据类型如下:字符串类型 string散列类型 hash列表类型 list集合类型set有序集合类型。
-
redis的应用场景缓存(数据查询、短连接、新闻内容、商品内容等等)。(最多使用)分布式集群架构中的session分离。聊天室的在线好友列表。任务队列。(秒杀、抢购、12306等等)应用排行榜。网站访问统计。数据过期处理(可以精确到毫秒)
-
通过jedis连接redis单机
-
jar包pom坐标:
<dependency>
<groupId>redis.clients</groupId>
<artifactId>jedis</artifactId>
<version>2.7.0</version>
</dependency>
jar包如下:
-
单实例连接通过创建单实例jedis对象连接redis服务,如下代码:// 单实例连接redis
@Test
public void testJedisSingle() {
Jedis jedis = new Jedis("192.168.101.3", 6379);
jedis.set("name", "bar");
String name = jedis.get("name");
System.out.println(name);
jedis.close();
}
-
使用连接池连接
通过单实例连接redis不能对redis连接进行共享,可以使用连接池对redis连接进行共享,提高资源利用率,使用jedisPool连接redis服务,如下代码:
@Test
public void pool() {
JedisPoolConfig config = new JedisPoolConfig();
//最大连接数
config.setMaxTotal(30);
//最大连接空闲数
config.setMaxIdle(2);
JedisPool pool = new JedisPool(config, "192.168.101.3", 6379);
Jedis jedis = null;
try {
jedis.set("name", "lisi");
String name = jedis.get("name");
System.out.println(name);
}catch(Exception ex){
ex.printStackTrace();
}finally{
if(jedis != null){
//关闭连接
jedis.close();
}
}
}
详细的连接池配置参数参考下节jedis和spring整合中applicationContext.xml的配置内容。
-
jedis与spring整合配置spring配置文件applicationContext.xml
<?xml version="1.0" encoding="UTF-8"?><beans xmlns="http://www.springframework.org/schema/beans"
xmlns:xsi="http://www.w3.org/2001/XMLSchema-instance" xmlns:mvc="http://www.springframework.org/schema/mvc"
xmlns:context="http://www.springframework.org/schema/context"
xmlns:aop="http://www.springframework.org/schema/aop" xmlns:tx="http://www.springframework.org/schema/tx"
xsi:schemaLocation="http://www.springframework.org/schema/beans
http://www.springframework.org/schema/beans/spring-beans-3.2.xsd
http://www.springframework.org/schema/mvc
http://www.springframework.org/schema/mvc/spring-mvc-3.2.xsd
http://www.springframework.org/schema/context
http://www.springframework.org/schema/context/spring-context-3.2.xsd
http://www.springframework.org/schema/aop
http://www.springframework.org/schema/aop/spring-aop-3.2.xsd
http://www.springframework.org/schema/tx
http://www.springframework.org/schema/tx/spring-tx-3.2.xsd ">
<!-- 连接池配置 -->
<bean id="jedisPoolConfig" class="redis.clients.jedis.JedisPoolConfig">
<!-- 最大连接数 -->
<property name="maxTotal" value="30" />
<!-- 最大空闲连接数 -->
<property name="maxIdle" value="10" />
<!-- 每次释放连接的最大数目 -->
<property name="numTestsPerEvictionRun" value="1024" />
<!-- 释放连接的扫描间隔(毫秒) -->
<property name="timeBetweenEvictionRunsMillis" value="30000" />
<!-- 连接最小空闲时间 -->
<property name="minEvictableIdleTimeMillis" value="1800000" />
<!-- 连接空闲多久后释放, 当空闲时间>该值且空闲连接>最大空闲连接数时直接释放 -->
<property name="softMinEvictableIdleTimeMillis" value="10000" />
<!-- 获取连接时的最大等待毫秒数,小于零:阻塞不确定的时间,默认-1 -->
<property name="maxWaitMillis" value="1500" />
<!-- 在获取连接的时候检查有效性, 默认false -->
<property name="testOnBorrow" value="true" />
<!-- 在空闲时检查有效性, 默认false -->
<property name="testWhileIdle" value="true" />
<!-- 连接耗尽时是否阻塞, false报异常,ture阻塞直到超时, 默认true -->
<property name="blockWhenExhausted" value="false" />
</bean>
<!-- redis单机通过连接池 -->
<bean id="jedisPool" class="redis.clients.jedis.JedisPool" destroy-method="close">
<constructor-arg name="poolConfig" ref="jedisPoolConfig"/>
<constructor-arg name="host" value="192.168.25.145"/>
<constructor-arg name="port" value="6379"/>
</bean>
测试代码:private ApplicationContext applicationContext;
@Before
public void init() {
applicationContext = new ClassPathXmlApplicationContext(
"classpath:applicationContext.xml");
}
@Test
public void testJedisPool() {
JedisPool pool = (JedisPool) applicationContext.getBean("jedisPool");
try {
jedis = pool.getResource();
jedis.set("name", "lisi");
String name = jedis.get("name");
System.out.println(name);
}catch(Exception ex){
ex.printStackTrace();
}finally{
if(jedis != null){
//关闭连接
jedis.close();
}
}
}
-
redis集群
-
集群原理
-
redis-cluster架构图
 架构细节:(1)所有的redis节点彼此互联(PING-PONG机制),内部使用二进制协议优化传输速度和带宽.(2)节点的fail是通过集群中超过半数的节点检测失效时才生效.(3)客户端与redis节点直连,不需要中间proxy层.客户端不需要连接集群所有节点,连接集群中任何一个可用节点即可(4)redis-cluster把所有的物理节点映射到[0-16383]slot上,cluster 负责维护node<->slot<->valueRedis 集群中内置了 16384 个哈希槽,当需要在 Redis 集群中放置一个 key-value 时,redis 先对 key 使用 crc16 算法算出一个结果,然后把结果对 16384 求余数,这样每个 key 都会对应一个编号在 0-16383 之间的哈希槽,redis 会根据节点数量大致均等的将哈希槽映射到不同的节点
 -
redis-cluster投票:容错
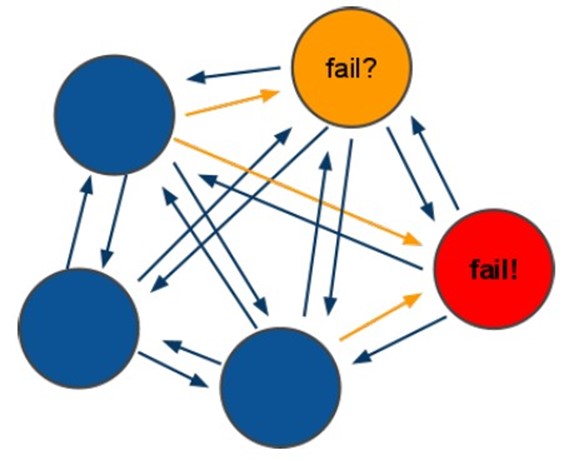 (1)领着投票过程是集群中所有master参与,如果半数以上master节点与master节点通信超过(cluster-node-timeout),认为当前master节点挂掉.(2):什么时候整个集群不可用(cluster_state:fail)? a:如果集群任意master挂掉,且当前master没有slave.集群进入fail状态,也可以理解成集群的slot映射[0-16383]不完成时进入fail状态. ps : redis-3.0.0.rc1加入cluster-require-full-coverage参数,默认关闭,打开集群兼容部分失败. b:如果集群超过半数以上master挂掉,无论是否有slave集群进入fail状态. ps:当集群不可用时,所有对集群的操作做都不可用,收到((error) CLUSTERDOWN The cluster is down)错误
-
-
-
jedisCluster
-
测试代码
-
// 连接redis集群
@Test
public void testJedisCluster() {
JedisPoolConfig config = new JedisPoolConfig();
// 最大连接数
config.setMaxTotal(30);
// 最大连接空闲数
config.setMaxIdle(2);
//集群结点
Set<HostAndPort> jedisClusterNode = new HashSet<HostAndPort>();
jedisClusterNode.add(new HostAndPort("192.168.101.3", 7001));
jedisClusterNode.add(new HostAndPort("192.168.101.3", 7002));
jedisClusterNode.add(new HostAndPort("192.168.101.3", 7003));
jedisClusterNode.add(new HostAndPort("192.168.101.3", 7004));
jedisClusterNode.add(new HostAndPort("192.168.101.3", 7005));
jedisClusterNode.add(new HostAndPort("192.168.101.3", 7006));
JedisCluster jc = new JedisCluster(jedisClusterNode, config);
JedisCluster jcd = new JedisCluster(jedisClusterNode);
jcd.set("name", "zhangsan");
String value = jcd.get("name");
System.out.println(value);
}
-
使用spring
配置applicationContext.xml
<!-- 连接池配置 -->
<bean id="jedisPoolConfig" class="redis.clients.jedis.JedisPoolConfig">
<!-- 最大连接数 -->
<property name="maxTotal" value="30" />
<!-- 最大空闲连接数 -->
<property name="maxIdle" value="10" />
<!-- 每次释放连接的最大数目 -->
<property name="numTestsPerEvictionRun" value="1024" />
<!-- 释放连接的扫描间隔(毫秒) -->
<property name="timeBetweenEvictionRunsMillis" value="30000" />
<!-- 连接最小空闲时间 -->
<property name="minEvictableIdleTimeMillis" value="1800000" />
<!-- 连接空闲多久后释放, 当空闲时间>该值且空闲连接>最大空闲连接数时直接释放 -->
<property name="softMinEvictableIdleTimeMillis" value="10000" />
<!-- 获取连接时的最大等待毫秒数,小于零:阻塞不确定的时间,默认-1 -->
<property name="maxWaitMillis" value="1500" />
<!-- 在获取连接的时候检查有效性, 默认false -->
<property name="testOnBorrow" value="true" />
<!-- 在空闲时检查有效性, 默认false -->
<property name="testWhileIdle" value="true" />
<!-- 连接耗尽时是否阻塞, false报异常,ture阻塞直到超时, 默认true -->
<property name="blockWhenExhausted" value="false" />
</bean>
<!-- redis集群 -->
<bean id="jedisCluster" class="redis.clients.jedis.JedisCluster">
<constructor-arg index="0">
<set>
<bean class="redis.clients.jedis.HostAndPort">
<constructor-arg index="0" value="192.168.101.3"></constructor-arg>
<constructor-arg index="1" value="7001"></constructor-arg>
</bean>
<bean class="redis.clients.jedis.HostAndPort">
<constructor-arg index="0" value="192.168.101.3"></constructor-arg>
<constructor-arg index="1" value="7002"></constructor-arg>
</bean>
<bean class="redis.clients.jedis.HostAndPort">
<constructor-arg index="0" value="192.168.101.3"></constructor-arg>
<constructor-arg index="1" value="7003"></constructor-arg>
</bean>
<bean class="redis.clients.jedis.HostAndPort">
<constructor-arg index="0" value="192.168.101.3"></constructor-arg>
<constructor-arg index="1" value="7004"></constructor-arg>
</bean>
<bean class="redis.clients.jedis.HostAndPort">
<constructor-arg index="0" value="192.168.101.3"></constructor-arg>
<constructor-arg index="1" value="7005"></constructor-arg>
</bean>
<bean class="redis.clients.jedis.HostAndPort">
<constructor-arg index="0" value="192.168.101.3"></constructor-arg>
<constructor-arg index="1" value="7006"></constructor-arg>
</bean>
</set>
</constructor-arg>
<constructor-arg index="1" ref="jedisPoolConfig"></constructor-arg>
</bean>
测试代码private ApplicationContext applicationContext;
@Before
public void init() {
applicationContext = new ClassPathXmlApplicationContext(
"classpath:applicationContext.xml");
}
//redis集群
@Test
public void testJedisCluster() {
JedisCluster jedisCluster = (JedisCluster) applicationContext
.getBean("jedisCluster");
jedisCluster.set("name", "zhangsan");
String value = jedisCluster.get("name");
System.out.println(value);
}
-
系统添加缓存逻辑添加缓存逻辑的原则:缓存逻辑不能影响正常的业务逻辑执行。
-
添加缓存后系统架构

-
首页大广告位添加缓存
-
缓存逻辑查询内容时先到redis中查询是否有改信息,如果有使用redis中的数据,如果没有查询数据库,然后将数据缓存至redis。返回结果。2、要添加缓存的位置为:ContentServiceImpl.java
-
-
-
-
实现步骤
-
先创建一个key,对应一个hash数据类型
-
在hash中缓存数据,每条数据对应的key为cid
-
把内容列表转换成json数据存储。
-
缓存实现
@Autowired
private TbContentMapper contentMapper;
@Autowired
private JedisClient jedisClient;
@Value("${INDEX_CONTENT_REDIS_KEY}")
private String INDEX_CONTENT_REDIS_KEY;
#首页内容信息在redis中的keyINDEX_CONTENT_REDIS_KEY=INDEX_CONTENT_REDIS_KEY
@Override
public List<TbContent> getContentList(long contentCid) {
//从缓存中取内容
try {
String result = jedisClient.hget(INDEX_CONTENT_REDIS_KEY, contentCid + "");
if (!StringUtils.isBlank(result)) {
//把字符串转换成list
List<TbContent> resultList = JsonUtils.jsonToList(result, TbContent.class);
return resultList;
}
} catch (Exception e) {
e.printStackTrace();
}
//根据内容分类id查询内容列表
TbContentExample example = new TbContentExample();
Criteria criteria = example.createCriteria();
criteria.andCategoryIdEqualTo(contentCid);
//执行查询
List<TbContent> list = contentMapper.selectByExample(example);
//向缓存中添加内容
try {
//把list转换成字符串
String cacheString = JsonUtils.objectToJson(list);
jedisClient.hset(INDEX_CONTENT_REDIS_KEY, contentCid + "", cacheString);
} catch (Exception e) {
e.printStackTrace();
}
return list;
}
@Autowired
private JedisPool jedisPool;
<!-- jedis客户端单机版 -->
<bean id="redisClient" class="redis.clients.jedis.JedisPool">
<constructor-arg name="host" value="192.168.0.101"></constructor-arg>
<constructor-arg name="port" value="6379"></constructor-arg>
</bean>
<bean id="jedisClient" class="com.taotao.rest.dao.impl.JedisClientSingle"/>
@Override
public String get(String key) {
Jedis jedis = jedisPool.getResource();
String string = jedis.get(key);
jedis.close();
return string;
}
@Override
public String set(String key, String value) {
Jedis jedis = jedisPool.getResource();
String string = jedis.set(key, value);
jedis.close();
return string;
}
@Override
public String hget(String hkey, String key) {
Jedis jedis = jedisPool.getResource();
String string = jedis.hget(hkey, key);
jedis.close();
return string;
}
@Override
public long hset(String hkey, String key, String value) {
Jedis jedis = jedisPool.getResource();
Long result = jedis.hset(hkey, key, value);
jedis.close();
return result;
}
@Override
public long incr(String key) {
Jedis jedis = jedisPool.getResource();
Long result = jedis.incr(key);
jedis.close();
return result;
}
@Override
public long expire(String key, int second) {
Jedis jedis = jedisPool.getResource();
Long result = jedis.expire(key, second);
jedis.close();
return result;
}
@Override
public long ttl(String key) {
Jedis jedis = jedisPool.getResource();
Long result = jedis.ttl(key);
jedis.close();
return result;
}
@Override
public long del(String key) {
Jedis jedis = jedisPool.getResource();
Long result = jedis.del(key);
jedis.close();
return result;
}
@Override
public long hdel(String hkey, String key) {
Jedis jedis = jedisPool.getResource();
Long result = jedis.hdel(hkey, key);
jedis.close();
return result;
}
#首页内容信息在redis中的keyINDEX_CONTENT_REDIS_KEY=INDEX_CONTENT_REDIS_KEY
-
缓存同步
-
同步逻辑分析当数据库中的内容信息发生改变后,例如首页大广告为的广告内容发生变化后,如何实现redis中的数据同步更新呢?可以在taotao-rest工程中发布一个服务,就是专门同步数据用的,其实只需要把缓存中的数据清空即可。当管理后台更新了内容信息后,需要调用此服务。
-
-
服务实现
-
Mapper此服务不需要mapper内容。只需要JedisCluster对象。
-
-
Service使用JedisCluster清空对应的cid的内容即可。
@@Servicepublic class ContentServiceImpl implements ContentService {
@Autowired
private TbContentMapper contentMapper;
@Value("${REST_BASE_URL}")
private String REST_BASE_URL;
@Value("${REST_CONTENT_SYNC_URL}")
private String REST_CONTENT_SYNC_URL;
#服务层基础urlREST_BASE_URL=http://localhost:8081/restREST_CONTENT_SYNC_URL=/cache/sync/content/
@Override
public TaotaoResult insertContent(TbContent content) {
//补全pojo内容
content.setCreated(new Date());
content.setUpdated(new Date());
contentMapper.insert(content);
//添加缓存同步逻辑
try {
HttpClientUtil.doGet(REST_BASE_URL + REST_CONTENT_SYNC_URL + content.getCategoryId());
} catch (Exception e) {
e.printStackTrace();
}
return TaotaoResult.ok();
}
}
-
Controller
@Controller@RequestMapping("/cache/sync")public class RedisController {
@Autowired
private RedisService redisService;
@RequestMapping("/content/{contentCid}")
@ResponseBody
public TaotaoResult contentCacheSync(@PathVariable Long contentCid) {
TaotaoResult result = redisService.syncContent(contentCid);
return result;
}}
@Servicepublic class RedisServiceImpl implements RedisService {
@Autowired
private JedisClient jedisClient;
@Value("${INDEX_CONTENT_REDIS_KEY}")
private String INDEX_CONTENT_REDIS_KEY;
#首页内容信息在redis中的keyINDEX_CONTENT_REDIS_KEY=INDEX_CONTENT_REDIS_KEY
@Override
public TaotaoResult syncContent(long contentCid) {
try {
jedisClient.hdel(INDEX_CONTENT_REDIS_KEY, contentCid + "");
} catch (Exception e) {
e.printStackTrace();
return TaotaoResult.build(500, ExceptionUtil.getStackTrace(e));
}
return TaotaoResult.ok();
}
}
-
课程计划
-
-
Solr服务的搭建
-
搜索功能的实现
-
系统架构
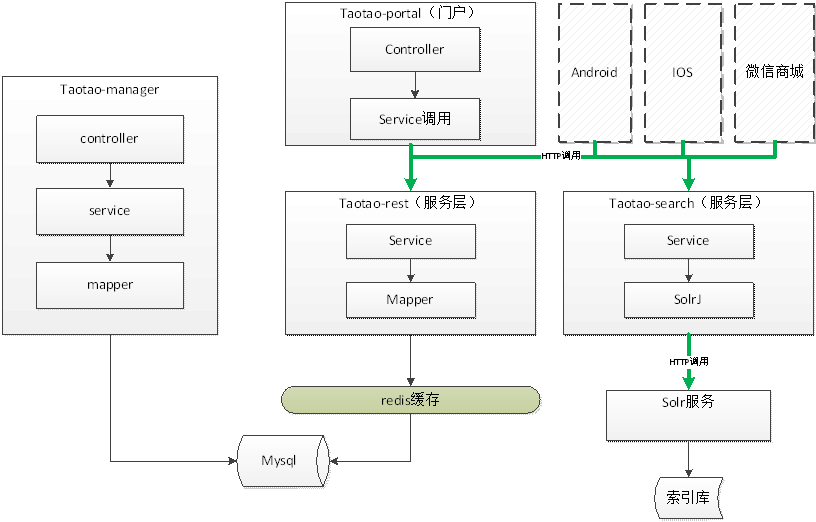
-
Solr概述
-
什么是Solr
-
Solr 是Apache下的一个顶级开源项目,采用Java开发,它是基于Lucene的全文搜索服务器。Solr提供了比Lucene更为丰富的查询语言,同时实现了可配置、可扩展,并对索引、搜索性能进行了优化。
Solr可以独立运行,运行在Jetty、Tomcat等这些Servlet容器中,Solr 索引的实现方法很简单,用 POST 方法向 Solr 服务器发送一个描述 Field 及其内容的 XML 文档,Solr根据xml文档添加、删除、更新索引 。Solr 搜索只需要发送 HTTP GET 请求,然后对 Solr 返回Xml、json等格式的查询结果进行解析,组织页面布局。Solr不提供构建UI的功能,Solr提供了一个管理界面,通过管理界面可以查询Solr的配置和运行情况。
-
下载
从Solr官方网站(http://lucene.apache.org/solr/ )下载Solr4.10.3,根据Solr的运行环境,Linux下需要下载lucene-4.10.3.tgz,windows下需要下载lucene-4.10.3.zip。
Solr使用指南可参考:https://wiki.apache.org/solr/FrontPage。
下载lucene-4.10.3.zip并解压:
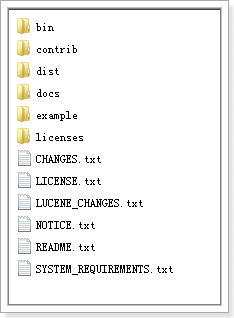
bin:solr的运行脚本
contrib:solr的一些贡献软件/插件,用于增强solr的功能。
dist:该目录包含build过程中产生的war和jar文件,以及相关的依赖文件。
docs:solr的API文档
example:solr工程的例子目录:
-
example/solr:
该目录是一个包含了默认配置信息的Solr的Core目录。
-
example/multicore:
该目录包含了在Solr的multicore中设置的多个Core目录。
-
example/webapps:
该目录中包括一个solr.war,该war可作为solr的运行实例工程。
licenses:solr相关的一些许可信息
-
Solr的安装及配置
-
运行环境
-
solr 需要运行在一个Servlet容器中,Solr4.10.3要求jdk使用1.7以上,Solr默认提供Jetty(java写的Servlet容器),本教程使用Tocmat作为Servlet容器,环境如下:
Solr:Solr4.10.3
Jdk:jdk1.7.0_72
Tomcat:apache-tomcat-7.0.53
-
Solr整合tomcat
-
将dist\solr-4.10.3.war拷贝到Tomcat的webapp目录下改名为solr.war
-
-
启动tomcat后,solr.war自动解压,将原来的solr.war删除。
-
拷贝example\lib\ext 目录下所有jar包到Tomcat的webapp\solr\WEB-INF\lib目录下
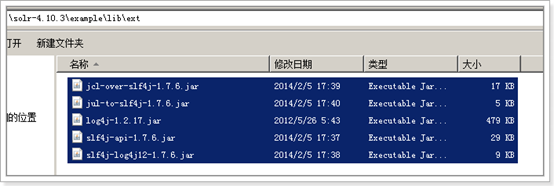

-
拷贝log4j.properties文件
在 Tomcat下webapps\solr\WEB-INF目录中创建文件 classes文件夹,
复制Solr目录下example\resources\log4j.properties至Tomcat下webapps\solr\WEB-INF\classes目录
-
创建solrhome及配置solrcore的solrconfig.xml文件
-
修改Tomcat目录 下webapp\solr\WEB-INF\web.xml文件,如下所示:
设置Solr home
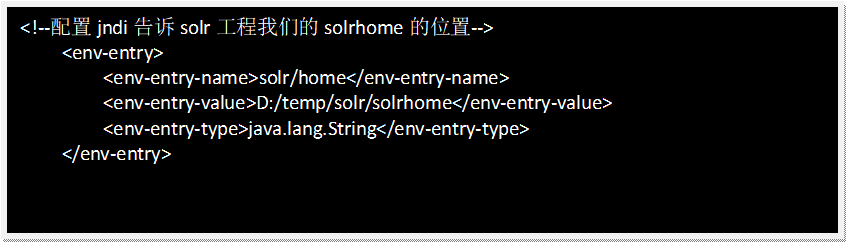

-
Solr界面功能
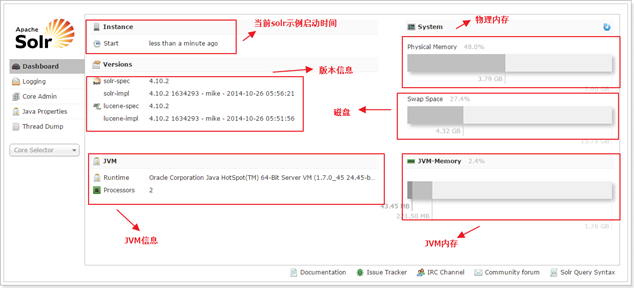
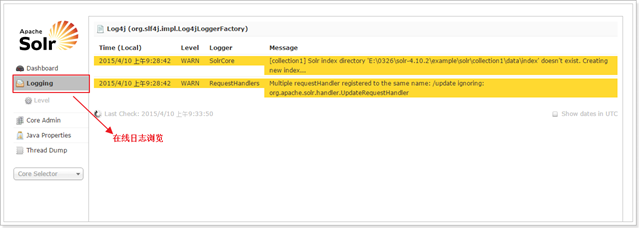
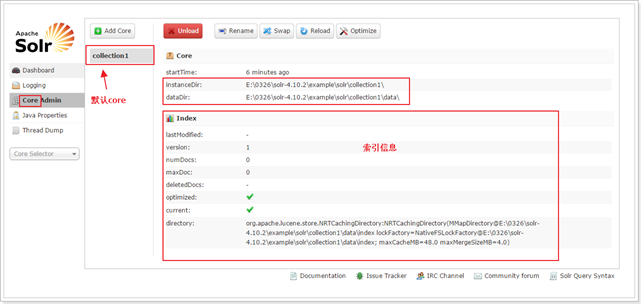
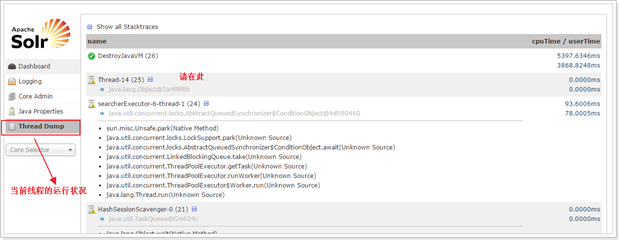
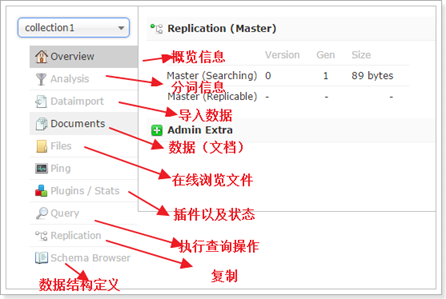
-
安装中文分词器
-
安装步骤
-
第一步:配置IKAnalyzer的jar包拷贝IKAnalyzer的文件到Tomcat下Solr目录中将IKAnalyzer2012FF_u1.jar拷贝到 Tomcat的webapps/solr/WEB-INF/lib 下。
-
第三步:修改schema.xml文件修改schema.xml文件修改Solr的schema.xml文件,添加FieldType:
-
-
| <fieldType name="text_ik" class="solr.TextField"> <analyzer class="org.wltea.analyzer.lucene.IKAnalyzer"/></fieldType> |
-
第四步:设置业务系统Field设置业务系统Field
| <field name="item_title" type="text_ik" indexed="true" stored="true"/><field name="item_sell_point" type="text_ik" indexed="true" stored="true"/><field name="item_price" type="long" indexed="true" stored="true"/><field name="item_image" type="string" indexed="false" stored="true" /><field name="item_category_name" type="string" indexed="true" stored="true" /><field name="item_desc" type="text_ik" indexed="true" stored="false" />
<field name="item_keywords" type="text_ik" indexed="true" stored="false" multiValued="true"/><copyField source="item_title" dest="item_keywords"/><copyField source="item_sell_point" dest="item_keywords"/><copyField source="item_category_name" dest="item_keywords"/><copyField source="item_desc" dest="item_keywords"/> |
-
搭建taotao-search服务
-
创建工程

-
配置工程工程配置参考taotao-rest,基本相同,不需要引入Jedis 的jar包,需要sorlJ的jar包。其他都相同。
-
-
添加solrj的依赖关系
| <!-- solr客户端 --> <dependency> <groupId>org.apache.solr</groupId> <artifactId>solr-solrj</artifactId> </dependency> |
-
商品信息导入索引库
-
实验solrj的使用
-
| public class SolrJTest {
@Test public void addDocument() throws Exception { //创建一连接 SolrServer solrServer = new HttpSolrServer("http://192.168.0.101:8080/solr"); //创建一个文档对象 SolrInputDocument document = new SolrInputDocument(); document.addField("id", "test001"); document.addField("item_title", "测试商品2"); document.addField("item_price", 54321); //把文档对象写入索引库 solrServer.add(document); //提交 solrServer.commit(); }
@Test public void deleteDocument() throws Exception { //创建一连接 SolrServer solrServer = new HttpSolrServer("http://192.168.0.101:8080/solr"); //solrServer.deleteById("test001"); solrServer.deleteByQuery("*:*"); solrServer.commit(); }
@Test public void queryDocument() throws Exception { SolrServer solrServer = new HttpSolrServer("http://192.168.0.101:8080/solr"); //创建一个查询对象 SolrQuery query = new SolrQuery(); //设置查询条件 query.setQuery("*:*"); query.setStart(20); query.setRows(50); //执行查询 QueryResponse response = solrServer.query(query); //取查询结果 SolrDocumentList solrDocumentList = response.getResults(); System.out.println("共查询到记录:" + solrDocumentList.getNumFound()); for (SolrDocument solrDocument : solrDocumentList) { System.out.println(solrDocument.get("id")); System.out.println(solrDocument.get("item_title")); System.out.println(solrDocument.get("item_price")); System.out.println(solrDocument.get("item_image"));
} } |
-
需求分析需要把数据库中的商品信息导入索引库,需要商品的id、商品的名称、商品的卖点、商品的价格、商品的图片、商品的分类名称。原则:需要展示给用户的字段、需要搜索的字段需要添加到索引库。
-
Sql语句
| SELECT a.id, a.title, a.sell_point, a.price, a.image, b. NAME category_name, c.item_desc FROM tb_item a LEFT JOIN tb_item_cat b ON a.cid = b.id LEFT JOIN tb_item_desc c ON a.id=c.item_id; |
-
POJO定义
| /** * 商品信息POJO * <p>Title: Item</p> * <p>Description: </p> * <p>Company: www.itcast.com</p> * @author 入云龙 * @date 2015年7月28日下午3:06:16 * @version 1.0 */public class Item { private Long id; private String title; private String sell_point; private Long price; private String image; private String category_name;} |
-
Mapper
| <?xml version="1.0" encoding="UTF-8" ?><!DOCTYPE mapper PUBLIC "-//mybatis.org//DTD Mapper 3.0//EN" "http://mybatis.org/dtd/mybatis-3-mapper.dtd" ><mapper namespace="com.taotao.search.mapper.ItemMapper" > <select id="getItemList" resultType="com.taotao.search.pojo.Item"> SELECT a.id, a.title, a.sell_point, a.price, a.image, b. NAME category_name, c.item_desc FROM tb_item a LEFT JOIN tb_item_cat b ON a.cid = b.id LEFT JOIN tb_item_desc c ON a.id=c.item_id; </select></mapper> |
-
Service
| @Servicepublic class ItemServiceImpl implements ItemService {
@Autowired private ItemMapper itemMapper; @Autowired private SolrServer solrServer;
@Override public TaotaoResult importItemToIndex() throws Exception { //查询商品列表 List<Item> itemList = itemMapper.getItemList(); //将商品列表导入solr for (Item item : itemList) { SolrInputDocument document = new SolrInputDocument(); document.addField("id", item.getId()); document.addField("item_title", item.getTitle()); document.addField("item_sell_point", item.getSell_point()); document.addField("item_price", item.getPrice()); document.addField("item_image", item.getImage()); document.addField("item_category_name", item.getCategory_name()); //将文档写入索引库 solrServer.add(document); } //提交修改 solrServer.commit(); return TaotaoResult.ok(); }
} |
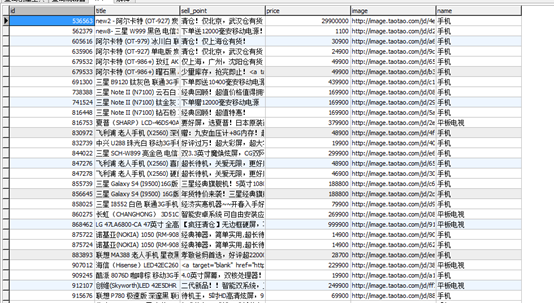
-
Controller
| @Controller@RequestMapping("/manager")public class ItemController {
@Autowired private ItemService itemService;
@RequestMapping("/importall") @ResponseBody public TaotaoResult importAll() { TaotaoResult result = null; try { result = itemService.importItemToIndex(); } catch (Exception e) { e.printStackTrace(); return TaotaoResult.build(500, ExceptionUtil.getStackTrace(e)); } return result; }} |
-
Pom.xml需要在pom文件的build节点中添加如下信息,否则mapper映射文件不会被发布,从而发生异常。
| <resources> <resource> <directory>src/main/java</directory> <includes> <include>**/*.properties</include> <include>**/*.xml</include> </includes> <filtering>false</filtering> </resource> <resource> <directory>src/main/resources</directory> <includes> <include>**/*.properties</include> <include>**/*.xml</include> </includes> <filtering>false</filtering> </resource> </resources> |
-
applicationContext-dao.xml扫描包添加taotao-search工程中的包:
| <!-- 加载mapper文件 --> <bean class="org.mybatis.spring.mapper.MapperScannerConfigurer"> <property name="basePackage" value="com.taotao.mapper,com.taotao.search.mapper"></property> </bean> |
-
实现商品搜索功能实现商品搜索功能需要两步实现:第一步:在taotoa-search工程中发布服务第二步:在taotao-portal中调用服务并展示结果。
-
发布搜索服务
-
Dao返回值SearchResult:
-
| public class SearchResult { //商品列表 private List<Item> itemList; //总记录数 private long recordCount; //总页数 private long pageCount; //当前页 private long curPage;
|
-
Dao
| @Repositorypublic class SearchDaoImpl implements SearchDao {
@Autowired private SolrServer solrServer;
@Override public SearchResult search(SolrQuery query) throws Exception { //返回值对象 SearchResult result = new SearchResult(); //根据查询条件查询索引库 QueryResponse queryResponse = solrServer.query(query); //取查询结果 SolrDocumentList solrDocumentList = queryResponse.getResults(); //取查询结果总数量 result.setRecordCount(solrDocumentList.getNumFound()); //商品列表 List<Item> itemList = new ArrayList<>(); //取高亮显示 Map<String, Map<String, List<String>>> highlighting = queryResponse.getHighlighting(); //取商品列表 for (SolrDocument solrDocument : solrDocumentList) { //创建一商品对象 Item item = new Item(); item.setId((String) solrDocument.get("id")); //取高亮显示的结果 List<String> list = highlighting.get(solrDocument.get("id")).get("item_title"); String title = ""; if (list != null && list.size()>0) { title = list.get(0); } else { title = (String) solrDocument.get("item_title"); } item.setTitle(title); item.setImage((String) solrDocument.get("item_image")); item.setPrice((long) solrDocument.get("item_price")); item.setSell_point((String) solrDocument.get("item_sell_point")); item.setCategory_name((String) solrDocument.get("item_category_name")); //添加的商品列表 itemList.add(item); } result.setItemList(itemList); return result; }
}} |
-
Service
| @Servicepublic class SearchServiceImpl implements SearchService {
@Autowired private SearchDao searchDao; @Override public SearchResult search(String queryString, int page, int rows) throws Exception { //创建查询对象 SolrQuery query = new SolrQuery(); //设置查询条件 query.setQuery(queryString); //设置分页 query.setStart((page - 1) * rows); query.setRows(rows); //设置默认搜素域 query.set("df", "item_keywords"); //设置高亮显示 query.setHighlight(true); query.addHighlightField("item_title"); query.setHighlightSimplePre("<em style=\"color:red\">"); query.setHighlightSimplePost("</em>"); //执行查询 SearchResult searchResult = searchDao.search(query); //计算查询结果总页数 long recordCount = searchResult.getRecordCount(); long pageCount = recordCount / rows; if (recordCount % rows > 0) { pageCount++; } searchResult.setPageCount(pageCount); searchResult.setCurPage(page);
return searchResult; }
} |
-
Controller
| @Controllerpublic class SearchController {
@Autowired private SearchService searchService;
@RequestMapping(value="/query", method=RequestMethod.GET) @ResponseBody public TaotaoResult search(@RequestParam("q")String queryString, @RequestParam(defaultValue="1")Integer page, @RequestParam(defaultValue="60")Integer rows) { //查询条件不能为空 if (StringUtils.isBlank(queryString)) { return TaotaoResult.build(400, "查询条件不能为空"); } SearchResult searchResult = null; try { queryString = new String(queryString.getBytes("iso8859-1"), "utf-8"); searchResult = searchService.search(queryString, page, rows); } catch (Exception e) { e.printStackTrace(); return TaotaoResult.build(500, ExceptionUtil.getStackTrace(e)); } return TaotaoResult.ok(searchResult);
} } |
-
扫描dao所在的包 在applicationContext-dao.xml文件中添加如下内容:

-
解决get请求乱码问题在controller中添加字符串编码转换逻辑:Tomcat默认的编码为ISO8859-1,需要转换成utf-8的编码。
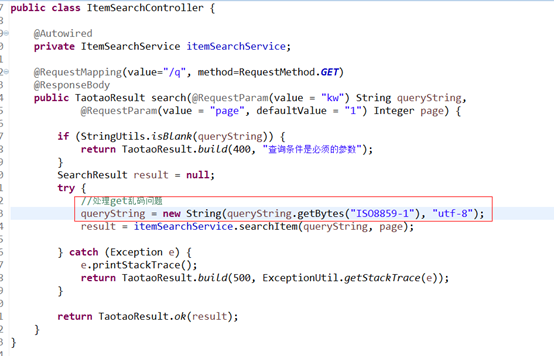
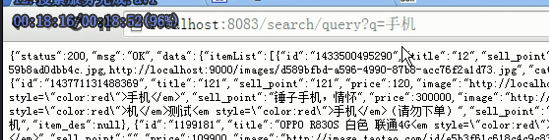
-
课程计划
-
商品详情页实现
1、商品查询服务事项
2、商品详情展示
3、添加缓存
-
实现商品详情页功能
-
功能分析1、Taotao-portal接收页面请求,接收到商品id。2、调用taotao-rest提供的商品详情的服务,把商品id作为参数传递给服务。接收到商品详细详细。3、渲染结果,展示商品详细页面4、为了提高响应速度,商品详情页的内容需要分步骤加载。
-
第一步:先展示商品基本信息,例如商品的名称、图片、价格。
第二步:展示商品的描述,此时商品页面已经展示完毕,需要ajax请求商品描述。展示的时机是页面加载完毕后一秒钟。
第三步:展示商品规格。当用户点击商品规格选项卡时展示。使用ajax请求商品规格。5、在搜索页面点击商品的图片或者商品名称请求商品详情页面。商品详情页请求的url:/item/{itemId}.html商品描述请求的url:/item/desc/{itemId}.html商品规格请求的url:/item/param/{itemId}.html
-
处理流程
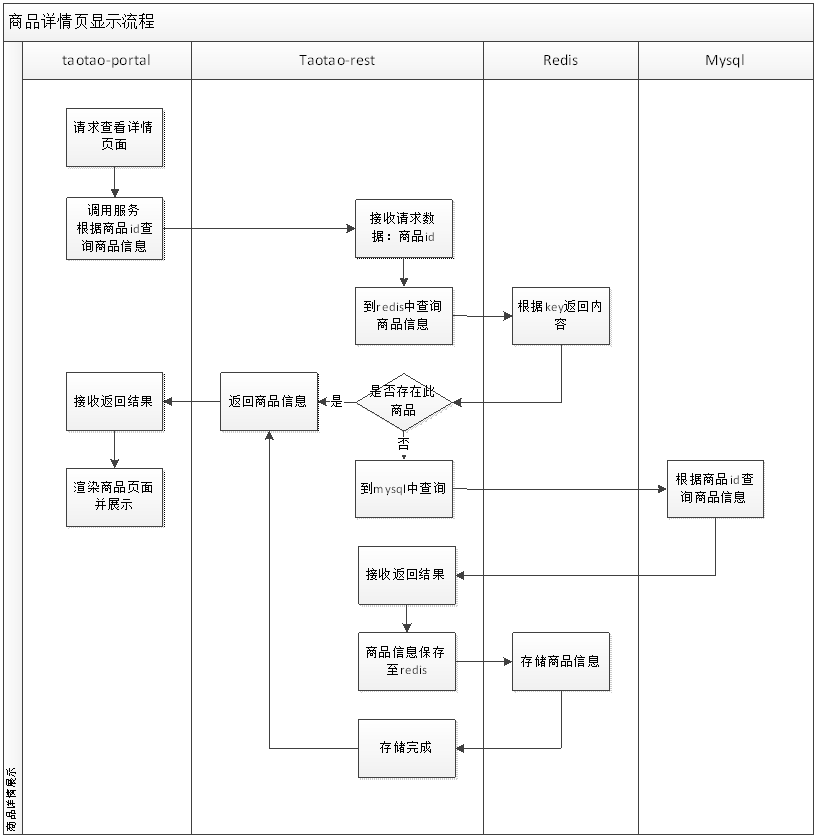
-
调用服务实现搜索功能请求url:http://localhost:8082/search.html?q=查询条件
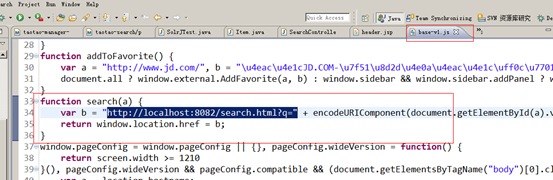 参数:q:查询条件返回结果:商品列表页面(jsp)
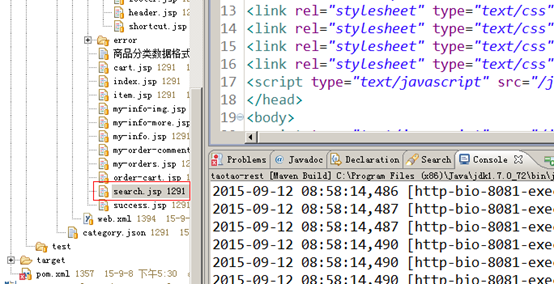 Query:回显的查询条件totalPages:总页数itemList:商品列表Page:当前页码翻页处理:
function search(a) {
var b = "http://localhost:8082/search.html?q=" + encodeURIComponent(document.getElementById(a).value);
return window.location.href = b;}
-
功能分析Taotao-portal展示首页,用户在首页输入查询内容提交至taotao-portal,taotao-portal调用taotao-search提供的搜索服务,得到商品列表。在taotao-portal中渲染商品列表展示搜索结果页面。
-
Dao层木有
-
Controller层使用HttpClientUtil工具类调用搜索服务,返回一个json数据,需要把json数据转换成TaotaoResult对象。
| @Controllerpublic class SearchController {
@Autowired private SearchService searchService;
@RequestMapping("/search") public String search(@RequestParam("q")String queryString, @RequestParam(defaultValue="1")Integer page, Model model) { if (queryString != null) { try { queryString = new String(queryString.getBytes("iso8859-1"), "utf-8"); } catch (UnsupportedEncodingException e) { e.printStackTrace(); } } SearchResult searchResult = searchService.search(queryString, page); //向页面传递参数 model.addAttribute("query", queryString); model.addAttribute("totalPages", searchResult.getPageCount()); model.addAttribute("itemList", searchResult.getItemList()); model.addAttribute("page", page);
return "search";
}} |
-
Service
| @Servicepublic class SearchServiceImpl implements SearchService {
@Value("${SEARCH_BASE_URL}") private String SEARCH_BASE_URL;
@Override public SearchResult search(String queryString, int page) { // 调用taotao-search的服务 //查询参数 Map<String, String> param = new HashMap<>(); param.put("q", queryString); param.put("page", page + ""); try { //调用服务 String json = HttpClientUtil.doGet(SEARCH_BASE_URL, param); //把字符串转换成java对象 TaotaoResult taotaoResult = TaotaoResult.formatToPojo(json, SearchResult.class); if (taotaoResult.getStatus() == 200) { SearchResult result = (SearchResult) taotaoResult.getData(); return result; }
} catch (Exception e) { e.printStackTrace(); } return null; }
} |
-
Jsp
| <body><script type="text/javascript" src="/js/base-2011.js" charset="utf-8"></script><!-- header start --><jsp:include page="commons/header.jsp" /><!-- header end --><div class="w main"> <div class="crumb">全部结果 > <strong>"${query}"</strong></div><div class="clr"></div><div class="m clearfix" id="bottom_pager"><div id="pagin-btm" class="pagin fr" clstag="search|keycount|search|pre-page2"> <span class="prev-disabled">上一页<b></b></span> <a href="javascript:void(0)" class="current">1</a> <a href="search?keyword=java&enc=utf-8&qr=&qrst=UNEXPAND&rt=1&page=2">2</a> <a href="search?keyword=java&enc=utf-8&qr=&qrst=UNEXPAND&rt=1&page=3">3</a> <a href="search?keyword=java&enc=utf-8&qr=&qrst=UNEXPAND&rt=1&page=4">4</a> <a href="search?keyword=java&enc=utf-8&qr=&qrst=UNEXPAND&rt=1&page=5">5</a> <a href="search?keyword=java&enc=utf-8&qr=&qrst=UNEXPAND&rt=1&page=6">6</a> <span class="text">…</span> <a href="search?keyword=java&enc=utf-8&qr=&qrst=UNEXPAND&rt=1&page=2" class="next">下一页<b></b></a> <span class="page-skip"><em> 共${totalPages}页 到第</em></span></div></div><div class="m psearch " id="plist"><ul class="list-h clearfix" tpl="2"><c:forEach items="${itemList}" var="item"><li class="item-book" bookid="11078102"> <div class="p-img"> <a target="_blank" href="/item/${item.id }.html"> <img width="160" height="160" data-img="1" data-lazyload="${item.images[0]}" /> </a> </div> <div class="p-name"> <a target="_blank" href="/item/${item.id }.html"> ${item.title} </a> </div> <div class="p-price"> <i>淘淘价:</i> <strong>¥<fmt:formatNumber groupingUsed="false" maxFractionDigits="2" minFractionDigits="2" value="${item.price / 100 }"/></strong> </div> <div class="service">由淘淘发货</div> <div class="extra"> <span class="star"><span class="star-white"><span class="star-yellow h5"> </span></span></span> </div></li></c:forEach></ul></div></div><!-- footer start --><jsp:include page="commons/footer.jsp" /><!-- footer end --><script type="text/javascript" src="/js/jquery.hashchange.js"></script><script type="text/javascript" src="/js/search_main.js"></script><script type="text/javascript">//${paginator.totalPages}SEARCH.query = "${query}";SEARCH.bottom_page_html(${page},${totalPages},'');</script></body> |
-
图片
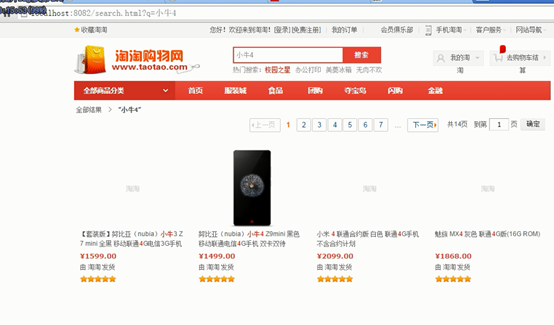
-
存在的问题搜索结果中图片展示不出来,image字段中存储的图片是多张,使用逗号分隔。修改方法:Pojo:
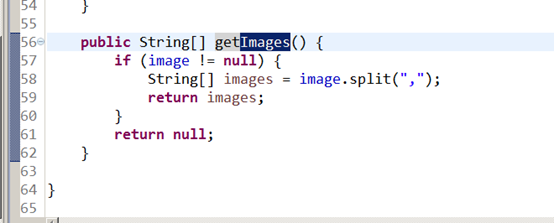 Jsp中:
Jsp中: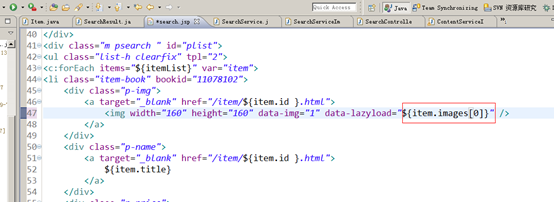
-
商品详情页面展示
-
需求分析需要在taotao-portal中调用taotao-rest发布的服务,查询商品详情。
-
-
商品的基本信息
-
商品的描述
-
商品的规格
当用户请求商品详情页面时,只需要把商品基本信息展示出来,为了快速响应用户。商品的描述可以延迟加载,延迟一秒钟加载。商品的规格参数按需加载,当用户点击商品规格参数的标签页此时加载。
-
服务发布需要在taotao-rest工程中发布服务
-
取商品基本信息的服务
-
取商品描述的服务
-
取商品规格的服务需要把商品信息添加到缓存中。设置商品的过期时间,过期时间为一天。需要缓存同步。
-
取商品基本信息
-
-
-
Dao层查询的表tb_item:

-
Service层接收商品id,根据商品id查询商品基本信息。返回一个商品的pojo,使用taotaoResult包装返回。
@Autowired
private ItemService itemService;
@RequestMapping("/info/{itemId}")
@ResponseBody
public TaotaoResult getItemBaseInfo(@PathVariable Long itemId) {
TaotaoResult result = itemService.getItemBaseInfo(itemId);
return result;
}
}
-
Controller层接收商品id调用Service查询商品信息,返回商品对象,使用TaotaoResult包装。Url:/rest/item/info/{itemId}
-
添加缓存逻辑Redis的hash类型中的key是不能设置过期时间。如果还需要对key进行分类可以使用折中的方案。Key的命名方式:Itheima:javaee16:01=袁飞Itheima:javaee16:02=张飞
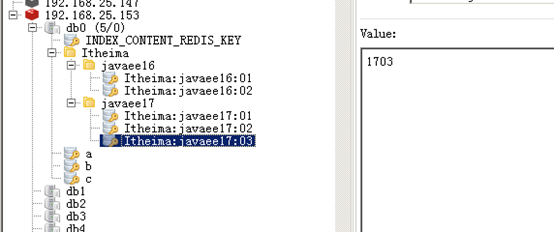
商品key的定义:基本信息:REDIS_ITEM_KEY:商品id:base=json描述:REDIS_ITEM_KEY:商品id:desc=json规格参数:REDIS_ITEM_KEY:商品id:param=json
@Service
public class ItemServiceImpl implements ItemService {
@Autowired
private TbItemMapper itemMapper;
@Autowired
private TbItemDescMapper itemDescMapper;
@Autowired
private TbItemParamItemMapper itemParamItemMapper;
@Value("${REDIS_ITEM_KEY}")
private String REDIS_ITEM_KEY;
@Value("${REDIS_ITEM_EXPIRE}")
private Integer REDIS_ITEM_EXPIRE;
#商品信息在缓存中保存的key
REDIS_ITEM_KEY=REDIS_ITEM_KEY
#商品信息在redis中的过期时间,默认为一天
REDIS_ITEM_EXPIRE=86400
@Autowired
private JedisClient jedisClient;
@Override
public TaotaoResult getItemBaseInfo(long itemId) {
try {
//添加缓存逻辑
//从缓存中取商品信息,商品id对应的信息
String json = jedisClient.get(REDIS_ITEM_KEY + ":" + itemId + ":base");
//判断是否有值
if (!StringUtils.isBlank(json)) {
//把json转换成java对象
TbItem item = JsonUtils.jsonToPojo(json, TbItem.class);
return TaotaoResult.ok(item);
}
} catch (Exception e) {
e.printStackTrace();
}
//根据商品id查询商品信息
TbItem item = itemMapper.selectByPrimaryKey(itemId);
//使用TaotaoResult包装一下
try {
//把商品信息写入缓存
jedisClient.set(REDIS_ITEM_KEY + ":" + itemId + ":base", JsonUtils.objectToJson(item));
//设置key的有效期
jedisClient.expire(REDIS_ITEM_KEY + ":" + itemId + ":base", REDIS_ITEM_EXPIRE);
} catch (Exception e) {
e.printStackTrace();
}
return TaotaoResult.ok(item);
}
}
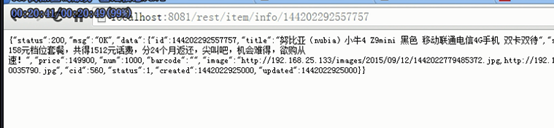
-
取商品描述信息根据商品id取商品描述信息。单表查询tb_item_desc。
-
Dao层使用逆向工程
-
Service层接收商品id根据商品id查询商品描述。返回商品描述的pojo。使用TaotaoResult包装。需要添加缓存逻辑。
@Override
public TaotaoResult getItemDesc(long itemId) {
//添加缓存
try {
//添加缓存逻辑
//从缓存中取商品信息,商品id对应的信息
String json = jedisClient.get(REDIS_ITEM_KEY + ":" + itemId + ":desc");
//判断是否有值
if (!StringUtils.isBlank(json)) {
//把json转换成java对象
TbItemDesc itemDesc = JsonUtils.jsonToPojo(json, TbItemDesc.class);
return TaotaoResult.ok(itemDesc);
}
} catch (Exception e) {
e.printStackTrace();
}
//创建查询条件
TbItemDesc itemDesc = itemDescMapper.selectByPrimaryKey(itemId);
try {
//把商品信息写入缓存
jedisClient.set(REDIS_ITEM_KEY + ":" + itemId + ":desc", JsonUtils.objectToJson(itemDesc));
//设置key的有效期
jedisClient.expire(REDIS_ITEM_KEY + ":" + itemId + ":desc", REDIS_ITEM_EXPIRE);
} catch (Exception e) {
e.printStackTrace();
}
return TaotaoResult.ok(itemDesc);
}
-
Controller层接收商品id参数,调用Service查询商品描述。返回TaotaoResult.
@RequestMapping("/desc/{itemId}")
@ResponseBody
public TaotaoResult getItemDesc(@PathVariable Long itemId) {
TaotaoResult result = itemService.getItemDesc(itemId);
return result;
}
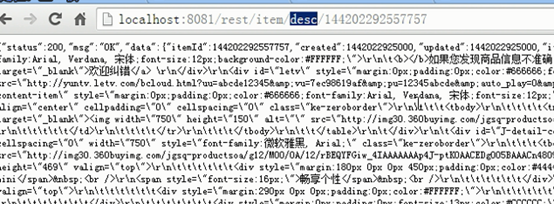
-
取商品规格参数需要从tb_item_param_item表中根据商品id取出商品的规格参数信息。返回pojo对象,使用TaotaoResult包装。
-
Dao层使用逆向工程
-
Service层接收商品id调用mapper查询商品规格参数,返回规格参数pojo使用TaotaoResult包装。添加缓存逻辑。
@Override
public TaotaoResult getItemParam(long itemId) {
//添加缓存
try {
//添加缓存逻辑
//从缓存中取商品信息,商品id对应的信息
String json = jedisClient.get(REDIS_ITEM_KEY + ":" + itemId + ":param");
//判断是否有值
if (!StringUtils.isBlank(json)) {
//把json转换成java对象
TbItemParamItem paramItem = JsonUtils.jsonToPojo(json, TbItemParamItem.class);
return TaotaoResult.ok(paramItem);
}
} catch (Exception e) {
e.printStackTrace();
}
//根据商品id查询规格参数
//设置查询条件
TbItemParamItemExample example = new TbItemParamItemExample();
Criteria criteria = example.createCriteria();
criteria.andItemIdEqualTo(itemId);
//执行查询
List<TbItemParamItem> list = itemParamItemMapper.selectByExampleWithBLOBs(example);
if (list != null && list.size()>0) {
TbItemParamItem paramItem = list.get(0);
try {
//把商品信息写入缓存
jedisClient.set(REDIS_ITEM_KEY + ":" + itemId + ":param", JsonUtils.objectToJson(paramItem));
//设置key的有效期
jedisClient.expire(REDIS_ITEM_KEY + ":" + itemId + ":param", REDIS_ITEM_EXPIRE);
} catch (Exception e) {
e.printStackTrace();
}
return TaotaoResult.ok(paramItem);
}
return TaotaoResult.build(400, "无此商品规格");
}

-
Controller层接收商品id调用Service返回TaotaoResult。
@RequestMapping("/param/{itemId}")
@ResponseBody
public TaotaoResult getItemParam(@PathVariable Long itemId) {
TaotaoResult result = itemService.getItemParam(itemId);
return result;
}
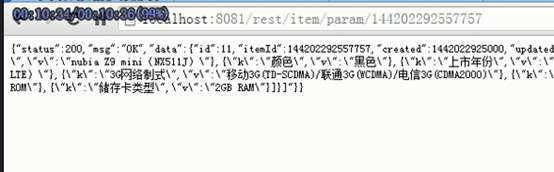
-
使用taotao-portal调用服务
-
需求分析当用户访问商品详情页面时,需要加载商品基本信息。延迟加载商品描述、按需加载商品的规格参数。
-
-
商品基本信息的查询当商品页面展示时,数据已经到位。请求的url:/item/{itemId}.html
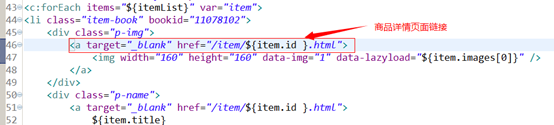
-
Dao层没有
-
Service层接收商品id,调用taotao-rest的服务,查询商品的基本信息。得到一个json字符串。需要把json转换成java对象。然后在jsp页面渲染。
@Value("${REST_BASE_URL}")
private String REST_BASE_URL;
@Value("${ITME_INFO_URL}")
private String ITME_INFO_URL;
#基础url
REST_BASE_URL=http://localhost:8081/rest
#商品基本信息url
ITME_INFO_URL=/item/info/
@Override
public ItemInfo getItemById(Long itemId) {
try {
//调用rest的服务查询商品基本信息
String json = HttpClientUtil.doGet(REST_BASE_URL + ITME_INFO_URL + itemId);
if (!StringUtils.isBlank(json)) {
TaotaoResult taotaoResult = TaotaoResult.formatToPojo(json, ItemInfo.class);
if (taotaoResult.getStatus() == 200) {
ItemInfo item = (ItemInfo) taotaoResult.getData();
return item;
}
}
} catch (Exception e) {
e.printStackTrace();
}
return null;
}
}
-
Controller层接收页面传递过来的商品id,调用Service查询商品基本信息。传递给jsp页面。返回逻辑视图,展示商品详情页面。
@Autowired
private ItemService itemService;
@RequestMapping("/item/{itemId}")
public String showItem(@PathVariable Long itemId, Model model) {
ItemInfo item = itemService.getItemById(itemId);
model.addAttribute("item", item);
return "item";
}
商品POJO:
public class ItemInfo extends TbItem {
public String[] getImages() {
String image = getImage();
if (image != null) {
String[] images = image.split(",");
return images;
}
return null;
}}
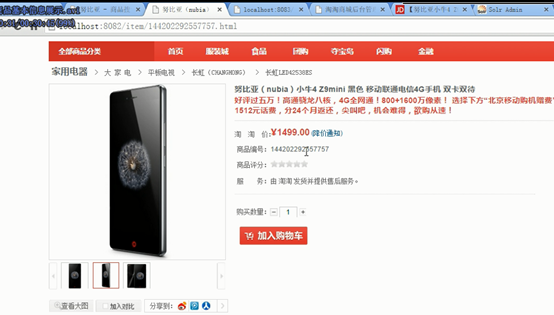
-
商品描述延迟加载当商品详情页面加载完毕后延迟一秒钟ajax请求商品详情。请求的URL:/item/desc/{itemId}.html参数:商品id返回值:商品描述信息(html片段)
-
Dao层没有
-
Service层接收商品id,调用taotao-rest的服务根据商品id查询商品描述信息。得到json数据。把json转换成java对象从java对象中把商品描述取出来。返回商品描述字符串。参数:商品id返回值:字符串(商品描述的html片段)
public String getItemDescById(Long itemId) {
try {
//查询商品描述
String json = HttpClientUtil.doGet(REST_BASE_URL + ITEM_DESC_URL + itemId);
#基础url
REST_BASE_URL=http://localhost:8081/rest
#商品描述的url
ITEM_DESC_URL=/item/desc/
//转换成java对象
TaotaoResult taotaoResult = TaotaoResult.formatToPojo(json, TbItemDesc.class);
if (taotaoResult.getStatus() == 200) {
TbItemDesc itemDesc = (TbItemDesc) taotaoResult.getData();
//取商品描述信息
String result = itemDesc.getItemDesc();
return result;
}
} catch (Exception e) {
e.printStackTrace();
}
return null;
}
-
Controller层接收商品id,调用Service查询商品的描述信息,返回一个字符串,是商品描述的片段。需要使用@ResponseBody。
@RequestMapping(value="/item/desc/{itemId}", produces=MediaType.TEXT_HTML_VALUE+";charset=utf-8")
@ResponseBody
public String getItemDesc(@PathVariable Long itemId) {
String string = itemService.getItemDescById(itemId);
ret
 urn string;
 }
-
商品规格参数展示按需加载。当用户点击规格参数tab页时触发一个单击事件,在事件中异步加载规格参数信息。规格参数内容是html片段。返回字符串。
-
Dao层没有
-
Service层接收商品id,根据商品id查询规格参数的数据,调用服务端的方法,返回json数据。把json转换成java对象,根据java对象生成html片段,返回。
参数:商品id返回值:字符串(规格参数html)
@Override
public String getItemParam(Long itemId) {
try {
String json = HttpClientUtil.doGet(REST_BASE_URL + ITEM_PARAM_URL + itemId);
//把json转换成java对象
TaotaoResult taotaoResult = TaotaoResult.formatToPojo(json, TbItemParamItem.class);
if (taotaoResult.getStatus() == 200) {
TbItemParamItem itemParamItem = (TbItemParamItem) taotaoResult.getData();
String paramData = itemParamItem.getParamData();
//生成html
// 把规格参数json数据转换成java对象
List<Map> jsonList = JsonUtils.jsonToList(paramData, Map.class);
StringBuffer sb = new StringBuffer();
sb.append("<table cellpadding=\"0\" cellspacing=\"1\" width=\"100%\" border=\"0\" class=\"Ptable\">\n");
sb.append(" <tbody>\n");
for(Map m1:jsonList) {
sb.append(" <tr>\n");
sb.append(" <th class=\"tdTitle\" colspan=\"2\">"+m1.get("group")+"</th>\n");
sb.append(" </tr>\n");
List<Map> list2 = (List<Map>) m1.get("params");
for(Map m2:list2) {
sb.append(" <tr>\n");
sb.append(" <td class=\"tdTitle\">"+m2.get("k")+"</td>\n");
sb.append(" <td>"+m2.get("v")+"</td>\n");
sb.append(" </tr>\n");
}
}
sb.append(" </tbody>\n");
sb.append("</table>");
//返回html片段
return sb.toString();
}
} catch (Exception e) {
e.printStackTrace();
}
return "";
}
-
Controller层页面的ajax请求Controller,请求的url://item/param/{itemId}.html响应一个字符串。规格参数的片段。@ResponseBody。
@RequestMapping(value="/item/param/{itemId}", produces=MediaType.TEXT_HTML_VALUE+";charset=utf-8")
@ResponseBody
public String getItemParam(@PathVariable Long itemId) {
String string = itemService.getItemParam(itemId);
return string;
}
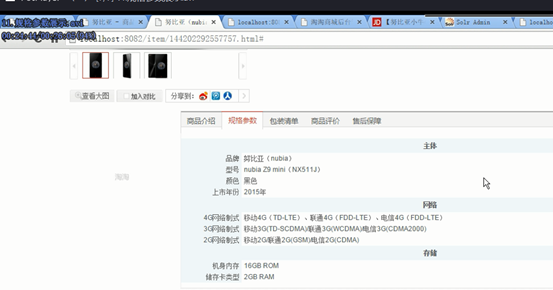
-
Jsp响应规格参数标签页的点击事件,在事件中进行ajax请求规格参数。只需要请求一次即可。给tab页dom节点绑定单击事件:
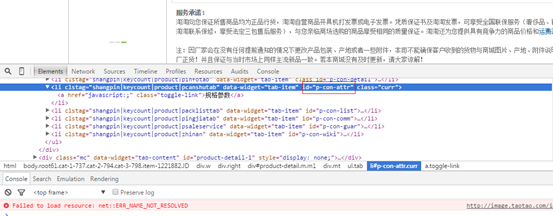 请求规格参数的方法:
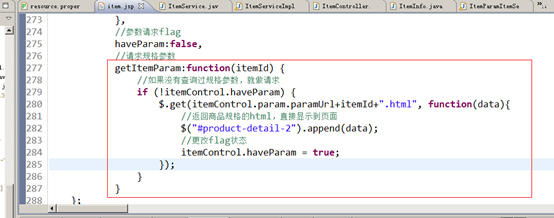 绑定单击事件:
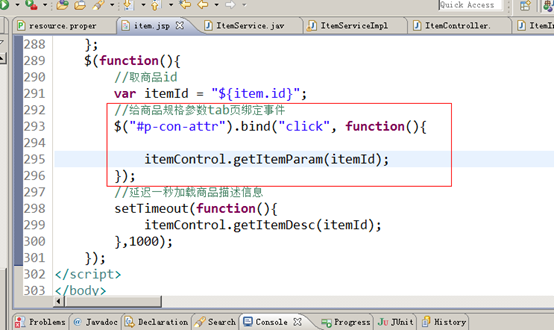
-
单点登录系统分析
-
什么是SSOSSO英文全称Single Sign On,单点登录。SSO是在多个应用系统中,用户只需要登录一次就可以访问所有相互信任的应用系统。它包括可以将这次主要的登录映射到其他应用中用于同一个用户的登录的机制。它是目前比较流行的企业业务整合的解决方案之一。
-
原来的登录逻辑实现

-
问题单台tomcat,以上实现是没有任何问题的,但是我们现在是集群的tomcat,就会存在session共享问题。
-
-
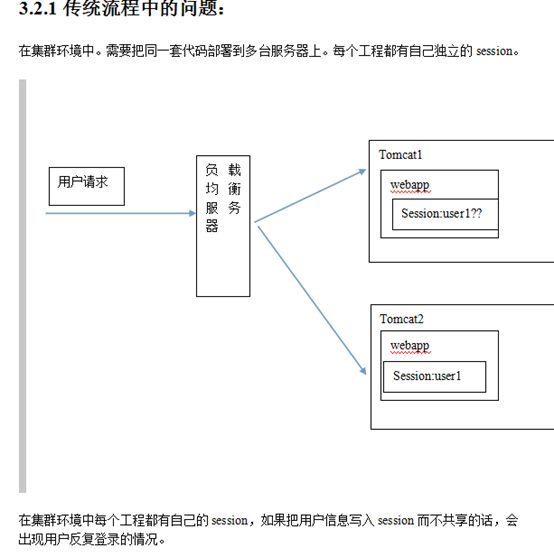
-
解决session共享问方案
-
tomcat的session复制优点:不需要额外开发,只需要搭建tomcat集群即可。缺点:tomcat 是全局session复制,集群内每个tomcat的session完全同步(也就是任何时候都完全一样的) 在大规模应用的时候,用户过多,集群内tomcat数量过多,session的全局复制会导致集群性能下降, 因此,tomcat的数量不能太多,5个以下为好。
-
实现单点登录系统,提供服务接口。把session数据存放在redis。Redis可以设置key的生存时间、访问速度快效率高。优点:redis存取速度快,不会出现多个节点session复制的问题。效率高。缺点:需要程序员开发。


-
单点登录系统的流程
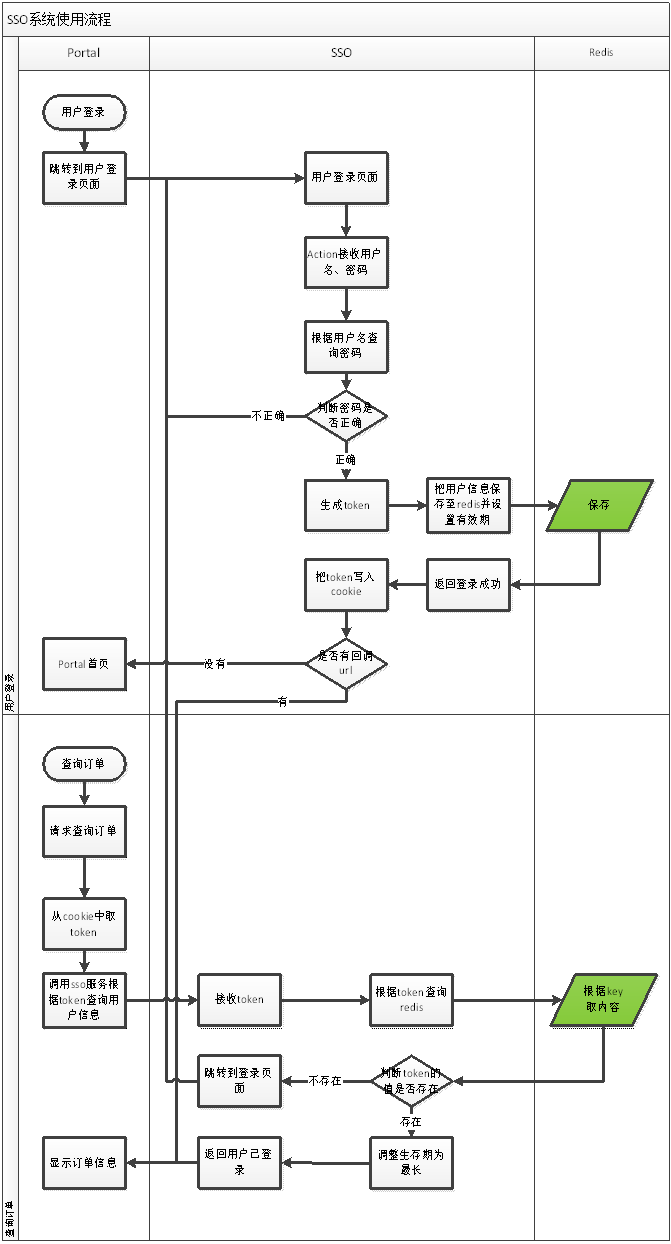
-
SSO开发
-
系统架构
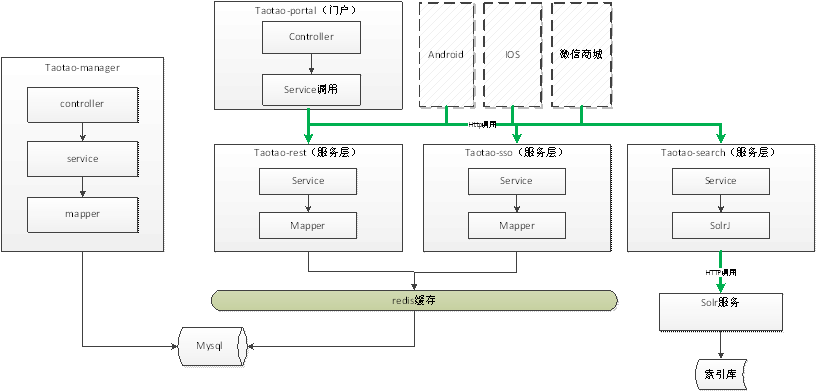
-
开发SSO服务
-
创建sso服务工程
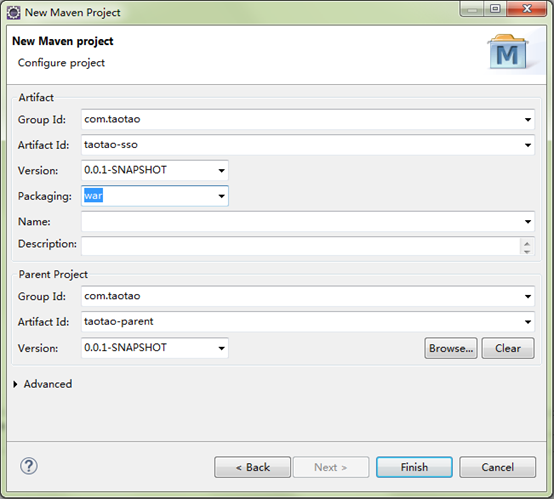
-
-
-
Pom.xmlPom.xml文件参考taotao-rest工程的pom文件。
-
服务开发
-
登录接口
-
注册接口
-
查询接口
-
退出登录接口
-
开发的流程:
-
确定流程、确定接口内容
-
提供接口文档
-
接口地址
-
入参说明
-
接口访问方式,get、post
-
结果输出,说明格式
-
接口调用的示例
-
-
约定联合测试的时间点
-
发布上线
参考:SSO接口文档.docx
-
注册接口
-
检查数据是否可用
-
请求方法
GET
URL
http://sso.taotao.com/user/check/{param}/{type}
参数说明
格式如:zhangsan/ 1,其中zhangsan是校验的数据,type为类型,可选参数1、2、3分别代表username、phone、email
可选参数callback:如果有此参数表示此方法为jsonp请求,需要支持jsonp。
示例
http://sso.taotao.com/user/check/zhangsan/1
返回值
{
status: 200 //200 成功
msg: "OK" // 返回信息消息
data: false // 返回数据,true:数据可用,false:数据不可用
}
-
开发注册接口
-
需要对用户提交的数据做校验
-
对密码做md5加密
-
对报错异常要做处理
-
数据校验接口
-
Mapper对tb_user表进行单表查询。使用逆向工程生成的mapper即可。
-
-
Service
@Override
public TaotaoResult checkData(String content, Integer type) {
//创建查询条件
TbUserExample example = new TbUserExample();
Criteria criteria = example.createCriteria();
//对数据进行校验:1、2、3分别代表username、phone、email
//用户名校验
if (1 == type) {
criteria.andUsernameEqualTo(content);
//电话校验
} else if ( 2 == type) {
criteria.andPhoneEqualTo(content);
//email校验
} else {
criteria.andEmailEqualTo(content);
}
//执行查询
List<TbUser> list = userMapper.selectByExample(example);
if (list == null || list.size() == 0) {
return TaotaoResult.ok(true);
}
return TaotaoResult.ok(false);
}
@Override
public TaotaoResult createUser(TbUser user) {
user.setUpdated(new Date());
user.setCreated(new Date());
//md5加密
user.setPassword(DigestUtils.md5DigestAsHex(user.getPassword().getBytes()));
userMapper.insert(user);
return TaotaoResult.ok();
}
-
Controller
|
@RequestMapping("/check/{param}/{type}") @ResponseBody public Object checkData(@PathVariable String param, @PathVariable Integer type, String callback) {
TaotaoResult result = null;
//参数有效性校验 if (StringUtils.isBlank(param)) { result = TaotaoResult.build(400, "校验内容不能为空"); } if (type == null) { result = TaotaoResult.build(400, "校验内容类型不能为空"); } if (type != 1 && type != 2 && type != 3 ) { result = TaotaoResult.build(400, "校验内容类型错误"); } //校验出错 if (null != result) { if (null != callback) { MappingJacksonValue mappingJacksonValue = new MappingJacksonValue(result); mappingJacksonValue.setJsonpFunction(callback); return mappingJacksonValue; } else { return result; } } //调用服务 try { result = userService.checkData(param, type);
} catch (Exception e) { result = TaotaoResult.build(500, ExceptionUtil.getStackTrace(e)); }
if (null != callback) { MappingJacksonValue mappingJacksonValue = new MappingJacksonValue(result); mappingJacksonValue.setJsonpFunction(callback); return mappingJacksonValue; } else { return result; } }
|
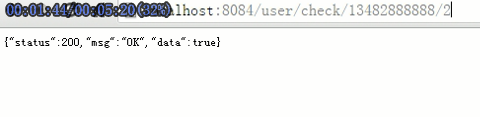
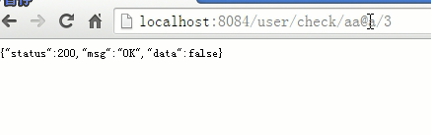

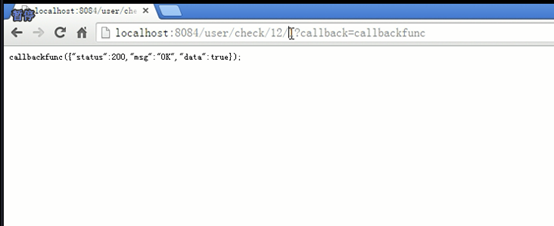
-
用户注册接口
-
用户注册
-
| 请求方法 |
POST |
| URL |
http://sso.taotao.com/user/register |
| 参数 |
username //用户名 password //密码 phone //手机号 email //邮箱 |
| 参数说明 |
|
| 示例 |
http://sso.taotao.com/user/register
|
| 返回值 |
{ status: 400 msg: "注册失败. 请校验数据后请再提交数据." data: null } |

-
service
| @Override public TaotaoResult createUser(TbUser user) { user.setUpdated(new Date()); user.setCreated(new Date()); //md5加密 user.setPassword(DigestUtils.md5DigestAsHex(user.getPassword().getBytes())); userMapper.insert(user); return TaotaoResult.ok(); } |
-
Controller
| //创建用户 @RequestMapping(value="/register", method=RequestMethod.POST) @ResponseBody public TaotaoResult createUser(TbUser user) {
try { TaotaoResult result = userService.createUser(user); return result; } catch (Exception e) { e.printStackTrace(); return TaotaoResult.build(500, ExceptionUtil.getStackTrace(e)); } } |
-
测试
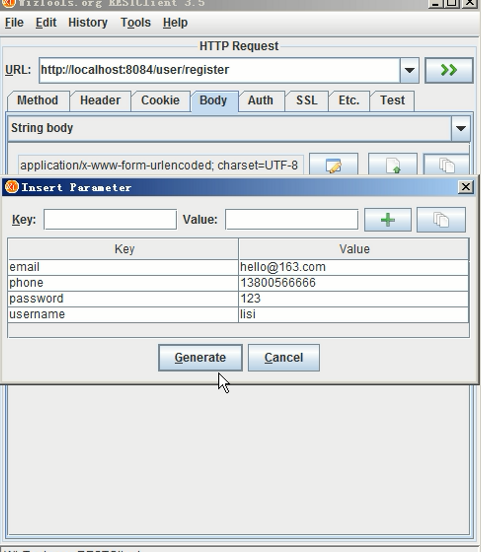
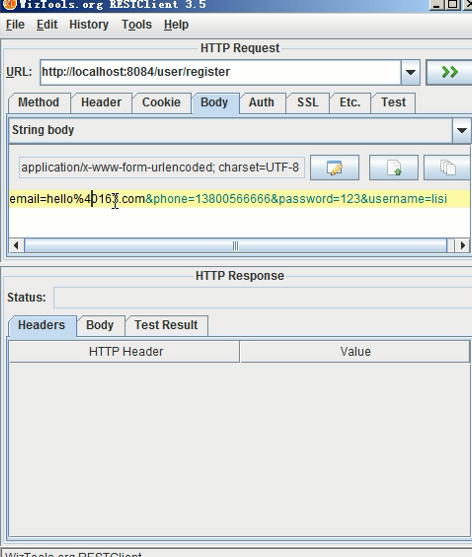
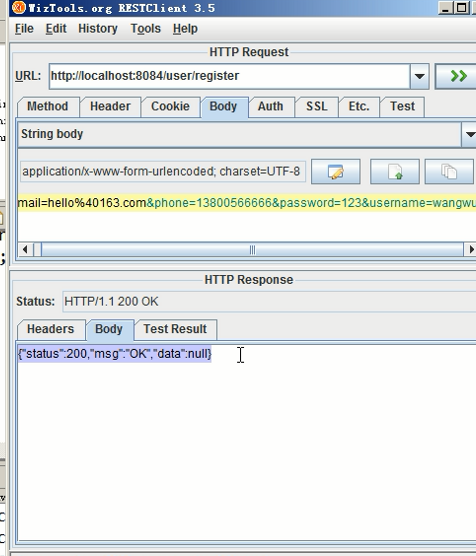
-
开发登录接口
-
用户登录
-
| 请求方法 |
POST |
| URL |
|
| 参数 |
username //用户名 password //密码 |
| 参数说明 |
|
| 示例 |
http://sso.taotao.com/user/login
username=zhangsan&password=123 |
| 返回值 |
{ status: 200 msg: "OK" data: "fe5cb546aeb3ce1bf37abcb08a40493e" //登录成功,返回token } |
-
Service
| @Servicepublic class UserLoginServiceImpl implements UserLoginService {
@Autowired private TbUserMapper userMapper; @Autowired private JedisCluster jedisCluster;
@Value("${USER_TOKEN_KEY}") private String USER_TOKEN_KEY; @Value("${SESSION_EXPIRE_TIME}") private Integer SESSION_EXPIRE_TIME;
@Override public TaotaoResult login(String username, String password) throws Exception {
//根据用户名查询用户信息 TbUserExample example = new TbUserExample(); Criteria criteria = example.createCriteria(); criteria.andUsernameEqualTo(username); List<TbUser> list = userMapper.selectByExample(example); if (null == list || list.isEmpty()) { return TaotaoResult.build(400, "用户不存在"); } //核对密码 TbUser user = list.get(0); if (!DigestUtils.md5DigestAsHex(password.getBytes()).equals(user.getPassword())) { return TaotaoResult.build(400, "密码错误"); } //登录成功,把用户信息写入redis //生成一个用户token String token = UUID.randomUUID().toString(); jedisCluster.set(USER_TOKEN_KEY + ":" + token, JsonUtils.objectToJson(user)); //设置session过期时间 jedisCluster.expire(USER_TOKEN_KEY + ":" + token, SESSION_EXPIRE_TIME); return TaotaoResult.ok(token); }
} |
-
Controller
| @Controller@RequestMapping("/user")public class UserLoginController {
@Autowired private UserLoginService userLoginService;
@RequestMapping(value="/login", method=RequestMethod.POST) @ResponseBody public TaotaoResult login(String username, String password) { TaotaoResult result = null; try { result = userLoginService.login(username, password); } catch (Exception e) { // TODO Auto-generated catch block e.printStackTrace(); return TaotaoResult.build(500, ExceptionUtil.getStackTrace(e)); }
return result;
}} |
-
测试

-
根据token查询用户
-
通过token查询用户信息
-
| 请求方法 |
GET |
| URL |
http://sso.taotao.com/user/token/{token} |
| 参数 |
token //用户登录凭证 callback//jsonp回调方法 |
| 参数说明 |
可选参数callback:如果有此参数表示此方法为jsonp请求,需要支持jsonp。 |
| 示例 |
http://sso.taotao.com/user/token/fe5cb546aeb3ce1bf37abcb08a40493e |
| 返回值 |
{ status: 200 msg: "OK" data: "{"id":1,"username":"zhangzhijun","phone":"15800807944", "email":"[email protected]","created":1414119176000,"updated":1414119179000}" } |
-
Service
| @Override public TaotaoResult getUserByToken(String token) {
//根据token从redis中查询用户信息 String json = jedisClient.get(REDIS_USER_SESSION_KEY + ":" + token); //判断是否为空 if (StringUtils.isBlank(json)) { return TaotaoResult.build(400, "此session已经过期,请重新登录"); } //更新过期时间 jedisClient.expire(REDIS_USER_SESSION_KEY + ":" + token, SSO_SESSION_EXPIRE); //返回用户信息 return TaotaoResult.ok(JsonUtils.jsonToPojo(json, TbUser.class)); } |
-
Controller
| @RequestMapping("/token/{token}") @ResponseBody public Object getUserByToken(@PathVariable String token, String callback) { TaotaoResult result = null; try { result = userService.getUserByToken(token); } catch (Exception e) { e.printStackTrace(); result = TaotaoResult.build(500, ExceptionUtil.getStackTrace(e)); }
//判断是否为jsonp调用 if (StringUtils.isBlank(callback)) { return result; } else { MappingJacksonValue mappingJacksonValue = new MappingJacksonValue(result); mappingJacksonValue.setJsonpFunction(callback); return mappingJacksonValue; }
} |
-
测试
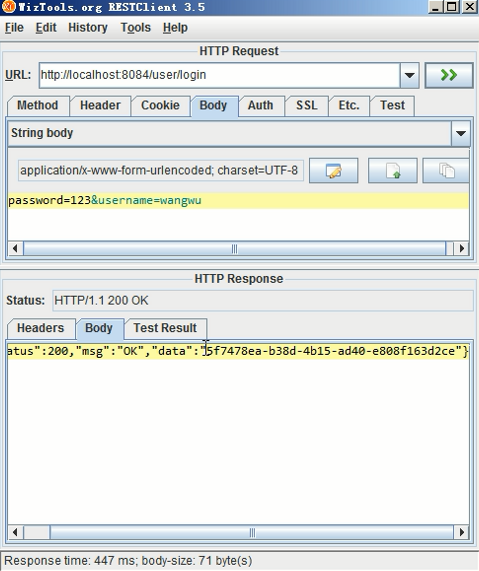
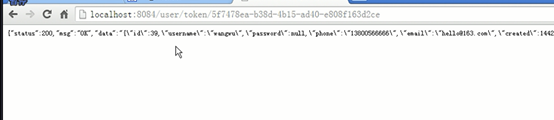
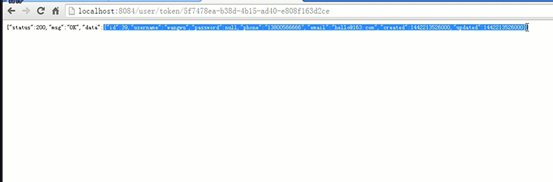
-
注册功能的实现
登录和注册的功能都放到单点登录系统中完成,供其他系统调用。
-
向sso系统中添加页面
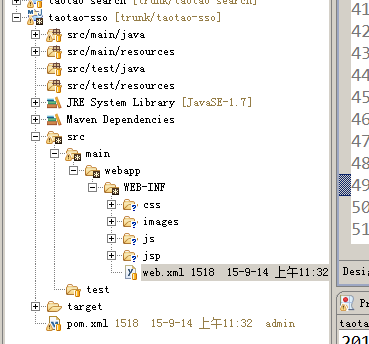
需要对静态资源做映射。需要修改springmvc.xml
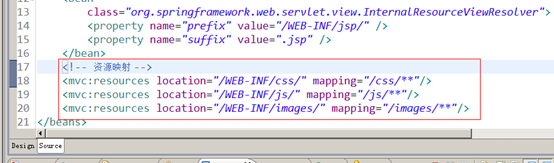
-
注册功能实现
-
进行注册之前先进行数据的有效性验证。
-
用户名不能重复
-
确认密码和密码文本框的内容要一致。
-
用户名、密码不能为空。
-
手机不能为空 并且不能重复。
-
-
校验完成后注册。可以调用sso系统的注册接口完成注册。
-
打开注册页面
@Controller
@RequestMapping("/page")
public class PageController {
@RequestMapping("/register")
public String showRegister() {
return "register";
}
}
-
数据校验
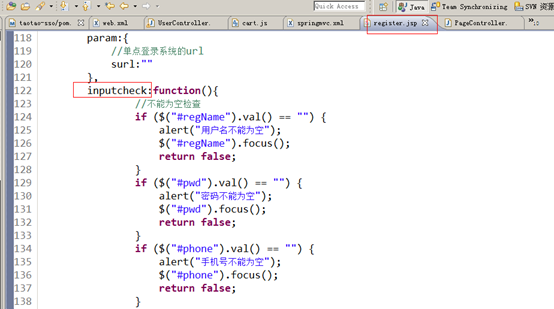
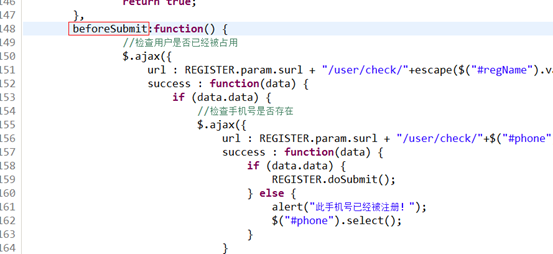
-
提交注册
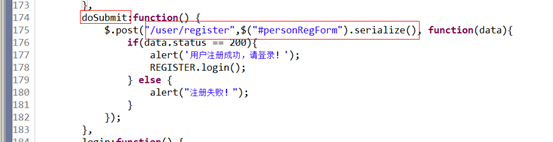
-
登录功能的实现
-
打开登录页面
-
使用一个Controller跳转到登录页面。
@RequestMapping("/login")
public String showLogin() {
return "login";
}
-
数据校验
校验用户名密码必须输入。
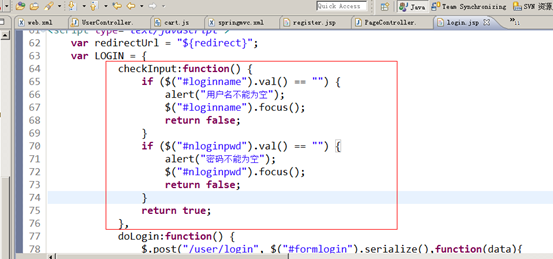
-
用户登录
用户点击登录按钮把用户名和密码表单提交给登录接口,接收返回结果判断是否登录成功。
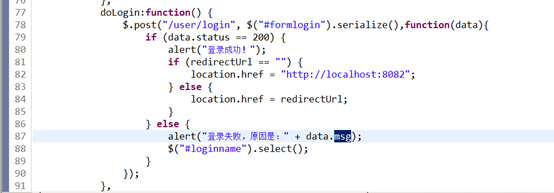
-
登录页面回调url
回调url应该是通过一个参数传递给显示登录页面的Controller。参数名为:redirect
需要把回调的url传递给jsp页面。当登录成功后,js的逻辑中判断是否有回调的rul,如果有就跳转到此url,如果没有就跳转到商城首页。

@RequestMapping("/login")
public String showLogin(String redirect, Model model) {
model.addAttribute("redirect", redirect);
return "login";
}
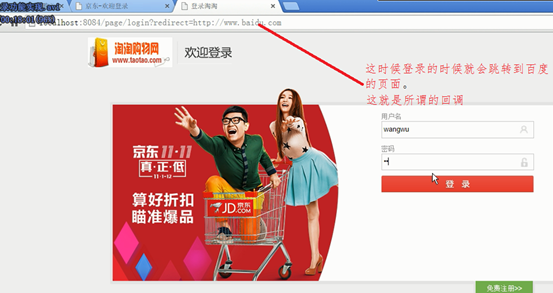
-
拦截器实现登录功能
-
拦截器流程
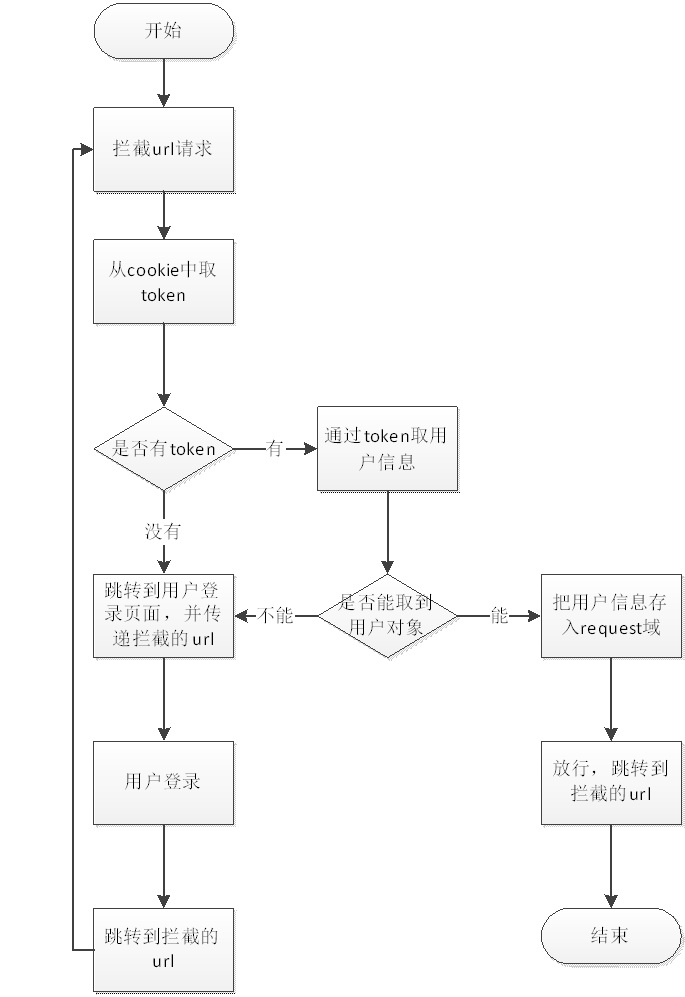
-
-
门户系统整合sso
在门户系统点击登录连接跳转到登录页面。登录成功后,跳转到门户系统的首页,在门户系统中需要从cookie中 把token取出来。所以必须在登录成功后把token写入cookie。并且cookie的值必须在系统之间能共享。
-
Cookie共享:
1、Domain:必须是相同的。
例如有多个域名:
Sso.taotao.com
Search.taotao.com
需要设置domain为:.taotao.com
-
-
设置path:/
-
工具类
如果是localhost不要设置domain。直接设置path就可以了。
工具类可以放到taotao-common中。
-
在登录接口中添加写cookie的逻辑
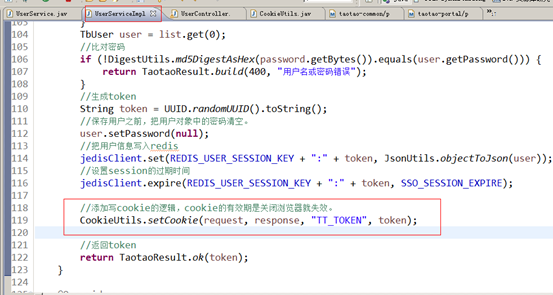
jedisClient.set(REDIS_USER_SESSION_KEY + ":" + token, JsonUtils.objectToJson(user));
//设置session的过期时间
jedisClient.expire(REDIS_USER_SESSION_KEY + ":" + token, SSO_SESSION_EXPIRE);
//添加写cookie的逻辑,cookie的有效期是关闭浏览器就失效。
CookieUtils.setCookie(request, response, "TT_TOKEN", token);
//返回token
return TaotaoResult.ok(token);
-
首页取cookie信息
从cookie中取token,在页面中根据token取用户信息,调用sso系统的服务来完成。需要使用jsonp调用。
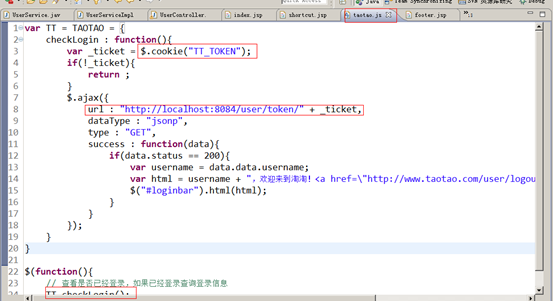
var TT = TAOTAO = {
checkLogin : function(){
var _ticket = $.cookie("TT_TOKEN");
if(!_ticket){
return ;
}
$.ajax({
url : "http://localhost:8084/user/token/" + _ticket,
dataType : "jsonp",
type : "GET",
success : function(data){
if(data.status == 200){
var username = data.data.username;
var html = username + ",欢迎来到淘淘!<a href=\"http://www.taotao.com/user/logout.html\" class=\"link-logout\">[退出]</a>";
$("#loginbar").html(html);
}
}
});
}
}
$(function(){
// 查看是否已经登录,如果已经登录查询登录信息
TT.checkLogin();
});
登录成功:
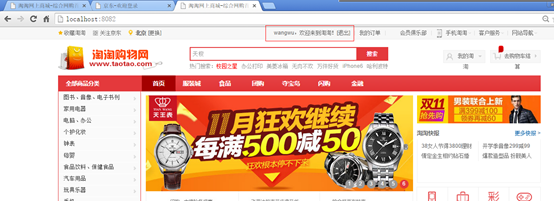
-
拦截器实现
-
用户登录Service
-
功能:根据token换取用户信息,需要调用sso系统的服务。返回TbUser对象。如果没有就返回null。
@Service
public class UserServiceImpl implements UserService {
@Value("${SSO_BASE_URL}")
public String SSO_BASE_URL;
@Value("${SSO_USER_TOKEN}")
private String SSO_USER_TOKEN;
@Value("${SSO_PAGE_LOGIN}")
public String SSO_PAGE_LOGIN;
#单点登录系统的url
SSO_BASE_URL=http://localhost:8084
#根据token来取token的信息
SSO_USER_TOKEN=/user/token/
#单点登录系统的url
SSO_PAGE_LOGIN=/page/login
@Override
public TbUser getUserByToken(String token) {
try {
//调用sso系统的服务,根据token取用户信息
String json = HttpClientUtil.doGet(SSO_BASE_URL + SSO_USER_TOKEN + token);
//把json转换成TaotaoREsult
TaotaoResult result = TaotaoResult.formatToPojo(json, TbUser.class);
if (result.getStatus() == 200) {
TbUser user = (TbUser) result.getData();
return user;
}
} catch (Exception e) {
e.printStackTrace();
}
return null;
}
-
拦截器实现
public class LoginInterceptor implements HandlerInterceptor {
@Autowired
private UserServiceImpl userService;
@Override
public boolean preHandle(HttpServletRequest request, HttpServletResponse response, Object handler)
throws Exception {
//在Handler执行之前处理
//判断用户是否登录
//从cookie中取token
String token = CookieUtils.getCookieValue(request, "TT_TOKEN");
//根据token换取用户信息,调用sso系统的接口。
TbUser user = userService.getUserByToken(token);
//取不到用户信息
if (null == user) {
//跳转到登录页面,把用户请求的url作为参数传递给登录页面。
response.sendRedirect(userService.SSO_BASE_URL + userService.SSO_PAGE_LOGIN
+ "?redirect=" + request.getRequestURL());
//返回false
return false;
}
//取到用户信息,放行
//把用户信息放入Request
request.setAttribute("user", user);
//返回值决定handler是否执行。true:执行,false:不执行。
return true;
}
@Override
public void postHandle(HttpServletRequest request, HttpServletResponse response, Object handler,
ModelAndView modelAndView) throws Exception {
// handler执行之后,返回ModelAndView之前
}
@Override
public void afterCompletion(HttpServletRequest request, HttpServletResponse response, Object handler, Exception ex)
throws Exception {
// 返回ModelAndView之后。
//响应用户之后。
}
}
-
Springmvc.xml
<!-- 拦截器配置 -->
<mvc:interceptors>
<mvc:interceptor>
<!-- 拦截订单类请求 -->
<mvc:mapping path="/order/**"/>
<bean class="com.taotao.portal.interceptor.LoginInterceptor"/>
</mvc:interceptor>
</mvc:interceptors>
-
购物车功能
-
功能说明
-
-
-
商品加入购物车时,不是必须要求登录。
-
计算购物车中商品的总价。当商品数量发生变化时需要重新计算。
-
用户可以删除购物车中的商品。
-
用户下单后,删除购物车的功能。
-
功能分析
-
-
在用户不登陆的清空下也可以使用购物车,那么就需要把购物车信息放入cookie中。
-
可以把商品信息,存放到pojo中,然后序列化成json存入cookie中。
-
取商品信息可以从cookie中把json数据取出来,然后转换成java对象即可。
-
此功能只需要操作cookie不需要数据库的支持,所以只需要在taotao-portal中实现即可。
-
购物车分有四种动作
-
添加商品
-
修改商品数量
-
删除购物车中的商品
-
展示购物车商品列表
-
添加购物车商品
-
service功能:1、接收controller传递过来的商品id,根据商品id查询商品信息。2、从cookie中取出购物车信息,转换成商品pojo列表。3、把商品信息添加到商品列表中。参数:1、商品id2、Request3、response返回值:TaoTaoResult
-
@Service
public class CartServiceImpl implements CartService{
@Value("${REST_BASE_URL}")
private String REST_BASE_URL;
@Value("${ITME_INFO_URL}")
private String ITME_INFO_URL;
#基础url
REST_BASE_URL=http://localhost:8081/rest
#商品基本信息url
ITME_INFO_URL=/item/info/
@Override
public TaotaoResult addCartItem(long itemId, int num,
HttpServletRequest request, HttpServletResponse response) {
//取商品信息
CartItem cartItem = null;
//取购物车商品列表
List<CartItem> itemList = getCartItemList(request);
//判断购物车商品列表中是否存在此商品
for (CartItem cItem : itemList) {
//如果存在此商品
if (cItem.getId() == itemId) {
//增加商品数量
cItem.setNum(cItem.getNum() + num);
cartItem = cItem;
break;
}
}
if (cartItem == null) {
cartItem = new CartItem();
//根据商品id查询商品基本信息。
String json = HttpClientUtil.doGet(REST_BASE_URL + ITME_INFO_URL + itemId);
//把json转换成java对象
TaotaoResult taotaoResult = TaotaoResult.formatToPojo(json, TbItem.class);
if (taotaoResult.getStatus() == 200) {
TbItem item = (TbItem) taotaoResult.getData();
cartItem.setId(item.getId());
cartItem.setTitle(item.getTitle());
cartItem.setImage(item.getImage() == null ? "":item.getImage().split(",")[0]);
cartItem.setNum(num);
cartItem.setPrice(item.getPrice());
}
//添加到购物车列表
itemList.add(cartItem);
}
//把购物车列表写入cookie
CookieUtils.setCookie(request, response, "TT_CART", JsonUtils.objectToJson(itemList), true);
return TaotaoResult.ok();
}
/**
* 从cookie中取商品列表
* <p>Title: getCartItemList</p>
* <p>Description: </p>
* @return
*/
private List<CartItem> getCartItemList(HttpServletRequest request) {
//从cookie中取商品列表
String cartJson = CookieUtils.getCookieValue(request, "TT_CART", true);
if (cartJson == null) {
return new ArrayList<>();
}
//把json转换成商品列表
try {
List<CartItem> list = JsonUtils.jsonToList(cartJson, CartItem.class);
return list;
} catch (Exception e) {
e.printStackTrace();
}
return new ArrayList<>();
}
-
商品pojo商品pojo需要使用taotao-portal中的Item。此pojo在反序列化时会抛异常。需要做如下修改:
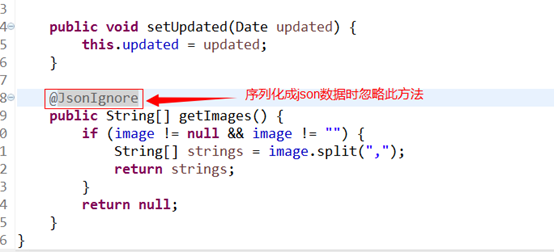
-
Controller
@RequestMapping("/add/{itemId}")
public String addCartItem(@PathVariable Long itemId,
@RequestParam(defaultValue="1")Integer num,
HttpServletRequest request, HttpServletResponse response) {
TaotaoResult result = cartService.addCartItem(itemId, num, request, response);
return "redirect:/cart/success.html";
}
@RequestMapping("/success")
public String showSuccess() {
return "cartSuccess";
}
-
展示购物车商品用户点击"我的购物车"展示购物车信息
-
Service
@Override
public List<CartItem> getCartItemList(HttpServletRequest request, HttpServletResponse response) {
List<CartItem> itemList = getCartItemList(request);
return itemList;
}
-
Controller
@RequestMapping("/cart")
public String showCart(HttpServletRequest request, HttpServletResponse response, Model model) {
List<CartItem> list = cartService.getCartItemList(request, response);
model.addAttribute("cartList", list);
return "cart";
}
-
修改商品数量当点击购物车商品的"+"、"-"号时增加或减少商品数量。减少商品数量时,如果数量为"1"则不继续减少。
-
Service
-
/**
* 修改指定商品的数量
* <p>Title: changeItemNum</p>
* <p>Description: </p>
* @param itemId
* @param num
* @param request
* @param response
* @return
* @see com.taotao.portal.service.CartService#changeItemNum(long, int, javax.servlet.http.HttpServletRequest, javax.servlet.http.HttpServletResponse)
*/
@Override
public TaotaoResult changeItemNum(long itemId, int num, HttpServletRequest request, HttpServletResponse response) {
//从cookie中取商品列表
List<Item> list = getItemListFromCookie(request);
//从商品列表中找到要修改数量的商品
for (Item item : list) {
if (item.getId() == itemId) {
//找到商品,修改数量
item.setNum(num);
break;
}
}
//把商品信息写入cookie
CookieUtils.setCookie(request, response, CART_ITEMS_LIST_KEY, JsonUtils.objectToJson(list), CART_ITEMS_EXPIRE_TIME, true);
return TaotaoResult.ok();
}
-
Controller
@RequestMapping("/update/num/{itemId}/{num}")
@ResponseBody
public TaotaoResult updateNumById(@PathVariable Long itemId, @PathVariable Integer num,
HttpServletRequest request, HttpServletResponse response) {
TaotaoResult result = cartService.changeItemNum(itemId, num, request, response);
return result;
}
-
删除购物车商品
-
Service
-
@Override
public TaotaoResult deleteCartItem(long itemId, HttpServletRequest request, HttpServletResponse response) {
//从cookie中取购物车商品列表
List<CartItem> itemList = getCartItemList(request);
//从列表中找到此商品
for (CartItem cartItem : itemList) {
if (cartItem.getId() == itemId) {
itemList.remove(cartItem);
break;
}
}
//把购物车列表重新写入cookie
CookieUtils.setCookie(request, response, "TT_CART", JsonUtils.objectToJson(itemList), true);
return TaotaoResult.ok();
}
-
Controller
@RequestMapping("/delete/{itemId}")
public String deleteCartItem(@PathVariable Long itemId, HttpServletRequest request, HttpServletResponse response) {
cartService.deleteCartItem(itemId, request, response);
return "redirect:/cart/cart.html";
}
-
订单系统的实现
-
系统架构
-
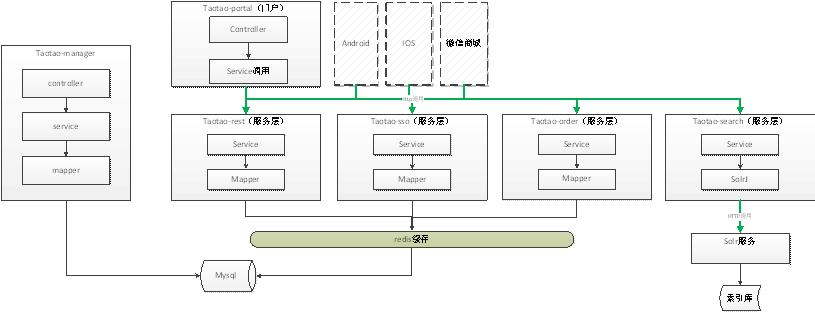
-
订单系统包含的功能
-
-
下单功能
-
查看订单列表
-
根据订单号查看订单详情。
下单功能一定要使用关系型数据库表,保证数据的一致性。
-
订单系统服务说明
-
创建订单系统

-
框架整合
Mybatis
Spring
Springmvc
Jedis
可以参考taotao-rest工程整合
-
Ssm整合
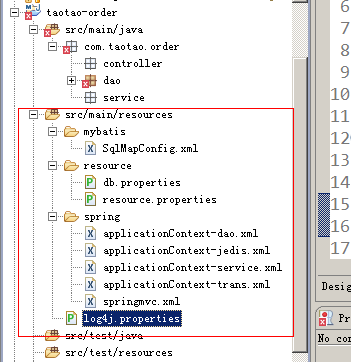
-
Pom.xml
<project xmlns="http://maven.apache.org/POM/4.0.0" xmlns:xsi="http://www.w3.org/2001/XMLSchema-instance"
xsi:schemaLocation="http://maven.apache.org/POM/4.0.0 http://maven.apache.org/xsd/maven-4.0.0.xsd">
<modelVersion>4.0.0</modelVersion>
<parent>
<groupId>com.taotao</groupId>
<artifactId>taotao-parent</artifactId>
<version>0.0.1-SNAPSHOT</version>
</parent>
<groupId>com.taotao</groupId>
<artifactId>taotao-order</artifactId>
<version>0.0.1-SNAPSHOT</version>
<packaging>war</packaging>
<dependencies>
<dependency>
<groupId>com.taotao</groupId>
<artifactId>taotao-manager-mapper</artifactId>
<version>0.0.1-SNAPSHOT</version>
</dependency>
<!-- Spring -->
<dependency>
<groupId>org.springframework</groupId>
<artifactId>spring-context</artifactId>
</dependency>
<dependency>
<groupId>org.springframework</groupId>
<artifactId>spring-beans</artifactId>
</dependency>
<dependency>
<groupId>org.springframework</groupId>
<artifactId>spring-webmvc</artifactId>
</dependency>
<dependency>
<groupId>org.springframework</groupId>
<artifactId>spring-jdbc</artifactId>
</dependency>
<dependency>
<groupId>org.springframework</groupId>
<artifactId>spring-aspects</artifactId>
</dependency>
<dependency>
<groupId>javax.servlet</groupId>
<artifactId>servlet-api</artifactId>
<scope>provided</scope>
</dependency>
<dependency>
<groupId>javax.servlet</groupId>
<artifactId>jsp-api</artifactId>
<scope>provided</scope>
</dependency>
<!-- Redis客户端 -->
<dependency>
<groupId>redis.clients</groupId>
<artifactId>jedis</artifactId>
</dependency>
</dependencies>
<build>
<!-- 配置插件 -->
<plugins>
<plugin>
<groupId>org.apache.tomcat.maven</groupId>
<artifactId>tomcat7-maven-plugin</artifactId>
<configuration>
<port>8085</port>
<path>/</path>
</configuration>
</plugin>
</plugins>
</build>
</project>
-
Web.xml
<?xml version="1.0" encoding="UTF-8"?>
<web-app xmlns:xsi="http://www.w3.org/2001/XMLSchema-instance"
xmlns="http://java.sun.com/xml/ns/javaee" xmlns:web="http://java.sun.com/xml/ns/javaee/web-app_2_5.xsd"
xsi:schemaLocation="http://java.sun.com/xml/ns/javaee http://java.sun.com/xml/ns/javaee/web-app_2_5.xsd"
id="taotao" version="2.5">
<display-name>taotao-order</display-name>
<welcome-file-list>
<welcome-file>index.html</welcome-file>
<welcome-file>index.htm</welcome-file>
<welcome-file>index.jsp</welcome-file>
<welcome-file>default.html</welcome-file>
<welcome-file>default.htm</welcome-file>
<welcome-file>default.jsp</welcome-file>
</welcome-file-list>
<!-- 加载spring容器 -->
<context-param>
<param-name>contextConfigLocation</param-name>
<param-value>classpath:spring/applicationContext-*.xml</param-value>
</context-param>
<listener>
<listener-class>org.springframework.web.context.ContextLoaderListener</listener-class>
</listener>
<!-- 解决post乱码 -->
<filter>
<filter-name>CharacterEncodingFilter</filter-name>
<filter-class>org.springframework.web.filter.CharacterEncodingFilter</filter-class>
<init-param>
<param-name>encoding</param-name>
<param-value>utf-8</param-value>
</init-param>
</filter>
<filter-mapping>
<filter-name>CharacterEncodingFilter</filter-name>
<url-pattern>/*</url-pattern>
</filter-mapping>
<!-- springmvc的前端控制器 -->
<servlet>
<servlet-name>taotao-order</servlet-name>
<servlet-class>org.springframework.web.servlet.DispatcherServlet</servlet-class>
<!-- contextConfigLocation不是必须的, 如果不配置contextConfigLocation, springmvc的配置文件默认在:WEB-INF/servlet的name+"-servlet.xml" -->
<init-param>
<param-name>contextConfigLocation</param-name>
<param-value>classpath:spring/springmvc.xml</param-value>
</init-param>
<load-on-startup>1</load-on-startup>
</servlet>
<servlet-mapping>
<servlet-name>taotao-order</servlet-name>
<url-pattern>/order/*</url-pattern>
</servlet-mapping>
</web-app>
-
创建订单接口
-
接口说明
-
用户使用portal创建订单、android、ios、微信商城提交订单时使用。
请求方法
POST
URL
http://order.taotao.com/order/create
参数说明
提交的数据格式:
{
"payment": 5288,
"postFee": 0,
"userId": "3",
"buyerMessage": null,
"buyerNick": "zhang123",
"orderItems": [
{
"itemId": "9",
"num": 1,
"title": "苹果(Apple)iPhone 6 (A1586) 16GB 金色 移动联通电信4G手机3",
"price": 5288,
"totalFee": 5288,
"picPath": "http://image.taotao.com/images/2015/03/06/2015030610045320609720.jpg"
}
],
"orderShipping": {
"receiverName": "张三",
"receiverPhone": "",
"receiverMobile": "15800000000",
"receiverState": "上海",
"receiverCity": "上海",
"receiverDistrict": "闵行区",
"receiverAddress": "三鲁公路3279号 明浦广场 3号楼 205室",
"receiverZip": "200000"
}
}
示例
返回值
{
status: 200 //200 成功
msg: "OK" // 返回信息消息
data: 100544// 返回订单号
}
-
使用到的表
订单表:

订单明细表:
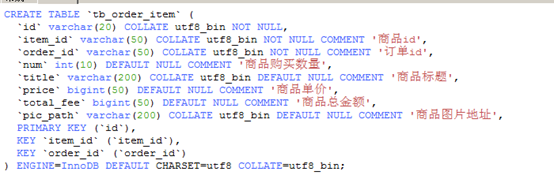
物流表:
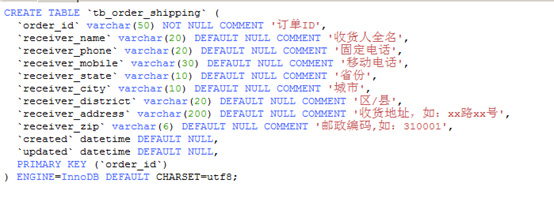
-
Dao层
要对三个表进行操作。都是插入操作。可以使用逆向工程生成的代码。
-
Service层
功能:接收三个参数,
-
-
对应订单表的pojo。
-
订单明细表对应的商品列表。每个元素是订单明细表对应的pojo
-
物流表对应的pojo
订单号的生成:
解决方案一(不能使用):
使用mysql的自增长。
优点:不需要我们自己生成订单号,mysql会自动生成。
缺点:如果订单表数量太大时需要分库分表,此时订单号会重复。如果数据备份后再恢复,订单号会变。
方案二:日期+随机数
采用毫秒+随机数。
缺点:仍然有重复的可能。不建议采用此方案。在没有更好的解决方案之前可以使用。
方案三:使用UUID
优点:不会重复。
缺点:长。可读性查。不建议使用。
方案四:可读性好,不能太长。一般订单都是全数字的。可以使用redis的incr命令生成订单号。
优点:可读性好,不会重复
缺点:需要搭建redis服务器。
返回值:TaotaoResult
@Service
public class OrderServiceImpl implements OrderService {
@Autowired
private TbOrderMapper orderMapper;
@Autowired
private TbOrderItemMapper orderItemMapper;
@Autowired
private TbOrderShippingMapper orderShippingMapper;
@Autowired
private JedisClient jedisClient;
@Value("${ORDER_GEN_KEY}")
private String ORDER_GEN_KEY;
@Value("${ORDER_INIT_ID}")
private String ORDER_INIT_ID;
@Value("${ORDER_DETAIL_GEN_KEY}")
private String ORDER_DETAIL_GEN_KEY;
#订单号生成的key值
ORDER_GEN_KEY=ORDER_GEN_KEY
#初始化的key值,假如从1开始是没人购买该商品的
ORDER_INIT_ID=100544
#订单明细生成key值
ORDER_DETAIL_GEN_KEY=ORDER_DETAIL_GEN_KEY
@Override
public TaotaoResult createOrder(TbOrder order, List<TbOrderItem> itemList, TbOrderShipping orderShipping) {
//向订单表中插入记录
//获得订单号
String string = jedisClient.get(ORDER_GEN_KEY);
if (StringUtils.isBlank(string)) {
jedisClient.set(ORDER_GEN_KEY, ORDER_INIT_ID);
}
long orderId = jedisClient.incr(ORDER_GEN_KEY);
//补全pojo的属性
order.setOrderId(orderId + "");
//状态:1、未付款,2、已付款,3、未发货,4、已发货,5、交易成功,6、交易关闭
order.setStatus(1);
Date date = new Date();
order.setCreateTime(date);
order.setUpdateTime(date);
//0:未评价 1:已评价
order.setBuyerRate(0);
//向订单表插入数据
orderMapper.insert(order);
//插入订单明细
for (TbOrderItem tbOrderItem : itemList) {
//补全订单明细
//取订单明细id
long orderDetailId = jedisClient.incr(ORDER_DETAIL_GEN_KEY);
tbOrderItem.setId(orderDetailId + "");
tbOrderItem.setOrderId(orderId + "");
//向订单明细插入记录
orderItemMapper.insert(tbOrderItem);
}
//插入物流表
//补全物流表的属性
orderShipping.setOrderId(orderId + "");
orderShipping.setCreated(date);
orderShipping.setUpdated(date);
orderShippingMapper.insert(orderShipping);
return TaotaoResult.ok(orderId);
}
}
-
Controller层
接收一个json格式的字符串作为参数。需要使用@RequestBody注解。需要使用一个pojo接收参数。创建一个对应json格式的pojo。
package com.taotao.order.pojo;
import java.util.List;
import com.taotao.pojo.TbOrder;
import com.taotao.pojo.TbOrderItem;
import com.taotao.pojo.TbOrderShipping;
public class Order extends TbOrder {
private List<TbOrderItem> orderItems;
private TbOrderShipping orderShipping;
public List<TbOrderItem> getOrderItems() {
return orderItems;
}
public void setOrderItems(List<TbOrderItem> orderItems) {
this.orderItems = orderItems;
}
public TbOrderShipping getOrderShipping() {
return orderShipping;
}
public void setOrderShipping(TbOrderShipping orderShipping) {
this.orderShipping = orderShipping;
}
}
Controller
@Controller
public class OrderController {
@Autowired
private OrderService orderService;
<servlet-mapping>
<servlet-name>taotao-order</servlet-name>
<url-pattern>/order/*</url-pattern>
</servlet-mapping>
@RequestMapping("/create")
@ResponseBody
public TaotaoResult createOrder(@RequestBody Order order) {
try {
TaotaoResult result = orderService.createOrder(order, order.getOrderItems(), order.getOrderShipping());
return result;
} catch (Exception e) {
e.printStackTrace();
return TaotaoResult.build(500, ExceptionUtil.getStackTrace(e));
}
}
}
-
在前台系统生成订单
在taotao-portal系统中添加商品至购物车后,点击提交订单调用taotao-order的服务生成订单。向用户展示订单号。提示创建订单成功。
-
点击购物车"去结算"按钮
点击"去结算"按钮跳转到订单确认页面。
展示url:/order/order-cart.html
@Controller
@RequestMapping("/order")
public class OrderController {
@RequestMapping("/order-cart")
public String showOrderCart() {
return "order-cart";
}
}

-
订单确认页面
-
-
要求用户登录。
-
根据用户id查询用户的收货地址列表。
-
在此页面展示购物车的商品列表。
-
需要计算订单的总金额(包括运费)展示给用户。
-
要求用户登录
修改springmvc.xml拦截所有以:/order/**形式的url
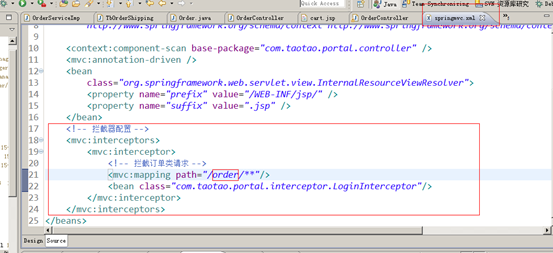
-
根据用户id查询用户的收货地址列表。
在实际的商城中是必须有此功能,需要taotao-rest发布服务,由taotao-portal根据用户查询用户的收货地址列表。
在此,使用静态数据模拟。
-
展示购物车的商品列表
需要从cookie中把购物车商品列表取出,传递给order-cart.jsp。
可以直接使用购物车服务。
@Controller
@RequestMapping("/order")
public class OrderController {
@Autowired
private CartService cartService;
@RequestMapping("/order-cart")
public String showOrderCart(HttpServletRequest request, HttpServletResponse response, Model model) {
//取购物车商品列表
List<CartItem> list = cartService.getCartItemList(request, response);
//传递给页面
model.addAttribute("cartList", list);
return "order-cart";
}
}

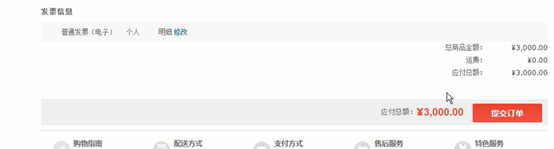
-
提交订单
点击"提交订单"按钮把用户已经确认的订单信息,提交给后台。提交一个隐藏的表单,其中包含订单基本信息,订单名称以及配送信息。需要使用一个包装的pojo接收表单中的内容。

请求的url:/order/create.html
参数:表单中的内容。使用Order接收表单的内容。
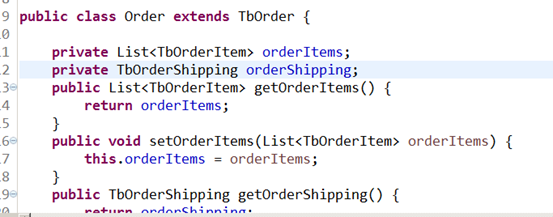
返回值:返回一个jsp页面。
-
Service层
接收Order对象,调用taotao-order提供的服务,提交订单。需要把pojo转换成json数据。调用taotao-order提供的服务返回taotaoResult,包含订单号。
参数:Order
返回值:String(订单号)
@Service
public class OrderServiceImpl implements OrderService {
@Value("${ORDER_BASE_URL}")
private String ORDER_BASE_URL;
@Value("${ORDER_CREATE_URL}")
private String ORDER_CREATE_URL;
#\订单系统的基础url
ORDER_BASE_URL=http://localhost:8085/order
#创建订单服务
ORDER_CREATE_URL=/create
@Override
public String createOrder(Order order) {
//调用taotao-order的服务提交订单。
String json = HttpClientUtil.doPostJson(ORDER_BASE_URL + ORDER_CREATE_URL, JsonUtils.objectToJson(order));
//把json转换成taotaoResult
TaotaoResult taotaoResult = TaotaoResult.format(json);
if (taotaoResult.getStatus() == 200) {
Long orderId = (Long) taotaoResult.getData();
return orderId.toString();
}
return "";
}
}
-
Controller层
接收页面提交的表单的内容,调用Service创建订单。返回成功页面。
@Controller
@RequestMapping("/order")
public class OrderController {
@Autowired
private CartService cartService;
@Autowired
private OrderService orderService;
@RequestMapping("/order-cart")
public String showOrderCart(HttpServletRequest request, HttpServletResponse response, Model model) {
//取购物车商品列表
List<CartItem> list = cartService.getCartItemList(request, response);
//传递给页面
model.addAttribute("cartList", list);
return "order-cart";
}
@RequestMapping("/create")
public String createOrder(Order order, Model model) {
String orderId = orderService.createOrder(order);
model.addAttribute("orderId", orderId);
model.addAttribute("payment", order.getPayment());
model.addAttribute("date", new DateTime().plusDays(3).toString("yyyy-MM-dd"));
return "success";
}
}
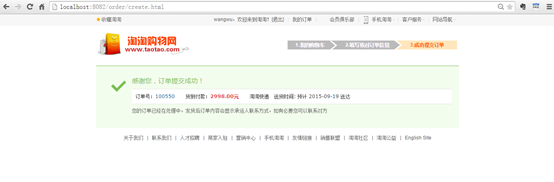
-
框架梳理
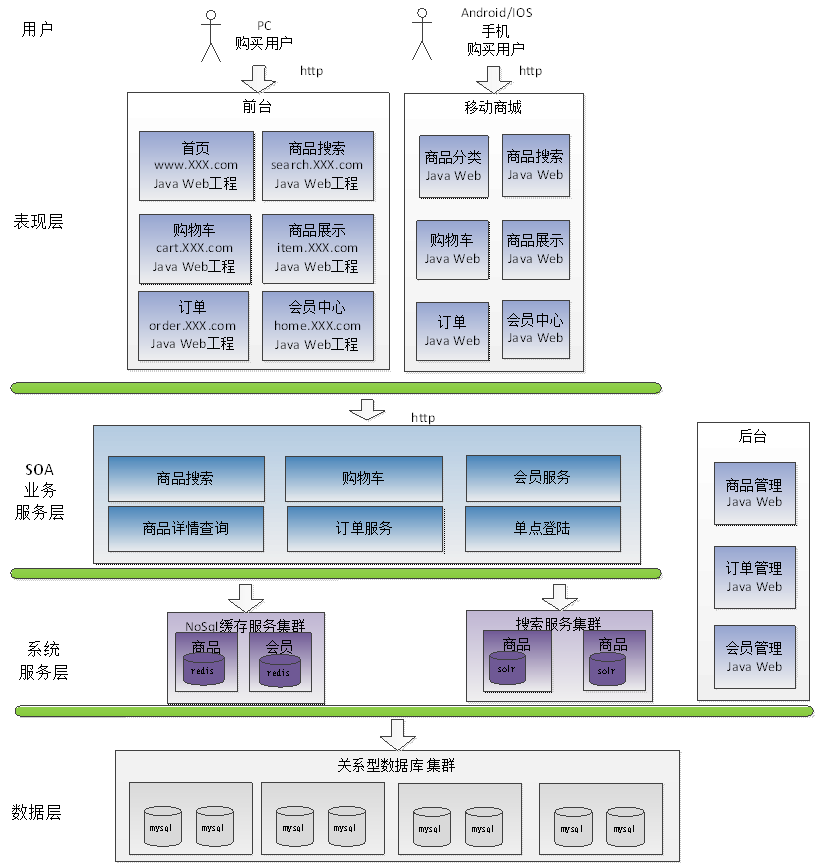
Soa:面向服务的架构
Solr集群需要讲。
Mysql的分库分表中间件:MyCat(cobar)提供资料。
-
网络拓扑图
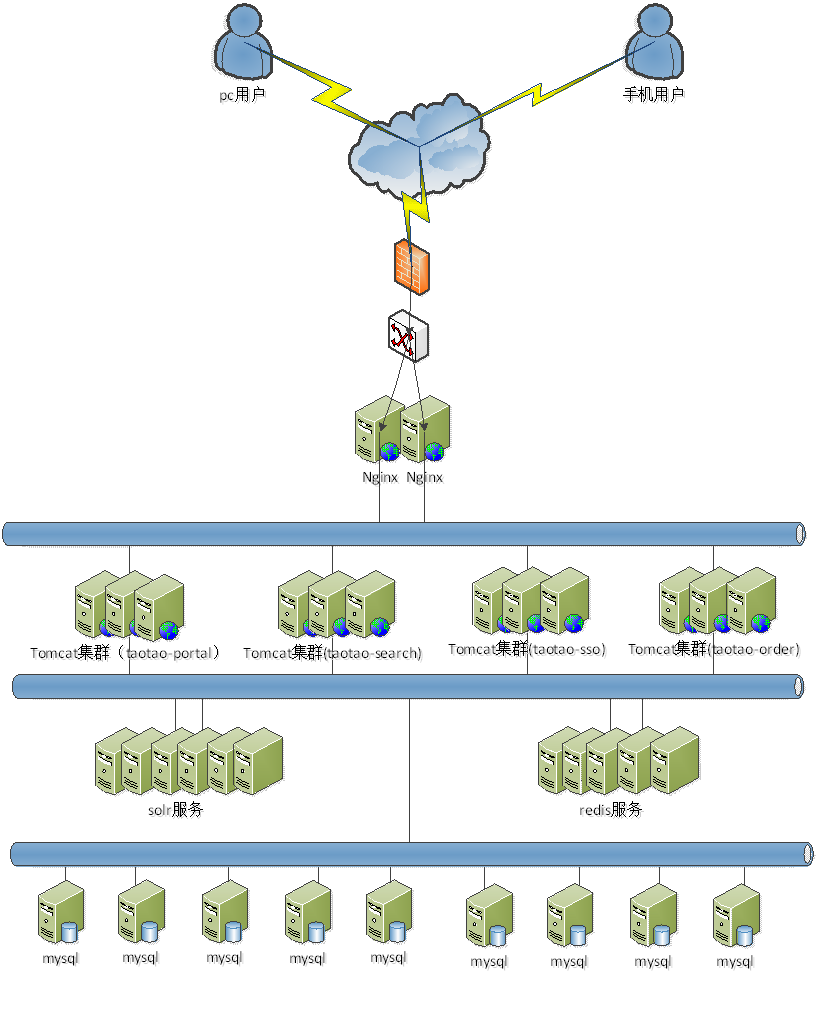
Nginx:反向代理、负载均衡。
-
Nginx
-
什么是nginx
-
Nginx是一款高性能的http 服务器/反向代理服务器及电子邮件(IMAP/POP3)代理服务器。由俄罗斯的程序设计师Igor Sysoev所开发,官方测试nginx能够支支撑5万并发链接,并且cpu、内存等资源消耗却非常低,运行非常稳定。开源、免费。
-
Nginx的应用场景
-
-
http服务器。Nginx是一个http服务可以独立提供http服务。可以做网页静态服务器。
-
虚拟主机。可以实现在一台服务器虚拟出多个网站。例如个人网站使用的虚拟主机。
-
反向代理,负载均衡。当网站的访问量达到一定程度后,单台服务器不能满足用户的请求时,需要用多台服务器集群可以使用nginx做反向代理。并且多台服务器可以平均分担负载,不会因为某台服务器负载高宕机而某台服务器闲置的情况。
-
Nginx的安装步骤
第一步:把nginx的压缩包上传到服务器
第二步:解压。
第三步:创建一个makefile。
参数设置如下:
./configure \
--prefix=/usr/local/nginx \
--pid-path=/var/run/nginx/nginx.pid \
--lock-path=/var/lock/nginx.lock \
--error-log-path=/var/log/nginx/error.log \
--http-log-path=/var/log/nginx/access.log \
--with-http_gzip_static_module \
--http-client-body-temp-path=/var/temp/nginx/client \
--http-proxy-temp-path=/var/temp/nginx/proxy \
--http-fastcgi-temp-path=/var/temp/nginx/fastcgi \
--http-uwsgi-temp-path=/var/temp/nginx/uwsgi \
--http-scgi-temp-path=/var/temp/nginx/scgi
注意:上边将临时文件目录指定为/var/temp/nginx,需要在/var下创建temp及nginx目录
第四步:编译make
第五步:安装make install
-
Nginx实现虚拟机
可以实现在同一台服务运行多个网站,而且网站之间互相不干扰。
同一个服务器可能有一个ip,网站需要使用80端口。网站的域名不同。
区分不同的网站有三种方式:
-
-
ip区分
-
端口区分
-
域名区分
-
Ip区分虚拟主机
需要一台服务器绑定多个ip地址。
方法一:
使用标准的网络配置工具(比如ifconfig和route命令)添加lP别名:
当前ip配置情况:
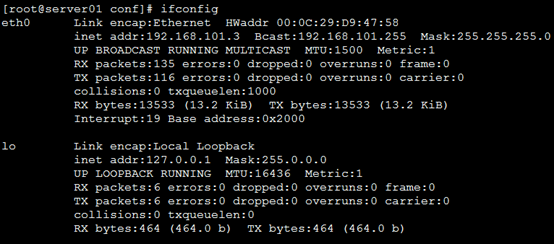
在eth0网卡再绑定一个ip:192.168.101.103
/sbin/ifconfig eth0:1 192.168.101.103 broadcast 192.168.101.255 netmask 255.255.255.0 up
/sbin/route add -host 192.168.101.103 dev eth0:1
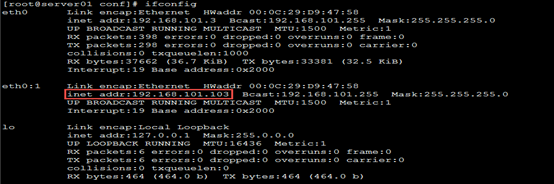
方法二:
1、将/etc/sysconfig/network-scripts/ifcfg-eth0文件复制一份,命名为ifcfg-eth0:1
修改其中内容:
DEVICE=eth0:1
IPADDR=192.168.25.103
其他项不用修改
2、重启系统
-
配置nginx基于ip地址的虚拟主机
-
Nginx的配置文件
#user nobody;
worker_processes 1;
#error_log logs/error.log;
#error_log logs/error.log notice;
#error_log logs/error.log info;
#pid logs/nginx.pid;
events {
worker_connections 1024;
}
http {
include mime.types;
default_type application/octet-stream;
#log_format main '$remote_addr - $remote_user [$time_local] "$request" '
# '$status $body_bytes_sent "$http_referer" '
# '"$http_user_agent" "$http_x_forwarded_for"';
#access_log logs/access.log main;
sendfile on;
#tcp_nopush on;
#keepalive_timeout 0;
keepalive_timeout 65;
#gzip on;
server { #一个Server就是一个虚拟主机
listen 80;
server_name localhost;
#charset koi8-r;
#access_log logs/host.access.log main;
location / {
root html;
index index.html index.htm;
}
}
}
-
基于ip的虚拟主机配置
server {
listen 80;
server_name 192.168.25.141;
#charset koi8-r;
#access_log logs/host.access.log main;
location / {
root html-141;
index index.html index.htm;
}
}
server {
listen 80;
server_name 192.168.25.100;
#charset koi8-r;
#access_log logs/host.access.log main;
location / {
root html-100;
index index.html index.htm;
}
}
Nginx重新加载配置文件。
-
基于端口的虚拟主机
server {
listen 81;
server_name 192.168.25.141;
#charset koi8-r;
#access_log logs/host.access.log main;
location / {
root html-81;
index index.html index.htm;
}
}
server {
listen 82;
server_name 192.168.25.141;
#charset koi8-r;
#access_log logs/host.access.log main;
location / {
root html-82;
index index.html index.htm;
}
}
-
基于域名的虚拟主机
最有用的虚拟主机配置方式。
一个域名只能绑定一个ip地址,一个ip地址可以被多个域名绑定。


可以修改host文件实现域名访问。
-
设置域名和ip的映射关系
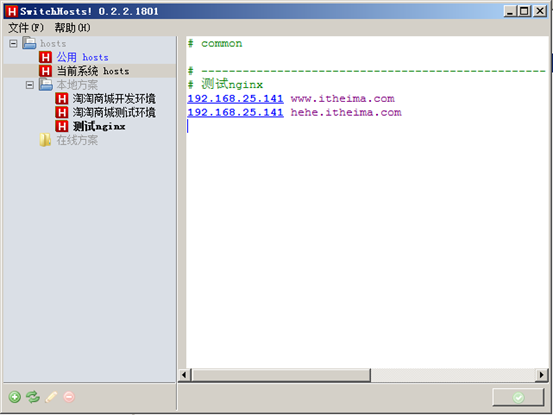
修改window的hosts文件:(C:\Windows\System32\drivers\etc)
-
基于域名的虚拟主机配置
server {
listen 80;
server_name www.itheima.com;
#charset koi8-r;
#access_log logs/host.access.log main;
location / {
root html-www;
index index.html index.htm;
}
}
server {
listen 80;
server_name hehe.itheima.com;
#charset koi8-r;
#access_log logs/host.access.log main;
location / {
root html-hehe;
index index.html index.htm;
}
}
修改配置文件后,需要nginx重新加载配置文件。
-
修改bug
-
-
定位
-
找解决方案
-
修改、测试
-
定位
发现测试服务时有用户信息,说明taotao-order发布的服务没有问题,调用服务端的问题。问题定位到taotao-portal。
-
解决方案
可以在拦截器中把取到的用户信息,放入Request对象中,在Controller中从Request对象中把用户信息取出来。就可以了。
-
修改
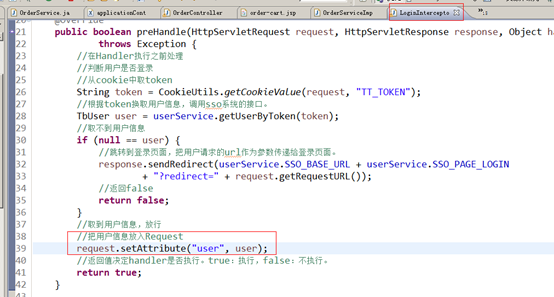
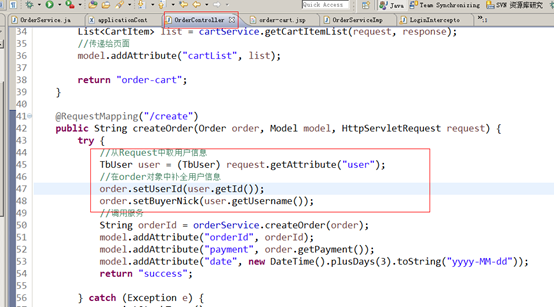
-
Nginx的反向代理
-
什么是反向代理
-

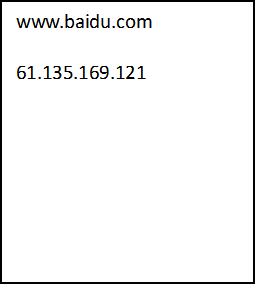
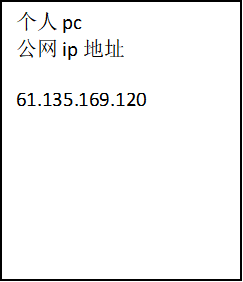
-


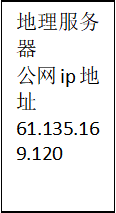


正向代理
-
反向代理


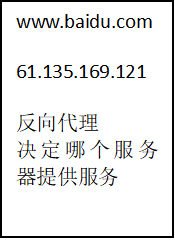
-
使用nginx实现反向代理
Nginx只做请求的转发,后台有多个http服务器提供服务,nginx的功能就是把请求转发给后面的服务器,决定把请求转发给谁。
-
安装tomcat
在一个虚拟机上创建两个tomcat实例,模拟多个服务器。
-
需求
通过访问不同的域名访问运行在不同端口的tomcat
8080.itheima.com 访问运行8080端口的tomcat
8081.itheima.com 访问运行8081端口的tomcat
-
域名需要配置host文件:
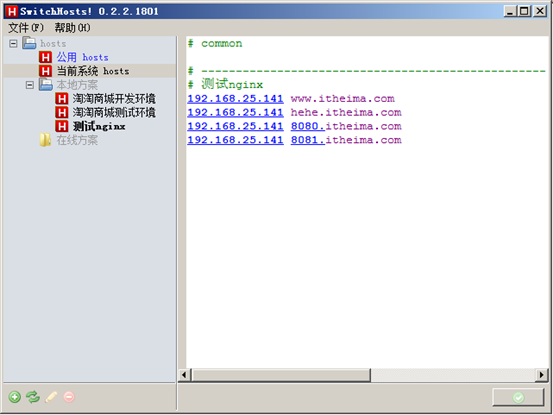
-
Nginx的配置
upstream tomcatserver1 {
server 192.168.25.141:8080;
}
upstream tomcatserver2 {
server 192.168.25.141:8081;
}
server {
listen 80;
server_name 8080.itheima.com;
#charset koi8-r;
#access_log logs/host.access.log main;
location / {
proxy_pass http://tomcatserver1;
index index.html index.htm;
}
}
server {
listen 80;
server_name 8081.itheima.com;
#charset koi8-r;
#access_log logs/host.access.log main;
location / {
proxy_pass http://tomcatserver2;
index index.html index.htm;
}
}
如果在同一个域名下有多台服务器提供服务,此时需要nginx负载均衡。
-
负载均衡
-
什么是负载均衡
-
负载均衡 建立在现有网络结构之上,它提供了一种廉价有效透明的方法扩展网络设备和服务器的带宽、增加吞吐量、加强网络数据处理能力、提高网络的灵活性和可用性。
负载均衡,英文名称为Load Balance,其意思就是分摊到多个操作单元上进行执行,例如Web服务器、FTP服务器、企业关键应用服务器和其它关键任务服务器等,从而共同完成工作任务。
-
需求
nginx作为负载均衡服务器,用户请求先到达nginx,再由nginx根据负载配置将请求转发至 tomcat服务器。
nginx负载均衡服务器:192.168.25.141
tomcat1服务器:192.168.25.141:8080
tomcat2服务器:192.168.25.141:8081
-
配置nginx的负载均衡
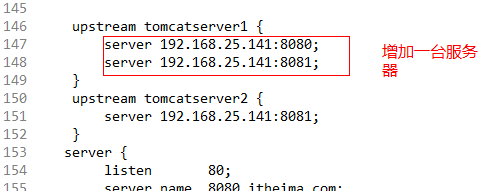
-
配置负载均衡的权重
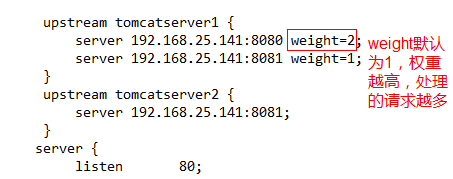
节点说明:
在http节点里添加:
#定义负载均衡设备的 Ip及设备状态
upstream myServer {
server 127.0.0.1:9090 down;
server 127.0.0.1:8080 weight=2;
server 127.0.0.1:6060;
server 127.0.0.1:7070 backup;
}
在需要使用负载的Server节点下添加
proxy_pass http://myServer;
upstream 每个设备的状态:
down 表示单前的server暂时不参与负载
weight 默认为1.weight越大,负载的权重就越大。
max_fails :允许请求失败的次数默认为1.当超过最大次数时,返回proxy_next_upstream 模块定义的错误
fail_timeout:max_fails 次失败后,暂停的时间。
backup: 其它所有的非backup机器down或者忙的时候,请求backup机器。所以这台机器压力会最轻。
-
Nginx的高可用
解决高可用的方案就是添加冗余。
-
Solr集群
-
什么是SolrCloud
-
SolrCloud(solr 云)是Solr提供的分布式搜索方案,当你需要大规模,容错,分布式索引和检索能力时使用 SolrCloud。当一个系统的索引数据量少的时候是不需要使用SolrCloud的,当索引量很大,搜索请求并发很高,这时需要使用SolrCloud来满足这些需求。
SolrCloud是基于Solr和Zookeeper的分布式搜索方案,它的主要思想是使用Zookeeper作为集群的配置信息中心。
它有几个特色功能:
1)集中式的配置信息
2)自动容错
3)近实时搜索
4)查询时自动负载均衡
-
zookeeper是个什么玩意?
顾名思义zookeeper就是动物园管理员,他是用来管hadoop(大象)、Hive(蜜蜂)、pig(小猪)的管理员, Apache Hbase和 Apache Solr 的分布式集群都用到了zookeeper;Zookeeper:是一个分布式的、开源的程序协调服务,是hadoop项目下的一个子项目。
-
Zookeeper可以干哪些事情
1、配置管理
在我们的应用中除了代码外,还有一些就是各种配置。比如数据库连接等。一般我们都是使用配置文件的方式,在代码中引入这些配置文件。但是当我们只有一种配置,只有一台服务器,并且不经常修改的时候,使用配置文件是一个很好的做法,但是如果我们配置非常多,有很多服务器都需要这个配置,而且还可能是动态的话使用配置文件就不是个好主意了。这个时候往往需要寻找一种集中管理配置的方法,我们在这个集中的地方修改了配置,所有对这个配置感兴趣的都可以获得变更。比如我们可以把配置放在数据库里,然后所有需要配置的服务都去这个数据库读取配置。但是,因为很多服务的正常运行都非常依赖这个配置,所以需要这个集中提供配置服务的服务具备很高的可靠性。一般我们可以用一个集群来提供这个配置服务,但是用集群提升可靠性,那如何保证配置在集群中的一致性呢? 这个时候就需要使用一种实现了一致性协议的服务了。Zookeeper就是这种服务,它使用Zab这种一致性协议来提供一致性。现在有很多开源项目使用Zookeeper来维护配置,比如在HBase中,客户端就是连接一个Zookeeper,获得必要的HBase集群的配置信息,然后才可以进一步操作。还有在开源的消息队列Kafka中,也使用Zookeeper来维护broker的信息。在Alibaba开源的SOA框架Dubbo中也广泛的使用Zookeeper管理一些配置来实现服务治理。
2、名字服务
名字服务这个就很好理解了。比如为了通过网络访问一个系统,我们得知道对方的IP地址,但是IP地址对人非常不友好,这个时候我们就需要使用域名来访问。但是计算机是不能是别域名的。怎么办呢?如果我们每台机器里都备有一份域名到IP地址的映射,这个倒是能解决一部分问题,但是如果域名对应的IP发生变化了又该怎么办呢?于是我们有了DNS这个东西。我们只需要访问一个大家熟知的(known)的点,它就会告诉你这个域名对应的IP是什么。在我们的应用中也会存在很多这类问题,特别是在我们的服务特别多的时候,如果我们在本地保存服务的地址的时候将非常不方便,但是如果我们只需要访问一个大家都熟知的访问点,这里提供统一的入口,那么维护起来将方便得多了。
3、分布式锁
其实在第一篇文章中已经介绍了Zookeeper是一个分布式协调服务。这样我们就可以利用Zookeeper来协调多个分布式进程之间的活动。比如在一个分布式环境中,为了提高可靠性,我们的集群的每台服务器上都部署着同样的服务。但是,一件事情如果集群中的每个服务器都进行的话,那相互之间就要协调,编程起来将非常复杂。而如果我们只让一个服务进行操作,那又存在单点。通常还有一种做法就是使用分布式锁,在某个时刻只让一个服务去干活,当这台服务出问题的时候锁释放,立即fail over到另外的服务。这在很多分布式系统中都是这么做,这种设计有一个更好听的名字叫Leader Election(leader选举)。比如HBase的Master就是采用这种机制。但要注意的是分布式锁跟同一个进程的锁还是有区别的,所以使用的时候要比同一个进程里的锁更谨慎的使用。
4、集群管理
在分布式的集群中,经常会由于各种原因,比如硬件故障,软件故障,网络问题,有些节点会进进出出。有新的节点加入进来,也有老的节点退出集群。这个时候,集群中其他机器需要感知到这种变化,然后根据这种变化做出对应的决策。比如我们是一个分布式存储系统,有一个中央控制节点负责存储的分配,当有新的存储进来的时候我们要根据现在集群目前的状态来分配存储节点。这个时候我们就需要动态感知到集群目前的状态。还有,比如一个分布式的SOA架构中,服务是一个集群提供的,当消费者访问某个服务时,就需要采用某种机制发现现在有哪些节点可以提供该服务(这也称之为服务发现,比如Alibaba开源的SOA框架Dubbo就采用了Zookeeper作为服务发现的底层机制)。还有开源的Kafka队列就采用了Zookeeper作为Cosnumer的上下线管理。
-
Solr集群的结构
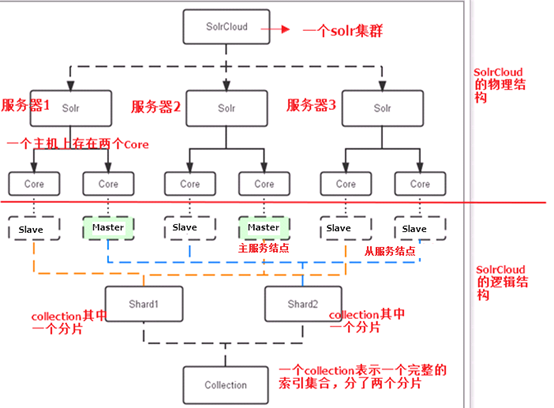
-
Solr集群的搭建
本教程的这套安装是单机版的安装,所以采用伪集群的方式进行安装,如果是真正的生产环境,将伪集群的ip改下就可以了,步骤是一样的。
SolrCloud结构图如下:

需要三个zookeeper节点
四个solr节点。
使用伪分布式实现solr集群。需要三个zookeeper实例,4个tomcat实例,可以在一台虚拟机上模拟。建议虚拟机1G以上内存。
-
Zookeeper集群的搭建
-
前台条件
-
三个zookeeper实例。Zookeeper也是java开发的所以需要安装jdk。
-
-
Linux系统
-
Jdk环境。
-
Zookeeper。
-
Zookeeper的安装步骤
第一步:把zookeeper的安装包上传到服务器
第二步:解压缩。
[root@bogon ~]# tar -zxf zookeeper-3.4.6.tar.gz
[root@bogon ~]#
第三步:在/usr/local/目录下创建一个solrcloud目录。把zookeeper解压后的文件夹复制到此目录下三份。分别命名为zookeeper1、2、3
[root@bogon ~]# mkdir /usr/local/solrcloud
[root@bogon ~]# mv zookeeper-3.4.6 /usr/local/solrcloud/zookeeper1
[root@bogon ~]# cd /usr/local/solrcloud
[root@bogon solrcloud]# ll
total 4
drwxr-xr-x. 10 1000 1000 4096 Feb 20 2014 zookeeper1
[root@bogon solrcloud]# cp -r zookeeper1/ zookeeper2
[root@bogon solrcloud]# cp -r zookeeper1/ zookeeper3
[root@bogon solrcloud]#
第四步:配置zookeeper。
-
-
在每个zookeeper文件夹下创建一个data目录。
-
在data文件夹下创建一个文件名称为myid,文件的内容就是此zookeeper的编号1、2、3
[root@bogon data]# echo 1 >> myid
[root@bogon data]# ll
total 4
-rw-r--r--. 1 root root 2 Sep 17 23:43 myid
[root@bogon data]# cat myid
1
[root@bogon data]#
在zookeeper2、3文件夹下分别创建data目录和myid文件
[root@bogon solrcloud]# mkdir zookeeper2/data
[root@bogon solrcloud]# echo 2 >> zookeeper2/data/myid
[root@bogon solrcloud]# ll zookeeper2/data
total 4
-rw-r--r--. 1 root root 2 Sep 17 23:44 myid
[root@bogon solrcloud]# cat zookeeper2/data/myid
2
[root@bogon solrcloud]# mkdir zookeeper3/data
[root@bogon solrcloud]# echo 3 >> zookeeper3/data/myid
[root@bogon solrcloud]#
-
把zookeeper1下conf目录下的zoo_sample.cfg文件复制一份改名为zoo.cfg
-
修改zoo.cfg的配置
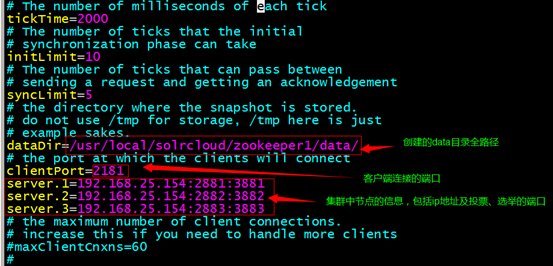
第五步:启动zookeeper。进入zookeeper1/bin目录下。
启动zookeeper:./zkServer.sh start
关闭:./zkServer.sh stop
查看状态:./zkServer.sh status
[root@bogon solrcloud]# zookeeper1/bin/zkServer.sh status
JMX enabled by default
Using config: /usr/local/solrcloud/zookeeper1/bin/../conf/zoo.cfg
Mode: follower
[root@bogon solrcloud]# zookeeper2/bin/zkServer.sh status
JMX enabled by default
Using config: /usr/local/solrcloud/zookeeper2/bin/../conf/zoo.cfg
Mode: leader
[root@bogon solrcloud]# zookeeper3/bin/zkServer.sh status
JMX enabled by default
Using config: /usr/local/solrcloud/zookeeper3/bin/../conf/zoo.cfg
Mode: follower
[root@bogon solrcloud]#
-
Solr实例的搭建
第一步:创建4个tomcat实例,修改其端口。8080-8083
第二步:解压solr-4.10.3.tar.gz压缩包。从压缩包中复制solr.war到tomcat。
第三步:启动tomcat解压war包。把solr-4.10.3目录下example目录下的关于日志相关的jar包添加到solr工程中。
第四步:创建solrhome。修改web.xml指定solrhome的位置。
-
solr集群的搭建
-
第一步
-
把solrhome中的配置文件上传到zookeeper集群。使用zookeeper的客户端上传。
客户端命令位置:/root/solr-4.10.3/example/scripts/cloud-scripts
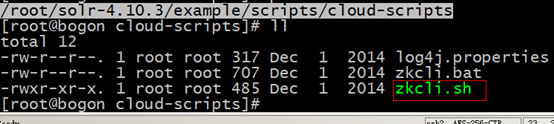
./zkcli.sh -zkhost 192.168.25.154:2181,192.168.25.154:2182,192.168.25.154:2183 -cmd upconfig -confdir /usr/local/solrcloud/solrhome1/collection1/conf -confname myconf
查看配置文件是否上传成功:
[root@bogon bin]# ./zkCli.sh
Connecting to localhost:2181
[zk: localhost:2181(CONNECTED) 0] ls /
[configs, zookeeper]
[zk: localhost:2181(CONNECTED) 1] ls /configs
[myconf]
[zk: localhost:2181(CONNECTED) 2] ls /configs/myconf
[admin-extra.menu-top.html, currency.xml, protwords.txt, mapping-FoldToASCII.txt, _schema_analysis_synonyms_english.json, _rest_managed.json, solrconfig.xml, _schema_analysis_stopwords_english.json, stopwords.txt, lang, spellings.txt, mapping-ISOLatin1Accent.txt, admin-extra.html, xslt, synonyms.txt, scripts.conf, update-script.js, velocity, elevate.xml, admin-extra.menu-bottom.html, clustering, schema.xml]
[zk: localhost:2181(CONNECTED) 3]
-
第二步
修改solrhome下的solr.xml文件,指定当前实例运行的ip地址及端口号。
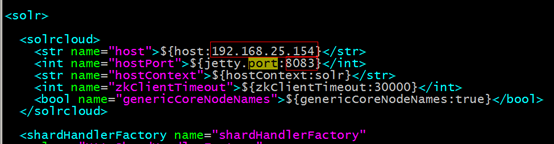
-
第三步
修改每一台solr的tomcat 的 bin目录下catalina.sh文件中加入DzkHost指定zookeeper服务器地址:
JAVA_OPTS="-DzkHost=192.168.25.154:2181,192.168.25.154:2182,192.168.25.154:2183"
(可以使用vim的查找功能查找到JAVA_OPTS的定义的位置,然后添加)
-
第四步
重新启动tomcat。
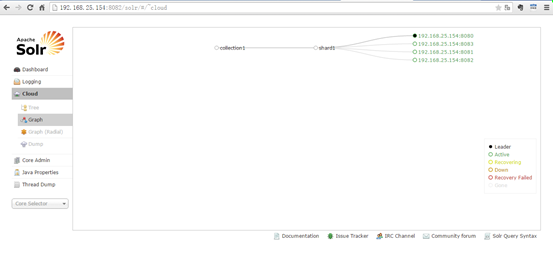
一个主节点多个备份节点,集群只有一片。
-
第五步
创建一个两片的collection,每片是一主一备。
使用以下命令创建:
http://192.168.25.154:8080/solr/admin/collections?action=CREATE&name=collection2&numShards=2&replicationFactor=2
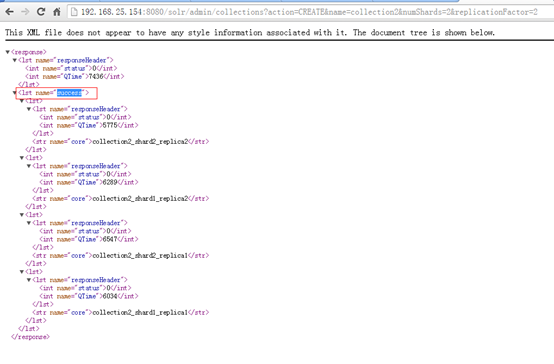

-
第六步
删除collection1.
http://192.168.25.154:8080/solr/admin/collections?action=DELETE&name=collection1
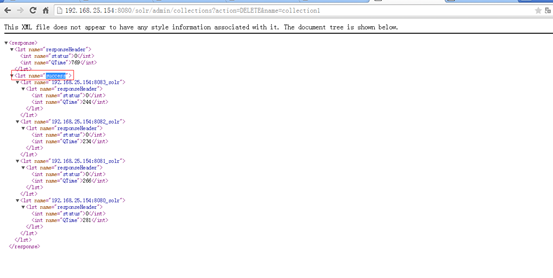
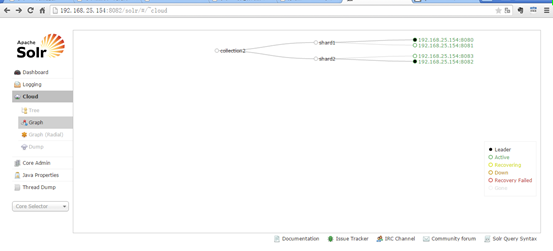
-
Solr集群的使用
使用solrj操作集群环境的索引库。
-
Solrj测试
public class SolrCloudTest {
@Test
public void testAddDocument() throws Exception {
//创建一个和solr集群的连接
//参数就是zookeeper的地址列表,使用逗号分隔
String zkHost = "192.168.25.154:2181,192.168.25.154:2182,192.168.25.154:2183";
CloudSolrServer solrServer = new CloudSolrServer(zkHost);
//设置默认的collection
solrServer.setDefaultCollection("collection2");
//创建一个文档对象
SolrInputDocument document = new SolrInputDocument();
//向文档中添加域
document.addField("id", "test001");
document.addField("item_title", "测试商品");
//把文档添加到索引库
solrServer.add(document);
//提交
solrServer.commit();
}
@Test
public void deleteDocument() throws SolrServerException, IOException {
//创建一个和solr集群的连接
//参数就是zookeeper的地址列表,使用逗号分隔
String zkHost = "192.168.25.154:2181,192.168.25.154:2182,192.168.25.154:2183";
CloudSolrServer solrServer = new CloudSolrServer(zkHost);
//设置默认的collection
solrServer.setDefaultCollection("collection2");
solrServer.deleteByQuery("*:*");
solrServer.commit();
}
}
-
Solrj和spring集成
修改spring的配置文件,添加集群版的配置:
<!-- 集群版 -->
<bean id="cloudSolrServer" class="org.apache.solr.client.solrj.impl.CloudSolrServer">
<constructor-arg name="zkHost" value="192.168.25.154:2181,192.168.25.154:2182,192.168.25.154:2183"></constructor-arg>
<property name="defaultCollection" value="collection2"></property>
</bean>
-
课程计划
1、把系统部署到生产环境。切换到redis集群、solr集群
2、安装mysql
3、项目部署,使用tomcat的热部署。
4、项目总结
5、面试中遇到的问题
-
Mysql的安装
-
查看mysql的安装路径:
-
[root@bogon ~]# whereis mysql
mysql: /usr/bin/mysql /usr/lib/mysql /usr/share/mysql /usr/share/man/man1/mysql.1.gz
-
查看mysql的安装包:
[root@bogon ~]# rpm -qa|grep mysql
mysql-community-client-5.6.26-2.el6.i686
mysql-community-release-el6-5.noarch
mysql-community-common-5.6.26-2.el6.i686
mysql-community-libs-5.6.26-2.el6.i686
mysql-community-server-5.6.26-2.el6.i686
[root@bogon ~]#
-
卸载mysql
[root@bogon ~]# yum remove mysql
删除mysql的数据库文件:删除/var/llib/mysql目录
-
安装mysql
第一步:从oracle官方网站下载linux系统对应的mysql的yum源包。

第二步:把yum源包上传到linux,安装。
[root@bogon ~]# yum localinstall mysql-community-release-el6-5.noarch.rpm
[root@bogon ~]# yum install mysql-server
第三步:启动mysql
[root@bogon ~]# service mysqld start

第四步:给root用户设置密码
[root@bogon ~]# /usr/bin/mysqladmin -u root password 'root'
第五步:远程连接授权
GRANT ALL PRIVILEGES ON *.* TO 'myuser'@'%' IDENTIFIED BY 'mypassword' WITH GRANT OPTION;
注意:'myuser'、'mypassword' 需要替换成实际的用户名和密码。
mysql> GRANT ALL PRIVILEGES ON *.* TO 'root'@'%' IDENTIFIED BY 'root' WITH GRANT OPTION;
-
Rpm安装法
如果没有网络环境可以使用参考资料中的mysql-rpm文件夹下的mysql安装包来安装。
[root@bogon mysql-rpm]# rpm -ivh mysql-community-*
安装后,启动服务、设置密码、远程授权后既可以使用。
-
系统部署
-
域名的分配
-
一级域名:taotao.com
二级域名:www.taotao.com
系统
域名
Taotao-manager
manager.taotao.com
Taotao-rest
rest.taotao.com
Taotao-portal
www.taotao.com
Taotao-search
search.taotao.com
Taotao-sso
sso.taotao.com
Taotao-order
order.taotao.com
所有的域名应该指向反向代理服务器。
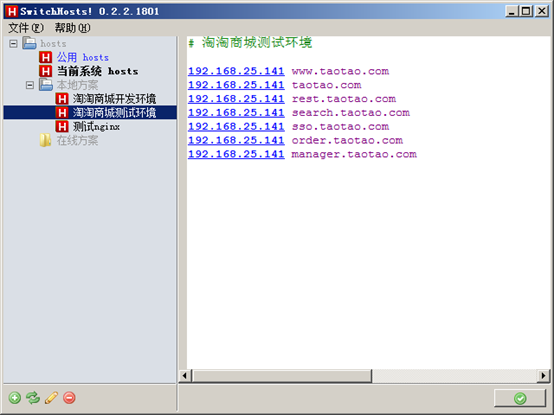
-
需要几台服务器部署系统
服务器规划:
图片服务器:1台虚拟机
Redis集群:1台
Solr集群:1台
Mysql:1台
Taotao-manager:1台
Taotao-porta:1台
Taotao-rest、taotao-search、taotao-sso、taotao-order:1台(4个tomcat实例)
Nginx:1台
共需要8台虚拟机。
-
Taotao-manager部署
-
要求的环境
-
Linux系统 centos6.4
Jdk 1.7版本
Tomcat 7
-
Tomcat热部署
-
Tomcat的配置
我们需要实现热部署,自然就需要通过maven操作tomcat,所以就需要maven取得操作tomcat的权限,现在这一步就是配置tomcat的可操作权限.
在tomcat的安装目录下,修改conf / tomcat-user.xml文件,在<tomcat-users> 节点下面增加如下配置:
<role rolename="manager-gui" />
<role rolename="manager-script" />
<user username="tomcat" password="tomcat" roles="manager-gui, manager-script"/>
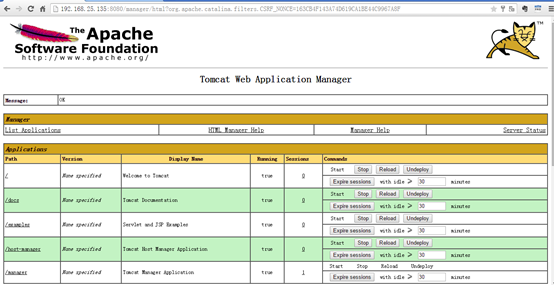
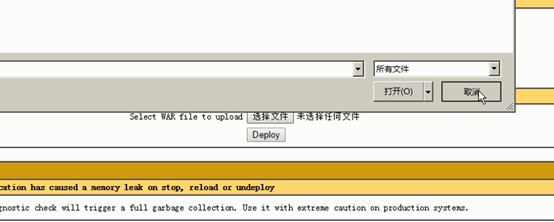
-
使用maven插件实现热部署
需要使用maven的tomcat插件。Apache官方提供的tomcat插件。
使用maven打包——》上传——热部署一气呵成。
Maven的配置
修改项目的pom.xml文件,在<build> 节点下面增加如下配置:tomcat7的配置
<build>
<plugins>
<!-- 配置Tomcat插件 -->
<plugin>
<groupId>org.apache.tomcat.maven</groupId>
<artifactId>tomcat7-maven-plugin</artifactId>
<configuration>
<port>8081</port>
<path>/</path>
<url>http://192.168.25.136:8080/manager/text</url>
<username>tomcat</username>
<password>tomcat</password>
</configuration>
</plugin>
</plugins>
</build>
-
热部署
热部署之前,修改配置文件中的数据库配置、调用服务的配置为生产环境需要的ip及端口。
执行以下命令:
初次部署可以使用 "tomcat7:deploy" 命令
如果已经部署过使用 "tomcat7:redeploy" 命令
部署跳过测试:
tomcat7:redeploy -DskipTests
-
服务层部署
部署四个工程包括taotao-rest、taotao-search、taotao-sso、taotao-order
第一步:配置4个tomcat实例
taotao-rest、8080
taotao-search、8081
taotao-sso、8082
taotao-order、8083
第二步:修改项目中的db配置及调用服务的配置,修改ip地址及端口号。
第三步:修改pom文件指定工程要部署的路径,及用户名、密码。
-
Taotao-portal的部署
第一步:修改taotao-portal中所有的localhost包括配置文件中、js中。
第二步:修改pom文件指定部署的服务器及用户名密码
第三步:安装服务器及tomcat。
第四步:部署taotao-portal
-
Nginx配置
#user nobody;
worker_processes 1;
#error_log logs/error.log;
#error_log logs/error.log notice;
#error_log logs/error.log info;
#pid logs/nginx.pid;
events {
worker_connections 1024;
}
http {
include mime.types;
default_type application/octet-stream;
#log_format main '$remote_addr - $remote_user [$time_local] "$request" '
# '$status $body_bytes_sent "$http_referer" '
# '"$http_user_agent" "$http_x_forwarded_for"';
#access_log logs/access.log main;
sendfile on;
#tcp_nopush on;
#keepalive_timeout 0;
keepalive_timeout 65;
#gzip on;
upstream manager.taotao.com {
server 192.168.25.135:8080;
}
upstream rest.taotao.com {
server 192.168.25.136:8080;
}
upstream search.taotao.com {
server 192.168.25.136:8081;
}
upstream sso.taotao.com {
server 192.168.25.136:8082;
}
upstream order.taotao.com {
server 192.168.25.136:8083;
}
upstream www.taotao.com {
server 192.168.25.137:8080;
}
server {
listen 80;
server_name manager.taotao.com;
#charset koi8-r;
#access_log logs/host.access.log main;
location / {
proxy_pass http://manager.taotao.com;
index index.html index.htm;
}
}
server {
listen 80;
server_name rest.taotao.com;
#charset koi8-r;
#access_log logs/host.access.log main;
location / {
proxy_pass http://rest.taotao.com;
index index.html index.htm;
}
}
server {
listen 80;
server_name search.taotao.com;
#charset koi8-r;
#access_log logs/host.access.log main;
location / {
proxy_pass http://search.taotao.com;
index index.html index.htm;
}
}
server {
listen 80;
server_name sso.taotao.com;
#charset koi8-r;
#access_log logs/host.access.log main;
location / {
proxy_pass http://sso.taotao.com;
index index.html index.htm;
}
}
server {
listen 80;
server_name order.taotao.com;
#charset koi8-r;
#access_log logs/host.access.log main;
location / {
proxy_pass http://order.taotao.com;
index index.html index.htm;
}
}
server {
listen 80;
server_name www.taotao.com;
#charset koi8-r;
#access_log logs/host.access.log main;
location / {
proxy_pass http://www.taotao.com;
index index.html index.htm;
}
}
}
-
系统部署完成
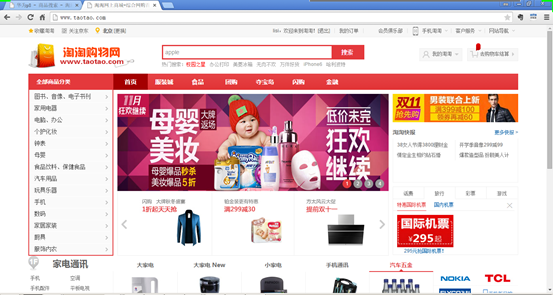
-
补充知识点
日志处理:
第一步:
需要引入log4j、Slf4j的jar包。
第二步:需要有log4j.properties配置文件。
http://blog.csdn.net/edward0830ly/article/details/8250412
log4j.rootLogger=DEBUG, stdout, R
log4j.appender.stdout=org.apache.log4j.ConsoleAppender
log4j.appender.stdout.layout=org.apache.log4j.PatternLayout
# Pattern to output the caller's file name and line number.
#log4j.appender.stdout.layout.ConversionPattern=%5p [%t] (%F:%L) - %m%n
# Print the date in ISO 8601 format
log4j.appender.stdout.layout.ConversionPattern=%-d{yyyy-MM-dd HH:mm:ss,SSS} [%t] [%c]-[%p] %m%n
log4j.appender.R=org.apache.log4j.RollingFileAppender
log4j.appender.R.File=taotao.log
log4j.appender.R.MaxFileSize=100KB
# Keep one backup file
log4j.appender.R.MaxBackupIndex=1
log4j.appender.R.layout=org.apache.log4j.PatternLayout
log4j.appender.R.layout.ConversionPattern=%-d{yyyy-MM-dd HH:mm:ss,SSS} [%t] [%c]-[%p] %m%n
# Print only messages of level WARN or above in the package com.foo.
log4j.logger.com.foo=WARN
public class JedisTest {
private static final Logger LOGGER = LoggerFactory.getLogger(JedisTest.class);
@Test
public void testJedisSingle() {
//创建一个jedis的对象。
Jedis jedis = new Jedis("192.168.25.153", 6379);
//调用jedis对象的方法,方法名称和redis的命令一致。
jedis.set("key1", "jedis test");
String string = jedis.get("key1");
System.out.println(string);
//关闭jedis。
jedis.close();
}
/**
* 使用连接池
*/
@Test
public void testJedisPool() {
//创建jedis连接池
JedisPool pool = new JedisPool("192.168.25.153", 6379);
//从连接池中获得Jedis对象
Jedis jedis = pool.getResource();
String string = jedis.get("key1");
System.out.println(string);
//关闭jedis对象
jedis.close();
pool.close();
}
/**
* 集群版测试
* <p>Title: testJedisCluster</p>
* <p>Description: </p>
*/
@Test
public void testJedisCluster() {
LOGGER.debug("调用redisCluster开始");
HashSet<HostAndPort> nodes = new HashSet<>();
nodes.add(new HostAndPort("192.168.25.153", 7001));
nodes.add(new HostAndPort("192.168.25.153", 7002));
nodes.add(new HostAndPort("192.168.25.153", 7003));
nodes.add(new HostAndPort("192.168.25.153", 7004));
nodes.add(new HostAndPort("192.168.25.153", 7005));
nodes.add(new HostAndPort("192.168.25.153", 7006));
LOGGER.info("创建一个JedisCluster对象");
JedisCluster cluster = new JedisCluster(nodes);
LOGGER.debug("设置key1的值为1000");
cluster.set("key1", "1000");
LOGGER.debug("从Redis中取key1的值");
String string = cluster.get("key1");
System.out.println(string);
cluster.close();
try {
int a = 1/0;
} catch (Exception e) {
LOGGER.error("系统发送异常", e);
}
}
/**
* 单机版测试
* <p>Title: testSpringJedisSingle</p>
* <p>Description: </p>
*/
@Test
public void testSpringJedisSingle() {
ApplicationContext applicationContext = new ClassPathXmlApplicationContext("classpath:spring/applicationContext-*.xml");
JedisPool pool = (JedisPool) applicationContext.getBean("redisClient");
Jedis jedis = pool.getResource();
String string = jedis.get("key1");
System.out.println(string);
jedis.close();
pool.close();
}
@Test
public void testSpringJedisCluster() {
ApplicationContext applicationContext = new ClassPathXmlApplicationContext("classpath:spring/applicationContext-*.xml");
JedisCluster jedisCluster = (JedisCluster) applicationContext.getBean("redisClient");
String string = jedisCluster.get("key1");
System.out.println(string);
jedisCluster.close();
}
}
-
面试中的问题回答
-
淘淘网站并发数:
-
1000-2000左右并发。
-
人员配置
产品经理:3人,确定需求以及给出产品原型图。
项目经理:1人,项目管理。
前端团队:5人,根据产品经理给出的原型制作静态页面。
后端团队:20人,实现产品功能。
测试团队:5人,测试所有的功能。
运维团队:3人,项目的发布以及维护。
-
开发周期
采用迭代开发的方式进行,一般一次迭代的周期为一个月左右。
-
你说你用了redis缓存,你redis存的是什么格式的数据,是怎么存的
redis中存储的都是key-value格式的。拿商品数据来说,key就是商品id,value是商品相关信息的json数据。
-
你前台portal采用4台服务器集群部署,那能前台高并发访问性能提上去了,那数据库会不会造成一个瓶颈,这一块你是怎么处理的?
portal系统在高并发的情况下如果每次请求都请求都查询数据库确实会出现数据库的瓶颈。为了降低数据库压力,在服务层会添加一个缓存,用redis实现,这样的话请求先到缓存中查找是否有缓存的内容,如果有直接从缓存中取数据,如果没有再到数据库中查询。这样数据库的压力就不会那么大了。
-
你购物车存cookie里边 可以实现不登录就可以使用购物车 那么我现在没有登录把商品存购物车了 然后登录了 然后我换台电脑并且登录了还能不能看见我购物车的信息?如果看不到怎么做到cookie同步,就是在另外一台电脑上可以看到购物车信息
回答:
淘淘商城现阶段使用的仅仅是把购物车的商品写入cookie中,这样服务端基本上么有存储的压力。但是弊端就是用户更换电脑后购物车不能同步。打算下一步这么实现:当用户没有登录时向购物车添加商品是添加到cookie中,当用户登录后购物车的信息是存储在redis中的并且是跟用户id向关联的,此时你更换电脑后使用同一账号登录购物车的信息就会展示出来。
-
如果用户一直添加购物车添加商品怎么办?并且他添加一次你查询一次数据库?互联网上用户那么多,这样会对数据库造成很大压力你怎么办?
当前我们使用cookie的方式来保存购物车的数据,所以当用户往购物车中添加商品时,并不对数据库进行操作。将来把购物车商品放入redis中,redis是可以持久化的可以永久保存,此时就算是频繁的往购物车中添加数据也没用什么问题。
-
电商活动解决方案
-
电商活动倒计时方案:
-
-
-
确定一个基准时间。可以使用一个sql语句从数据库中取出一个当前时间。SELECT NOW();
-
活动开始的时间是固定的。
-
使用活动开始时间-基准时间可以计算出一个秒为单位的数值。
-
在redis中设置一个key(活动开始标识)。设置key的过期时间为第三步计算出来的时间。
-
展示页面的时候取出key的有效时间。Ttl命令。使用js倒计时。
-
一旦活动开始的key失效,说明活动开始。
-
需要在活动的逻辑中,先判断活动是否开始。
-
秒杀方案:
-
-
把商品的数量放到redis中。
-
秒杀时使用decr命令对商品数量减一。如果不是负数说明抢到。
-
一旦返回数值是负数说明商品已售完。