版权声明:本文为博主原创文章,可以随意转载,但是必须在开头标明出处。 https://blog.csdn.net/qq_29951983/article/details/78248068
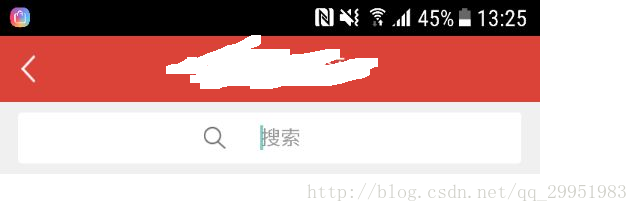
最近的项目大部分用到了搜索功能(妈的感觉产品脑子有屎,为什么要用那么多搜索),而且样式都是这样子的:

这就触及我只是盲区了,android:drawableLeft=""这个方法只能使图片在左面,无法居中显示,所以万般无奈只能考虑重写EditText了
第一步
创建一个类继承AppCompatEditText(惊不惊喜,意不意外)
第二步
第二部我先简单的写一下思路,相对于这种继承已有的控件,是十分的好写的,比起来你要继承View好写的太多了,你不用考虑去画布局,考虑padding,margin等等。
圈1:先去测量整个EditText的宽度,这里注意,你不用去重写onMeasure方法,只需要在onLayout方法去getMeasuredWidth就行了,因为根据自定义View的原理,onLayout在onMeasure之后,你可以很容易的得到整个控件的宽度。
圈2:然后我们需要去测量文字的宽度,具体如何测量,网上有很多的方法:
 Paint paint = new Paint();
        Rect rect = new Rect();
        paint.getTextBounds(hintString, 0, hintString.length(), rect);
        int w = dip2px(getContext(), rect.width());
圈3:通过setBounds方法为图片设置大小,这个方法传递四个参数,分别是左、上、右、下。
    左:整个搜索框的宽/2-文字的宽
    上:0
    右:左+searchDrawable.getIntrinsicWidth()
    下:searchDrawable.getIntrinsicHeight()
圈4:
    这个方法去设置图片即可
    setCompoundDrawables(searchDrawable, null, null, null);
圈5:
    设置文字的居中
    setTextAlignment(TextView.TEXT_ALIGNMENT_CENTER);
完整代码:
public class SearchDemo extends AppCompatEditText {

    private Drawable searchDrawable;
    private int offset;
    private int searchWidth;
    private String hintString;
    private int w;
    private int flag = 0;

    public SearchDemo(Context context) {
        super(context);
        init();
    }

    public SearchDemo(Context context, AttributeSet attrs) {
        super(context, attrs);
        init();
    }

    public SearchDemo(Context context, AttributeSet attrs, int defStyleAttr) {
        super(context, attrs, defStyleAttr);
        init();
    }

    private void init() {
        setOnFocusChangeListener(new OnFocusChangeListener() {
            @Override
            public void onFocusChange(View v, boolean hasFocus) {
                if (hasFocus) {
                    // 获得焦点
                    setTextAlignment(TextView.TEXT_ALIGNMENT_VIEW_START);
                } else {
                    // 失去焦点
                    setTextAlignment(TextView.TEXT_ALIGNMENT_CENTER);
                }
            }
        });
        setTextAlignment(TextView.TEXT_ALIGNMENT_CENTER);
    }

    @Override
    protected void onLayout(boolean changed, int left, int top, int right, int bottom) {
        super.onLayout(changed, left, top, right, bottom);
        //圈1
        searchWidth = getMeasuredWidth();
        hintString = getHint().toString();
        //圈2
        Paint paint = new Paint();
        Rect rect = new Rect();
        paint.getTextBounds(hintString, 0, hintString.length(), rect);
        w = dip2px(getContext(), rect.width());
        offset = searchWidth / 2 - w * 2;
        if (flag == 0) {
            //圈3  //圈4
            setTextDrawable();
        }
        flag++;
    }

    public static int dip2px(Context context, float dpValue) {
        final float scale = context.getResources().getDisplayMetrics().density;
        return (int) (dpValue * scale + 0.5f);
    }

    @Override
    protected void onTextChanged(CharSequence text, int start, int lengthBefore, int lengthAfter) {
        super.onTextChanged(text, start, lengthBefore, lengthAfter);
        if (searchDrawable == null) {
            getDrawable();
        }
        if (length() > 0) {
            setTextAlignment(TextView.TEXT_ALIGNMENT_VIEW_START);
            setCompoundDrawables(null, null, null, null);
        } else if (length() == 0) {
            setTextAlignment(TextView.TEXT_ALIGNMENT_CENTER);
            setTextDrawable();
        }
    }

    void getDrawable() {
        //圈5
        Drawable[] compoundDrawables = getCompoundDrawables();
        searchDrawable = compoundDrawables[0];
    }

    void setTextDrawable() {
        searchDrawable.setBounds(offset, 0, offset + searchDrawable.getIntrinsicWidth(), searchDrawable.getIntrinsicHeight());
        setCompoundDrawables(searchDrawable, null, null, null);
    }
}
可以直接在布局文件中使用(包名我打码了)
<RelativeLayout
        android:layout_width="match_parent"
        android:layout_height="@dimen/px96"
        android:background="@color/f0f0f0">

        <com.****.****.****.****.view.SearchDemo

            android:id="@+id/search"
            android:drawableLeft="@drawable/search_g"
            android:layout_width="match_parent"
            android:layout_height="match_parent"
            android:layout_marginBottom="@dimen/px14"
            android:layout_marginLeft="@dimen/px26"
            android:layout_marginRight="@dimen/px26"
            android:layout_marginTop="@dimen/px14"
            android:background="@drawable/angle_white"
            android:hint="搜索"
            android:textColor="@color/c999999"
            android:textColorHint="@color/c999999"
            android:textSize="@dimen/px28">

        </com.****.****.****.****.view.SearchDemo>

    </RelativeLayout>
图片提供:

效果展示:
QQ群:365473065
公众号: