版权声明:本文为博主原创文章,未经博主允许不得转载。 https://blog.csdn.net/gfd54gd5f46/article/details/78606062
GitHub:https://github.com/asd821300801/Spring-Boot/tree/spring-boot-redis
前期准备
- 创建Spring Boot 工程
......- Maven 加入必要的依赖
<dependency>
    <groupId>org.springframework.boot</groupId>
    <artifactId>spring-boot-starter-data-redis</artifactId>
    <version>1.5.7.RELEASE</version>
</dependency>- application.properties
spring.redis.host=127.0.0.1
spring.redis.port=6379
spring.redis.password=123456
spring.redis.database=0
spring.redis.pool.max-active=8
spring.redis.pool.max-wait=-1
spring.redis.pool.max-idle=500
spring.redis.pool.min-idle=0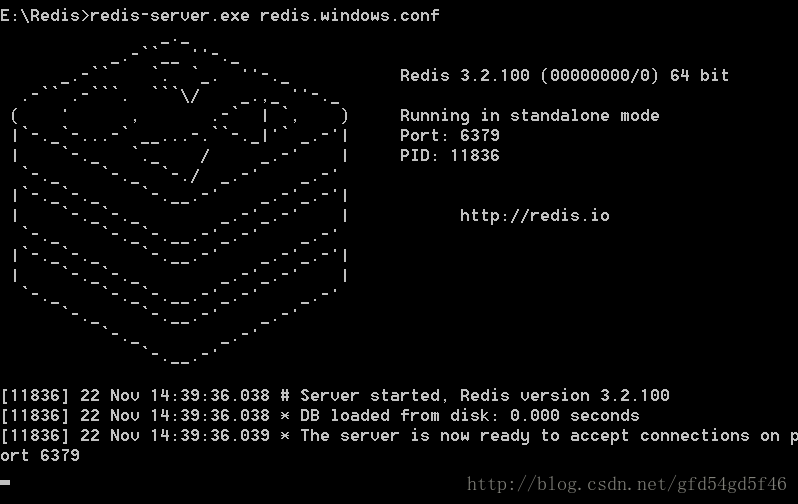
spring.redis.timeout=0- 启动redis
连接redis做相应的数据操作
查看源码可知 redisTemplate 和 StringRedisTemplate已被自动配置,所以我们直接用就可以
org.springframework.boot.autoconfigure.data.redis.RedisAutoConfiguration.class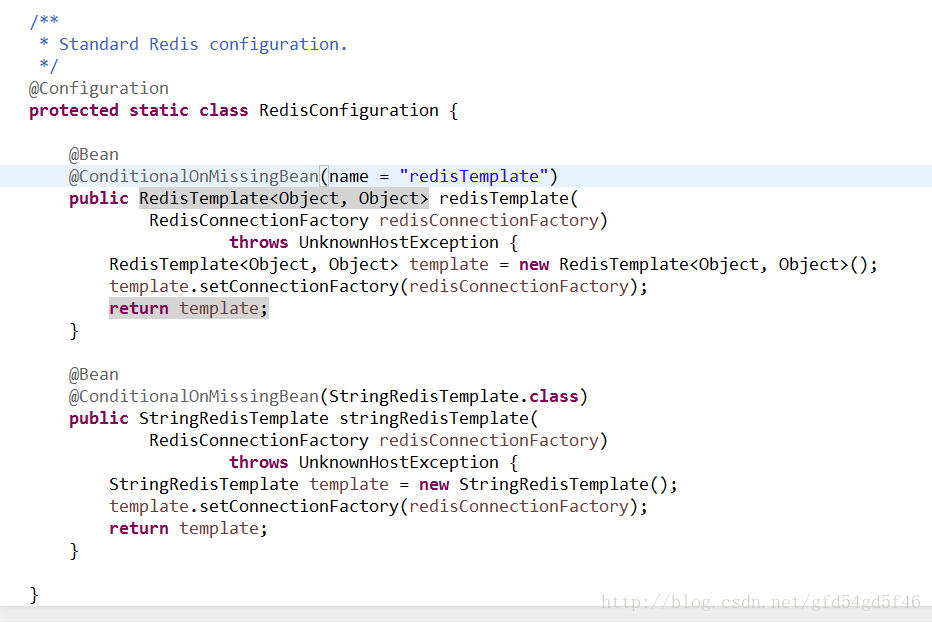
RedisDao.java
import org.springframework.beans.factory.annotation.Autowired;
import org.springframework.data.redis.core.StringRedisTemplate;
import org.springframework.data.redis.core.ValueOperations;
import org.springframework.stereotype.Repository;

@Repository
public class RedisDao {

    @Autowired
    private StringRedisTemplate template;

    public  void setKey(String key,String value){
        ValueOperations<String, String> ops = template.opsForValue();
        ops.set(key,value);
    }

    public String getValue(String key){
        ValueOperations<String, String> ops = this.template.opsForValue();
        return ops.get(key);
    }
}
RedisController.java
import org.springframework.beans.factory.annotation.Autowired;
import org.springframework.web.bind.annotation.RequestMapping;
import org.springframework.web.bind.annotation.RestController;
import com.dao.RedisDao;
@RestController
public class RedisController {
@Autowired
private RedisDao redisDao;
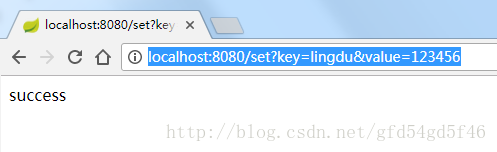
@RequestMapping("/set")
public String set(String key,String value){
redisDao.setKey(key, value);
return "success";
}
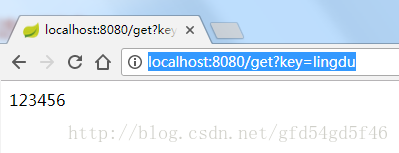
@RequestMapping("/get")
public String get(String key){
return redisDao.getValue(key);
}
}