1.安装mailx
安装mailx:

yum install mailx


vi /etc/mail.rc

set [email protected]
set smtp="smtps://smtp.qq.com:465"
set smtp-auth-user=12345678
set smtp-auth-password=xxxxxxx (邮箱账号的客户端授权码,需要登陆自己的邮箱进行设置,不是邮箱密码)
set smtp-auth=login
set ssl-verify=ignore
set nss-config-dir=/etc/pki/nssdb


测试:

echo test | mailx -v -s "test"  [email protected]
2.生成certificate
解决报错:
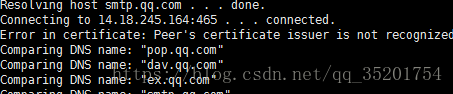
使用上面的配置,邮件是完全能够发出去的,但是发送邮件的时候会提示 “Error in certificate: Peer’s certificate issuer is not recognized.”提示,运行以下命令生成一个证书即可。
mkdir -p /root/.certs/
echo -n | openssl s_client -connect smtp.qq.com:465 | sed -ne '/-BEGIN CERTIFICATE-/,/-END CERTIFICATE-/p' > ~/.certs/qq.crt
certutil -A -n "GeoTrust SSL CA" -t "C,," -d ~/.certs -i ~/.certs/qq.crt
certutil -A -n "GeoTrust Global CA" -t "C,," -d ~/.certs -i ~/.certs/qq.crt
certutil -L -d /root/.certs
生成完成之后,修改 mail.rc 邮件配置,修改 nss-config-dir 为上面命令生成的 /root/.certs,保存即可
3.shell脚本
创建一个shell脚本如下:
#/bin/bash
#author:findyou
help(){
   echo "eg: $0 [Subject] [address] [content_file] [file]"
   echo ""
   exit 1
}

sub="the mail"

cDate=`date +%Y%m%d`

if [ ! -n "$1" ] ; then
    help
else
    mail_to=$1
    echo "      Send Mail to ${mail_to}"
fi

if [ ! -n "$3" ] ; then
    mail -s 'the mail' ${mail_to}<$2
else
    mail -s 'the mail' -a $3 ${mail_to}<$2
fi
调用:./mail_send.sh [email protected] /opt/send.log