版权声明:本文为博主原创文章,未经博主允许不得转载。 https://blog.csdn.net/u013255127/article/details/51315529
1、注册友盟账号
2、添加应用
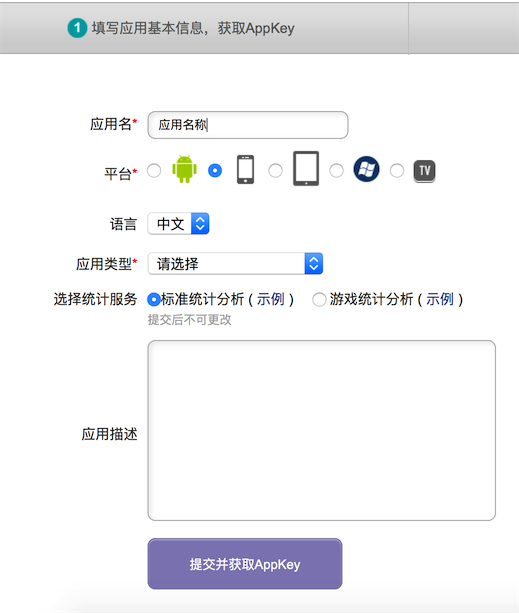
填写应用信息
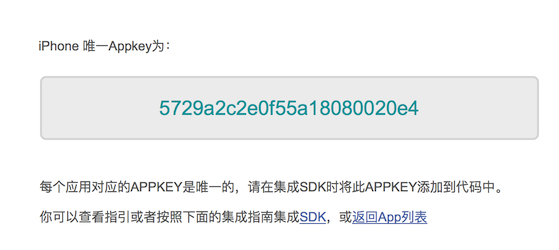
得到AppKey
3、使用CocoaPods集成友盟分享
在Podfile中增加一行
pod ‘UMengSocial’, ‘~> 5.0’
下载
pod install
4、设置AppKey
    func application(application: UIApplication, didFinishLaunchingWithOptions launchOptions: [NSObject: AnyObject]?) -> Bool {

        UMSocialData.setAppKey("友盟AppKey")

        return true
    }
5、微信分享
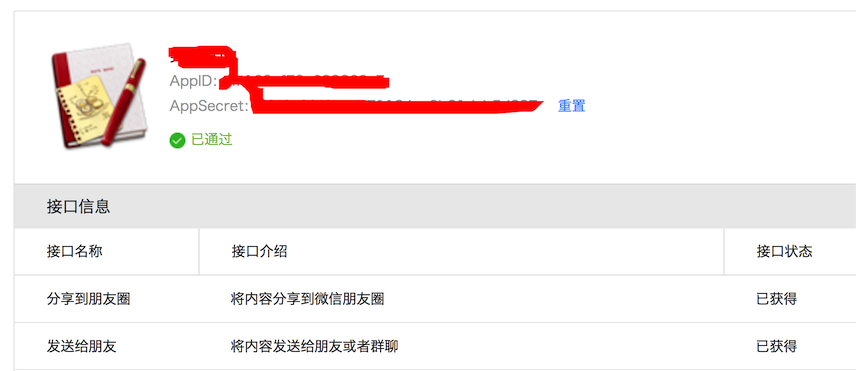
注册微信应用
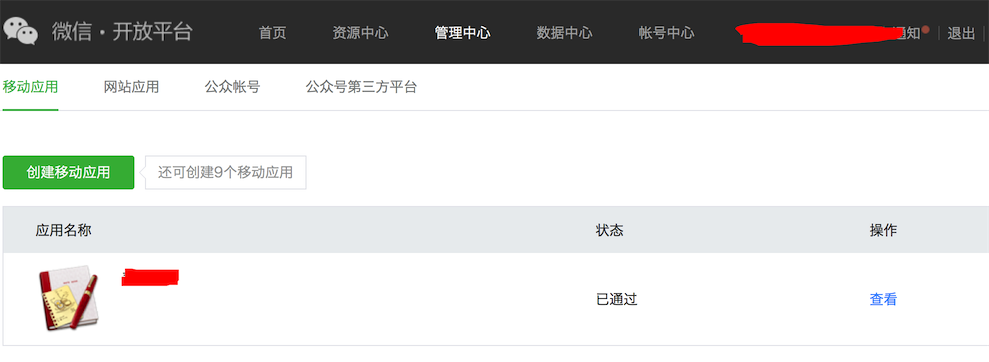
获取AppID和AppSecret
6、添加微信AppID和AppSecret
AppDelegate
    func application(application: UIApplication, didFinishLaunchingWithOptions launchOptions: [NSObject: AnyObject]?) -> Bool {
        UMSocialData.setAppKey("友盟AppKey")
        UMSocialWechatHandler.setWXAppId("微信AppID", appSecret: "微信AppSecret", url: "跳转的网址")
        return true
    }
配置URL schemes
在你的工程设置项,targets 一栏下,选中自己的 target,在 Info->URL Types 中添加 URL Schemes,添加xcode的url scheme为微信应用appId,例如“wxd9a39c7122aa6516”

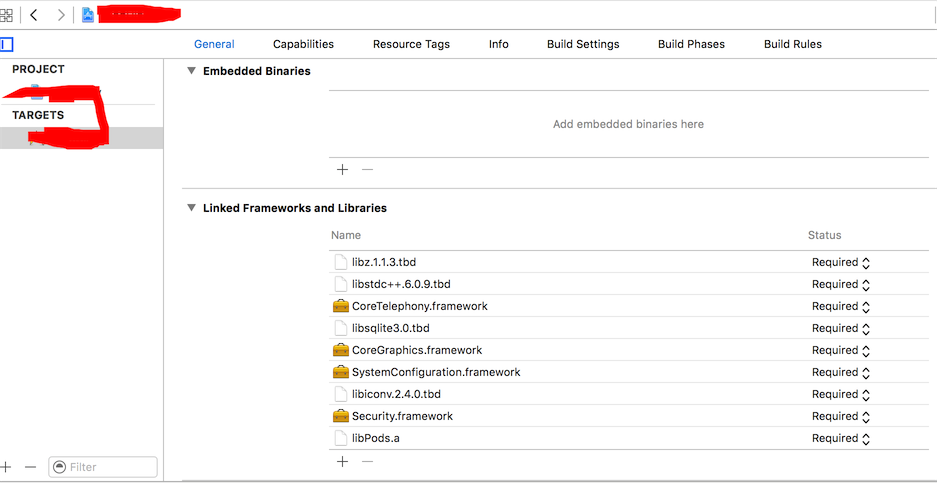
添加SDK依赖的系统库文件。
在Xcode中打开工程配置文件,选择“summary”一栏。在“summary”中选择“Linked Frameworks and Libraries”一栏,点击“+”图标添加下面八个库文件,分别是
Security.framework
libiconv.dylib
SystemConfiguration.framework
CoreGraphics.Framework
libsqlite3.dylib
CoreTelephony.framework
libstdc++.dylib
libz.dylib
7、设置分享内容
func shareFoodDiary(){
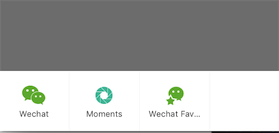
UMSocialSnsService.presentSnsIconSheetView(self, appKey: "5729562b67e58e173f002f20", shareText: "测试", shareImage: nil, shareToSnsNames: [UMShareToWechatSession,UMShareToWechatTimeline,UMShareToWechatFavorite], delegate: self)
}
func didFinishGetUMSocialDataInViewController(response: UMSocialResponseEntity!) {
if response.responseCode == UMSResponseCodeSuccess {
print("\(response.data)")
}
}