1、CXF框架:
Apache CXF一个开源的Service框架,CXF简化了构造,集成,面向服务架构(SOA)业务组件与技术的灵活复用。在CXF中,Service使用WSDL标准定义并能够使用各种不同的消息格式(或binding)和网络协议(transports)包括SOAP、XML(通过HTTP或JMS)进行访问。支持多种协议SOAP、POST/HTTP、RESTful、HTTP等。
CXF是一个实现SOA思想框架,依赖spring,核心是org.apache.cxf.Bus(总线),类似于Spring的 ApplicationContext
内置了Jetty是一个serlvet容器。
2、CXF特点:
(1)可以和spring、servlet无缝对接
(2)可以用注解方式来发布webService(@WebService)
(3)能够添加输入、输出拦截器(日志形式,便于观察输入输出)
3、CXF结合springboot发布服务
(1)添加依赖:
<dependency>
	<groupId>org.apache.cxf</groupId>
	<artifactId>cxf-spring-boot-starter-jaxws</artifactId>
	<version>3.2.4</version>
</dependency>
(2)先创建一个实体User:
package com.test.cxfdemo.dao;

import java.io.Serializable;

/**
 * @author yanghao
 * @Description:
 * @date 2018/11/6 9:39
 */
public class User implements Serializable{
    private static final long serialVersionUID = -3628469724795296287L;

    private String userId;
    private String userName;
    private String email;

    public String getUserId() {
        return userId;
    }

    public void setUserId(String userId) {
        this.userId = userId;
    }

    public String getUserName() {
        return userName;
    }

    public void setUserName(String userName) {
        this.userName = userName;
    }

    public String getEmail() {
        return email;
    }

    public void setEmail(String email) {
        this.email = email;
    }

    @Override
    public String toString() {
        return "User{" +
                "userId='" + userId + '\'' +
                ", userName='" + userName + '\'' +
                ", email='" + email + '\'' +
                '}';
    }
}
(3)写服务端接口UserService,以及实现代码UserServiceImpl:
接口UserService:
package com.test.cxfdemo.Impl;

import com.test.cxfdemo.dao.User;

import javax.jws.WebMethod;
import javax.jws.WebParam;
import javax.jws.WebResult;
import javax.jws.WebService;
import javax.jws.soap.SOAPBinding;
import javax.xml.ws.soap.Addressing;

/**
 * @author yanghao
 * @Description:
 * @date 2018/11/6 9:44
 */

@WebService(name = "UserService",
        targetNamespace = "http://www.impl.cxfdemo.test.com")
@SOAPBinding(parameterStyle = SOAPBinding.ParameterStyle.BARE)
@Addressing(enabled = true)
public interface UserService {

    @WebMethod  ////标注该方法为webservice暴露的方法,用于向外公布,它修饰的方法是webservice方法,去掉也没影响的,类似一个注释信息
    User getUser(@WebParam(name = "userId") String userId);

    @WebMethod
    @WebResult(name = "String", targetNamespace = "")
    String getUserName(@WebParam(name = "userId") String userId);
}
实现类UserServiceImpl:
package com.test.cxfdemo.Impl;

import com.test.cxfdemo.dao.User;
import org.springframework.stereotype.Component;

import javax.jws.WebService;
import java.util.HashMap;
import java.util.Map;
import java.util.UUID;

/**
 * @author yanghao
 * @Description:
 * @date 2018/11/6 9:49
 */
@WebService(
        serviceName = "UserService", //对外发布的服务名
        targetNamespace = "http://www.impl.cxfdemo.test.com",
        endpointInterface = "com.test.cxfdemo.Impl.UserService")
@Component
public class UserServiceImpl implements UserService {

    private Map<String, User> userMap = new HashMap<>();

    public UserServiceImpl() {
        System.out.println("向实体类插入数据");
        User user = new User();
        user.setUserId(UUID.randomUUID().toString().replace("-", ""));
        user.setUserName("test1");
        user.setEmail("[email protected]");
        userMap.put(user.getUserId(), user);
    }

    @Override
    public String getUserName(String userId) {
        return "userId为:" + userId;
    }

    @Override
    public User getUser(String userId) {
        System.out.println("userMap is " + userMap);
        return userMap.get(userId);
    }
}
CXF发布方式:
package com.test.cxfdemo.CxfConfig;

import com.test.cxfdemo.Impl.UserService;
import org.apache.cxf.Bus;
import org.apache.cxf.jaxws.EndpointImpl;
import org.springframework.beans.factory.annotation.Autowired;
import org.springframework.context.annotation.Bean;
import org.springframework.context.annotation.Configuration;

import javax.xml.ws.Endpoint;

/**
 * @author yanghao
 * @Description:
 * @date 2018/11/6 9:58
 */
@Configuration
public class CxfConfig {

    @Autowired
    private Bus bus;

    @Autowired
    UserService userService;

    @Bean
    public Endpoint endpoint() {
        EndpointImpl endpoint = new EndpointImpl(bus, userService);
        endpoint.publish("/UserService");
        return endpoint;
    }

}
运行即可:

发布成功
网页查看Wsdl:

摘抄别人对wsdl的注解,个人觉得还行:
<?xml version="1.0" ?>
<wsdl:definitions name="CodeLanguageService"
    targetNamespace="http://cxf.service.com/" xmlns:ns1="http://schemas.xmlsoap.org/soap/http"
    xmlns:soap="http://schemas.xmlsoap.org/wsdl/soap/" xmlns:tns="http://cxf.service.com/"
    xmlns:wsdl="http://schemas.xmlsoap.org/wsdl/" xmlns:xsd="http://www.w3.org/2001/XMLSchema">

    <!-- tns 类型的描述 -->
    <wsdl:types>
        <xs:schema elementFormDefault="unqualified" targetNamespace="http://cxf.service.com/"
            version="1.0" xmlns:tns="http://cxf.service.com/" xmlns:xs="http://www.w3.org/2001/XMLSchema">
            <xs:element name="getCodeRank" type="tns:getCodeRank"></xs:element>
            <xs:element name="getCodeRankResponse" type="tns:getCodeRankResponse"></xs:element>
            <xs:complexType name="getCodeRank">
                <xs:sequence>
                    <xs:element name="codeRank" type="xs:int"></xs:element>
                </xs:sequence>
            </xs:complexType>
            <xs:complexType name="getCodeRankResponse">
                <xs:sequence>
                    <xs:element minOccurs="0" name="codeName" type="xs:string"></xs:element>
                </xs:sequence>
            </xs:complexType>
        </xs:schema>
    </wsdl:types>


    <!-- 描述参数及其类型 -->
    <wsdl:message name="getCodeRankResponse">
        <wsdl:part element="tns:getCodeRankResponse" name="parameters">
        </wsdl:part>
    </wsdl:message>

    <wsdl:message name="getCodeRank">
        <wsdl:part element="tns:getCodeRank" name="parameters">
        </wsdl:part>
    </wsdl:message>

    <!-- 暴露出去的方法的描述,以及对应的描述类型 tns-->
    <wsdl:portType name="CodeLanguage">
        <wsdl:operation name="getCodeRank">
            <wsdl:input message="tns:getCodeRank" name="getCodeRank">
            </wsdl:input>
            <wsdl:output message="tns:getCodeRankResponse" name="getCodeRankResponse">
            </wsdl:output>
        </wsdl:operation>
    </wsdl:portType>

    <wsdl:binding name="CodeLanguageServiceSoapBinding" type="tns:CodeLanguage">
        <soap:binding style="document"
            transport="http://schemas.xmlsoap.org/soap/http"></soap:binding>

        <!-- 暴露出去的方法soap格式的描述 -->
        <wsdl:operation name="getCodeRank">
            <soap:operation soapAction="" style="document"></soap:operation>

            <!-- 方法的WSDL参数描述 -->
            <wsdl:input name="getCodeRank">
                <soap:body use="literal"></soap:body>
            </wsdl:input>

            <!-- 方法的WSDL返回值描述 -->
            <wsdl:output name="getCodeRankResponse">
                <soap:body use="literal"></soap:body>
            </wsdl:output>
        </wsdl:operation>
    </wsdl:binding>

    <!-- 暴露出去的服务类的描述 -->
    <wsdl:service name="CodeLanguageService">
        <wsdl:port binding="tns:CodeLanguageServiceSoapBinding"
            name="CodeLanguagePort">
            <soap:address location="http://127.0.0.1:6969/ws/CodeLanguageService"></soap:address>
        </wsdl:port>
    </wsdl:service>

</wsdl:definitions>
内容类似。
4、客户端调用代码:
package com.test.cxfdemo.Test;

import com.test.cxfdemo.Impl.UserService;
import org.apache.cxf.endpoint.Client;
import org.apache.cxf.jaxws.JaxWsProxyFactoryBean;
import org.apache.cxf.jaxws.endpoint.dynamic.JaxWsDynamicClientFactory;

/**
 * @author yanghao
 * @Description:
 * @date 2018/11/6 11:33
 */
public class CxfClient {
    public static void main(String[] args) {
        CxfClient.main1();
    }

    /**
     * 1.代理类工厂的方式,需要拿到对方的接口地址
     */
    public static void main1() {
        try {
            // 接口地址
            String address = "http://127.0.0.1:8182/services/UserService?wsdl";
            // 代理工厂
            JaxWsProxyFactoryBean jaxWsProxyFactoryBean = new JaxWsProxyFactoryBean();
            // 设置代理地址
            jaxWsProxyFactoryBean.setAddress(address);
            // 设置接口类型
            jaxWsProxyFactoryBean.setServiceClass(UserService.class);
            // 创建一个代理接口实现
            UserService us = (UserService) jaxWsProxyFactoryBean.create();
            // 数据准备
            String userId = "123456";
            // 调用代理接口的方法调用并返回结果
            String result = us.getUserName(userId);
            System.out.println("返回结果:" + result);
        } catch (Exception e) {
            e.printStackTrace();
        }
    }

    /**
     * 2:动态调用
     */
    public static void main2() {
        // 创建动态客户端
        JaxWsDynamicClientFactory dcf = JaxWsDynamicClientFactory.newInstance();
        Client client = dcf.createClient("http://127.0.0.1:8182/services/UserService?wsdl");
        // 需要密码的情况需要加上用户名和密码
        // client.getOutInterceptors().add(new ClientLoginInterceptor(USER_NAME, PASS_WORD));
        Object[] objects = new Object[0];
        try {
            // invoke("方法名",参数1,参数2,参数3....);
            objects = client.invoke("getUserName", "123456");
            System.out.println("返回数据:" + objects[0]);
        } catch (java.lang.Exception e) {
            e.printStackTrace();
        }
    }

}
提供了两种方式,一个是代理模式,还有一个是动态调用。但是在公司项目使用中,这两个方法并不实用!
最好通过生成代码方式:
5、CXF自动生成客户端调用代码:
CXF 项目的主页地址是:
http://cxf.apache.org/
下载地址是:
http://cxf.apache.org/download.html
可以下载 解压版也可以下载安装版的。 具体的下载页面如下:
这里下载解压版就可以了。
下载镜像地址: http://mirror.bit.edu.cn/apache/cxf/3.0.1/apache-cxf-3.0.1.zip
将下载的文件拷贝到响应的文件目录下或者将CXF配置到classPath中:
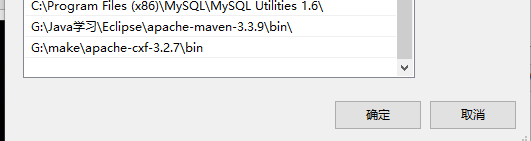
到对应bin目录下或者在对应工程src下,输入:

这样在工程目录下就会自动生成客户端调用代码:

6、最后给一个客户端生成代码的小例子(非一个工程,但是调用方式一样)
public class CPClientTest {

    public static void main(String[] args) throws MalformedURLException {
        ChargePointService_Service fartory = new ChargePointService_Service(new URL("file:/C:/Users/DELL/Desktop/***********.wsdl"));
        ChargePointService chargePointService = fartory.getChargePointServiceSoap12();

        Client client = ClientProxy.getClient(chargePointService);
        List<Interceptor<? extends Message>> outInterceptors = client.getOutInterceptors();
        List<Interceptor<? extends Message>> inInterceptors = client.getInInterceptors();

        // 客户端的日志出拦截器
        outInterceptors.add(new LoggingOutInterceptor());
        inInterceptors.add(new LoggingInInterceptor());

        String chargeBoxIdentity = "chargedot_0";
        RemoteStopTransactionRequest remoteStopTransactionRequest = new RemoteStopTransactionRequest();
        remoteStopTransactionRequest.setTransactionId(12345678);
        RemoteStopTransactionResponse remoteStopTransactionResponse = chargePointService.remoteStopTransaction(remoteStopTransactionRequest, chargeBoxIdentity);
        System.out.println(remoteStopTransactionResponse.getStatus().value());

    }

}
今天的学习记录就到这儿。
最后记录一个CXF的apche官网解释:http://cxf.apache.org/docs/springboot.html#SpringBoot-AutoConfiguration