12.1 LNMP架构介绍
1. 和LAMP不同的是,提供web服务的是Nginx
2. 并且php是作为一个独立服务存在的,这个服务叫做php-fpm
3. Nginx直接处理静态请求,动态请求会转发给php-fpm

12.2 MySQL安装
删除之前安装的mysql
1. 查看之前安装mysql是否开启 :[root@hao-01 ~]# ps aux |grep mysql
2. 关闭之前安装的mysql服务 :[root@hao-01 ~]# service mysqld stop
3. 删除之前安装的mysql目录 :[root@hao-01 ~]# rm -rf /usr/local/mysql
4. 删除之前安装的mysql启动脚本 :[root@hao-01 ~]# rm -rf /etc/init.d/mysqld
5. 删除之前安装的mysql目录 :[root@hao-01 ~]# rm -rf /data/mysql
安装mysql(以下以MySQL5.7为例,与5.6的不同点在于会自动生成密码)
安装下载工具: yum -y install wget
wget 是一个从网络上自动下载文件的自由工具,支持通过 HTTP、HTTPS、FTP 三个最常见的 TCP/IP协议 下载,并可以使用 HTTP 代理
1. 进入下载安装包目录 :[root@hao-01 ~]# cd /usr/local/src/
2.下载mysql安装包 :[root@hao-01 src]# wget http://mirrors.163.com/mysql/Downloads/MySQL-5.7/mysql-5.7.23-linux-glibc2.12-x86_64.tar.gz # 部分软件更新下载:[r.aminglinux.com]
3. 解包解压mysql包 :[root@hao-01 src]# tar zxvf mysql-5.6.35-linux-glibc2.5-x86_64.tar.gz

4. 解压的mysql包,移动到/usr/local/目录下,并重命名为mysql:
(注意:/usr/local/目录下,不能已经存在mysql目录,
如果存在,再用mv移动,会放在已存的mysql目录下面,而不会覆盖!!!)
[root@hao-01 src]# mv mysql-5.6.35-linux-glibc2.5-x86_64 /usr/local/mysql
5. 列出mysql目录下所有文件目录(检查是否和下图一样) :
[root@hao-01 local]# ls /usr/local/mysql
[root@localhost mysql]# ls /usr/local/mysql
bin COPYING docs include lib man README share support-files
6. 进入mysql目录下 :[root@hao-01 src]# cd /usr/local/mysql
7. 创建mysql用户 :
[root@hao-01 mysql]#groupadd mysql #创建用户组
[root@hao-01 mysql]# useradd -r -s /sbin/nologin -g mysql mysql -d /usr/local/mysql ---新建msyql用户禁止登录shell
8. 根目录下,创建data目录,如果有/data目录了,可以不在创建 :
(注意:如果根目录下已存在data目录,一定要把/data里的mysql目录先删除!!!)
[root@hao-01 mysql]# rm -rf /data/mysql
[root@hao-01 mysql]#mkdir -p /data/mysql
改变目录属有者
[root@hao-01 mysql]#cd /usr/local/mysql
[root@hao-01 mysql]#pwd
[root@hao-01 mysql]#chown -R mysql .
[root@hao-01 mysql]#chgrp -R mysql .
[root@hao-01 mysql]#chown -R mysql /data/mysql
9. 安装依赖包 :
[root@hao-01 mysql]# yum install -y perl-Data-Dumper
[root@hao-01 mysql]# yum install -y libaio
10.配置参数
[root@hao-01 mysql]# bin/mysqld --initialize --user=mysql --basedir=/usr/local/mysql --datadir=/data/mysql #注意末尾生成的临时密码
[root@localhost mysql]# bin/mysqld --initialize --user=mysql --basedir=/usr/local/mysql --datadir=/data/mysql
2018-10-20T15:18:18.400607Z 0 [Warning] TIMESTAMP with implicit DEFAULT value is deprecated. Please use --explicit_defaults_for_timestamp server option (see documentation for more details).
2018-10-20T15:18:19.087259Z 0 [Warning] InnoDB: New log files created, LSN=45790
2018-10-20T15:18:19.219532Z 0 [Warning] InnoDB: Creating foreign key constraint system tables.
2018-10-20T15:18:19.308938Z 0 [Warning] No existing UUID has been found, so we assume that this is the first time that this server has been started. Generating a new UUID: 601891f6-d47b-11e8-a6af-000c29cbc6ef.
2018-10-20T15:18:19.314977Z 0 [Warning] Gtid table is not ready to be used. Table 'mysql.gtid_executed' cannot be opened.
2018-10-20T15:18:19.319328Z 1 [Note] A temporary password is generated for root@localhost: yiulsb&oq4vZ
[root@hao-01 mysql]#bin/mysql_ssl_rsa_setup --datadir=/data/mysql
检验上一条命令执行是否有错?(数值0为没问题) :[root@hao-01 mysql]# echo $?
11. 编辑my.cnf配置文件 :
# cd /usr/local/mysql/support-files
# cp my-default.cnf /etc/my.cnf # MySQL的my.cnf文件不再需要(解决5.7.18下没有my-default.cnf)
# cp mysql.server /etc/init.d/mysql
# vim /etc/init.d/mysql
修改以下内容:
basedir=/user/local/mysql
datadir=/data/mysql
12. 启动mysqld服务:[root@hao-01 mysql]# /etc/init.d/mysql start
[root@localhost support-files]# /etc/init.d/mysql start
Starting MySQL.2018-10-20T15:50:18.565074Z mysqld_safe error: log-error set to '/var/log/mariadb/mariadb.log', however file don't exists. Create writable for user 'mysql'.
ERROR! The server quit without updating PID file (/var/lib/mysql/localhost.localdomain.pid).
解决办法:mv /etc/my.cnf /etc/my.cnf.bak 我是使用源码在虚拟机上安装的MySQL,安装目录为/usr/local/mysql/,相关配置文件都保存在此目录。并且有检查/etc/my.cnf文件是否存在(存在就将其重命名/删除)。
[root@localhost mysql]# /etc/init.d/mysql start
Starting MySQL.Logging to '/data/mysql/localhost.localdomain.err'.
. SUCCESS!
9启动mysql
# /etc/init.d/mysql start #--登陆
# mysql -hlocalhost -uroot -p
--如果出现:-bash: mysql: command not found
--就执行: # ln -s /usr/local/mysql/bin/mysql /usr/bin --没有出现就不用执行
--输入第6步生成的临时密码
--修改密码
mysql> set password=password('root');
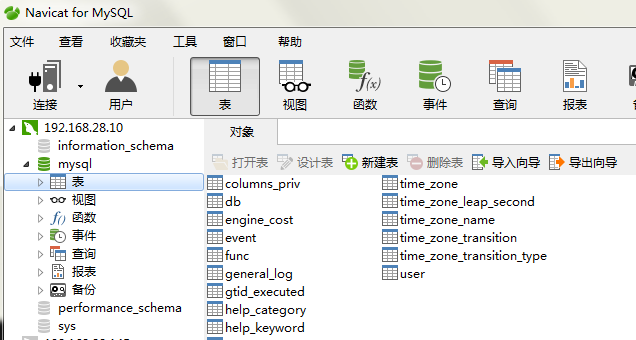
--使用grant all privileges on来更改用户对应某些库的远程权限
mysql>grant all privileges on *.* to 'root'@'%' identified by 'root'; # mysql数据库设置远程连接权限
mysql>flush privileges;
grant all privileges on *.* to 'root'@'%' identified by 'root';
ERROR 1064 (42000): You have an error in your SQL syntax; check the manual that corresponds to your MySQL server version for the right syntax to use near ' identified by 'root'' at line 1 #在上述的sql语句中,列名称使用的是单引号而不是反引号,所以会就报了这个错误出来。
语法模板
grant all privileges on 库名.表名 to '用户名'@'IP地址' identified by '密码' with grant option;
flush privileges;
--查看表
mysql> use mysql;
mysql> select host,user from user;
--这里就可以使用远程连接测试了;
10添加系统路径
# vim /etc/profile
添加:
export PATH=/usr/local/mysql/bin:$PATH
如下:
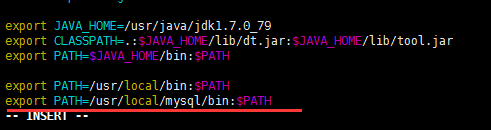
# source /etc/profile
11配置mysql自动启动
# chmod 755 /etc/init.d/mysql
# chkconfig --add mysql
# chkconfig --level 345 mysql on
搜索mysql进程,查看是否启动 ?[root@hao-01 mysql]# ps aux |grep mysql
查看mysql对应的端口号(3306) :[root@hao-01 mysql]# netstat -lntp # yum install -y net-tools
[root@localhost mysql]# netstat -lntp
Active Internet connections (only servers)
Proto Recv-Q Send-Q Local Address Foreign Address State PID/Program name
tcp 0 0 0.0.0.0:22 0.0.0.0:* LISTEN 761/sshd
tcp 0 0 127.0.0.1:25 0.0.0.0:* LISTEN 927/master
tcp6 0 0 :::3306 :::* LISTEN 11063/mysqld
tcp6 0 0 :::22 :::* LISTEN 761/sshd
tcp6 0 0 ::1:25 :::* LISTEN 927/master
补充:
--退出mysql命令窗口 #exit
--查看mysql状态 #service mysql status
--停止mysql #service mysql stop
--启动mysql #service mysql start
附my.cnf(这是一个配置mysql配置文件,暂时可以不用管,如你想钻研 你可以百度或google “mysql my.cnf 配置详情”)

12.3-12.4 PHP安装(上下)
1. 进入下载安装包目录 :[root@hao-01 ~]# cd /usr/local/src/
2. 下载php-5.6.30版本安装包 :[root@hao-01 src]# wget http://cn2.php.net/distributions/php-5.6.32.tar.bz2
3. 解包解压php安装包:[root@hao-01 src]# tar -jxvf php-5.6.32.tar.bz2
[root@localhost src]# tar -jxvf php-5.6.32.tar.bz2
tar (child): bzip2:无法 exec: 没有那个文件或目录
tar (child): Error is not recoverable: exiting now
tar: Child returned status 2
tar: Error is not recoverable: exiting now解决办法 安装bzip2工具 yum search bzip2 //查询安装包 yum -y install bzip2.x86_64
1. rpm -qa|grep 软件包缩写 #查找软件
2. rpm -ql 软件包完整名 #显示安装地址
4. 进入php目录下 :[root@hao-01 src]# cd php-5.6.32
5. 如果之前编译过php-5.6.30包,进入这个包下解除删除之前的编译 :[root@hao-01 php-5.6.32]# make clean
如果是第一次或者重新下载的PHP包,不用此步骤
6. 编译 :
[root@hao-01 php-5.6.32]# ./configure --prefix=/usr/local/php-fpm --with-config-file-path=/usr/local/php-fpm/etc --enable-fpm --with-fpm-user=php-fpm --with-fpm-group=php-fpm --with-mysql=/usr/local/mysql --with-mysqli=/usr/local/mysql/bin/mysql_config --with-pdo-mysql=/usr/local/mysql --with-mysql-sock=/tmp/mysql.sock --with-libxml-dir --with-gd --with-jpeg-dir --with-png-dir --with-freetype-dir --with-iconv-dir --with-zlib-dir --with-mcrypt --enable-soap --enable-gd-native-ttf --enable-ftp --enable-mbstring --enable-exif --with-pear --with-curl --with-openssl
[root@localhost php-5.6.32]# ./configure --prefix=/usr/local/php-fpm --with-.....
configure: WARNING: you should use --build, --host, --target
configure: WARNING: invalid host type: --with-openssl
checking for grep that handles long lines and -e... /usr/bin/grep
checking for egrep... /usr/bin/grep -E
checking for a sed that does not truncate output... /usr/bin/sed
checking build system type... Invalid configuration ` --with-openssl': machine ` --with' not recognized
configure: error: /bin/sh ./config.sub --with-openssl failed故障分析:yum install -y openssl openssl-devel 并 openssl version -a 空格重新改
configure: error: in `/usr/local/src/php-5.6.32':
configure: error: no acceptable C compiler found in $PATH
See `config.log' for more details故障排除:yum install -y gcc 并 重新执行命令
configure: error: xml2-config not found Please check your libxml2 installation.
故障排除:yum install -y libxml2-devel 并 重新执行命令
configure: error: Please reinstall the libcurl distribution -
easy.h should be in <curl-dir>/include/curl/故障排除:yum install -y curl curl-devel 并 重新执行安装命令
If configure fails try --with-vpx-dir=<DIR>
configure: error: jpeglib.h not found.故障排除:rpm -qa | grep libjpeg 表示没有 并 yum -y install libjpeg-turbo libjpeg-devel 并 重新执行安装命令
configure: error: png.h not found.
故障排除: yum -y install libpng 并 yum -y install libpng-devel并 重新执行安装命令
If configure fails try --with-xpm-dir=<DIR>
configure: error: freetype-config not found.故障排除:yum -y install freetype-devel 并 重新执行安装命令
configure: error: mcrypt.h not found. Please reinstall libmcrypt.
故障排除:yum install -y epel-release 并 yum install -y libmcrypt-devel
两个不能一起安装,因为CentOs6默认的yum源没有libmcrypt-devel这个包,只能借助epel的yum源,所以先epel,再libmcrypt
7. 检验上一条命令执行是否有错?(数值0为没问题)[root@hao-01 mariadb]# echo $?

11. make和make install执行 :[root@hao-01 php-5.6.30]# make && make install #(编译速度有点慢)
12. 拷贝当前目录下php.iniproduction,并重命名 :[root@hao-01 php-5.6.30]# cp php.ini-production /usr/local/php-fpm/etc/php-ini #生产
13. 在/usr/local/php-fpm/etc/目录下,创建php-fpm.conf文件,并写入内容 :[root@hao-01 php-5.6.30]# vim /usr/local/php-fpm/etc/php-fpm.conf # 添加内容如下:https://coding.net/u/aminglinux/p/aminglinux-book/git/blob/master/D15Z/php-fpm.conf
[global]
pid = /usr/local/php-fpm/var/run/php-fpm.pid
error_log = /usr/local/php-fpm/var/log/php-fpm.log
[www]
listen = /tmp/php-fcgi.sock
listen.mode = 666
user = php-fpm
group = php-fpm
pm = dynamic
pm.max_children = 50
pm.start_servers = 20
pm.min_spare_servers = 5
pm.max_spare_servers = 35
pm.max_requests = 500
rlimit_files = 1024
14. 拷贝当前目录sapi下的fpm/init.d.php-fpm(启动脚本),并重命名 :[root@hao-01 php-5.6.30]# cp sapi/fpm/init.d.php-fpm /etc/init.d/php-fpm
15. 给php-fpm(启动脚本) 设定755权限 :[root@hao-01 php-5.6.32]# chmod 755 /etc/init.d/php-fpm #启动脚本
16. 添加php-fpm服务 到服务列表 :[root@hao-01 php-5.6.32]# chkconfig --add php-fpm
17. 设定 php-fpm服务 开机启动 :[root@hao-01 php-5.6.32]# chkconfig php-fpm on
18. 创建php-fpm用户 :[root@hao-01 php-5.6.32]# useradd php-fpm
19. 检测php-fpm配置文件是否有错 ?[root@hao-01 php-5.6.30]# /usr/local/php-fpm/sbin/php-fpm -t![]()
20. 启动php-fpm服务 :[root@hao-01 php-5.6.30]# service php-fpm start
[root@localhost php-5.6.32]# service php-fpm start
Starting php-fpm [21-Oct-2018 15:59:08] ERROR: [pool www] cannot get uid for user 'php-fpm'
[21-Oct-2018 15:59:08] ERROR: FPM initialization failed failed故障排除:useradd php-fpm没有执行
21. 搜索php-fpm服务是否启动 ?[root@hao-01 php-5.6.30]# ps aux |grep php-fpm
12.5 Nginx介绍
1. Nginx官网 nginx.org,最新版1.13,最新稳定版1.12
2. Nginx应用场景:web服务、反向代理(代理一台)、负载均衡(代理两台)
3. Nginx著名分支,淘宝基于Nginx开发的Tengine,使用上和Nginx一致,服务名,配置文件名都一样,和Nginx的最大区别在于Tenging增加了一些定制化模块,在安全限速方面表现突出,另外它支持对js,css合并
4. Nginx核心+lua相关的组件和模块组成了一个支持lua的高性能web容器openresty,参考:http://jinnianshilongnian.iteye.com/blog/2280928
12.6 Nginx安装
1. 进入下载安装包目录 :[root@hao-01 ~]# cd /usr/local/src/
2. 下载nginx安装包 :[root@hao-01 src]# wget http://nginx.org/download/nginx-1.14.0.tar.gz
3. 解包解压nginx安装包 :[root@hao-01 src]# tar zxvf nginx-1.14.0.tar.gz
4. 进入解压nginx包下 :[root@hao-01 src]# cd nginx-1.14.0
5. 编译nginx :[root@hao-01 nginx-1.12.1]# ./configure --prefix=/usr/local/nginx
6. make和make install :[root@hao-01 nginx-1.12.1]# make && make install
7. 在/etc/init.d/目录下,创建nginx启动脚本,并写入内容:[root@hao-01 nginx-1.12.1]# vim /etc/init.d/nginx
https://coding.net/u/aminglinux/p/aminglinux-book/git/blob/master/D15Z/etc_init.d_nginx
写入内容如下:
#!/bin/bash
# chkconfig: - 30 21
# description: http service.
# Source Function Library
. /etc/init.d/functions
# Nginx SettingsNGINX_SBIN="/usr/local/nginx/sbin/nginx"
NGINX_CONF="/usr/local/nginx/conf/nginx.conf"
NGINX_PID="/usr/local/nginx/logs/nginx.pid"
RETVAL=0
prog="Nginx"start()
{
echo -n $"Starting $prog: "
mkdir -p /dev/shm/nginx_temp
daemon $NGINX_SBIN -c $NGINX_CONF
RETVAL=$?
echo
return $RETVAL
}stop()
{
echo -n $"Stopping $prog: "
killproc -p $NGINX_PID $NGINX_SBIN -TERM
rm -rf /dev/shm/nginx_temp
RETVAL=$?
echo
return $RETVAL
}reload()
{
echo -n $"Reloading $prog: "
killproc -p $NGINX_PID $NGINX_SBIN -HUP
RETVAL=$?
echo
return $RETVAL
}restart()
{
stop
start
}configtest()
{
$NGINX_SBIN -c $NGINX_CONF -t
return 0
}case "$1" in
start)
start
;;
stop)
stop
;;
reload)
reload
;;
restart)
restart
;;
configtest)
configtest
;;
*)
echo $"Usage: $0 {start|stop|reload|restart|configtest}"
RETVAL=1
esacexit $RETVAL
8. 给nginx(启动脚本) 设定755权限 :[root@hao-01 nginx-1.12.1]# chmod 755 /etc/init.d/nginx
9. 添加 nginx服务 到服务列表 :[root@hao-01 nginx-1.12.1]# chkconfig --add nginx
[root@localhost nginx-1.14.0]# chkconfig --add nginx
服务 nginx 不支持 chkconfig
故障解决: #!/bin/bash #chkconfig:、、、 脚本/etc/init.d/nginx没写全 chkconfig
10. 设定 nginx服务 开机启动 :[root@hao-01 nginx-1.12.1]# chkconfig nginx on
11. 进入.../conf目录下 :[root@hao-01 nginx-1.12.1]# cd /usr/local/nginx/conf/
12. 先把.../conf目录下的nginx.conf文件重命名为其他名称 :[root@hao-01 conf]# mv nginx.conf nginx.conf.1
13. 在.../conf目录下,创建新的nginx.conf文件,并写入内容 :[root@hao-01 conf]# vim /usr/local/nginx/conf/nginx.conf
https://coding.net/u/aminglinux/p/aminglinux-book/git/blob/master/D15Z/nginx.conf
写入内容如下:
user nobody nobody;
worker_processes 2;
error_log /usr/local/nginx/logs/nginx_error.log crit;
pid /usr/local/nginx/logs/nginx.pid;
worker_rlimit_nofile 51200;events
{
use epoll;
worker_connections 6000;
}http
{
include mime.types;
default_type application/octet-stream;
server_names_hash_bucket_size 3526;
server_names_hash_max_size 4096;
log_format combined_realip '$remote_addr $http_x_forwarded_for [$time_local]'
' $host "$request_uri" $status'
' "$http_referer" "$http_user_agent"';
sendfile on;
tcp_nopush on;
keepalive_timeout 30;
client_header_timeout 3m;
client_body_timeout 3m;
send_timeout 3m;
connection_pool_size 256;
client_header_buffer_size 1k;
large_client_header_buffers 8 4k;
request_pool_size 4k;
output_buffers 4 32k;
postpone_output 1460;
client_max_body_size 10m;
client_body_buffer_size 256k;
client_body_temp_path /usr/local/nginx/client_body_temp;
proxy_temp_path /usr/local/nginx/proxy_temp;
fastcgi_temp_path /usr/local/nginx/fastcgi_temp;
fastcgi_intercept_errors on;
tcp_nodelay on;
gzip on;
gzip_min_length 1k;
gzip_buffers 4 8k;
gzip_comp_level 5;
gzip_http_version 1.1;
gzip_types text/plain application/x-javascript text/css text/htm
application/xml;server
{
listen 80;
server_name localhost;
index index.html index.htm index.php;
root /usr/local/nginx/html;location ~ \.php$
{
include fastcgi_params;
fastcgi_pass unix:/tmp/php-fcgi.sock;
fastcgi_index index.php;
fastcgi_param SCRIPT_FILENAME /usr/local/nginx/html$fastcgi_script_name;
}
}
}
14. 检测nginx配置文件是否有错 ?[root@hao-01 conf]# /usr/local/nginx/sbin/nginx -t
[root@localhost conf]# /usr/local/nginx/sbin/nginx -t
nginx: [emerg] unexpected "}" in /usr/local/nginx/conf/nginx.conf:63
nginx: configuration file /usr/local/nginx/conf/nginx.conf test failed故暂解决:62行行尾有空格,更改下空格格式
15. 启动nginx服务 :[root@hao-01 conf]# /etc/init.d/nginx start
16. 搜索nginx服务是否启动 ?[root@hao-01 conf]# ps aux |grep nginx

17. 创建一个1.php测试文件 :[root@hao-01 conf]# vim /usr/local/nginx/html/test.php
写入内容如下:
<?php
echo "This is nginx test page.";
18. curl访问localhost域名下的1.php测试文件 :[root@hao-01 conf]# curl localhost/test.php -I
[root@localhost conf]# curl localhost/test.php -I
HTTP/1.1 200 OK
Server: nginx/1.14.0
Date: Sun, 21 Oct 2018 09:04:23 GMT
Content-Type: application/octet-stream
Content-Length: 39
Last-Modified: Sun, 21 Oct 2018 09:03:44 GMT
Connection: keep-alive
ETag: "5bcc40f0-27"
Accept-Ranges: bytes