版权声明:本文为博主原创文章,未经博主允许不得转载。 https://blog.csdn.net/abc6368765/article/details/82392151
效果图:
在项目中资源素材文件
添加plist文件
添加名叫AFGridItem的model对象,用来代替我们从plist文件中解析得到的字典数据,并添加通过字典获取对象实例和初始化对象的方法。
#import <Foundation/Foundation.h>

@interface AFGridItem : NSObject
@property (nonatomic, copy) NSString *name;
@property (nonatomic, copy) NSString *icon;


- (instancetype)initWithDict:(NSDictionary *)dict;
+ (instancetype)appWithDict:(NSDictionary *)dict;

@end
#import "AFGridItem.h"
@implementation AFGridItem
- (instancetype)initWithDict:(NSDictionary *)dict
{
if (self = [super init]) {
self.name = dict[@"name"];
self.icon = dict[@"icon"];
}
return self;
}
+ (instancetype)appWithDict:(NSDictionary *)dict
{
return [[self alloc] initWithDict:dict];
}
@end- 为项目新建名叫AFGridItemView.xlib文件,xlib文件中添加一个空的View控件,并为这个空的View控件添加UIImageView,UIButton,UILabel控件,为UIButton添加点击响应事件,户点击下载,在界面中间出现一个类似于Android上面的toast提示
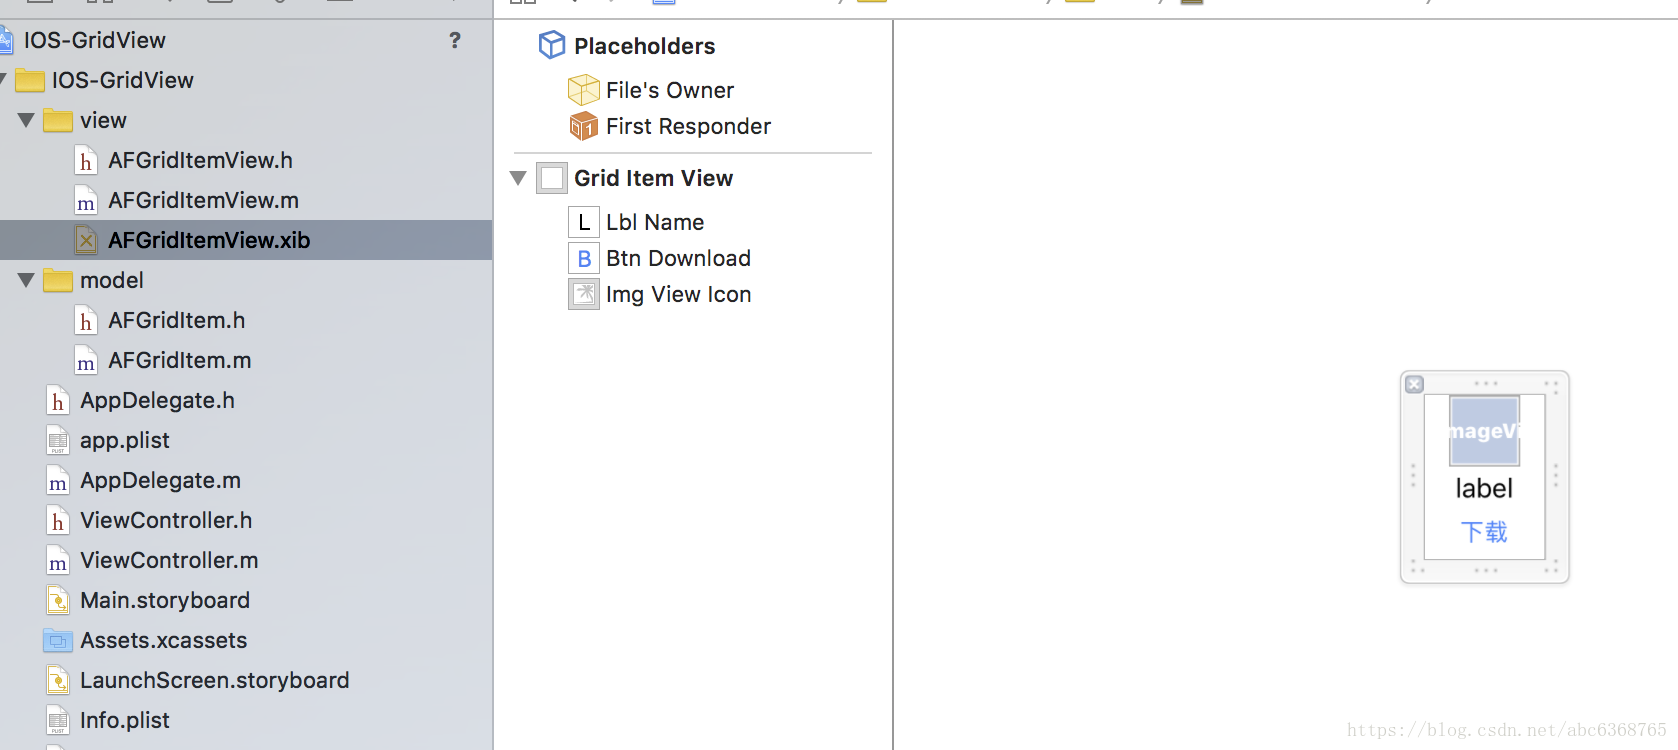
- 为AFGridItemView.xlib文件中的View控件添加一个对应的类AFGridItemView,为View中的UIImageView,UIButton,UILabel添加对应的变量,并为UIButton添加点击响应事件,并添加通过传入AFGridItem对象来初始化的方法。
#import <UIKit/UIKit.h>
@class AFGridItem;
@interface AFGridItemView : UIView
@property (nonatomic, strong) AFGridItem *model;

// 为自定义view封装一个类方法, 这个类方法的作用就是创建一个view对象
+ (instancetype)appView;
@end
#import "AFGridItem.h"
#import "AFGridItemView.h"
@interface AFGridItemView ()
@property (weak, nonatomic) IBOutlet UIImageView *imgViewIcon;
@property (weak, nonatomic) IBOutlet UILabel *lblName;
@property (weak, nonatomic) IBOutlet UIButton *btnDownload;
- (IBAction)btnDownloadClick:(UIButton *)sender;
- (IBAction)down:(id)sender;
@end
@implementation AFGridItemView
+ (instancetype)appView
{
// 1. 通过xib创建每个应用(UIView)
// 通过动态加载xib文件创建里面的view
// 1.1> 找到应用的根目录
NSBundle *rootBundle = [NSBundle mainBundle]; // //NSLog(@"%@", [mainBundle bundlePath]);
// 1.2> 在应用程序根目录下取搜索对应的Xib(nib)文件
return [[rootBundle loadNibNamed:@"AFGridItemView" owner:nil options:nil] lastObject];
}
// 重写model属性的set方法
- (void)setModel:(AFGridItem *)model
{
// 先赋值
_model = model;
// 解析模型数据, 把模型数据赋值给UIView中的各个子控件
self.imgViewIcon.image = [UIImage imageNamed:model.icon];
self.lblName.text = model.name;
}
// 下载按钮的单击事件
- (IBAction)btnDownloadClick:(UIButton *)sender {
// 1. 禁用当前被点击的按钮
sender.enabled = NO;
// 2. 弹出一个消息提醒框(这个消息提醒框其实就是一个UILabel)
UILabel *lblMsg = [[UILabel alloc] init];
// 2.1 设置lblMsg的显示文字
lblMsg.text = @"正在下载...";
// 2.2 设置lblMsg的背景色
lblMsg.backgroundColor = [UIColor blackColor];
// 2.3 设置lblMsg的frame
CGFloat viewW = self.superview.frame.size.width;
CGFloat viewH = self.superview.frame.size.height;
CGFloat msgW = 200;
CGFloat msgH = 30;
CGFloat msgX = (viewW - msgW) / 2;
CGFloat msgY = (viewH - msgH) * 0.5;
lblMsg.frame = CGRectMake(msgX, msgY, msgW, msgH);
// 2.4 设置label的文字颜色
lblMsg.textColor = [UIColor redColor];
// 2.5 设置label居中显示
lblMsg.textAlignment = NSTextAlignmentCenter;
// 2.6 设置文字粗体
lblMsg.font = [UIFont boldSystemFontOfSize:17];
// 2.7 设置Label的透明度
lblMsg.alpha = 0.0; // 一开始把透明度设置为0, 然后通过动画的方式慢慢的改变透明度
// 2.8 设置Label为"圆角"
// 设置四个角的“半径”
lblMsg.layer.cornerRadius = 10;
// 把多余的部分裁剪掉
lblMsg.layer.masksToBounds = YES;
// 2.9通过动画的方式来显示Label
// [UIView animateWithDuration:2.0 animations:^{
// lblMsg.alpha = 0.6;
// }];
// 开启一个动画, 这个动画要执行1.5秒钟
[UIView animateWithDuration:1.5 animations:^{
// 动画代码: 将透明度变成0.6
lblMsg.alpha = 0.6;
} completion:^(BOOL finished) {
// 当上面的动画执行完毕以后执行这个代码
if (finished) {
// 这个代码的含义是, 隔一段时间后再启动另外一个动画
// 这个动画的执行时间是1.5秒钟, 但是这个动画会在1.0秒之后再开始执行
// UIViewAnimationOptionCurveLinear表示是匀速执行动画
[UIView animateWithDuration:1.5 delay:1.0 options:UIViewAnimationOptionCurveLinear animations:^{
// 这个动画的代码
lblMsg.alpha = 0;
} completion:^(BOOL finished) {
if (finished) {
// 当Label的透明度变成0以后, 再把这个Label从view中移除
[lblMsg removeFromSuperview];
}
}];
}
}];
// 3. 把lblMsg加到控制器所管理的那个view上
[self.superview addSubview:lblMsg];
}
- (IBAction)down:(id)sender {
// 1. 禁用当前被点击的按钮
//sender.enabled = NO;
// 2. 弹出一个消息提醒框(这个消息提醒框其实就是一个UILabel)
UILabel *lblMsg = [[UILabel alloc] init];
// 2.1 设置lblMsg的显示文字
lblMsg.text = @"正在下载...";
// 2.2 设置lblMsg的背景色
lblMsg.backgroundColor = [UIColor blackColor];
// 2.3 设置lblMsg的frame
CGFloat viewW = self.superview.frame.size.width;
CGFloat viewH = self.superview.frame.size.height;
CGFloat msgW = 200;
CGFloat msgH = 30;
CGFloat msgX = (viewW - msgW) / 2;
CGFloat msgY = (viewH - msgH) * 0.5;
lblMsg.frame = CGRectMake(msgX, msgY, msgW, msgH);
// 2.4 设置label的文字颜色
lblMsg.textColor = [UIColor redColor];
// 2.5 设置label居中显示
lblMsg.textAlignment = NSTextAlignmentCenter;
// 2.6 设置文字粗体
lblMsg.font = [UIFont boldSystemFontOfSize:17];
// 2.7 设置Label的透明度
lblMsg.alpha = 0.0; // 一开始把透明度设置为0, 然后通过动画的方式慢慢的改变透明度
// 2.8 设置Label为"圆角"
// 设置四个角的“半径”
lblMsg.layer.cornerRadius = 10;
// 把多余的部分裁剪掉
lblMsg.layer.masksToBounds = YES;
// 2.9通过动画的方式来显示Label
// [UIView animateWithDuration:2.0 animations:^{
// lblMsg.alpha = 0.6;
// }];
// 开启一个动画, 这个动画要执行1.5秒钟
[UIView animateWithDuration:1.5 animations:^{
// 动画代码: 将透明度变成0.6
lblMsg.alpha = 0.6;
} completion:^(BOOL finished) {
// 当上面的动画执行完毕以后执行这个代码
if (finished) {
// 这个代码的含义是, 隔一段时间后再启动另外一个动画
// 这个动画的执行时间是1.5秒钟, 但是这个动画会在1.0秒之后再开始执行
// UIViewAnimationOptionCurveLinear表示是匀速执行动画
[UIView animateWithDuration:1.5 delay:1.0 options:UIViewAnimationOptionCurveLinear animations:^{
// 这个动画的代码
lblMsg.alpha = 0;
} completion:^(BOOL finished) {
if (finished) {
// 当Label的透明度变成0以后, 再把这个Label从view中移除
[lblMsg removeFromSuperview];
}
}];
}
}];
// 3. 把lblMsg加到控制器所管理的那个view上
[self.superview addSubview:lblMsg];
}
@end- 在ViewController里面加载AFGridItemView.xlib文件,使用AFGridItemView来接受其中的View控件,把之前解析plist文件得到的AFGridItem数据赋值给对应的AFGridItemView对象的UIImageView,UILabel控件上。
具体代码如下
#import "ViewController.h"
#import "AFGridItem.h"
#import "AFGridItemView.h"

@interface ViewController ()


// 用来保存所有应用的数据
@property (nonatomic, strong) NSArray *apps;

@end

@implementation ViewController

// shift + option + command + 左 (折叠所有的代码)
// shift + option + command + 右 (展开所有的代码)

// 重写apps属性的get方法, 进行懒加载数据
- (NSArray *)apps
{
    if (_apps == nil) {
        // 加载数据
        // 1. 获取app.plist文件在手机上的路径
        NSString *path = [[NSBundle mainBundle] pathForResource:@"app.plist" ofType:nil];

        // 2. 根据路径加载数据
        NSArray *arrayDict = [NSArray arrayWithContentsOfFile:path];

        // 3. 创建一个可变数据用来保存一个一个的模型对象
        NSMutableArray *arrayModels = [NSMutableArray array]; // 一个空的可变数组

        // 4. 循环字典数组, 把每个字典对象转换成一个模型对象
        for (NSDictionary *dict in arrayDict) {
            // 创建一个模型
            AFGridItem *model = [AFGridItem appWithDict:dict];

            // 把模型加到arrayModels中
            [arrayModels addObject:model];
        }

        _apps = arrayModels;
    }
    return _apps;
}


- (void)viewDidLoad {
    [super viewDidLoad];

    // 假设每行的应用的个数
    int columns = 3;

    // 获取控制器所管理的view的宽度
    CGFloat viewWidth = self.view.frame.size.width;

    // 每个应用的宽和高
    CGFloat appW = 75;
    CGFloat appH = 90;
    CGFloat marginTop = 30; // 第一行距离顶部的距离
    CGFloat marginX = (viewWidth - columns * appW) / (columns + 1);
    CGFloat marginY = marginX; // 假设每行之间的间距与marginX相等

    for (int i = 0; i < self.apps.count; i++) {

        // 获取当前这个应用的数据字典
        AFGridItem *appModel = self.apps[i];


        // 1. 通过xib创建每个应用(UIView)
        // 通过动态加载xib文件创建里面的view
        // 1.1> 找到应用的根目录
        NSBundle *rootBundle = [NSBundle mainBundle]; // //NSLog(@"%@", [mainBundle bundlePath]);
        // 1.2> 在应用程序根目录下取搜索对应的Xib(nib)文件
        AFGridItemView *appView = [[rootBundle loadNibNamed:@"AFGridItemView" owner:nil options:nil] lastObject];


        // 2.2 设置appView的frame属性
        // 计算每个单元格所在的列的索引
        int colIdx = i % columns;
        // 计算每个单元格的行索引
        int rowIdx = i / columns;

        CGFloat appX = marginX + colIdx * (appW + marginX);
        CGFloat appY = marginTop + rowIdx * (appH + marginY);
        appView.frame = CGRectMake(appX, appY, appW, appH);


        // 3. 将appView加到self.view(控制器所管理的那个view)
        [self.view addSubview:appView];


//        // 4. 设置appView中的子控件的数据
//                UIImageView *imgViewIcon = (UIImageView *)[appView viewWithTag:1000];
//                imgViewIcon.image = [UIImage imageNamed:appModel.icon];

        //        UILabel *lblName = (UILabel *)[appView viewWithTag:2000];
        //        lblName.text = appModel.name;


        //        appView.imgViewIcon.image = [UIImage imageNamed:appModel.icon];
        //        appView.lblName.text = appModel.name;

        // 设置数据
        // 把模型数据设置给“自定义view”的model属性
        // 然后重写model属性的set方法, 在set方法中解析模型对象中的属性, 并把属性值设置给自定义view的各个子控件
        appView.model = appModel;

    }


}

// 按钮的单击事件
- (void)btnDownloadClick
{
    NSLog(@"下载按钮被点击了。。。。");
}

- (void)didReceiveMemoryWarning {
    [super didReceiveMemoryWarning];
    // Dispose of any resources that can be recreated.
}

@end