Table of Contents
一、项目地址
[project page]、[paper]:Girdhar R, Gkioxari G, Torresani L, et al. Detect-and-Track: Efficient Pose Estimation in Videos[C]//Proceedings of the IEEE Conference on Computer Vision and Pattern Recognition. 2018: 350-359.
该项目是基于初始版本的 Detectron代码做的。
二、要求
大多数配置至少需要4个GPU,有些还需要8个GPU。可以通过缩小学习速度和扩大迭代时间来在单个GPU上进行训练,可以在单个GPU上进行测试。不可在CPU上运行。
三、安装
建议用annaconda,它安装 caffe2 and other ops比较简便些.下载项目:
```bash
$ git clone https://github.com/facebookresearch/DetectAndTrack.git
$ cd DetectAndTrack
```- 先决条件和软件设置(作者的)
The code was tested with the following setup:
0. CentOS 6.5
1. Anaconda (python 2.7)
2. OpenCV 3.4.1
3. GCC 4.9
4. CUDA 9.0
5. cuDNN 7.1.2
6. numpy 1.14.2 (needs >=1.12.1, for the [poseval]evaluation scripts)
也就是需要安装[poseval]evaluation scripts
- [`all_pkg_versions.txt`]包含应该使用此代码的软件包的确切版本。 为了避免冲突包,建议在conda中创建一个新环境,并在那里安装所有需求。 它可以通过以下方式完成:可查看conda虚拟环境。如果根据作者的指令会出现错误(见末尾已知错误)。
```bash
$ export ENV_NAME="detect_and_track"  # or any other name you prefer
$ conda create --name $ENV_NAME --file /home/vivian/HelloWorld/tracker/DetectAndTrack/all_pkg_versions.txt python=2.7 anaconda  #你的地址
$ source activate $ENV_NAME
```
#一些指令
1.查看已建好的环境
conda info --envs

2.对虚拟环境中安装额外的包。 即可安装package到your_env_name中
conda install -n your_env_name [package]
#例如numpy :
conda install --name detect_and_track numpy
#也可以激活虚拟环境后,直接conda install numpy

4.激活或停用
# To activate this environment, use
$ conda activate detect_and_track
$ source activate detect_and_trac
$ source activate $ENV_NAME  (也可以)
# To deactivate an active environment, use
#     $ source deactivate
#     $ conda deactivate
还有个参考安装方法:$ conda create --name $ENV_NAME --file all_pkg_versions.txt python=2.7 anaconda -c conda-forge
- [Caffe2]、[caffe2 安装说明](又需要安装 [pytorch] 了)(安装前先下一步op)
关于github解决慢的情况请转至:git clone的问题.
下载完你会发现caffe2下只有三个.txt文件;因为隐藏了.ctrl+h可以显示.
#此为CentOS 6.5的安装方法
```bash
$ cd ..
$ git clone --recursive https://github.com/caffe2/caffe2.git && cd caffe2
$ git submodule update --init
$ mkdir build && cd build
$ export CONDA_PATH=/path/to/anaconda2  # Set this path as per your anaconda installation
$ export CONDA_ENV_PATH=$CONDA_PATH/envs/$ENV_NAME
$ cmake \
    -DCMAKE_PREFIX_PATH=$CONDA_ENV_PATH \
    -DCMAKE_INSTALL_PREFIX=$CONDA_ENV_PATH \
    -Dpybind11_INCLUDE_DIR=$CONDA_ENV_PATH/include \
    -DCMAKE_THREAD_LIBS_INIT=$CONDA_ENV_PATH/lib ..
$ make -j32
$ make install -j32  # This installs into the environment
```- 编译自定义操作
需要一个额外的OP(以`lib/ops/affine_channel_nd_op.*`的形式提供)来运行3D模型,[安装说明]
方法①:将`lib/Ops/affine_Channel_nd_op.*‘文件复制到(`caffe2/modules/detectron/`),并重新编译caffe2。这也将使caffe2可以增加OP,编译caffe2。将使caffe2增加OP。
方法②:(我老是进不了文件夹.)
阅读 [FAQ]。然后为构建自定义操作符(building custom operators)提供cmake支持。所有自定义操作符都内置到一个库中,该库可以从python动态加载。将custom operator implementation放在detectron/ops/ 下,示例:
# 构建自定义操作符库:
cd $DETECTRON && make ops

#检查自定义运算符是否通过测试:
python $DETECTRON/detectron/tests/test_zero_even_op.py
方法③:出现问题;这种方法先安装caffe2
```bash
$ cd ../DetectAndTrack/lib   #这里看出来caffe2是和detectandtrack同级的
$ make && make ops
$ cd ..
$ python tests/test_zero_even_op.py  # test that compilation worked
```- [ COCO API ] 用COCO API读取 train/test文件
```bash
$ # COCOAPI=/path/to/clone/cocoapi
$ git clone https://github.com/cocodataset/cocoapi.git $COCOAPI
$ cd $COCOAPI/PythonAPI
$ # Install into global site-packages
$ make install
$ # Alternatively, if you do not have permissions or prefer
$ # not to install the COCO API into global site-packages
$ python2 setup.py install --user
```
四、数据集与评价
1) [PoseTrack dataset] 。数据集用的是修改的将帧重命名为`%08d`格式,即第一个帧被索引为1(即`00000001.jpg‘)。
①下载数据存入`lib/datasets/data/PoseTrack` (or create a symlink to this location).
②按以上要求对每个视频重命名④⑤⑥⑦⑧⑨
③或者用[`lib/datasets/lists/PoseTrack/v1.0`]下的[`tools/gen_posetrack_json.py`], 转换数据并生成与Detectron兼容的json格式的标签。注意统一数据的路径在`lib/datasets/json_dataset.py`内。
2) [poseval]、[py-motmetrics] 和[MAT/JSON文件]。 评估是PoseTrack的官方评估代码poseval,它的内部使用py-motmetrics 度量,该代码中的数字与从[evaluation server]获得的数字是相匹配的。由于评估是使用提供的代码完成的,因此我们还需要提供带有标签的[MAT/JSON文件],这些标签是此代码用来计算最终数字的标签。
把文件解压为`lib/datasets/data/PoseTrackV1.0_Annots_val_json`
**注意**:
将val文件解压缩到快速本地磁盘中。 出于某种原因,如果这些文件存储在NFS目录中,我会看到略有不同的性能。 这可能是评估代码的问题(组织者也发现在本地和评估服务器上使用他们的代码略有不同的数字),但由于差异很小(整体MOTA约为0.1%),我现在忽略了它。 将val文件存储在快速本地磁盘上时,我可以完全重现本文中报告的性能。 但是在任何磁盘上,趋势应该保持不变,绝对数字只有很小的变化。with only minor variations in the absolute numbers.
五、运行
终于来到了运行部分。
①.在开始之前,在根目录中创建一个空的outputs /`文件夹。 要把 file.yaml /`,并包含`.pkl`模型文件,检测文件等放进去,也可以sym-linked到某个大磁盘,会将所有输出模型,文件存储到此目录中。 命名约定为`outputs / path / to / config / file.yaml /`为方便使用,training模式的代码将自动运行测试、跟踪,然后自动运行评估并产生最终性能。
②.脚本`launch.py`,可以用来train/test/tracking,类似于 Detectron,每个实验都完全由YAML配置文件(config file)来定义,(已提供,要放到outputs / 下)
```bash
$ export CUDA_VISIBLE_DEVICES="0,1,2,3"  # set the subset of GPUs on the current node to use. Count must be same as NUM_GPUS set in the config设置要使用的当前节点上的GPU子集。总数必须与config中设置的NUM_GPUS相同
$ python launch.py --cfg/-c /path/to/config.yaml --mode/-m [train (default)/test/track/eval] ...[other config opts]...
```
解析:`/path/to/config.yaml‘是具有实验配置的YAML文件的路径(示例参见`config`目录)。
`mode` :选择运行类型是training/testing/tracking/evaluation, 更多看`lib/core/config.py` .
5.1 关于运行跟踪和评估预先训练的、经过测试的模型
在[此处]目录(https://cmu.box.com/s/qn5dnrv6pvrolcr16buxk28ctoizinu8)(需要翻墙)中提供预先训练的模型和文件。可以选择将整个目录下载为根目录中的`pretrained_models/`,也可以下载最终需要的单个模型。
首先,让我们简单地运行跟踪和评估我们最好的模型的性能(这赢得了后跟踪挑战)。我们将直接使用val set上的输出检测并运行跟踪(稍后我们将测试和生成此检测)。正如你会注意到的,跟踪是超快的,并获得了很强的性能。按照以下方式运行匈牙利标准匹配:
$ python launch.py \
	--cfg configs/video/2d_best/01_R101_best_hungarian-4GPU.yaml \
	--mode track \
	TRACKING.DETECTIONS_FILE pretrained_models/configs/video/2d_best/01_R101_best_hungarian.yaml/detections.pkl
# Can also run with greedy matching
$ python launch.py \
	--cfg configs/video/2d_best/01_R101_best_hungarian-4GPU.yaml \
	--mode track \
	TRACKING.DETECTIONS_FILE pretrained_models/configs/video/2d_best/01_R101_best_hungarian.yaml/detections.pkl \
	TRACKING.BIPARTITE_MATCHING_ALGO greedy
表现为:
| Algorithm | mAP (overall) | MOTA (overall) |
| Hungarian | 60.6 | 55.2 |
| Greedy | 60.6 | 55.1 |
5.11 上限实验
作为另一个例子,我们可以尝试再现上限性能:
# Perfect tracking
$ python launch.py \
	--cfg configs/video/2d_best/01_R101_best_hungarian-4GPU.yaml \
	--mode track \
	TRACKING.DETECTIONS_FILE pretrained_models/configs/video/2d_best/01_R101_best_hungarian.yaml/detections.pkl \
	TRACKING.DEBUG.UPPER_BOUND_4_EVAL_UPPER_BOUND True
# Perfect keypoints
$ python launch.py \
	--cfg configs/video/2d_best/01_R101_best_hungarian-4GPU.yaml \
	--mode track \
	TRACKING.DETECTIONS_FILE pretrained_models/configs/video/2d_best/01_R101_best_hungarian.yaml/detections.pkl \
	TRACKING.DEBUG.UPPER_BOUND_5_GT_KPS_ONLY True
# Perfect keypoints and tracks
$ python launch.py \
	--cfg configs/video/2d_best/01_R101_best_hungarian-4GPU.yaml \
	--mode track \
	TRACKING.DETECTIONS_FILE pretrained_models/configs/video/2d_best/01_R101_best_hungarian.yaml/detections.pkl \
	TRACKING.DEBUG.UPPER_BOUND_5_GT_KPS_ONLY True \
TRACKING.DEBUG.UPPER_BOUND_4_EVAL_UPPER_BOUND True| Setup | mAP (overall) | MOTA (overall) |
| Perfect tracking | 60.6 | 57.6 |
| Perfect keypoints | 82.9 | 78.4 |
| Perfect keypoints + tracking | 82.9 | 82.9 |
5.2 测试pre-trained的模型
我们还可以从预先训练的模型中计算检测文件,如下所示。这也将自动运行跟踪和评估,以产生最终的数字。确保使用num_GPU与要在其上测试的GPUs相同(如‘cuda_visual_devices’中设置的那样)
$ python launch.py \
	--cfg configs/video/2d_best/01_R101_best_hungarian-4GPU.yaml \
	--mode test \
	TEST.WEIGHTS pretrained_models/configs/video/2d_best/01_R101_best_hungarian.yaml/model_final.pkl
这将上面报告的性能一样,55.2%的Mota和60.6%的MAP。类似地,您可以使用相应的配置文件对所提供的任何模型进行测试。
5.3 无评估测试
①`test_on_single_video.py`.来计算单个独立视频的检测和跟踪。
$ python tools/test_on_single_video.py \
         --cfg configs/video2d_best/01_R101_best_hungarian-4GPU.yaml \
         --video path/to/video.mp4 \
         --output path/to/output/tracks_and_visualizations \
         TEST.WEIGHTS pretrained_models/configs/video/2d_best/01_R101_best_hungarian-4GPU.yaml/model_final.pkl
5.4 训练模型
①减少内存需求,减少批量大小 the batch size、缩小学习率。扩展迭代schedule(总迭代次数total iterations,步长step size),性能也能差不多。
②`pretrained_models`文件夹下有经过训练的模型和检测文件,该文件夹可用于复制the numbers。
①②③④⑤⑥⑦⑧⑨
5.4.1 2D Mask R-CNN models
```bash
# Trained on 8xP100 GPUs
$ python launch.py -c configs/video/2d_best/01_R101_best_hungarian.yaml -m train
# Trained on 4x1080Ti GPUs
$ python launch.py -c configs/video/2d_best/01_R101_best_hungarian-4GPU.yaml -m train
```
| Config | mAP | MOTA |
|-----------|--------|----------|
| 8 GPU | 60.6 | 55.2 |
| 4 GPU | 61.3 | 55.9 |
因此,4 GPU配置虽然花费更长的时间,但获得了类似的性能(在本例中实际上更好)。
5.4.2 3D Mask R-CNN models
可以用完全相同的方式进行训练/测试。Trained on P100s (reported in paper, table 6)
```bash
# 2D model, pre-trained on ImNet
$ python launch.py -c configs/video/3d/02_R-18_PTFromImNet.yaml
# 3D model, pre-trained on ImNet
$ python launch.py -c configs/video/3d/04_R-18-3D_PTFromImNet.yaml
# 2D model, pre-trained on COCO
$ python launch.py -c configs/video/3d/01_R-18_PTFromCOCO.yaml
# 3D model, pre-trained on COCO
$ python launch.py -c configs/video/3d/03_R-18-3D_PTFromCOCO.yaml
```
| Model type | Pre-training | mAP | MOTA |
|------------|--------------|-----|------|
| 2D | ImageNet | 14.8 | 3.2 |
| 3D | ImageNet | 16.7 | 4.3 |
| 2D | COCO | 19.9 | 14.1 |
| 3D | COCO | 22.6 | 15.4 |
内存很重要。所有的4/8GPU 配置相当于: 降低了学习率,缩小了步骤数/步长。steps/step size 。
```bash
# 2D model, pre-trained on ImNet
$ python launch.py -c configs/video/3d/02_R-18_PTFromImNet-4GPU.yaml
# 3D model, pre-trained on ImNet
$ python launch.py -c configs/video/3d/04_R-18-3D_PTFromImNet-8GPU-BATCH1.yaml
# 3D model, pre-trained on ImNet
$ python launch.py -c configs/video/3d/04_R-18-3D_PTFromImNet-4GPU-BATCH1.yaml
# 2D model, pre-trained on COCO
$ python launch.py -c configs/video/3d/01_R-18_PTFromCOCO-4GPU.yaml
# 3D model, pre-trained on COCO (8 GPU)
$ python launch.py -c configs/video/3d/03_R-18-3D_PTFromCOCO-8GPU-BATCH1.yaml
# 3D model, pre-trained on COCO (4 GPU)
$ python launch.py -c configs/video/3d/03_R-18-3D_PTFromCOCO-4GPU-BATCH1.yaml
```
| Model type | #GPU | Pre-training | mAP | MOTA |
|------------|------|--------|-----|------|
| 2D | 4 | ImageNet | 13.9 | 2.3 |
| 3D | 8 | ImageNet | 16.6 | 4.1 |
| 3D | 4 | ImageNet | 16.7 | 5.3 |
| 2D | 4 | COCO | 19.5 | 13.8 |
| 3D | 8 | COCO | 22.9 | 16.0 |
| 3D | 4 | COCO | 22.5 | 15.6 |
六、已知问题:
- conda create -c conda-forge --name $ENV_NAME --file all_pkg_versions.txt python=2.7 anaconda
我的天,这个问题耽误我好久啊,综合起来有一天了,昨天有小伙伴说直接删了,貌似也可以,跟玄学似的.我都打算今早试试了,突然天灵盖一动!竟然被我解决了!哈哈哈.大概是没吃早饭的魅力.开心~~~
嫌麻烦可以直接看[解决办法],需要两步即可解决.
问题1):
Solving environment: failed

PackagesNotFoundError: The following packages are not available from current channels:

  - libiconv==1.15=0

Current channels:

  - https://mirrors.tuna.tsinghua.edu.cn/anaconda/pkgs/free/linux-64
  - https://mirrors.tuna.tsinghua.edu.cn/anaconda/pkgs/free/noarch
  - https://mirrors.ustc.edu.cn/anaconda/pkgs/free/linux-64
  - https://mirrors.ustc.edu.cn/anaconda/pkgs/free/noarch
  - https://mirrors.tuna.tsinghua.edu.cn/anaconda/cloud/pytorch/linux-64
  - https://mirrors.tuna.tsinghua.edu.cn/anaconda/cloud/pytorch/noarch
  - https://mirrors.tuna.tsinghua.edu.cn/anaconda/pkgs/main/linux-64
  - https://mirrors.tuna.tsinghua.edu.cn/anaconda/pkgs/main/noarch
  - https://mirrors.tuna.tsinghua.edu.cn/anaconda/cloud/conda-forge/linux-64
  - https://mirrors.tuna.tsinghua.edu.cn/anaconda/cloud/conda-forge/noarch

To search for alternate channels that may provide the conda package you're
looking for, navigate to

    https://anaconda.org

and use the search bar at the top of the page.首先弄懂了all_pkg_versions.txt文件中=0的意思是:如libedit 3.1.20170329 有haf1bffa_0和0两个版本;指后者
1)libedit 3.1.20170329 haf1bffa_0
...
dependencies:
libgcc-ng >=4.9
ncurses >=6.1,<6.2.0a0
2)libedit 3.1.20170329 0
…
dependencies:
ncurses 5.9
查看:conda info libiconv=1.15 版本是没有0这个版本的。如下:
libiconv 1.15 h63c8f33_5
------------------------
...
dependencies:
libgcc-ng >=7.2.0

libiconv 1.15 h470a237_3
------------------------
...
dependencies:
libgcc-ng >=4.9

libiconv 1.15 h470a237_1
------------------------
...
dependencies:
libgcc-ng >=4.9

libiconv 1.15 h470a237_2
------------------------
...
dependencies:
libgcc-ng >=4.9
而all_pkg_versions.txt文件是libgcc-ng=7.2.0=h7cc24e2_2;故:
[解决办法第一步]:修改libiconv=1.15=0为 libiconv=1.15=h63c8f33_5
问题2) 修改后出现:
UnsatisfiableError: The following specifications were found to be in conflict:
  - blas==1.1=openblas
  - numexpr==2.6.4=py27hd318778_0 -> blas=[build=mkl]
Use "conda info <package>" to see the dependencies for each package.
这个我也是一一查了.
:~$ conda info blas==1.1  (没问题)
blas 1.1 openblas
-----------------
...
dependencies:
    openblas
- numexpr==2.6.4=py27hd318778_0
重点是:-> blas=[build=mkl]
暂时理解是 blas==mkl,转分析mkl; .txt文件的mkl=2018.0.2=1 查看info;没问题
mkl 2018.0.2 1
--------------
dependencies:
intel-openmp
:~$ conda info numexpr==2.6.4#摘录py27的有:
numexpr 2.6.4 py27hd318778_0
----------------------------
...
dependencies:
    libgcc-ng >=7.2.0
    libstdcxx-ng >=7.2.0
    numpy >=1.9.3,<2.0a0
    python >=2.7,<2.8.0a0
    mkl >=2018.0.1,<2019.0a0
    blas * mkl

numexpr 2.6.4 py27_nomklh19cb0ea_0
----------------------------------
...
dependencies:
    libgcc-ng >=7.2.0
    libopenblas >=0.2.20,<0.2.21.0a0
 ##没有
    libstdcxx-ng >=7.2.0
    numpy >=1.9.3,<2.0a0
    python >=2.7,<2.8.0a0
    blas * openblas

numexpr 2.6.4 py27_1
--------------------
...
dependencies:
    numpy >=1.11
    python 2.7*
    setuptools

numexpr 2.6.4 py27_0
--------------------
..
dependencies:
    numpy >=1.8
    python 2.7*
也就是dependencies 有blas * mkl blas * openblas 和没有这俩的.(文件的依赖我都对比了,没冲突);考虑.txt\提到setuptools了.故:
[解决办法第二步]:numexpr=2.6.4=py27hd318778_0改为numexpr=2.6.4=py27_1
愉快的下载:
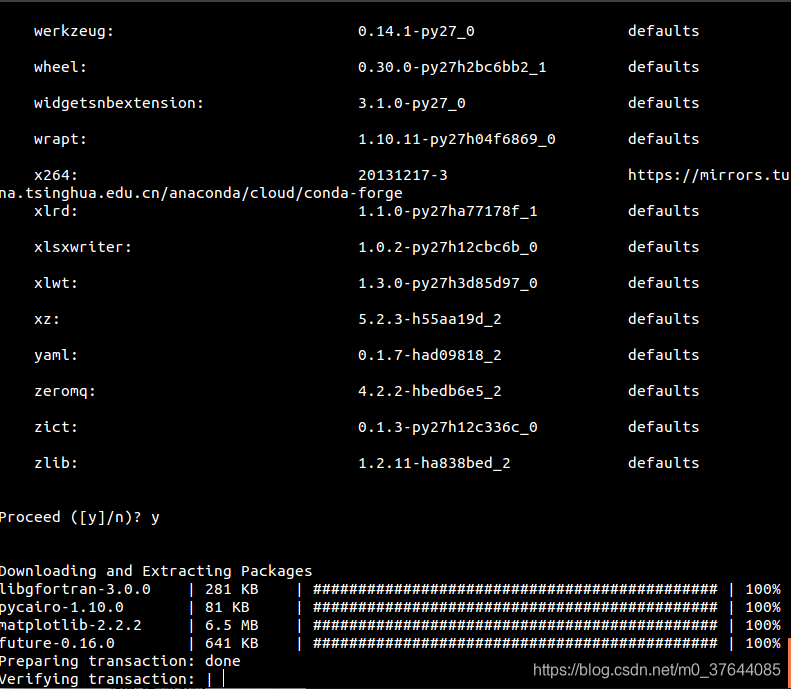
啊?并没有很愉快:
问题3):
CondaHTTPError: HTTP 000 CONNECTION FAILED for url <https://repo.anaconda.com/pkgs/main/linux-64/matplotlib-2.2.2-py27h0e671d2_0.tar.bz2>
Elapsed: -

An HTTP error occurred when trying to retrieve this URL.
HTTP errors are often intermittent, and a simple retry will get you on your way.
[解决办法]:网断了,重试.
成功!!!!! 放大图!!!!
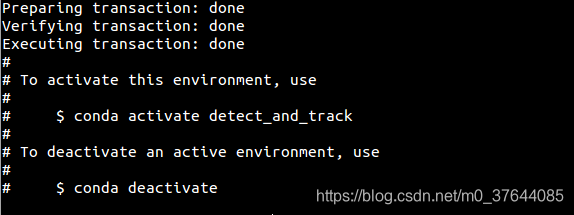
一下方法都可以激活或者关闭.
# To activate this environment, use
#     $ conda activate detect_and_track
#     $ source activate detect_and_track
#     $ source activate $ENV_NAME
# To deactivate an active environment, use
#     $ source deactivate
# $ conda deactivate- 问题2:
-- Configuring incomplete, errors occurred!
See also "/home/vivian/HelloWorld/tracker/DetectAndTrack/lib/build/CMakeFiles/CMakeOutput.log".
make: *** [ops] Error 1
Due to a bug in Caffe2, the multi-GPU training will normally work on machines where peer access within GPUs is enabled. There exists a workaround for machines where this is not the case. As mentioned in [this issue](https://github.com/facebookresearch/Detectron/issues/32), you can set 'USE_NCCL True' in config (or when running) to be able to run on other machines, though it is susceptible to deadlocks and hang-ups. For example, run as follows:
```bash
$ python launch.py -c /path/to/config.yaml -m train USE_NCCL True
```
ubuntu 上的问题分享:
1.
Caffe2 compilation requires system protobuf, leveldb, gflags, opencv, etc rather than those installed from conda. Please refer to this issue from Caffe2.
According to README.md, we install these packages by conda first, and then compile Caffe2, which will lead to errors like:
undefined reference to google::protobuf::internal::AssignDescriptors(std::__cxx11::basic_string
undefined reference to leveldb::Status::ToString[abi:cxx11]()
undefined reference to google::protobuf::internal::empty_string_[abi:cxx11]
I've solved this problem by:
-
Add
-DCMAKE_CXX_FLAGS=-D__GLIBCXX_USE_CXX11_ABI=0to the cmake command. -
Use system versions of
gflags,protobuf,opencv, orleveldb(try installing withapt-get). Uninstall these libraries from Anaconda and try to build again.
Finally successfully build on:
- Ubuntu 16.04
- Anaconda (python 2.7)
- OpenCV 3.4.1
- GCC 5.4
- CUDA 9.0
- cuDNN 7.1.2
- numpy 1.14.3
2.可视化:
As the message suggests, it's not able to find the pre-trained model at the expected location. Did you download the model and store at the location in the log message?
For visualization you can use/adapt tools/visualize_results_v2.py.
3.是否可以在不评估模型性能的情况下提取检测到的关键点和跟踪信息?use Detect and Track on a data set for which I don't have the ground-truth annotations.
4.
conda create -c conda-forge --name $ENV_NAME --file all_pkg_versions.txt python=2.7 anaconda
Solving environment: failed
PackagesNotFoundError: The following packages are not available from current channels:
- libiconv==1.15=0 考虑版本更新Please try a newer version of the package.//linux 是用不了的