版权声明:LiuK°版权所有 https://blog.csdn.net/weixin_43401946/article/details/83180776
几种JDBCUtils
第一种
public class JDBCUtils {
    public static  String driver;
    public static String url;
    public static String user;
    public static String password;
    static{
        try {
            Properties pro=new Properties();
            //jdbc.properties一般是放在src目录下的配置文件具体内容下面给出
            pro.load(JDBCUtils.class.getClassLoader().getResourceAsStream("jdbc.properties"));
            driver = pro.getProperty("driver");
            url = pro.getProperty("url");
            user = pro.getProperty("user");
            password = pro.getProperty("password");
            Class.forName(driver);
        } catch (IOException e) {
            e.printStackTrace();
        } catch (ClassNotFoundException e) {
            e.printStackTrace();
        }
    }
	//获取Connection对象
    public static Connection getConnection() throws SQLException {
        return DriverManager.getConnection(url,user,password);
    }
	//关闭资源
    public static void close(PreparedStatement pstat,Connection conn){
        if(pstat!=null){
            try {
                pstat.close();
            } catch (SQLException e) {
                e.printStackTrace();
            }
        }
        if(conn!=null){
            try {
                conn.close();
            } catch (SQLException e) {
                e.printStackTrace();
            }
        }
    }

    public static void close(ResultSet rs,PreparedStatement pstat, Connection conn){
        if(rs!=null){
            try {
                rs.close();
            } catch (SQLException e) {
                e.printStackTrace();
            }
        }
        close(pstat,conn);
    }

}
jdbc.properties攥写方法:
在src目录下创建jdbc.properties文档里面内容如下:
url=jdbc:mysql:///db3
user=root
password=root
driver=com.mysql.jdbc.Driver
注意:不能有多余空格;db3为数据库名;两个root分别是MySQL安装时的用户名和密码
这种使用的时候直接JDBCUtils.getConnection()获取连接对象,然后根据连接对象获取执行对象执行你写的SQL语句;但这个使用的少 ,一般连接池用的多,例如C3P0连接池或者阿里的Druid连接池,我用阿里的这个多一点。druid具体用法如下 :
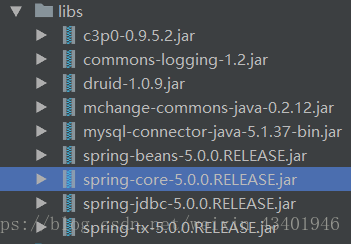
需要导的jar包如下:
里面有些不需要的 例如c3p0那个:
DruidJDBCUtils工具类代码:
public class DruidJDBCUtils {
   /* 1. 步骤:
        1. 导入jar包 druid-1.0.9.jar
		2. 定义配置文件:
            * 是properties形式的
			* 可以叫任意名称,可以放在任意目录下
		3. 加载配置文件。Properties
		4. 获取数据库连接池对象:通过工厂来来获取  DruidDataSourceFactory
		5. 获取连接:getConnection
		*/
    private static DataSource ds;
    static {

        try {
            //加载配置文件JDBCUtils.class.getClassLoader().getResourceAsStream("druid.properties")

            Properties pro=new Properties();
            pro.load(DruidJDBCUtils.class.getClassLoader().getResourceAsStream("druid.properties"));
            ds = DruidDataSourceFactory.createDataSource(pro);
        } catch (IOException e) {
            e.printStackTrace();
        } catch (Exception e) {
            e.printStackTrace();
        }
    }

    /**
     *  获取连接对象 Connection conn
     * @return conn
     * @throws SQLException
     */
    public static Connection getConnection() throws SQLException {
        return ds.getConnection();
    }

    /**
     * 回收资源(两个参数)
     * @param pstat
     * @param conn
     */
    public static void close(PreparedStatement pstat, Connection conn){
        close(null,pstat,conn);
    }

    /**
     * 回收资源(三个参数)
     * @param rs
     * @param pstat
     * @param conn
     */
    public static void close(ResultSet rs, PreparedStatement pstat, Connection conn){
        if(rs!=null){
            try {
                rs.close();
            } catch (SQLException e) {
                e.printStackTrace();
            }
        }
        if(pstat!=null){
            try {
                pstat.close();
            } catch (SQLException e) {
                e.printStackTrace();
            }
        }
        if(conn!=null){
            try {
                conn.close();
            } catch (SQLException e) {
                e.printStackTrace();
            }
        }
    }

    /**
     * 返回DataSource 对象 ds
     * @return DataSource
     */
    public static DataSource getDataSource(){
        return ds;
    }

}

这段代码是需要配置文件的:首先在src目录下创建druid.properties文件
内容如下:
driverClassName=com.mysql.jdbc.Driver
url=jdbc:mysql://127.0.0.1:3306/db3
username=root
password=root
initialSize=5
maxActive=10
maxWait=3000
这样,工具类就建好了,下面我们来使用吧.
一般结合Template来使用,有很多很好用的方法很方便:
注意:这里用的测试类来简单使用的,具体使用有略微不同,视具体情况而定。
public class JDBCTemplateDemo01 {
    DataSource ds= DruidJDBCUtils.getDataSource();
    JdbcTemplate template=new JdbcTemplate(ds);

    /**
     * 使用template进行插入操作
     **/
    @Test
    public void test01(){
        String sql="insert into user values (null,?,?)";
        template.update(sql,"Jeson","123");
    }

    /**
     * update
     */
    @Test
    public void test02(){
        String sql="update user set username=? where id=4";
        template.update(sql,"Jim");
    }

    /**
     * delete
     */
    @Test
    public void test03(){
        String sql="delete from user where id=5";
        template.update(sql);
    }
    /**
     * 测试用 queryForMap()
     */
    @Test
    public void test04(){
        String sql="select * from user where id=?";
        Map<String, Object> stringObjectMap = template.queryForMap(sql, 3);
        System.out.println(stringObjectMap);

    }
    /**
     * 测试queryForList()
     */
    @Test
    public void test05(){
        String sql="SELECT * FROM user";
        List<Map<String, Object>> maps = template.queryForList(sql);
        for (Map<String, Object> map : maps) {
            System.out.println(map);
        }
    }
    /**
     * 6.1 查询所有记录,将其封装为Emp对象的List集合,自己实现mapRow
     */
    @Test
    public void test06_1(){
        String sql="select * from user";
        List<User> list = template.query(sql, new RowMapper<User>() {
            @Override
            public User mapRow(ResultSet rs, int i) throws SQLException {
                return new User(rs.getInt("id"),rs.getString("username"),rs.getString("password"));
            }
        });
        for (User user : list) {
            System.out.println(user);
        }
    }
    /**
     * 6.2 查询所有记录,将其封装为Emp对象的List集合使用new BeanPropertyRowMapper<类型>(类型.class)
     */
    @Test
    public void test06_2(){
        String sql="select * from user";
        List<User> query = template.query(sql, new BeanPropertyRowMapper<User>(User.class));

        for (User user : query) {
            System.out.println(user);
        }
    }
    /**
     * 7. 查询总记录数
     */
    @Test
    public void test07(){
        String sql="select count(id) from user";
        Long aLong = template.queryForObject(sql, Long.class);
        System.out.println(aLong);
    }
}