准备安装包:(JDK1.8以上)
| elasticsearch-6.5.1.tar.gz |
https://www.elastic.co/downloads/past-releases |
| elasticsearch-head-master.zip |
https://github.com,搜索 elasticsearch-head 选择 mobz/elasticsearch-head |
| kibana-6.5.1-linux-x86_64.tar.gz |
https://www.elastic.co/cn/downloads/past-releases |
| logstash-6.5.1.tar.gz |
https://www.elastic.co/cn/downloads/past-releases |
| node-v10.13.0-linux-x64.tar.xz |
https://nodejs.org/en/download/ |
准备3台虚拟机:
node1:192.168.227.3
node2:192.168.227.4
node3:192.168.227.5
一:单机版搭建
安装:
下载之后,上传到linux服务器直接解压即可。(tar -zxvf elasticsearch-6.5.1.tar.gz)
useradd -g root lvjie 在root 用户组下添加lvjie用户
chown -R lvjie elasticsearch-6.5.1/ 给elasticsearch-6.5.1目录赋权给lvjie用户
切换到lvjie用户,bin/elasticsearch 直接启动
问题:
这种启动之后只能127.0.0.1:9200来访问,外网是访问不通的
外网访问:
编辑vim elasticsearch.yml
配置外网能访问的IP(本机IP):network.host: 192.168.227.3
错误:
seccomp unavailable: CONFIG_SECCOMP not compiled into kernel, CONFIG_SECCOMP and CONFIG_SECCOMP_FILT
在elasticsearch.yml添加:
bootstrap.system_call_filter: false
错误:
ERROR: [3] bootstrap checks failed
[1]: max file descriptors [4096] for elasticsearch process is too low, increase to at least [65536]
[3]: max virtual memory areas vm.max_map_count [65530] is too low, increase to at least [262144]
先编辑一个脚本比如叫esbash
以root运行脚本:
#!/bin/bash
echo "* soft nofile 65536" >> /etc/security/limits.conf
echo "* hard nofile 65536" >> /etc/security/limits.conf
echo "* soft memlock unlimited" >> /etc/security/limits.conf
echo "* hard memlock unlimited" >> /etc/security/limits.conf
echo "vm.max_map_count = 262144" >> /etc/sysctl.conf
sysctl -p
ulimit -l unlimited
首先给脚本赋权:chmod 777 esbash,然后运行
错误:
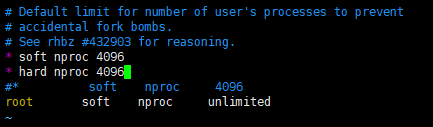
[2]: max number of threads [1024] for user [lvjie] is too low, increase to at least [4096]
原因:默认的最大可创建线程数是1024,不满足es程序的要求,设置为4096即可
切换到root用户:vim /etc/security/limits.d/90-nproc.conf
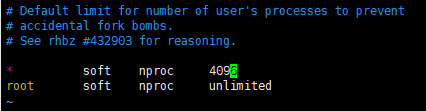
注意:如果修改不管用的话
修改/etc/security/limit.d/90-nproc.conf
需要再加一句 * hard nproc 4096
启动成功:访问192.168.227.3:9200,能看到ES配置信息就行。
二:集群版搭建
安装:
复制elasticsearch-6.5.1到其他2台服务器
scp -r elasticsearch-6.5.1 [email protected]:`pwd`
scp -r elasticsearch-6.5.1 [email protected]:`pwd`
编辑主节点node1:vim elasticsearch.yml
cluster.name: ELK-master #集群名称
node.name: master #节点 ID,保证唯一
node.master: true #标记是否为主节点
network.host: 192.168.227.3 #对外公开的 IP 地址,如果自动识别配置为 0.0.0.0
bootstrap.memory_lock: false
bootstrap.system_call_filter: false
编辑从节点node2:vim elasticsearch.yml
cluster.name: ELK-master #集群名称三个节点保持一致
node.name: slave1 #从节点 ID,保证唯一
network.host: 192.168.227.4 #对外公开的 IP 地址,如果自动识别配置为 0.0.0.0
discovery.zen.ping.unicast.hosts: ["192.168.227.3"] #集群的 IP 组,配置主节点 IP 即可
bootstrap.memory_lock: false
bootstrap.system_call_filter: false
编辑从节点node3:vim elasticsearch.yml
cluster.name: ELK-master #集群名称三个节点保持一致
node.name: slave2 #从节点 ID,保证唯一
network.host: 192.168.227.5 #对外公开的 IP 地址,如果自动识别配置为 0.0.0.0
discovery.zen.ping.unicast.hosts: ["192.168.227.3"] #集群的 IP 组,配置主节点 IP 即可
bootstrap.memory_lock: false
bootstrap.system_call_filter: false
创建启动用户(单机版只在node1上创建了启动用户,现在需在node2,node3创建):
useradd -g root lvjie 在root 用户组下添加lvjie用户
chown -R lvjie elasticsearch-6.5.1/ 给elasticsearch-6.5.1目录赋权给lvjie用户
切换到lvjie用户,bin/elasticsearch 分别启动三个节点
错误:从节点启动会报错;按照上面单节点解决就行
[1]: max file descriptors [4096] for elasticsearch process is too low, increase to at least [65536]
[2]: max number of threads [1024] for user [lvjie] is too low, increase to at least [4096]
[3]: max virtual memory areas vm.max_map_count [65530] is too low, increase to at least [262144]
启动成功:访问192.168.227.3:9200,192.168.227.4:9200,192.168.227.5:9200能看到ES配置信息就行。
问题:
从节点启动时报failed to send join request to master
原因是:是因为复制的主elasticsearch文件夹下包含了data文件中主的节点数据,需要把从节点data文件下的文件清空