Dubbo入门到重构服务
8-1 架构演变过程


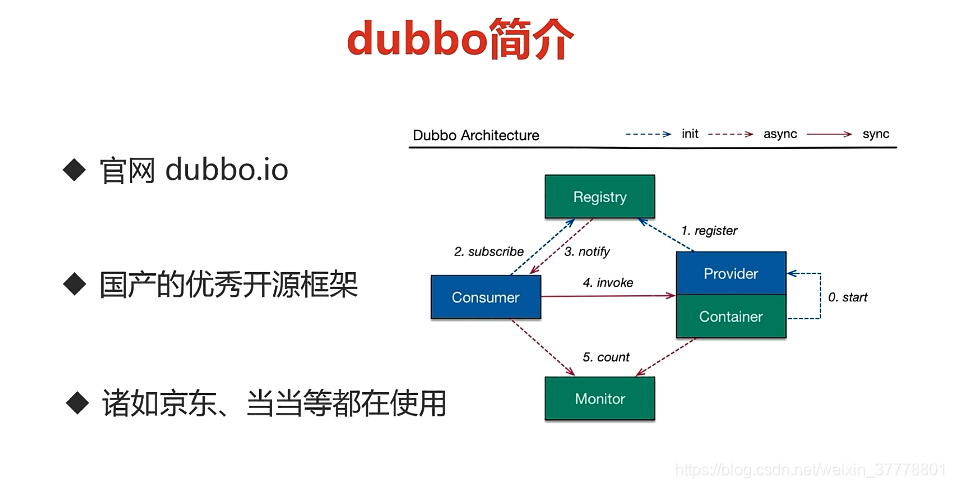
8-2 dubbo 入门简介

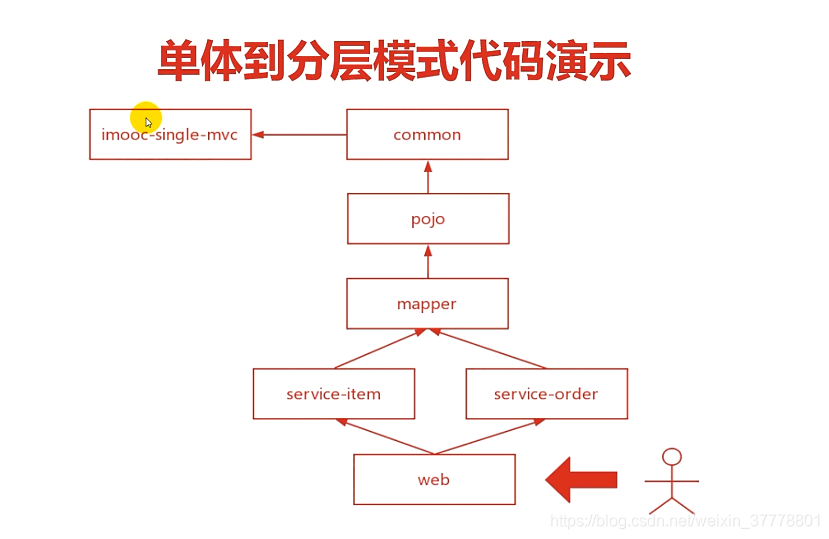
8-3 单体到分层模式代码演示
这种单体的方式,如果我们需要哪一个服务,那么我们就把这个服务的依赖导入即可引用:
IMoocJSONResult类:统一返回给前端的类
/**
 *
 * @Description: 自定义响应数据结构
 * 				这个类是提供给门户,ios,安卓,微信商城用的
 * 				门户接受此类数据后需要使用本类的方法转换成对于的数据类型格式(类,或者list)
 * 				其他自行处理
 * 				200:表示成功
 * 				500:表示错误,错误信息在msg字段中
 * 				501:bean验证错误,不管多少个错误都以map形式返回
 * 				502:拦截器拦截到用户token出错
 * 				555:异常抛出信息
 */
public class IMoocJSONResult {

    // 响应业务状态
    private Integer status;

    // 响应消息
    private String msg;

    // 响应中的数据
    private Object data;

    private String ok;	// 不使用

    public static IMoocJSONResult build(Integer status, String msg, Object data) {
        return new IMoocJSONResult(status, msg, data);
    }

    public static IMoocJSONResult ok(Object data) {
        return new IMoocJSONResult(data);
    }

    public static IMoocJSONResult ok() {
        return new IMoocJSONResult(null);
    }

    public static IMoocJSONResult errorMsg(String msg) {
        return new IMoocJSONResult(500, msg, null);
    }

    public static IMoocJSONResult errorMap(Object data) {
        return new IMoocJSONResult(501, "error", data);
    }

    public static IMoocJSONResult errorTokenMsg(String msg) {
        return new IMoocJSONResult(502, msg, null);
    }

    public static IMoocJSONResult errorException(String msg) {
        return new IMoocJSONResult(555, msg, null);
    }

    public IMoocJSONResult() {

    }

//    public static LeeJSONResult build(Integer status, String msg) {
//        return new LeeJSONResult(status, msg, null);
//    }

    public IMoocJSONResult(Integer status, String msg, Object data) {
        this.status = status;
        this.msg = msg;
        this.data = data;
    }

    public IMoocJSONResult(Object data) {
        this.status = 200;
        this.msg = "OK";
        this.data = data;
    }

    public Boolean isOK() {
        return this.status == 200;
    }

    public Integer getStatus() {
        return status;
    }

    public void setStatus(Integer status) {
        this.status = status;
    }

    public String getMsg() {
        return msg;
    }

    public void setMsg(String msg) {
        this.msg = msg;
    }

    public Object getData() {
        return data;
    }

    public void setData(Object data) {
        this.data = data;
    }

	public String getOk() {
		return ok;
	}

	public void setOk(String ok) {
		this.ok = ok;
	}

}
这个就是Mybatis逆向工程的配置文件:
<?xml version="1.0" encoding="UTF-8"?>
<!DOCTYPE generatorConfiguration
  PUBLIC "-//mybatis.org//DTD MyBatis Generator Configuration 1.0//EN"
  "http://mybatis.org/dtd/mybatis-generator-config_1_0.dtd">

<generatorConfiguration>
	<context id="testTables" targetRuntime="MyBatis3">
		<commentGenerator>
			<!-- 是否去除自动生成的注释 true:是 : false:否 -->
			<property name="suppressAllComments" value="true" />
		</commentGenerator>
		<!--数据库连接的信息:驱动类、连接地址、用户名、密码 -->
		<jdbcConnection
			driverClass="com.mysql.jdbc.Driver"
			connectionURL="jdbc:mysql://localhost:3306/imooc-services" userId="root"
			password="root">
		</jdbcConnection>
		<!-- 默认false,把JDBC DECIMAL 和 NUMERIC 类型解析为 Integer,为 true时把JDBC DECIMAL 和
			NUMERIC 类型解析为java.math.BigDecimal -->
		<javaTypeResolver>
			<property name="forceBigDecimals" value="false" />
		</javaTypeResolver>

		<!-- targetProject:生成PO类的位置 -->
		<javaModelGenerator
			targetPackage="com.imooc.pojo"
			targetProject=".\src">
			<!-- enableSubPackages:是否让schema作为包的后缀 -->
			<property name="enableSubPackages" value="false" />
			<!-- 从数据库返回的值被清理前后的空格 -->
			<property name="trimStrings" value="true" />
		</javaModelGenerator>
        <!-- targetProject:mapper映射文件生成的位置 -->
		<sqlMapGenerator
			targetPackage="com.imooc.mapper"
			targetProject=".\src">
			<!-- enableSubPackages:是否让schema作为包的后缀 -->
			<property name="enableSubPackages" value="false" />
		</sqlMapGenerator>
		<!-- targetPackage:mapper接口生成的位置 -->
		<javaClientGenerator
			type="XMLMAPPER"
			targetPackage="com.imooc.mapper"
			targetProject=".\src">
			<!-- enableSubPackages:是否让schema作为包的后缀 -->
			<property name="enableSubPackages" value="false" />
		</javaClientGenerator>
		<!-- 指定数据库表 -->
		<table schema="" tableName="orders"></table>
		<table schema="" tableName="items"></table>

	</context>
</generatorConfiguration>
当我们配置好了之后,我们启动这个类里面的主方法就可以了:
public class GeneratorSqlmap {

	public void generator() throws Exception{

		List<String> warnings = new ArrayList<String>();
		boolean overwrite = true;
		//指定 逆向工程配置文件
		File configFile = new File("generatorConfig.xml");
		ConfigurationParser cp = new ConfigurationParser(warnings);
		Configuration config = cp.parseConfiguration(configFile);
		DefaultShellCallback callback = new DefaultShellCallback(overwrite);
		MyBatisGenerator myBatisGenerator = new MyBatisGenerator(config,
				callback, warnings);
		myBatisGenerator.generate(null);

	}
	public static void main(String[] args) throws Exception {
		try {
			GeneratorSqlmap generatorSqlmap = new GeneratorSqlmap();
			generatorSqlmap.generator();
		} catch (Exception e) {
			e.printStackTrace();
		}

	}

}
当我们生成好了实体类、Mapper接口类,Mapper映射文件了之后,我们把这些文件拷贝到我们要用的地方就可以了!
这个就是订单模块里面的订单服务:
@Service("ordersService")
public class OrdersServiceImpl implements OrdersService {

	final static Logger log = LoggerFactory.getLogger(OrdersServiceImpl.class);

	@Autowired
	private OrdersMapper ordersMapper;

	@Override
	public Orders getOrder(String orderId) {
		return ordersMapper.selectByPrimaryKey(orderId);
	}

	@Override
	public boolean createOrder(String itemId) {

		// 创建订单
		String oid = UUID.randomUUID().toString().replaceAll("-", "");
		Orders o = new Orders();
		o.setId(oid);
		o.setOrderNum(oid);
		o.setItemId(itemId);
		ordersMapper.insert(o);

		log.info("订单创建成功");

		return true;
	}

}
而这个就是商品服务里面的server接口:
public interface ItemsService {

	/**
	 * @Description: 根据商品id获取商品
	 */
	public Items getItem(String itemId);

	/**
	 * @Description: 查询商品库存
	 */
	public int getItemCounts(String itemId);

	/**
	 * @Description: 购买商品成功后减少库存
	 */
	public void displayReduceCounts(String itemId, int buyCounts);

}
而这个就是实现类:
@Service("itemsService")
public class ItemsServiceImpl implements ItemsService {

	@Autowired
	private ItemsMapper itemsMapper;

	@Override
	public Items getItem(String itemId) {
		return itemsMapper.selectByPrimaryKey(itemId);
	}

	@Override
	public int getItemCounts(String itemId) {
		Items item = itemsMapper.selectByPrimaryKey(itemId);
		return item.getCounts();
	}

	@Override
	public void displayReduceCounts(String itemId, int buyCounts) {

		//		int a  = 1 / 0;

		Items reduceItem = new Items();
		reduceItem.setId(itemId);
		reduceItem.setBuyCounts(buyCounts);
		itemsMapper.reduceCounts(reduceItem);
	}

}
这个就是购买商品的service:有两个过程,一个是从商品服务里面去减少库存,另外一个就从订单服务里面去创建订单;
@Service("buyService")
public class BuyServiceImpl implements BuyService {

	final static Logger log = LoggerFactory.getLogger(BuyServiceImpl.class);

	@Autowired
	private ItemsService itemService;

	@Autowired
	private OrdersService ordersService;

	@Override
	public void doBuyItem(String itemId) {
		// 减少库存
		itemService.displayReduceCounts(itemId, 1);

		// 创建订单
		ordersService.createOrder(itemId);
	}

	@Override
	public boolean displayBuy(String itemId) {

		int buyCounts = 5;

		// 1. 判断库存
		int stockCounts = itemService.getItemCounts(itemId);
		if (stockCounts < buyCounts) {
			log.info("库存剩余{}件,用户需求量{}件,库存不足,订单创建失败...",
					stockCounts, buyCounts);
			return false;
		}

		// 2. 创建订单
		boolean isOrderCreated = ordersService.createOrder(itemId);

		// 3. 创建订单成功后,扣除库存
		if (isOrderCreated) {
			log.info("订单创建成功...");
			itemService.displayReduceCounts(itemId, buyCounts);
		} else {
			log.info("订单创建失败...");
			return false;
		}

		return true;
	}

}
8-4 重构商品服务,抽取抽象工程
创建一个API工程:

8-5 暴露商品服务
上面所写的就是API层就是接口层;而下面我们写的service层就是实现层:
这个就是生产者的xml配置:
<?xml version="1.0" encoding="UTF-8"?>
<beans xmlns="http://www.springframework.org/schema/beans"
	xmlns:xsi="http://www.w3.org/2001/XMLSchema-instance"
	xmlns:dubbo="http://code.alibabatech.com/schema/dubbo"
	xsi:schemaLocation="http://www.springframework.org/schema/beans http://www.springframework.org/schema/beans/spring-beans-4.2.xsd
	http://code.alibabatech.com/schema/dubbo http://code.alibabatech.com/schema/dubbo/dubbo.xsd">

	<!-- 为当前服务提供者取个名字,并且提供给注册中心 -->
	<dubbo:application name="imooc-dubbo-item-service"></dubbo:application>

	<!-- 注册中心的配置,使用zk暴露服务 -->
	<dubbo:registry protocol="zookeeper" address="192.168.1.110:2181"></dubbo:registry>

	<!-- 定义暴露服务的端口号 -->
	<dubbo:protocol name="dubbo" port="20880"></dubbo:protocol>

	<!-- 暴露具体的服务接口 -->
	<dubbo:service retries="3" interface="com.imooc.item.service.ItemsService"
		ref="itemsService"></dubbo:service>

</beans>

这个就是暴露生产者的xml配置:我们暴露出去的实际上一个接口
<?xml version="1.0" encoding="UTF-8"?>
<beans xmlns="http://www.springframework.org/schema/beans"
	xmlns:xsi="http://www.w3.org/2001/XMLSchema-instance"
	xmlns:dubbo="http://code.alibabatech.com/schema/dubbo"
	xsi:schemaLocation="http://www.springframework.org/schema/beans http://www.springframework.org/schema/beans/spring-beans-4.2.xsd
	http://code.alibabatech.com/schema/dubbo http://code.alibabatech.com/schema/dubbo/dubbo.xsd">

	<!-- 为当前服务提供者取个名字,并且提供给注册中心 -->
	<dubbo:application name="imooc-dubbo-item-service"></dubbo:application>

	<!-- 注册中心的配置,使用zk暴露服务 -->
	<dubbo:registry protocol="zookeeper" address="192.168.1.110:2181"></dubbo:registry>

	<!-- 定义暴露服务的端口号 -->
	<dubbo:protocol name="dubbo" port="20880"></dubbo:protocol>

	<!-- 暴露具体的服务接口,retries表示的就是一个重连机制 -->
	<dubbo:service retries="3" interface="com.imooc.item.service.ItemsService"
		ref="itemsService"></dubbo:service>

</beans>
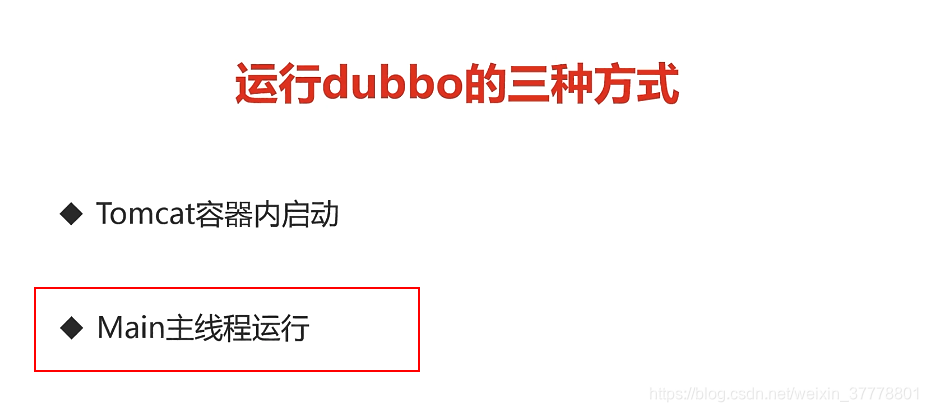
8-6 使用tomcat启动dubbo服务

我们在聚合工程里面引入jar包:
		<!-- 引入dubbo -->
		<dependency>
			<groupId>com.alibaba</groupId>
			<artifactId>dubbo</artifactId>
			<exclusions>
				<exclusion>
					<groupId>org.springframework</groupId>
					<artifactId>spring</artifactId>
				</exclusion>
			</exclusions>
		</dependency>
		<dependency>
			<groupId>org.apache.zookeeper</groupId>
			<artifactId>zookeeper</artifactId>
		</dependency>
		<dependency>
			<groupId>com.github.sgroschupf</groupId>
			<artifactId>zkclient</artifactId>
		</dependency>
我们需要注意一个问题:Exclude

这样的话,就是可以排除了:

然后,我们就是可以用tomcat来进行运行;但是这种方式有一个弊端,那就是tomcat本身也一个应用,也是会占用资源的;
8-7 使用main主线程启动dubbo服务
我们可以进入dubbo的官网来进行查看:
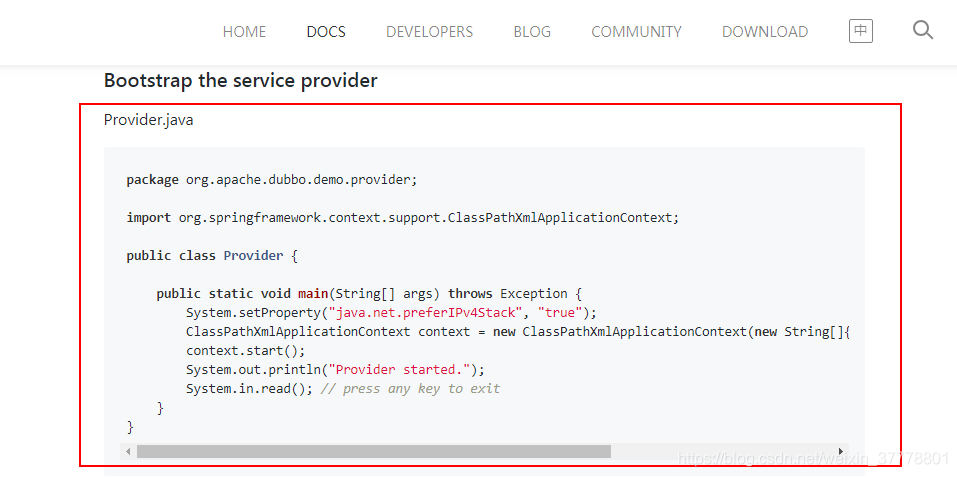
package org.apache.dubbo.demo.provider;

import org.springframework.context.support.ClassPathXmlApplicationContext;

public class Provider {

    public static void main(String[] args) throws Exception {
        System.setProperty("java.net.preferIPv4Stack", "true");
        ClassPathXmlApplicationContext context = new ClassPathXmlApplicationContext(new String[]{"META-INF/spring/dubbo-demo-provider.xml"});
        context.start();
        System.out.println("Provider started.");
        System.in.read(); // press any key to exit
    }
}
我们的代码里面就是可以这样来写:
import org.springframework.context.support.ClassPathXmlApplicationContext;

public class ItemApplication {

	public static void main(String[] args) throws Exception {
		ClassPathXmlApplicationContext context = new ClassPathXmlApplicationContext(
                new String[] {"classpath:spring/spring-context.xml"});
        context.start();
        // press any key to exit
        System.in.read();
	}

}
我们可以把所有的spring的配置文件通过引入的方式来进行引入:
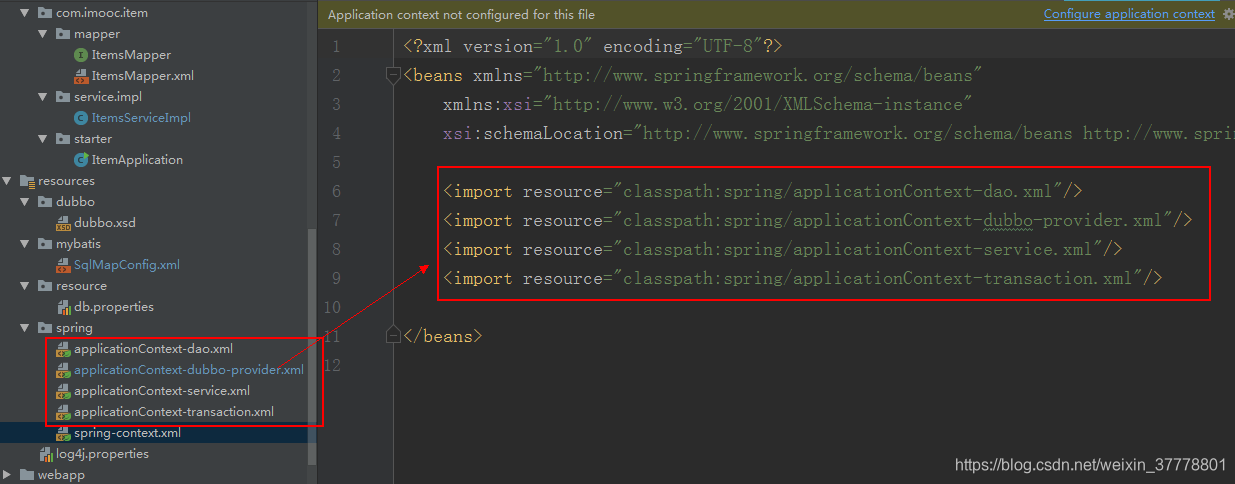
然后,我们右键运行就是可以了;
8-8 使用dubbo内置main打包jar启动

有两个文件:
- run-dubbo-use-jar-pom.xml文件:
<build>
	<resources>
		<resource>
			<directory>src/main/java</directory>
			<includes>
				<include>**/*.properties</include>
				<include>**/*.xml</include>
			</includes>
			<filtering>false</filtering>
		</resource>
		<resource>
			<directory>src/main/resources</directory>
			<includes>
				<include>**/*.properties</include>
				<include>**/*.xml</include>
				<include>**/*.ini</include>
			</includes>
			<filtering>false</filtering>
		</resource>
	</resources>

	<plugins>
		<plugin>
			<groupId>org.apache.tomcat.maven</groupId>
			<artifactId>tomcat7-maven-plugin</artifactId>
			<configuration>
				<port>8081</port>
				<path>/</path>
				<useBodyEncodingForURI>true</useBodyEncodingForURI>
				<uriEncoding>UTF-8</uriEncoding>
			</configuration>
		</plugin>

		<plugin>
			<artifactId>maven-eclipse-plugin</artifactId>
			<configuration>
				<additionalProjectnatures>
					<projectnature>org.springframework.ide.eclipse.core.springnature</projectnature>
				</additionalProjectnatures>
				<additionalBuildcommands>
					<buildcommand>org.springframework.ide.eclipse.core.springbuilder</buildcommand>
				</additionalBuildcommands>
				<downloadSources>true</downloadSources>
				<downloadJavadocs>true</downloadJavadocs>
			</configuration>
		</plugin>
	</plugins>
</build>
- run-dubbo-use-war-on-tomcat-pom.xml文件:
<build>
	<resources>
		<resource>
			<directory>src/main/java</directory>
			<includes>
				<include>**/*.properties</include>
				<include>**/*.xml</include>
			</includes>
			<filtering>false</filtering>
		</resource>
		<resource>
			<directory>src/main/resources</directory>
			<includes>
				<include>**/*.properties</include>
				<include>**/*.xml</include>
				<include>**/*.ini</include>
			</includes>
			<filtering>false</filtering>
		</resource>
	</resources>

	<plugins>
		<plugin>
			<groupId>org.apache.tomcat.maven</groupId>
			<artifactId>tomcat7-maven-plugin</artifactId>
			<configuration>
				<port>8081</port>
				<path>/</path>
				<useBodyEncodingForURI>true</useBodyEncodingForURI>
				<uriEncoding>UTF-8</uriEncoding>
			</configuration>
		</plugin>

		<plugin>
			<artifactId>maven-eclipse-plugin</artifactId>
			<configuration>
				<additionalProjectnatures>
					<projectnature>org.springframework.ide.eclipse.core.springnature</projectnature>
				</additionalProjectnatures>
				<additionalBuildcommands>
					<buildcommand>org.springframework.ide.eclipse.core.springbuilder</buildcommand>
				</additionalBuildcommands>
				<downloadSources>true</downloadSources>
				<downloadJavadocs>true</downloadJavadocs>
			</configuration>
		</plugin>
	</plugins>
</build>
我们把上面的run-dubbo-use-jar-pom.xml文件里面的内容拷贝到pom文件里面,并且改成jar包,我们就可以运行打完包的jar包就可以了;
然后我们要对聚合工程进行install打包;
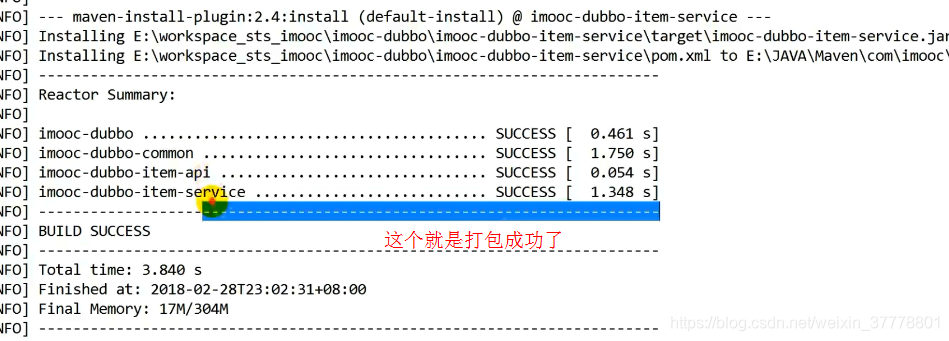
然后,我们就是可以对打完的jar包通过java -jar命令来进行运行;
8-9 重构并且暴露订单服务
配置同上面的暴露商品服务;
8-10 开发dubbo消费者服务调用方
这个就是消费者的配置:
<?xml version="1.0" encoding="UTF-8"?>
<beans xmlns="http://www.springframework.org/schema/beans"
	xmlns:xsi="http://www.w3.org/2001/XMLSchema-instance"
	xmlns:dubbo="http://code.alibabatech.com/schema/dubbo"
	xsi:schemaLocation="http://www.springframework.org/schema/beans http://www.springframework.org/schema/beans/spring-beans-4.2.xsd
	http://code.alibabatech.com/schema/dubbo http://code.alibabatech.com/schema/dubbo/dubbo.xsd">

	<!-- 为当前服务提供者取个名字,并且提供给注册中心 -->
	<dubbo:application name="imooc-dubbo-web"></dubbo:application>

	<!-- 注册中心的配置,用于消费者的监听 -->
	<dubbo:registry protocol="zookeeper" address="192.168.1.110:2181"></dubbo:registry>

	<!-- 监听服务,通过注册中心去进行查找,查找到后进行服务调用 -->
	<dubbo:reference id="itemService" interface="com.imooc.item.service.ItemsService"
		retries="3" check="false" init="true"></dubbo:reference>
	<dubbo:reference id="ordersService" interface="com.imooc.order.service.OrdersService"
		retries="3" check="false" init="true"></dubbo:reference>

</beans>
8-11 测试dubbo消费者调用商品服务和订单服务
@Service("buyService")
public class CulsterServiceImpl implements CulsterService {

	final static Logger log = LoggerFactory.getLogger(CulsterServiceImpl.class);

	@Autowired
	private ItemsService itemService;

	@Autowired
	private OrdersService ordersService;

	@Override
	public void doBuyItem(String itemId) {
		// 减少库存
		itemService.displayReduceCounts(itemId, 1);

		// 创建订单
		ordersService.createOrder(itemId);
	}

	@Override
	public boolean displayBuy(String itemId) {

		int buyCounts = 5;

		// 1. 判断库存
		int stockCounts = itemService.getItemCounts(itemId);
		if (stockCounts < buyCounts) {
			log.info("库存剩余{}件,用户需求量{}件,库存不足,订单创建失败...",
					stockCounts, buyCounts);
			return false;
		}

		// 2. 创建订单
		boolean isOrderCreated = ordersService.createOrder(itemId);

		// 3. 创建订单成功后,扣除库存
		if (isOrderCreated) {
			log.info("订单创建成功...");
			itemService.displayReduceCounts(itemId, buyCounts);
		} else {
			log.info("订单创建失败...");
			return false;
		}

		return true;
	}

}
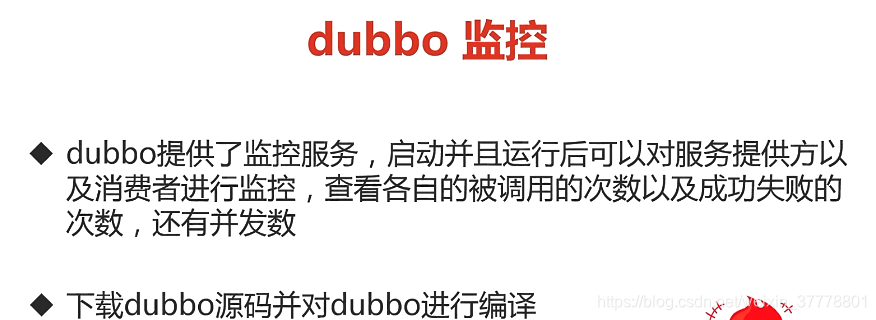
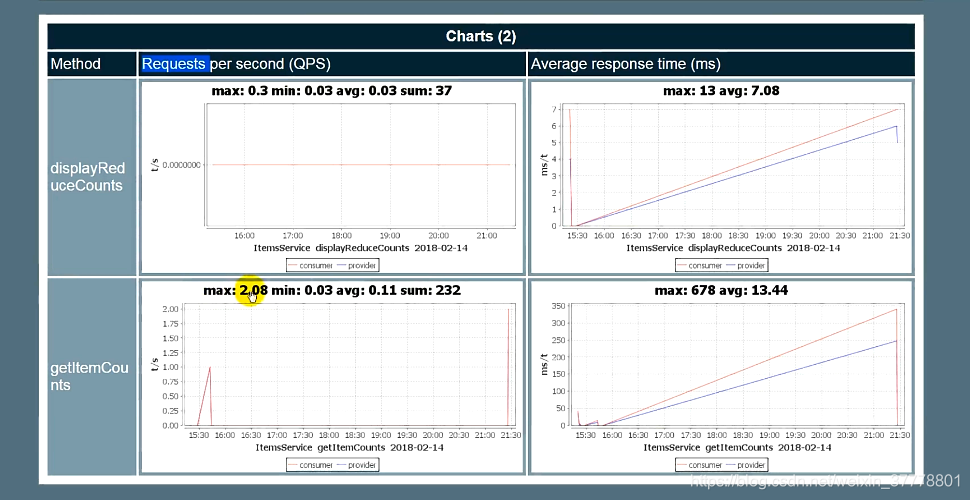
8-12 安装启动dubbo监控服务

8-14 如何升级dubbo到最新版本
参考dubbo的github