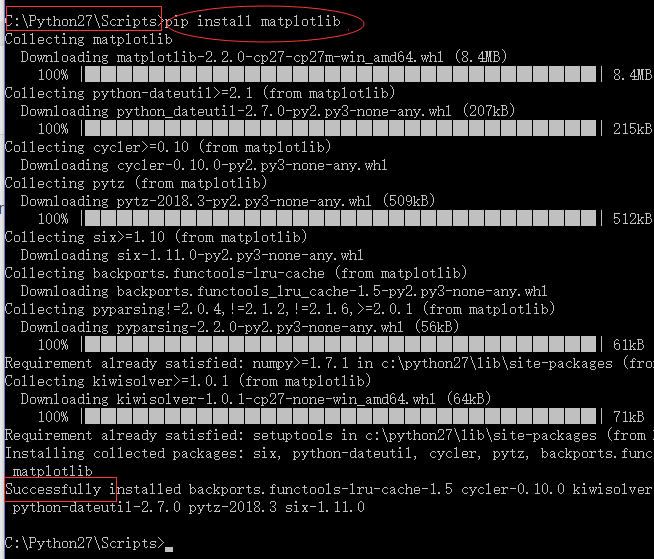
一、安装matplotlib
在cmd环境下,按照自己安装的python位置进入Scripts目录下,输入命令:pip install matplotlib
二、 绘出图片的直方图
代码如下:
#导入cv模块
import cv2 as cv
import numpy as np
from matplotlib import pyplot as plt

def plot_demo(image):
    plt.hist(image.ravel(),256,[0,256])
    plt.show()

#画出图像的直方图
def image_hist(image):
    color = ("blue", "green", "red")
    for i, color in enumerate(color):
        hist = cv.calcHist([image], [i], None, [256], [0, 256])
        plt.plot(hist, color=color)
        plt.xlim([0, 256])
    plt.show()

print("------------Hi,Python!-------------")
# 读取图像,支持 bmp、jpg、png、tiff 等常用格式
src = cv.imread("F:/Projects/images/3.jpg")
#创建窗口并显示图像
cv.namedWindow("input image",cv.WINDOW_AUTOSIZE)
cv.imshow("input image",src)   #显示原图
plot_demo(src)
image_hist(src)
cv.waitKey(0)
#释放窗口
cv.destroyAllWindows()
效果如下:

三、直方图的应用
(1)直方图的均衡化
直方图均衡化:提升对比度的两种方法:默认、自定义
代码如下:
#导入cv模块
import cv2 as cv
import numpy as np

#直方图均衡化是基于灰度图的,实现对比度增前
def equalHist_demo(image):
    gray=cv.cvtColor(image,cv.COLOR_BGR2GRAY)#提升对比度(默认提升),只能是灰度图像
    dst=cv.equalizeHist(gray)
    cv.imshow("equalHist_demo",dst)

#自定义直方图均值化
def clahe_demo(image):
    gray = cv.cvtColor(image, cv.COLOR_BGR2GRAY)  # 提升对比度(默认提升),只能是灰度图像
    clahe = cv.createCLAHE(clipLimit=5.0,tileGridSize=(8,8))#clipLimit是对比度的大小,tileGridSize是每次处理块的大小
    dst=clahe.apply(gray)
    cv.imshow("clahe_demo",dst)


print("------------Hi,Python!-------------")
# 读取图像,支持 bmp、jpg、png、tiff 等常用格式
src = cv.imread("F:/Projects/images/rise.png")
#创建窗口并显示图像
cv.namedWindow("input image",cv.WINDOW_AUTOSIZE)
cv.imshow("input image",src)   #显示原图
equalHist_demo(src)
clahe_demo(src)
cv.waitKey(0)
#释放窗口
cv.destroyAllWindows()
效果如下:

(2)直方图比较
代码如下:
# 导入cv模块
import cv2 as cv
import numpy as np


# 直方图均衡化是基于灰度图的,实现对比度增前
def equalHist_demo(image):
    gray = cv.cvtColor(image, cv.COLOR_BGR2GRAY)  # 提升对比度(默认提升),只能是灰度图像
    dst = cv.equalizeHist(gray)
    cv.imshow("equalHist_demo", dst)


# 自定义直方图均值化
def clahe_demo(image):
    gray = cv.cvtColor(image, cv.COLOR_BGR2GRAY)  # 提升对比度(默认提升),只能是灰度图像
    clahe = cv.createCLAHE(clipLimit=5.0, tileGridSize=(8, 8))  # clipLimit是对比度的大小,tileGridSize是每次处理块的大小
    dst = clahe.apply(gray)
    cv.imshow("clahe_demo", dst)


# 直方图比较

def create_rgb_hist(image):#创建直方图
    h, w, c = image.shape
    rgbhist = np.zeros([16 * 16 * 16, 1], np.float32)
    bsize = 256 / 16
    for row in range(h):
        for col in range(w):
            b = image[row, col, 0]
            g = image[row, col, 1]
            r = image[row, col, 2]
            index = np.int(b / bsize) * 16 * 16 + np.int(g / bsize) * 16 + np.int(r / bsize)
            rgbhist[np.int(index), 0] = rgbhist[np.int(index), 0] + 1

def hist_compare(image1,image2):
    hist1=create_rgb_hist(image1)
    hist2=create_rgb_hist(image2)
    match1=cv.compareHist(hist1,hist2,cv.HISTCMP_BHATTACHARYYA)#巴氏距离比较
    match2=cv.compareHist(hist1,hist2,cv.HISTCMP_CORREL)#相关性比较
    match3 = cv.compareHist(hist1, hist2, cv.HISTCMP_CHISQR)  #卡方相关性比较
    print("巴氏距离:%s,相关性:%s,卡方:%s")%(match1,match2,match3)


print("------------Hi,Python!-------------")
# 读取图像,支持 bmp、jpg、png、tiff 等常用格式
src = cv.imread("F:/Projects/images/rise.png")
# 创建窗口并显示图像
cv.namedWindow("input image", cv.WINDOW_AUTOSIZE)
# cv.imshow("input image", src)  # 显示原图

image1= cv.imread("F:/Projects//images/image1.jpg")
image2= cv.imread("F:/Projects/images/image2.jpg")
cv.imshow("image1",image1)
cv.imshow("image2",image2)

#equalHist_demo(src)
#clahe_demo(src)
hist_compare(image1,image2)

cv.waitKey(0)
# 释放窗口
cv.destroyAllWindows()
效果如下:
