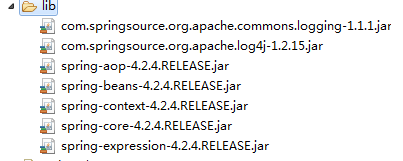
1、所需要的jar包
2、引入Spring的核心配置文件
约束
<?xml version="1.0" encoding="UTF-8"?>
<beans xmlns="http://www.springframework.org/schema/beans"
    xmlns:xsi="http://www.w3.org/2001/XMLSchema-instance"
    xmlns:context="http://www.springframework.org/schema/context" xsi:schemaLocation="
        http://www.springframework.org/schema/beans http://www.springframework.org/schema/beans/spring-beans.xsd
        http://www.springframework.org/schema/context http://www.springframework.org/schema/context/spring-context.xsd">

</beans>
3、开启Spring的扫描组件
<!--使用IOC的注解开发,配置组件扫描(哪些包下面需要使用IOC的注解)-->
<context:component-scan base-package=""></context:component-scan>
4、在类上面添加注解
@Conponent(value="useDao")
//相当于配置了<bean id="UserDao" class="类的路径名">
public class UserDaoImpl implements UserDao{
	public save(){
		System.out.println("这是一个保存的方法");
	}
}
5、注解的方式设置属性的值
- 注解的方式是可以没有set方法的
- 如果有set方法需要将注解放到set方法上
private String name; @value("小张") public void setName(){ this.name = name; } - 如果没有set方法就将注解放到属性上面
@value("小张")
private String name;
- 如果有set方法需要将注解放到set方法上
6、spring的IOC的注解的详解
6.1@Conponent :组件
- 修饰一个类,将其交给spring管理
- 这个注解有3个衍生注解(功能类似),修饰类
- @Controller :web层的类
- @Service :业务层的类
- @Repository :Dao层的类
6.2 属性注入的注解
- 普通属性:
- @Value :设置普通属性的值
- 对象类型的属性:
- @Autoware :设置对象类型的属性的值,但是按照类型完成注入
- 我们习惯按名称完成属性注入,@Autoware和@Qualifier一起使用。
- @Resource :完成对象类型属性注入,按照名称完成
6.3 Bean的其他注解
- Bean生命周期的注解
- @PostConstruct :初始化
- 相当于配置了
- @PreDestroy :销毁
- 相当于配置了
- @PostConstruct :初始化
- Bean作用范围的注解
- @Scope :作用范围
- singleton :默认单例(创建1次)
- prototype :多例(创建多次)
- request
- session
- globalsession
- @Scope :作用范围