转载自:https://blog.csdn.net/u013895206/article/details/52671550
随着直播渐渐的火起来,像抱着直播大腿的其他功能也渐渐的火起来了,比如说人脸识别。说起人脸识别用处甚广,比如说有以这个功能为核心的app:美颜相机、美图秀秀、SNOW等等,但是美颜相机和美图秀秀是用的国内SDK《Face++》来做的,这个sdk呢好像是他们自己的后台进行识别并不是app本身做识别。这样就跟我们今天要了解的动态识别不是很对路,肯定不能拿到摄像头的一帧画面去调一次接口再接回参数吧,这样性能肯定不行。所以今天就拿SNOW的例子来说,虽然我不知道他是用什么做的,但是我们可以用openCV也能实现。
我们先看看效果图:
实现步骤如下:
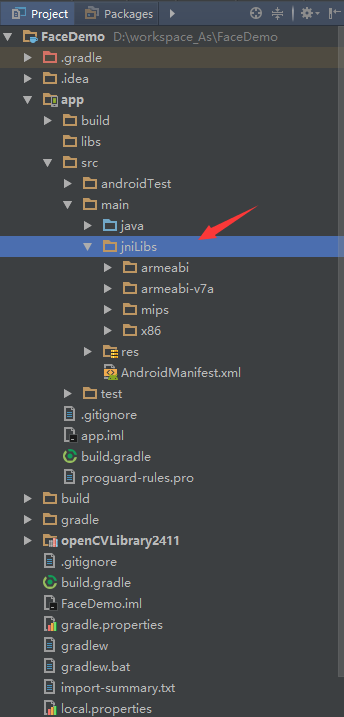
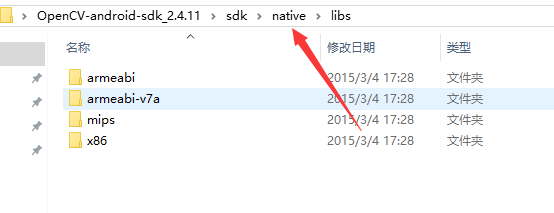
2、然后新建个项目我这里以studio里为基准,在main目录里面新建jniLibs文件夹,为什么叫jniLibs呢,因为这是调用c库的默认文件夹命名,当然你也可以命名其他的,但是需要在build里面指定这个文件夹。好了,打开我们刚才下载的文件,然后一次打开sdk\native\libs,最后把libs目录里面的所有文件夹拷贝到jniLibs里面去。请看图:
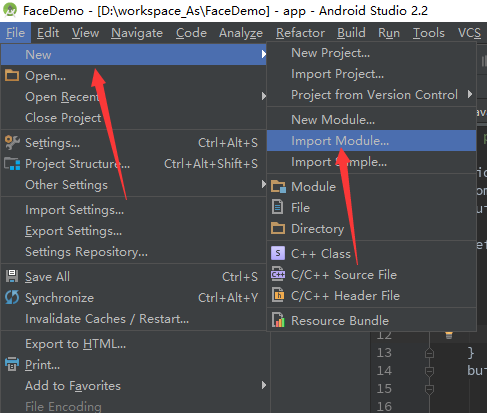
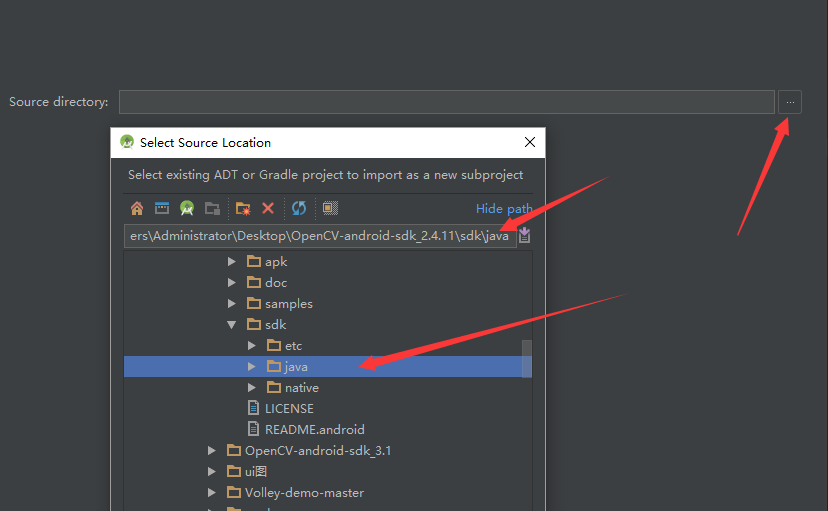
3、加好jniLibs之后呢还需要导入一个module,在studio里面点击file->new->import module->导入module目录是刚才下载的sdk\java这个目录。请看图:
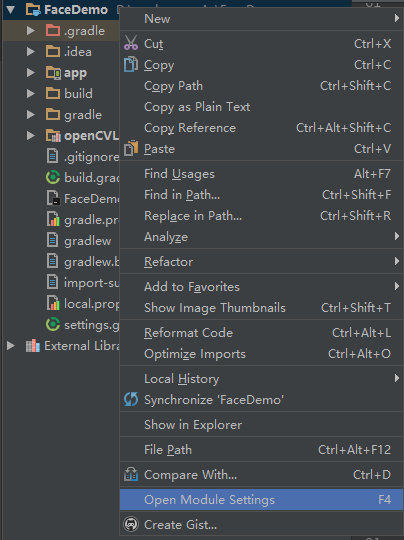
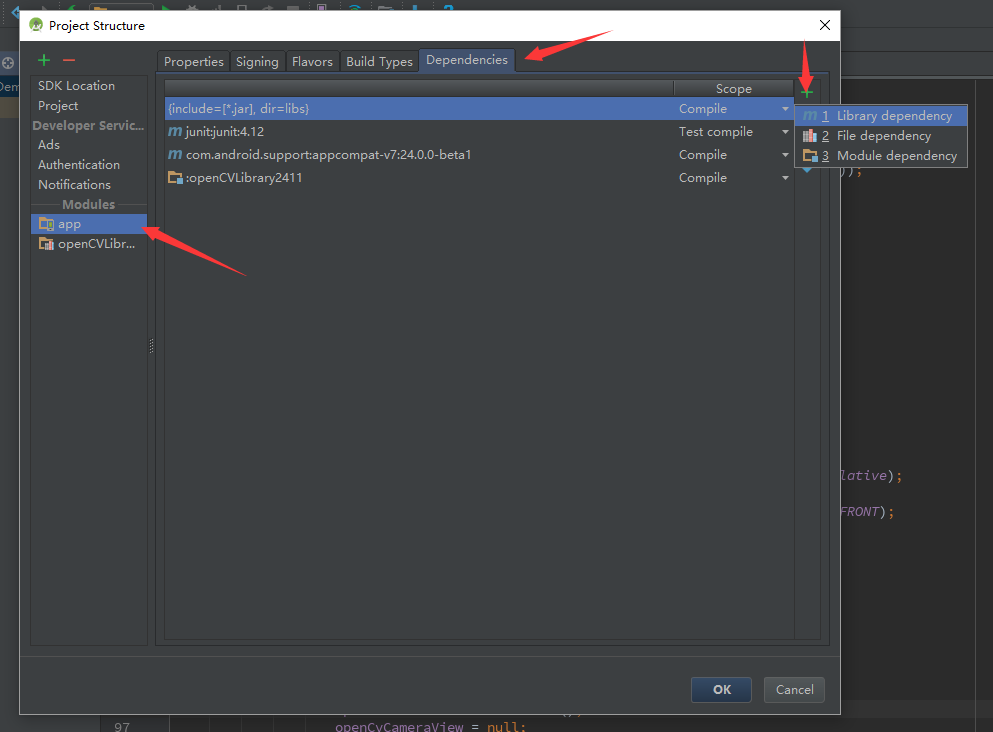
4、导入之后呢右键项目打开open module setting选项,在app选项里点击Dependencies这个,然后点击最右边的+号把刚刚导入的module加进去。请看图:
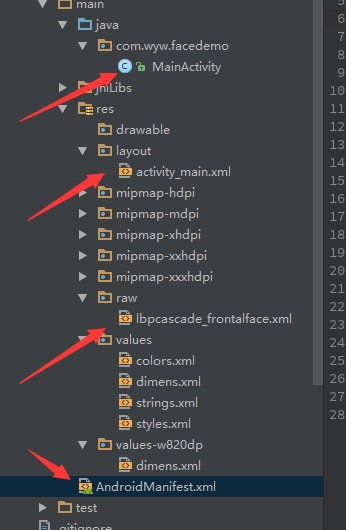
5、现在开始写代码了,这里我把需要写的代码文件会一一贴出来,下面请看图:
首先是MainActivity的代码:
package com.wyw.facedemo;
import android.content.Context;
import android.os.Bundle;
import android.support.v7.app.AppCompatActivity;
import android.util.Log;
import android.view.View;
import android.view.WindowManager;
import android.widget.Button;
import android.widget.RelativeLayout;
import org.opencv.android.CameraBridgeViewBase;
import org.opencv.android.JavaCameraView;
import org.opencv.android.OpenCVLoader;
import org.opencv.core.Core;
import org.opencv.core.CvType;
import org.opencv.core.Mat;
import org.opencv.core.MatOfRect;
import org.opencv.core.Rect;
import org.opencv.core.Scalar;
import org.opencv.core.Size;
import org.opencv.objdetect.CascadeClassifier;
import java.io.File;
import java.io.FileOutputStream;
import java.io.InputStream;
public class MainActivity extends AppCompatActivity
implements CameraBridgeViewBase.CvCameraViewListener {
private CameraBridgeViewBase openCvCameraView;
private CascadeClassifier cascadeClassifier;
private int absoluteFaceSize;
private Mat matLin;
private Mat mat;
public static int CAMERA_FRONT = 0;
public static int CAMERA_BACK = 1;
private int camera_scene = CAMERA_BACK;
private void initializeOpenCVDependencies() {
try {
InputStream is = getResources().openRawResource(R.raw.lbpcascade_frontalface);
File cascadeDir = getDir("cascade", Context.MODE_PRIVATE);
File mCascadeFile = new File(cascadeDir, "lbpcascade_frontalface.xml");
FileOutputStream os = new FileOutputStream(mCascadeFile);
byte[] buffer = new byte[4096];
int bytesRead;
while ((bytesRead = is.read(buffer)) != -1) {
os.write(buffer, 0, bytesRead);
}
is.close();
os.close();
cascadeClassifier = new CascadeClassifier(mCascadeFile.getAbsolutePath());
} catch (Exception e) {
Log.e("OpenCVActivity", "Error loading cascade", e);
}
openCvCameraView.enableView();
}
@Override
public void onCreate(Bundle savedInstanceState) {
super.onCreate(savedInstanceState);
getWindow().addFlags(WindowManager.LayoutParams.FLAG_KEEP_SCREEN_ON);
setContentView(R.layout.activity_main);
final RelativeLayout relativeLayout = (RelativeLayout) findViewById(R.id.relative);
openCvCameraView = new JavaCameraView(this, CameraBridgeViewBase.CAMERA_ID_FRONT);
openCvCameraView.setCvCameraViewListener(this);
final Button button = new Button(MainActivity.this);
button.setText("切换摄像头");
button.setOnClickListener(new View.OnClickListener() {
@Override
public void onClick(View v) {
if (camera_scene == CAMERA_FRONT) {
relativeLayout.removeAllViews();
openCvCameraView.disableView();
openCvCameraView = null;
cascadeClassifier = null;
openCvCameraView = new JavaCameraView(MainActivity.this, CameraBridgeViewBase.CAMERA_ID_BACK);
openCvCameraView.setCvCameraViewListener(MainActivity.this);
openCvCameraView.setCameraIndex(CameraBridgeViewBase.CAMERA_ID_BACK);
camera_scene = CAMERA_BACK;
relativeLayout.addView(openCvCameraView);
relativeLayout.addView(button);
initializeOpenCVDependencies();
} else {
relativeLayout.removeAllViews();
openCvCameraView.disableView();
openCvCameraView = null;
cascadeClassifier = null;
openCvCameraView = new JavaCameraView(MainActivity.this, CameraBridgeViewBase.CAMERA_ID_FRONT);
openCvCameraView.setCvCameraViewListener(MainActivity.this);
openCvCameraView.setCameraIndex(CameraBridgeViewBase.CAMERA_ID_FRONT);
camera_scene = CAMERA_FRONT;
relativeLayout.addView(openCvCameraView);
relativeLayout.addView(button);
initializeOpenCVDependencies();
}
}
});
relativeLayout.addView(openCvCameraView);
relativeLayout.addView(button);
if (camera_scene == CAMERA_FRONT) {
openCvCameraView.setCameraIndex(CameraBridgeViewBase.CAMERA_ID_FRONT);
} else if (camera_scene == CAMERA_BACK) {
openCvCameraView.setCameraIndex(CameraBridgeViewBase.CAMERA_ID_BACK);
}
}
@Override
public void onCameraViewStarted(int width, int height) {
matLin = new Mat(height, width, CvType.CV_8UC4);
absoluteFaceSize = (int) (height * 0.3);
}
@Override
public void onCameraViewStopped() {
}
@Override
public Mat onCameraFrame(Mat aInputFrame) {
Core.transpose(aInputFrame, matLin);
if (camera_scene == CAMERA_FRONT) {
Core.flip(matLin, aInputFrame, 1);
Core.flip(aInputFrame, matLin, 0);
mat = matLin;
} else if (camera_scene == CAMERA_BACK) {
Core.flip(matLin, aInputFrame, 1);
mat = aInputFrame;
}
MatOfRect faces = new MatOfRect();
Log.i("123456", "absoluteFaceSize = " + absoluteFaceSize);
if (cascadeClassifier != null) {
cascadeClassifier.detectMultiScale(mat, faces, 1.1, 1, 1,
new Size(absoluteFaceSize, absoluteFaceSize), new Size());
}
Rect[] facesArray = faces.toArray();
for (int i = 0; i < facesArray.length; i++) {
Log.i("123456", "facesArray[i].tl()坐上坐标 == " + facesArray[i].tl() + " facesArray[i].br() == 右下坐标" + facesArray[i].br());
Core.rectangle(mat, facesArray[i].tl(), facesArray[i].br(), new Scalar(0, 255, 0, 255), 3);
}
return mat;
}
@Override
public void onResume() {
super.onResume();
if (!OpenCVLoader.initDebug()) {
Log.e("log_wons", "OpenCV init error");
}
initializeOpenCVDependencies();
}
}
- 1
- 2
- 3
- 4
- 5
- 6
- 7
- 8
- 9
- 10
- 11
- 12
- 13
- 14
- 15
- 16
- 17
- 18
- 19
- 20
- 21
- 22
- 23
- 24
- 25
- 26
- 27
- 28
- 29
- 30
- 31
- 32
- 33
- 34
- 35
- 36
- 37
- 38
- 39
- 40
- 41
- 42
- 43
- 44
- 45
- 46
- 47
- 48
- 49
- 50
- 51
- 52
- 53
- 54
- 55
- 56
- 57
- 58
- 59
- 60
- 61
- 62
- 63
- 64
- 65
- 66
- 67
- 68
- 69
- 70
- 71
- 72
- 73
- 74
- 75
- 76
- 77
- 78
- 79
- 80
- 81
- 82
- 83
- 84
- 85
- 86
- 87
- 88
- 89
- 90
- 91
- 92
- 93
- 94
- 95
- 96
- 97
- 98
- 99
- 100
- 101
- 102
- 103
- 104
- 105
- 106
- 107
- 108
- 109
- 110
- 111
- 112
- 113
- 114
- 115
- 116
- 117
- 118
- 119
- 120
- 121
- 122
- 123
- 124
- 125
- 126
- 127
- 128
- 129
- 130
- 131
- 132
- 133
- 134
- 135
- 136
- 137
- 138
- 139
- 140
- 141
- 142
- 143
- 144
- 145
- 146
- 147
- 148
- 149
- 150
- 151
- 152
- 153
- 154
- 155
- 156
- 157
- 158
- 159
- 160
- 161
- 162
- 163
- 164
- 165
- 166
- 167
- 168
- 169
- 170
- 171
- 172
- 173
- 174
- 175
- 176
- 177
- 178
- 179
- 180
- 181
- 182
- 183
- 184
- 185
- 186
- 187
- 188
- 189
- 190
- 191
- 192
- 193
- 194
- 195
- 196
- 197
- 198
- 199
- 200
- 201
- 202
- 203
- 204
然后是layout的xml代码:
<?xml version="1.0" encoding="utf-8"?>
<RelativeLayout
    xmlns:android="http://schemas.android.com/apk/res/android"
    android:id="@+id/relative"
    android:layout_width="match_parent"
    android:layout_height="match_parent">

</RelativeLayout>
现在是raw文件夹里面的xml(这个xml是图片解析出来进行对比校验人脸的模型库)由于这个文件有一千多行就不贴了,如有需要请去下载本demo查看!当然也可以去你下载的openCV的sdk里面拿,目录是\samples\face-detection\res\raw。请看图:

最后就是AndroidManifest文件了:
<?xml version="1.0" encoding="utf-8"?>
<manifest package="com.wyw.facedemo"
          xmlns:android="http://schemas.android.com/apk/res/android">

    <uses-permission android:name="android.permission.CAMERA"/>

    <uses-feature android:name="android.hardware.camera" android:required="false"/>
    <uses-feature android:name="android.hardware.camera.autofocus" android:required="false"/>
    <uses-feature android:name="android.hardware.camera.front" android:required="false"/>
    <uses-feature android:name="android.hardware.camera.front.autofocus" android:required="false"/>

    <application
        android:allowBackup="true"
        android:icon="@mipmap/ic_launcher"
        android:label="@string/app_name"
        android:supportsRtl="true"
        android:theme="@style/AppTheme">
        <activity android:name=".MainActivity">
            <intent-filter>
                <action android:name="android.intent.action.MAIN"/>

                <category android:name="android.intent.category.LAUNCHER"/>
            </intent-filter>
        </activity>
    </application>

</manifest>
- 1
- 2
- 3
- 4
- 5
- 6
- 7
- 8
- 9
- 10
- 11
- 12
- 13
- 14
- 15
- 16
- 17
- 18
- 19
- 20
- 21
- 22
- 23
- 24
- 25
- 26
- 27
- 28
做到这一步就赶紧把你的代码运行起来吧!!本篇博客就到这里,如果有有疑问的欢迎留言讨论。同时希望大家多多关注我的博客,多多支持我。