1. 什么是SpringBoot?
SpringBoot是一个快速开发框架,能够帮我们快速整合第三方框架(Maven依赖关系##Maven继承),完全采用注解化,简化XML配置,内置嵌入Http服务器(Tomcat、Jetty),默认嵌入Tomcat服务器。最终以java应用程序进行执行。(SpringBoot项目中没有web.xml)
2. SpringBoot与SpringCloud的关系
SpringCloud是一套目前比较完整的微服务框架,功能非常强大。注册中心、客户端调用工具、服务治理(负载均衡、断路器、分布配置中心、网关、服务链路、消息总线等)
关系:SpringBoot + SpringCloud 实现微服务开发,使用Springmvc实现微服务接口
SpringBoot 实现快速开发
3. SpringBoot与SpringMVC的关系
SpringBoot web组件集成了SpringMVC框架。

4. 用SpringBoot写一个 HelloWorld
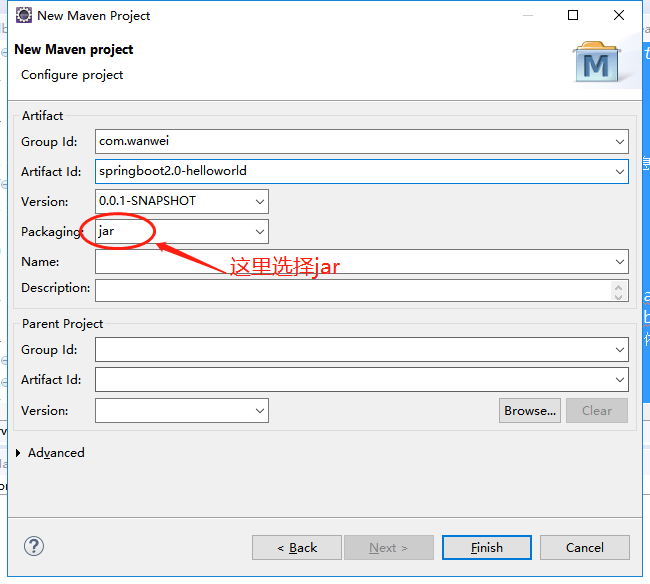
- 新建一个Maven工程
- 在pom.xml中添加依赖信息
<project xmlns="http://maven.apache.org/POM/4.0.0" xmlns:xsi="http://www.w3.org/2001/XMLSchema-instance" xsi:schemaLocation="http://maven.apache.org/POM/4.0.0 http://maven.apache.org/xsd/maven-4.0.0.xsd">
  <modelVersion>4.0.0</modelVersion>
  <groupId>com.wanwei</groupId>
  <artifactId>springboot2.0-helloword</artifactId>
  <version>0.0.1-SNAPSHOT</version>
  <!-- spring-boot-starter-parent 整合第三方常用框架依赖信息(各种依赖信息) -->
  <parent>
      <groupId>org.springframework.boot</groupId>
      <artifactId>spring-boot-starter-parent</artifactId>
      <version>2.0.0.RELEASE</version>
  </parent>
  <!-- spring-boot-starter-web是springboot整合SpringMVC 实现原理:Maven依赖继承关系 -->
  <!-- 相当于把第三方常用maven依赖信息在parent项目中已经封装好了,使用springboot提供依赖信息关联整合的jar包 -->
  <!-- springboot 中快速处理原理(Maven子父依赖关系),springboot对常用的依赖信息进行封装 -->
  <dependencies>
      <dependency>
          <groupId>org.springframework.boot</groupId>
          <artifactId>spring-boot-starter-web</artifactId>
          <!-- 因为parent里面已经封装了版本号,所以这里不需要再写版本号 -->
      </dependency>
  </dependencies>
</project>
- 创建一个Controller
package com.wanwei.index.controller;

import org.springframework.boot.SpringApplication;
import org.springframework.boot.autoconfigure.EnableAutoConfiguration;
import org.springframework.web.bind.annotation.RequestMapping;
import org.springframework.web.bind.annotation.RestController;
/**
 *SpringBoot启动原理:SpringMVC注解方式启动,内嵌http服务器(默认是Tomcat)
 @EnableAutoConfiguration注解作用:开启自动配置,默认只扫描当前类
 *
 */
@RestController
@EnableAutoConfiguration
public class MemberController {

    //RestController注解表示该类的所有方法都返回json格式

    @RequestMapping("/memberIndex")
    public String memberIndex(){
        return "SpringBoot的第一个案例";
    }

    public static void main(String[] args) {
        //整个程序的入口,启动SpringBoot
        SpringApplication.run(MemberController.class, args);
    }
}
这样一个简单的SpringBoot Holloworld就写好了,运行后在浏览器访问:http://localhost:8080/memeberIndex
5. @ComponentScan 注解
上面的项目中只有一个Controller,但我们实际开发的项目中往往是有多个Controller,而 @EnableAutoConfiguration 注解只扫描当前类,这时候我们可以新建一个类将启动代码抽取出来,并使用 @ComponentScan 注解设置扫包范围。

package com.wanwei.index.controller;

import org.springframework.boot.SpringApplication;
import org.springframework.boot.autoconfigure.EnableAutoConfiguration;
import org.springframework.context.annotation.ComponentScan;
import org.springframework.web.bind.annotation.RestController;
/**
 *
 * 将启动代码单独出来运行
 * @ComponentScan注解作用:包扫描器,设置扫包范围
 */
@RestController
@EnableAutoConfiguration
@ComponentScan("com.wanwei.index.controller")
public class App {
    public static void main(String[] args) {
        SpringApplication.run(App.class, args);
    }
}
这时候我们再增加一个Controller
packagecom.wanwei.index.controller;

import org.springframework.boot.SpringApplication;
import org.springframework.web.bind.annotation.RequestMapping;
import org.springframework.web.bind.annotation.RestController;
@RestController
public class IndexController {
    @RequestMapping("/index")
    public String index(){
        return "SpringBoot2.0 index";
    }
    public static void main(String[] args) {
        SpringApplication.run(IndexController.class, args);
    }
}
运行后在浏览器访问:http://localhost:8080/memeberIndex 和 http://localhost:8080/index 都可以成功。
6.@SpringBootApplication 注解
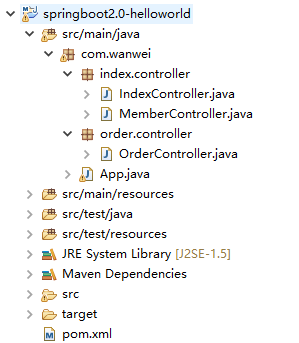
在实际项目中不同的Controller一般会有不同的包,那我们在设置扫包范围时就需要这么写:@ComponentScan(basePackage = {"com.wanwei.index.controller","com.wanwei.order.controller"})但是如果包太多这样写又很麻烦,这时候我们就可以使用@SpringBootApplication注解,(它的作用其实就等同于@EnableAutoConfiguration + @ComponentScan),默认扫描当前包和当前包的同级包、子包。
- 新建一个包,在此包下创建一个Controller,然后把启动类App放在com.wanwei包下(保证了启动类和其他Controller类都在同级包下)
package com.wanwei.order.controller;

import org.springframework.boot.SpringApplication;
import org.springframework.web.bind.annotation.RequestMapping;
import org.springframework.web.bind.annotation.RestController;
@RestController
public class OrderController {
    @RequestMapping("/order")
    public String order(){
        return "使用@SpringApplication注解";
    }
    public static void main(String[] args) {
        SpringApplication.run(OrderController.class, args);
    }
}
- 在启动Controller的类中注释掉@EnableAutoConfiguration 和 @ComponentScan,添加@SpringBootApplication注解
package com.wanwei;

import org.springframework.boot.SpringApplication;
import org.springframework.boot.autoconfigure.EnableAutoConfiguration;
import org.springframework.boot.autoconfigure.SpringBootApplication;
import org.springframework.context.annotation.ComponentScan;
/**
 *
 * 将启动代码单独出来运行
 * @ComponentScan注解作用:设置扫包范围
 */
//@EnableAutoConfiguration
//@ComponentScan("com.wanwei.index.controller")
@SpringBootApplication
public class App {
    public static void main(String[] args) {
        SpringApplication.run(App.class, args);
    }
}
运行代码,所有页面都能访问成功。