学习目标
- 目标
- 说明验证码识别的原理
- 说明全连接层的输出设置
- 说明输出结果的损失、准确率计算
- 说明验证码标签值的数字转换
- 应用tf.one_hot实现验证码目标值的one_hot编码处理
- 应用
- 应用神经网络识别验证码图片
1、识别效果
2、验证码识别实战
- 处理原始数据
- 方便特征值、目标值读取训练
- 设计网络结构
- 网络的输出处理
- 训练模型并预测
原理分析
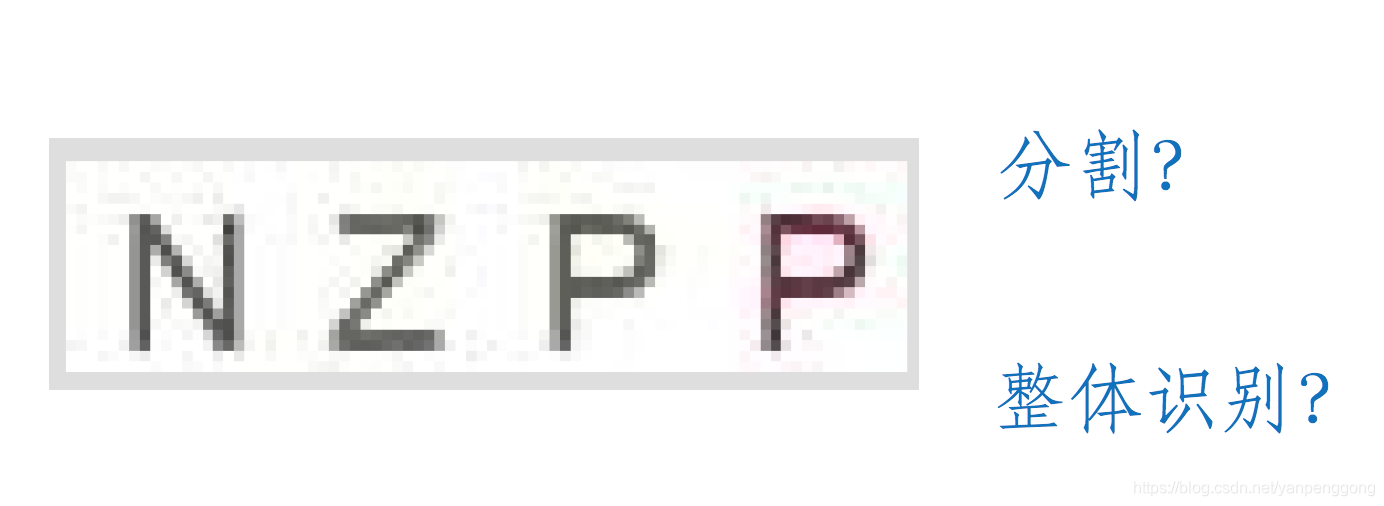
- 1、目标标签分析
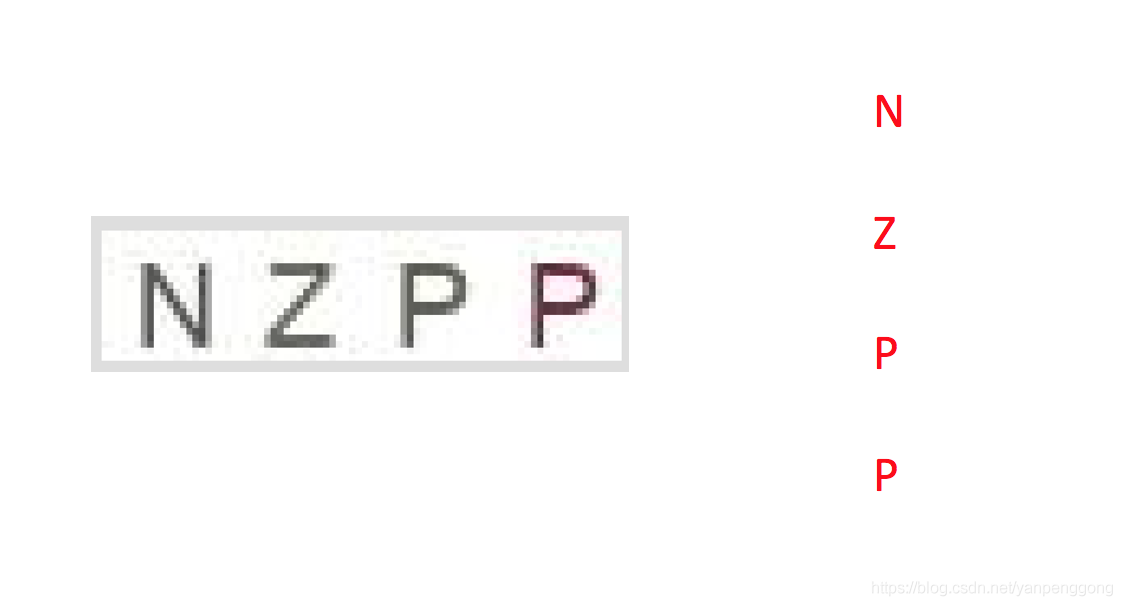
考虑每个位置的可能性?“ABCDEFGHIJKLMNOPQRSTUVWXYZ”
第一个位置:26种可能性
第二个位置:26种可能性
第三个位置:26种可能性
第四个位置:26种可能性
如何比较输出结果和真实值的正确性?可以对每个位置进行one_hot编码
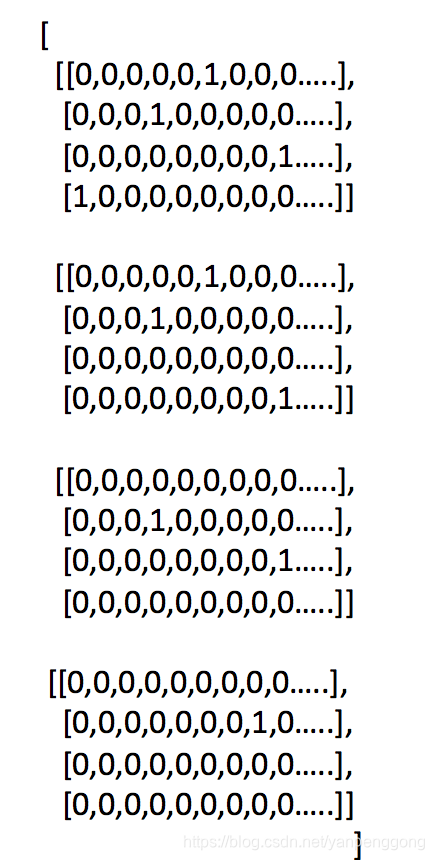
- 2、网络输出分析
按照这样的顺序,“ABCDEFGHIJKLMNOPQRSTUVWXYZ”
真实值:
第一个位置:[0,0,0,0,0,0,0,0,0,0,0,0,0,0,1,0,0,0,0,0,0,0,0,0,0,0]
第二个位置:[0,0,0,0,0,0,0,0,0,0,0,0,0,0,0,0,0,0,0,0,0,0,0,0,0,1]
第三个位置:[0,0,0,0,0,0,0,0,0,0,0,0,1,0,0,0,0,0,0,0,0,0,0,0,0,0]
第四个位置:[0,0,0,0,0,0,0,0,0,0,0,0,1,0,0,0,0,0,0,0,0,0,0,0,0,0]
那么每个验证码的目标有[4, 26]这样一个数组
- 3、如何衡量损失
我们考虑将目标值拼接在一起,形成一个[104]长度的一阶张量
真实值:
[0,0,0,0,...0,0,1,0,0][0,0,0,1,...0,0,0,0,0][0,0,0,0,...0,0,0,1,0][1,0,0,0,...0,0,0,0,0]
		  26                    26                   26                     26

预测概率值:
[0.001,0.01,,...,0.2,][0.001,0.01,,...,0.2,][0.001,0.01,,...,0.2,][0.02,0.01,,...,0.1,]
		  26                    26                   26                     26
这两个104的一阶张量进行交叉熵损失计算,得出损失大小。会提高四个位置的概率,使得4组中每组26个目标值中为1的位置对应的预测概率值越来越大,在预测的四组当中概率值最大。这样得出预测中每组的字母位置。
-
所有104个概率相加为1
-
4、准确率如何计算
预测值和目标值形状要变为[None, 4, 26],即可这样去比较
在每个验证码的第三个维度去进行比较,4个标签的目标值位置与预测概率位置是否相等,4个全相等,这个样本才预测正确
维度位置比较:
    0   1   2
[None, 4, 26]

tf.argmax(y_predict, 2)
3.1 处理原始图片标签数据到TFRecords
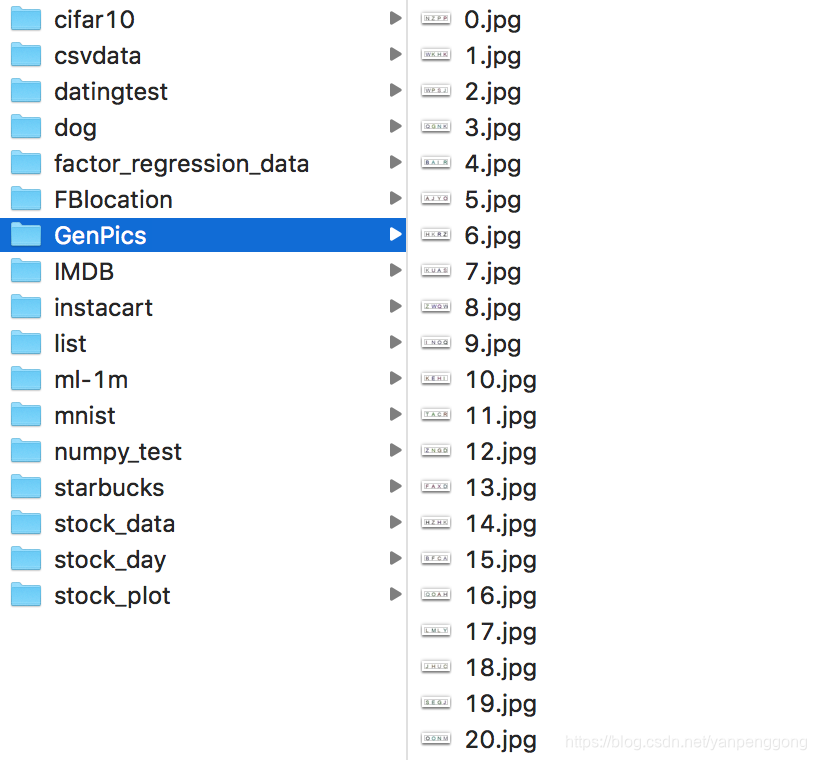
3.1.1 验证码原始数据
3.1.2 处理分析
- 处理特征值
避免读取的时候文件名字混乱,自己构造的0~5999的验证码图片文件名字列表
def get_captcha_image():
    """
    获取验证码图片数据
    :param file_list: 路径+文件名列表
    :return: image
    """
    # 构造文件名
    filename = []

    for i in range(6000):
        string = str(i) + ".jpg"
        filename.append(string)

    # 构造路径+文件
    file_list = [os.path.join(FLAGS.captcha_dir, file) for file in filename]

    # 构造文件队列
    file_queue = tf.train.string_input_producer(file_list, shuffle=False)

    # 构造阅读器
    reader = tf.WholeFileReader()

    # 读取图片数据内容
    key, value = reader.read(file_queue)

    # 解码图片数据
    image = tf.image.decode_jpeg(value)

    image.set_shape([20, 80, 3])

    # 批处理数据 [6000, 20, 80, 3]
    image_batch = tf.train.batch([image], batch_size=6000, num_threads=1, capacity=6000)

    return image_batch
- 目标值处理
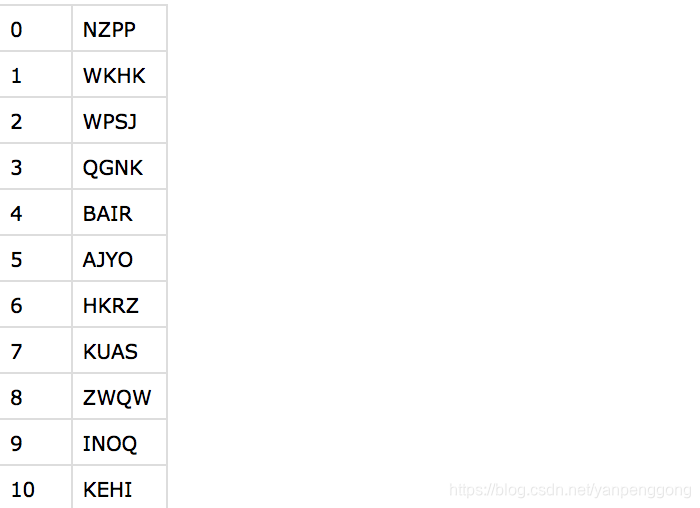
目标值怎么处理,我们每个图片的目标值都是一个字符串。那么将其当做一个个的字符单独处理。一张验证码的图片的目标值由4个数字组成。建立这样的对应关系
"ABCDEFGHIJKLMNOPQRSTUVWXYZ"
0,1,2,................,24,25

最终:
"NZPP"----> [[13, 25, 15, 15]]
然后将所有的目标值都变成四个数字,然后与对应的特征值一起存入example当中
[[13, 25, 15, 15], [22, 10, 7, 10], [22, 15, 18, 9], [16, 6, 13, 10], [1, 0, 8, 17], [0, 9, 24, 14].....]
代码部分:
读取label文件
def get_captcha_label():
    """
    读取验证码图片标签数据
    :return: label
    """
    file_queue = tf.train.string_input_producer(["../data/Genpics/labels.csv"], shuffle=False)

    reader = tf.TextLineReader()

    key, value = reader.read(file_queue)

    records = [[1], ["None"]]

    number, label = tf.decode_csv(value, record_defaults=records)

    # [["NZPP"], ["WKHK"], ["ASDY"]]
    label_batch = tf.train.batch([label], batch_size=6000, num_threads=1, capacity=6000)

    return label_batch
处理目标值
# [b'NZPP' b'WKHK' b'WPSJ' ..., b'FVQJ' b'BQYA' b'BCHR']
label_str = sess.run(label)

print(label_str)

# 处理字符串标签到数字张量
label_batch = dealwithlabel(label_str)
转换对应的数字
def dealwithlabel(label_str):

    # 构建字符索引 {0:'A', 1:'B'......}
    num_letter = dict(enumerate(list(FLAGS.letter)))

    # 键值对反转 {'A':0, 'B':1......}
    letter_num = dict(zip(num_letter.values(), num_letter.keys()))

    print(letter_num)

    # 构建标签的列表
    array = []

    # 给标签数据进行处理[[b"NZPP"]......]
    for string in label_str:

        letter_list = []# [1,2,3,4]

        # 修改编码,b'FVQJ'到字符串,并且循环找到每张验证码的字符对应的数字标记
        for letter in string.decode('utf-8'):
            letter_list.append(letter_num[letter])

        array.append(letter_list)

    # [[13, 25, 15, 15], [22, 10, 7, 10], [22, 15, 18, 9], [16, 6, 13, 10], [1, 0, 8, 17], [0, 9, 24, 14].....]
    print(array)

    # 将array转换成tensor类型
    label = tf.constant(array)
- 特征值、目标值一一对应构造example并写入文件
同一个图片的特征值目标值由于都是非0维数组,所以都以bytes存入
def write_to_tfrecords(image_batch, label_batch):
    """
    将图片内容和标签写入到tfrecords文件当中
    :param image_batch: 特征值
    :param label_batch: 标签纸
    :return: None
    """
    # 转换类型
    label_batch = tf.cast(label_batch, tf.uint8)

    print(label_batch)

    # 建立TFRecords 存储器
    writer = tf.python_io.TFRecordWriter(FLAGS.tfrecords_dir)

    # 循环将每一个图片上的数据构造example协议块,序列化后写入
    for i in range(6000):
        # 取出第i个图片数据,转换相应类型,图片的特征值要转换成字符串形式
        image_string = image_batch[i].eval().tostring()

        # 标签值,转换成整型
        label_string = label_batch[i].eval().tostring()

        # 构造协议块
        example = tf.train.Example(features=tf.train.Features(feature={
            "image": tf.train.Feature(bytes_list=tf.train.BytesList(value=[image_string])),
            "label": tf.train.Feature(bytes_list=tf.train.BytesList(value=[label_string]))
        }))

        writer.write(example.SerializeToString())

    # 关闭文件
    writer.close()

    return None
3.2 读取数据训练
3.2.1 读取TFRecords文件数据
def read_captcha_tfrecords():
    """
    从tfrecords读取图片特征值和目标值
    :return: 特征值、目标值
    """
    # 1、构造文件队列
    file_queue = tf.train.string_input_producer([FLAGS.captcha_tfrecords])

    # 2、构造读取器去读取数据,默认一个样本
    reader = tf.TFRecordReader()

    key, values = reader.read(file_queue)

    # 3、解析example协议
    feature = tf.parse_single_example(values, features={
        "image": tf.FixedLenFeature([], tf.string),
        "label": tf.FixedLenFeature([], tf.string),
    })

    # 4、对bytes类型的数据进行解码
    image = tf.decode_raw(feature['image'], tf.uint8)

    label = tf.decode_raw(feature['label'], tf.uint8)

    print(image, label)

    # 固定每一个数据张量的形状
    image_reshape = tf.reshape(image, [FLAGS.height, FLAGS.width, FLAGS.channel])

    label_reshape = tf.reshape(label, [FLAGS.label_num])

    print(image_reshape, label_reshape)

    # 处理数据的类型
    # 对特征值进行类型修改
    image_reshape = tf.cast(image_reshape, tf.float32)

    label_reshape = tf.cast(label_reshape, tf.int32)

    # 5、进行批处理
    # 意味着每批次训练的样本数量
    image_batch, label_batch = tf.train.batch([image_reshape, label_reshape], batch_size=100, num_threads=1, capacity=100)

    print(image_batch, label_batch)

    return image_batch, label_batch
3.2.2 标签数据处理成三维
def change_to_onehot(label_batch):
    """
    处理图片的四个目标值到ont_hot编码
    :param label_batch: [[13, 25, 15, 15], [22, 10, 7, 10], [22, 15, 18, 9]]
    :return: ont_hot
    """

    # [100, 4]---->[100, 4, 26]
    y_true = tf.one_hot(label_batch, depth=FLAGS.depth, on_value=1.0)

    return y_true
3.2.3 全连接层模型建立
每个样本的目标值4个,每个目标值26中可能性,全连接层神经元个数4*26个
def captcha_model(image_batch):
    """
    定义验证码的神经网络模型,得出模型输出
    :param image_batch: 模型的输入数据
    :return: 模型输出结果(预测结果)
    """

    # 直接使用一层  全连接层的神经网络进行预测
    # 确定全连接层的模型计算
    # 输入:[100, 20, 80, 3]         输出:[None, 104]   104 = 4个目标值 * 26中可能性
    with tf.variable_scope("captcha_model"):

        # [100, 20 * 80 * 3]*[20*80*3, 104]+[104] = [None, 104]
        # 随机初始化全连接层的权重和偏置
        w = weight_variables([20 * 80 * 3, 104])

        b = bias_variables([104])

        # 做出全连接层的形状改变[100, 20, 80, 3] ----->[100, 20 * 80 * 3]
        image_reshape = tf.reshape(image_batch, [-1, FLAGS.height * FLAGS.width * FLAGS.channel])

        # 进行矩阵运算
        # y_predict   [None, 104]
        y_predict = tf.matmul(image_reshape, w) + b

    return y_predict
3.2.4 计算交叉熵损失
每个图片的104个预测概率与104个真实值之间进行交叉熵计算
# 3、softmax运算计算交叉熵损失
with tf.variable_scope("softmax_crossentropy"):
    # y_true:真实值 [100, 4, 26]  one_hot---->[100, 4 * 26]
    # y_predict :全脸层的输出[100, 104]
    # 返回每个样本的损失组成的列表
    loss = tf.reduce_mean(
        tf.nn.softmax_cross_entropy_with_logits(labels=tf.reshape(y_true, [100, FLAGS.label_num * FLAGS.depth]),
                                                                      logits=y_predict)
3.2.5 得出准确率
形状:[100, 4, 26]的低三个维度进行比较最大值位置
# 5、得出每次训练的准确率(通过真实值和预测值进行位置比较,每个样本都比较)
with tf.variable_scope("accuracy"):
    # 准确率计算需要三维数据对比
    # y_true:真实值 [100, 4, 26]
    # y_predict :全脸层的输出[100, 104]--->[100, 4, 26]
    equal_list = tf.equal(
    tf.argmax(y_true, 2),
    tf.argmax(tf.reshape(y_predict, [100, FLAGS.label_num, FLAGS.depth]), 2)
    )

    accuracy = tf.reduce_mean(tf.cast(tf.reduce_all(equal_list, 1), tf.float32))
需要用到一个函数处理equal_list
```python
    x = tf.constant([[True,  True], [False, False]])
    tf.reduce_all(x)     # False
    tf.reduce_all(x, 0)  # [False, False]
    tf.reduce_all(x, 1)  # [True, False]
```
3.2.6 封装连个参数工具函数
# 封装两个初始化参数的API,以变量Op定义
def weight_variables(shape):
    w = tf.Variable(tf.random_normal(shape=shape, mean=0.0, stddev=1.0))
    return w


def bias_variables(shape):
    b = tf.Variable(tf.random_normal(shape=shape, mean=0.0, stddev=1.0))
    return b
3.3 模型训练
def captcha_reco():
"""
四个目标值的验证码图片识别
:return:
"""
# 1、从tfrecords读取图片特征值和目标值
# image_batch [100, 20, 80, 3]
# label_batch [100, 4] [[13, 25, 15, 15], [22, 10, 7, 10], [22, 15, 18, 9]]
image_batch, label_batch = read_captcha_tfrecords()
# 2、建立识别验证码的神经网络模型
# y_predict-->[100, 104]
y_predict = captcha_model(image_batch)
# 对目标值进行one_hot编码处理
# y_true是一个三维形状[100, 4, 26]
y_true = change_to_onehot(label_batch)
# 3、softmax运算计算交叉熵损失
with tf.variable_scope("softmax_crossentropy"):
# y_true:真实值 [100, 4, 26] one_hot---->[100, 4 * 26]
# y_predict :全脸层的输出[100, 104]
# 返回每个样本的损失组成的列表
loss = tf.reduce_mean(
tf.nn.softmax_cross_entropy_with_logits(labels=tf.reshape(y_true, [100, FLAGS.label_num * FLAGS.depth]),
logits=y_predict)
)
# 4、梯度下降损失优化
with tf.variable_scope("optimizer"):
# 学习率
train_op = tf.train.GradientDescentOptimizer(0.1).minimize(loss)
# 5、得出每次训练的准确率(通过真实值和预测值进行位置比较,每个样本都比较)
with tf.variable_scope("accuracy"):
# 准确率计算需要三维数据对比
# y_true:真实值 [100, 4, 26]
# y_predict :全脸层的输出[100, 104]--->[100, 4, 26]
equal_list = tf.equal(
tf.argmax(y_true, 2),
tf.argmax(tf.reshape(y_predict, [100, FLAGS.label_num, FLAGS.depth]), 2)
)
accuracy = tf.reduce_mean(tf.cast(equal_list, tf.float32))
# 初始化变量的op
init_op = tf.global_variables_initializer()
# 开启会话运行
with tf.Session() as sess:
sess.run(init_op)
# 创建线程去开启读取任务
coord = tf.train.Coordinator()
threads = tf.train.start_queue_runners(sess, coord=coord)
# sess.run([image_batch, label_batch])
# 循环训练
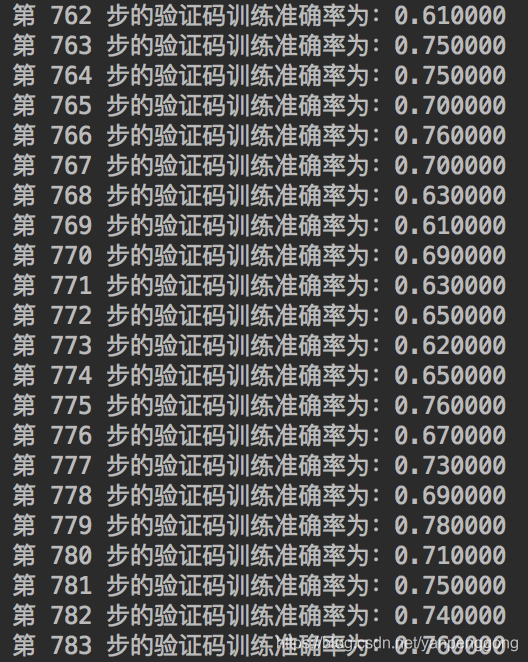
for i in range(1000):
sess.run(train_op)
print("第%d步的验证码训练准确率为:%f" % (i,
accuracy.eval()
))
# 回收线程
coord.request_stop()
coord.join(threads)
return None
3.3 保存模型预测
if i % 100 == 0:

	saver.save(sess, "./tmp/model/captcha_model")
完整代码:
# -*- coding=utf-8 -*-
# tensorboard图像 终端查看
# tensorboard --logdir="./temp/summary/"

import os
# os.environ["TF_CPP_MIN_LOG_LEVEL"]='1' # 这是默认的显示等级,显示所有信息
os.environ["TF_CPP_MIN_LOG_LEVEL"]='2' # 只显示 warning 和 Error
# os.environ["TF_CPP_MIN_LOG_LEVEL"]='3' # 只显示 Error

import tensorflow as tf


class CaptchaIdentification(object):
    """
    验证码的读取数据、网络训练
    """

    def __init__(self):
        # 验证码图片的属性
        self.height = 20
        self.width = 80
        self.channel = 3
        # 每个验证码的目标值个数(4个字符)
        self.label_num = 4
        # 每个目标值对应的属性
        self.feature_num = 26

        # 权重和偏置
        self.weight = []
        self.bias = []

        # 每批次训练样本个数
        self.train_batch = 100

    @staticmethod  # 设置静态方法
    def weight_variables(shape):
        w = tf.Variable(tf.random_normal(shape=shape, mean=0.0, stddev=0.1))
        return w

    @staticmethod  # 设置静态方法
    def bias_variables(shape):
        b = tf.Variable(tf.random_normal(shape=shape, mean=0.0, stddev=0.1))
        return b

    def read_tfrecords(self):
        """
        读取验证码特征值和目标值数据
        :return:
        """
        # 1、构造文件的队列
        file_queue = tf.train.string_input_producer(["./tfrecords/captcha.tfrecords"])

        # 2、 tf.TFRecordReader 读取TFRecorders数据
        reader = tf.TFRecordReader()

        # 单个样本数据
        key, value = reader.read(file_queue)

        # 3、解析example协议
        feature = tf.parse_single_example(value, features={
            "image": tf.FixedLenFeature(shape=[], dtype=tf.string),
            "label": tf.FixedLenFeature(shape=[], dtype=tf.string),
        })

        # 4、解码操作、数据类型、形状
        image = tf.decode_raw(bytes=feature["image"], out_type=tf.uint8)
        label = tf.decode_raw(bytes=feature["label"], out_type=tf.uint8)

        # 确定类型和形状
        # 图片的形状 [20, 80, 3]
        # 目标值 [4]
        image_reshape = tf.reshape(image, shape=[self.height, self.width, self.channel])
        label_reshape = tf.reshape(label, shape=[self.label_num])

        # 类型转换
        image_type = tf.cast(image_reshape, dtype=tf.float32)
        label_type = tf.cast(label_reshape, dtype=tf.int32)
        # print(image_type, label_type)

        # 5、批处理
        # 提供每批次多少样本去进行训练
        image_batch, label_batch = tf.train.batch([image_type, label_type],
                                                  batch_size=self.train_batch,
                                                  num_threads=1,
                                                  capacity=self.train_batch)

        print(image_batch, label_batch)
        return image_batch, label_batch

    def captcha_model(self, image_batch, label_batch):
        """
        建立全连接层神经网络
        :param image_batch: 验证码图片特征值
        :param label_batch: 验证码图片的目标值
        :return: 预测结果
        """
        # 全连接层
        # [self.train_batch, self.height, self.width, self.channel] --> [self.train_batch, self.height * self.width * self.channel]
        # 即:[100, 20, 80, 3]  --> [100, 20 * 80 * 3]
        # [self.train_batch, self.height * self.width * self.channel] * [self.height * self.width * self.channel, self.label_num * self.feature_num] + [self.label_num * self.feature_num] = [None, self.label_num * self.feature_num]
        # 即:[100, 20 * 80 * 3] * [20 * 80 * 3, 104] + [104] = [None, 104]   104= 4*26
        with tf.variable_scope("captcha_fc_model"):
            # 初始化权重和偏置参数
            self.weight = self.weight_variables(
                shape=[self.height * self.width * self.channel, self.label_num * self.feature_num])
            self.bias = self.bias_variables(shape=[self.label_num * self.feature_num])

            # 4维 --> 2维做矩阵运算
            x_reshape = tf.reshape(tensor=image_batch,
                                   shape=[self.train_batch, self.height * self.width * self.channel])

            # 预测结果的形状 [self.train_batch, self.label*self.feature_num]
            y_predict = tf.matmul(x_reshape, self.weight) + self.bias

        return y_predict, self.weight, self.bias

    def turn_to_onehot(self, label_batch):
        """
        目标值转换成one_hot编码
        :param label_batch: 目标值 [None, 4]
        :return:
        """
        with tf.variable_scope("one_hot"):
            # [None, self.label_num] --> [None, self.label_num, self.feature_num]
            # 即:[None, 4] --> [None, 4, 26]
            y_true = tf.one_hot(indices=label_batch,
                                depth=self.feature_num,
                                on_value=1.0)
            return y_true

    def loss(self, y_true, y_predict):
        """
        建立验证码4个目标值
        :param y_true:
        :param y_predict:
        :return:
        """
        with tf.variable_scope("loss"):
            # 先进行网络输出值的概率计算softmax,再进行交叉熵损失计算
            # y_true:[None, 4, 26] -->[None, 104]
            # y_predict:[None, 104]
            y_reshape = tf.reshape(tensor=y_true, shape=[self.train_batch, self.label_num * self.feature_num])
            all_loss = tf.nn.softmax_cross_entropy_with_logits(labels=y_reshape,
                                                               logits=y_predict,
                                                               name="compute_loss")

            # 求出平均损失
            loss = tf.reduce_mean(all_loss)

        return loss

    def sgd(self, loss):
        """
        梯度下降优化损失
        :param loss:
        :return:
        """
        with tf.variable_scope("sgd"):
            train_op = tf.train.GradientDescentOptimizer(learning_rate=0.1).minimize(loss=loss)

        return train_op

    def accuracy(self, y_true, y_predict):
        """
        就按准确率
        :param y_true: 真实值
        :param y_predict: 预测值
        :return: accuracy
        """
        with tf.variable_scope("accuracy"):
            # y_true: [None, self.label_num, self.feature_num]  即:[None, 4, 26]
            # y_predict: [None, self.label_num * self.feature_num] 即:[None, 104]
            y_predict_reshape = tf.reshape(tensor=y_predict, shape=[self.train_batch, self.label_num, self.feature_num])

            # 先对最大值的位置去求解
            t1 = tf.argmax(y_true, 2)  # 这里 2 是矩阵的层数减1。 [None, 104]的层数为2
            t2 = tf.argmax(y_predict_reshape, 2)
            equal_list = tf.equal(t1, t2)  # 返回的是bool值

            # 需要对每个样本进行判断
            # x = tf.constant([[True, True], [False, False]])
            # tf.reduce_all(x, 1)  # [True, False]
            accuracy = tf.reduce_mean(tf.cast(tf.reduce_all(equal_list, 1), dtype=tf.float32))  # 这里 1 是矩阵的层数减2。 [None, 104]的层数为2

        return accuracy

    def train(self):
        """
        模型训练逻辑
        :return:
        """
        # 1、通过接口获取特征值和目标值
        # image_batch: [100, 20, 80, 3]
        # label_batch: [100, 4]  例:[[13, 25, 15, 15], [22, 10, 7, 10], [22, 15, 18, 9], ...]
        image_batch, label_batch = self.read_tfrecords()

        # 2、建立验证码识别的模型
        # 全连接层神经网络
        # y_predict:[self.train_batch, self.label*self.feature_num] 即:[100, 104]
        y_predict, self.weight, self.bias = self.captcha_model(image_batch, label_batch)

        # 转换label_batch 到one_hot编码
        # y_true:[None, 4, 26]
        y_true = self.turn_to_onehot(label_batch)

        # 3、利用真实值和目标值建立损失
        loss = self.loss(y_true, y_predict)

        # 4、对损失进行梯度下降优化
        train_op = self.sgd(loss)

        # 5、计算准确率
        accuracy = self.accuracy(y_true, y_predict)

        # 6、tensorflowboard展示的数据
        # 1)收集要在tensorflowboard观察的张量值
        # 数值型  --> scalar 准确率, 损失值
        tf.summary.scalar("loss", loss)
        tf.summary.scalar("accuracy", accuracy)

        # 维度高的张量值
        tf.summary.histogram("w", self.weight)
        tf.summary.histogram("b", self.bias)

        # 2)合并变量
        merged = tf.summary.merge_all()

        # 7、创建保存模型的OP
        saver = tf.train.Saver()

        # 会话训练
        with tf.Session() as sess:
            # 会话初始化
            sess.run(tf.global_variables_initializer())

            # 创建tensorboard的events文件
            filte_writer = tf.summary.FileWriter("./temp/summary/", graph=sess.graph)

            # 生成线程的管理
            coord = tf.train.Coordinator()

            # 指定开启子线程去读取数据
            threads = tf.train.start_queue_runners(sess=sess, coord=coord)

            # 循环训练打印结果
            for i in range(1000):
                _, loss_run, accuracy_run, summary = sess.run([train_op, loss, accuracy, merged])

                print("第 {:d} 次训练的损失为:{:.6f},准确率为:{:.6f}".format(i, loss_run, accuracy_run))

                # 3) 写入运行的结果到文件当中
                filte_writer.add_summary(summary, i)

            # 回收线程
            coord.request_stop()
            coord.join(threads=threads)

        return None


if __name__ == '__main__':
    pic_indentify = CaptchaIdentification()
    pic_indentify.train()
4、拓展
- 如果验证码的标签值不止是大写字母,比如还包含小写字母和数字,该怎么处理?
- 如果图片的目标值不止4个,可能5,6个,该怎么处理?
注:主要是在网络输出的结果以及数据对应数字进行分析