Gevlet 的使用与概述
说明:本博客中涉及的代码为学习用demo 没有在任何生产环境使用
为什么要写一个 HTTP REST 服务器
在刚开始学习编程的时候就对服务器或者应用容器特别好奇,不明白应用服务器的运行原理是什么。最近个人时间比较多,所以歇下来看了看Tomcat的实现原理(只是看了看目前还在继续)。所以为了总结一下,写了这样一个Demo 我暂且叫它 Gevlet 吧。
Gevlet 的使用
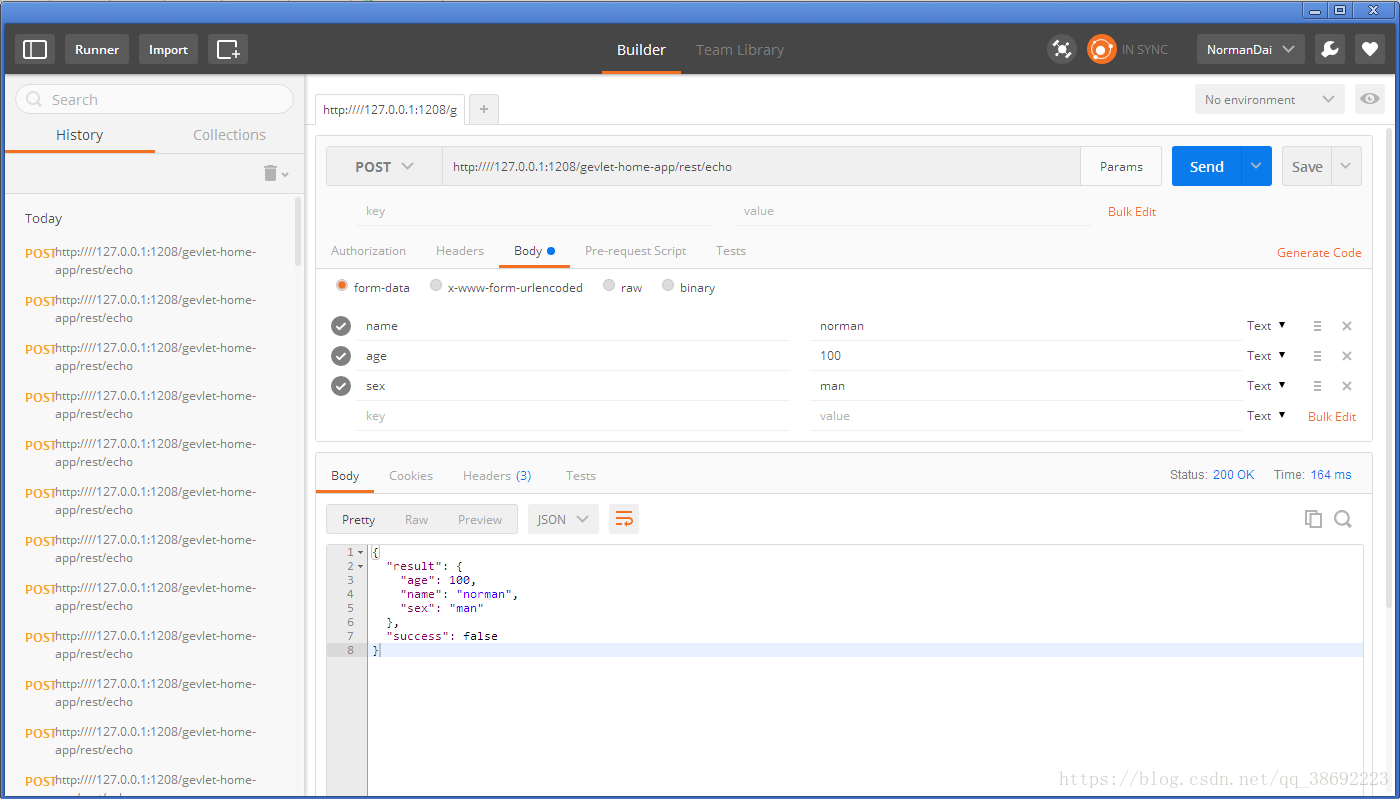
在开发过程中我一直使用 Postman 进行测试,效果如下
- 通过 HTTP POST 方式进行请求
- URL 的格式是 http://hostname:1208/appName/path
- URL 实例 : http:////127.0.0.1:1208/gevlet-home-app/rest/echo
应用的部署与结构
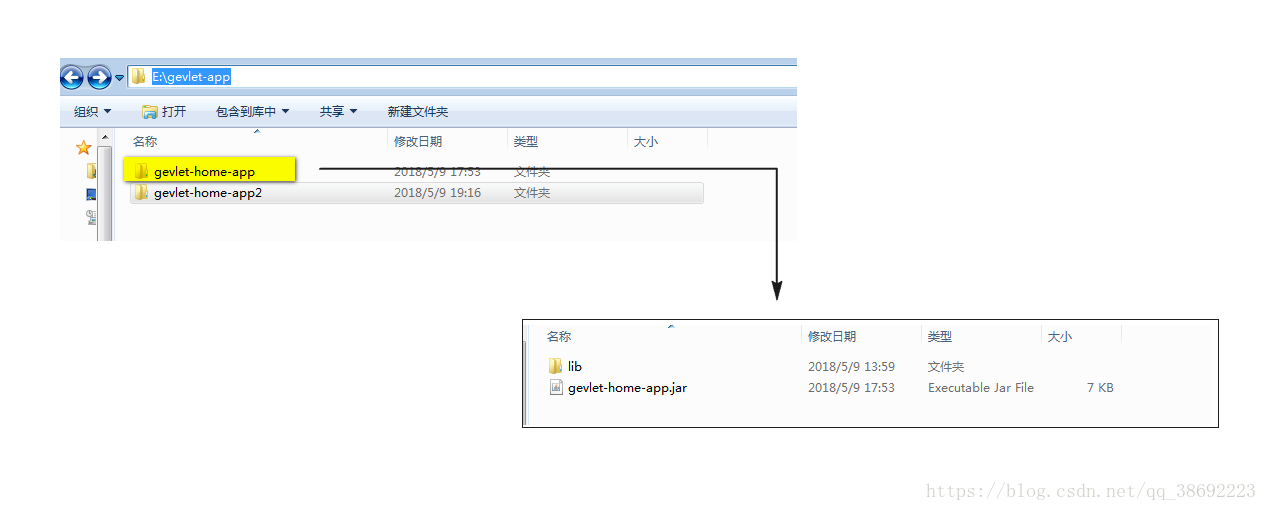
Gevlet 可以支持在任何系统路径下部署多个应用(目前路径等信息是写死的)。下面是我的部署结构,两个应用的代码是一样的。
- 注意:应用的jar包名称必须与应用的文件夹名称一致。并且依赖的jar包放置在lib路径下
—E:\gevlet-app
|__gevlet-home-app
|__gevlet-home-app2
启动Gevlet 服务
目前Gevlet 没有 .bat 或者.sh 的方式启动。需要在IDE中运行 Bootstract 进行启动
Gevlet应用开发
开发一个Gevlet应用非常简单,你只需要基于Spring + SpringMVC 开发好应用。然后打包将jar 和依赖包放置在指定的路径下就可以。
- 提供服务的类必须按照SpringMVC 的方式定义好 RequestMapping 和 Controller 注解
- 提供服务的方法也要定义 RequestMapping注解
服务类实例
@Controller
@RequestMapping("/rest")
public class RestTestHandler {

    @Autowired
    private RestTestHandlerBiz biz;


    @RequestMapping("/echo")
    public ResponseBo echo(BaseRequestBo param) {
        System.out.println("RestTestHandler:"+param);
        ResponseBo responseBo = biz.echo(param);
        return responseBo;
    }

}
请求对象实例
public class BaseRequestBo {

    private String name;

    private int age;

    private String sex;

    public String getName() {
        return name;
    }

    public void setName(String name) {
        this.name = name;
    }

    public int getAge() {
        return age;
    }

    public void setAge(int age) {
        this.age = age;
    }

    public String getSex() {
        return sex;
    }

    public void setSex(String sex) {
        this.sex = sex;
    }

    @Override
    public String toString() {
        return "BaseRequestBo{" +
                "name='" + name + '\'' +
                ", age=" + age +
                ", sex='" + sex + '\'' +
                '}';
    }
}
返回对象实例
public class ResponseBo<T> {
    private boolean success;
    private String errorCode;
    private String errorMsg;
    private T result;

    public boolean isSuccess() {
        return success;
    }

    public void setSuccess(boolean success) {
        this.success = success;
    }

    public String getErrorCode() {
        return errorCode;
    }

    public void setErrorCode(String errorCode) {
        this.errorCode = errorCode;
    }

    public String getErrorMsg() {
        return errorMsg;
    }

    public void setErrorMsg(String errorMsg) {
        this.errorMsg = errorMsg;
    }

    public T getResult() {
        return result;
    }

    public void setResult(T result) {
        this.result = result;
    }

    @Override
    public String toString() {
        return "ResponseBo{" +
                "success=" + success +
                ", errorCode='" + errorCode + '\'' +
                ", errorMsg='" + errorMsg + '\'' +
                ", result=" + result +
                '}';
    }
}
Spring 配置文件说明:配置文件必须以 application.xml 命名 并且必须在包的根路径下,结构如下
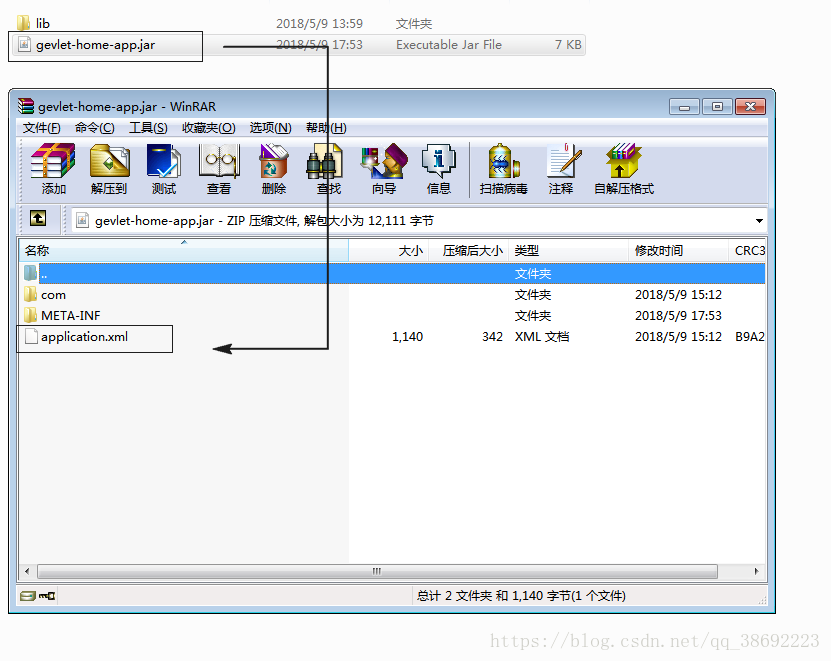
application.xml 示例
<?xml version="1.0" encoding="UTF-8"?>
<beans xmlns="http://www.springframework.org/schema/beans"
       xmlns:xsi="http://www.w3.org/2001/XMLSchema-instance"
       xmlns:context="http://www.springframework.org/schema/context"
       xmlns:util="http://www.springframework.org/schema/util"
       xmlns:aop="http://www.springframework.org/schema/aop"
       xsi:schemaLocation="http://www.springframework.org/schema/beans
      http://www.springframework.org/schema/beans/spring-beans-4.0.xsd
      http://www.springframework.org/schema/util
      http://www.springframework.org/schema/util/spring-util.xsd
      http://www.springframework.org/schema/aop
      http://www.springframework.org/schema/aop/spring-aop-4.0.xsd
      http://www.springframework.org/schema/context
      http://www.springframework.org/schema/context/spring-context-4.0.xsd
      http://www.springframework.org/schema/util
      http://www.springframework.org/schema/util/spring-util.xsd"
       default-lazy-init="false">

    <!-- 使用annotation 自动注册bean -->
    <context:component-scan base-package="com.norman.gevlet"/>

</beans>