版权声明:本文为博主原创文章,未经博主允许不得转载。 https://blog.csdn.net/u010044440/article/details/79412534
注解方式 AOP
本章节把XML方式配置AOP改造为注解方式
1、注解配置业务类
使用@Component("hjsy2") 注解ProductService 类
package com.hjsy.service;
import org.springframework.stereotype.Component;
@Component("hjsy2")
public class ProductService {
	public void doSomeService(){
        System.out.println("doSomeService");
    }
}
@Aspect 注解表示这是一个切面
@Component 表示这是一个bean,由Spring进行管理
@Around(value = "execution(* com.hjsy.service.ProductService.*(..))") 表示对com.hjsy.service.ProductService 这个类中的所有方法进行切面操作
package com.hjsy.aspect;

import org.aspectj.lang.ProceedingJoinPoint;
import org.aspectj.lang.annotation.Around;
import org.aspectj.lang.annotation.Aspect;
import org.springframework.stereotype.Component;
@Aspect
@Component
public class LoggerAspect {
	@Around(value = "execution(* com.hjsy.service.ProductService.*(..))")
	public Object log(ProceedingJoinPoint joinPoint) throws Throwable {
        System.out.println("start log:" + joinPoint.getSignature().getName());
        Object object = joinPoint.proceed();
        System.out.println("end log:" + joinPoint.getSignature().getName());
        return object;
    }
}
去掉原有信息,添加如下3行:
<context:component-scan base-package="com.hjsy.aspect"/>
<context:component-scan base-package="com.hjsy.service"/><aop:aspectj-autoproxy/> <?xml version="1.0" encoding="UTF-8"?>
<beans xmlns="http://www.springframework.org/schema/beans"
xmlns:xsi="http://www.w3.org/2001/XMLSchema-instance"
xmlns:aop="http://www.springframework.org/schema/aop"
xmlns:tx="http://www.springframework.org/schema/tx"
xmlns:context="http://www.springframework.org/schema/context"
xsi:schemaLocation="
http://www.springframework.org/schema/beans
http://www.springframework.org/schema/beans/spring-beans-3.0.xsd
http://www.springframework.org/schema/aop
http://www.springframework.org/schema/aop/spring-aop-3.0.xsd
http://www.springframework.org/schema/tx
http://www.springframework.org/schema/tx/spring-tx-3.0.xsd
http://www.springframework.org/schema/context
http://www.springframework.org/schema/context/spring-context-3.0.xsd">
<context:component-scan base-package="com.hjsy.aspect"/>
<context:component-scan base-package="com.hjsy.service"/>
<aop:aspectj-autoproxy/>
</beans>package spring;
import org.springframework.context.ApplicationContext;
import org.springframework.context.support.ClassPathXmlApplicationContext;
import com.hjsy.pojo.Category;
import com.hjsy.pojo.Product;
import com.hjsy.service.ProductService;
public class TestSpring {
public static void main(String[] args) {
ApplicationContext context1 = new ClassPathXmlApplicationContext(new String[] { "applicationContext.xml" });
ProductService s = (ProductService) context1.getBean("hjsy2");
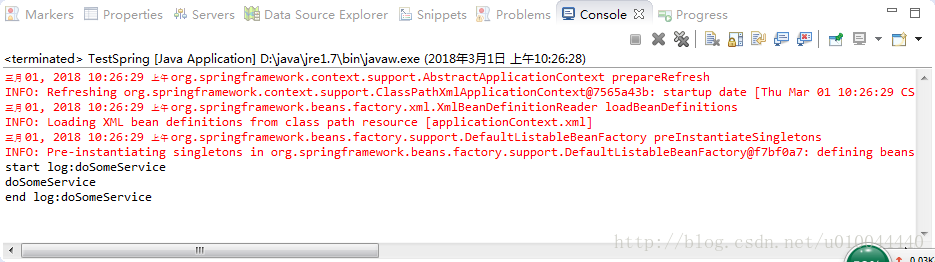
s.doSomeService();
}
}
5、注解方式测试
注解方式用到了junit,用到了以下两个jar包,在项目lib目录下
junit-4.12.jar和hamcrest-all-1.3.jar
6、修改测试类
修改TestSpring.java, 并运行
1. @RunWith(SpringJUnit4ClassRunner.class)
表示这是一个Spring的测试类
2. @ContextConfiguration("classpath:applicationContext.xml")
定位Spring的配置文件
3. @Autowired
给这个测试类装配Category对象
4. @Test
测试逻辑,打印Category对象的名称
package spring;
import org.junit.Test;
import org.junit.runner.RunWith;
import org.springframework.beans.factory.annotation.Autowired;
import org.springframework.context.ApplicationContext;
import org.springframework.context.support.ClassPathXmlApplicationContext;
import org.springframework.test.context.ContextConfiguration;
import org.springframework.test.context.junit4.SpringJUnit4ClassRunner;
import com.hjsy.pojo.Category;
import com.hjsy.pojo.Product;
import com.hjsy.service.ProductService;
@RunWith(SpringJUnit4ClassRunner.class)
@ContextConfiguration("classpath:applicationContext.xml")
public class TestSpring {
// public static void main(String[] args) {
// ApplicationContext context = new ClassPathXmlApplicationContext(new String[] { "applicationContext.xml" });
// Category category = (Category) context.getBean("hjsy");
// System.out.println(category.getName());
// ApplicationContext context1 = new ClassPathXmlApplicationContext(new String[] { "applicationContext.xml" });
// Product product = (Product) context1.getBean("hjsy1");
// System.out.println(product.getName());
// System.out.println(product.getCategory().getName());
// ApplicationContext context2 = new ClassPathXmlApplicationContext(new String[] { "applicationContext.xml" });
// ProductService s = (ProductService) context2.getBean("hjsy2");
// s.doSomeService();
@Autowired
Category c;
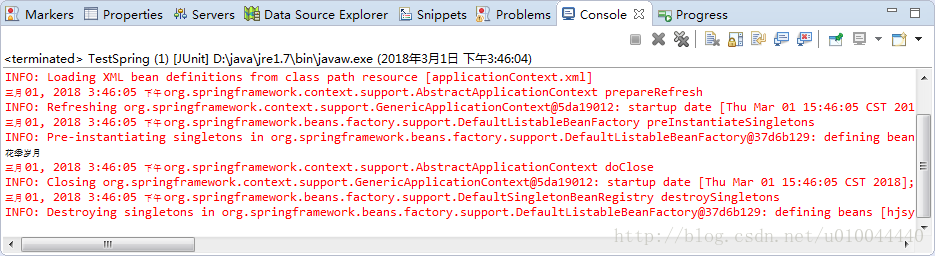
@Test
public void test(){
System.out.println(c.getName());
}
// }
}
源码:链接:https://pan.baidu.com/s/1o9lqtlg 密码:e191