资料参考:《Spring Cloud 微服务实战》
目录
前面几篇文章我们详细的介绍了Ribbon、RestTemplate、Hystrix组件,这些组件是我们Spring Cloud中非常基础的组件,小伙伴们在使用的过程中可能也发现了这些东西都是同时出现的,而且配置也都非常相似,每次开发都有很多相同的代码,因此,Spring Cloud基于Netflix Feign整合了Ribbon和Hystrix,让我们的开发工作变得更加简单,就像Spring Boot是对Spring+SpringMVC的简化一样。Spring Cloud Feign不仅在配置上大大简化了开发工作,同时还提供了一种声明式的Web服务客户端定义方式。
在前面几篇文章中,我们为了简化RestTemplate操作,将之封装在一个BookService中,但同时我们也发现BookService中的方法几乎都是模板式的,写起来很枯燥,Spring Cloud Feign对此进行了进一步的封装,简化了我们的封装操作。接下来我们就来看看Spring Cloud Feign的使用。

Spring Cloud Feign入门
第一步:创建普通Spring Boot工程
首先我们来创建一个普通的Spring Boot工程,取名为feign-consumer。
第二步:添加依赖
这里要添加的依赖主要是spring-cloud-starter-eureka和spring-cloud-starter-feign,如下:
<parent>
    <groupId>org.springframework.boot</groupId>
    <artifactId>spring-boot-starter-parent</artifactId>
    <version>1.5.7.RELEASE</version>
    <relativePath/> <!-- lookup parent from repository -->
</parent>
<properties>
    <spring-cloud.version>Dalston.SR3</spring-cloud.version>
</properties>
<dependencies>
    <!-- 其他依赖 -->
    <!-- 自己添加的依赖 -->
    <dependency>
        <groupId>org.springframework.cloud</groupId>
        <artifactId>spring-cloud-starter-eureka</artifactId>
    </dependency>
    <dependency>
        <groupId>org.springframework.cloud</groupId>
        <artifactId>spring-cloud-starter-feign</artifactId>
    </dependency>
</dependencies>
<dependencyManagement>
    <dependencies>
        <dependency>
            <groupId>org.springframework.cloud</groupId>
            <artifactId>spring-cloud-dependencies</artifactId>
            <version>${spring-cloud.version}</version>
            <type>pom</type>
            <scope>import</scope>
        </dependency>
    </dependencies>
</dependencyManagement>
第三步:添加注解
然后在工程的入口类上添加@EnableFeignClients注解表示开启Spring Cloud Feign的支持功能,如下:
@SpringBootApplication
@EnableDiscoveryClient
@EnableFeignClients
public class FeignConsumerApplication {

    public static void main(String[] args) {
        SpringApplication.run(FeignConsumerApplication.class, args);
    }
}
第四步:声明服务
定义一个HelloService接口,通过@FeignClient注解来指定服务名进而绑定服务,然后再通过SpringMVC中提供的注解来绑定服务提供者提供的接口,如下:
@FeignClient("hello-service")
public interface HelloService {
    @RequestMapping("/hello")
    String hello();
}这相当于绑定了一个名叫hello-service(这里hello-service大小写无所谓)的服务提供者提供的/hello接口。我们来看一下我服务提供者提供的接口,如下:
@RequestMapping(value = "/hello", method = RequestMethod.GET)
public String hello() {
    return "hello";
}
第五步:Controller中调用服务
接着来创建一个Controller来调用上面的服务,如下:
@RestController
public class FeignConsumerController {
    @Autowired
    HelloService helloService;

    @RequestMapping("/hello")
    public String hello() {
        return helloService.hello();
    }
}
第六步:属性配置
最后,我们需要在application.properties中指定服务注册中心,并配置端口号等,如下:
spring.application.name=feign-consumer
server.port=2005
eureka.client.service-url.defaultZone=http://localhost:1111/eureka/
测试
做完上面的操作之后,依次启动eureka-server、provider和feign-consumer,然后访问如下地址:http://localhost:2005/hello,访问结果如下:
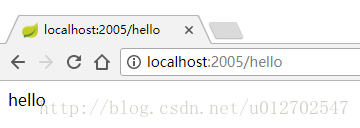
Ribbon和Hystrix的功能都有,只是我们使用Feign实现起来更简单,Feign使用了一种更加优雅的方式来调用服务提供者的接口,避免了我们写模板式的RestTemplate代码。
参数传递
上面我们看了一个简单的调用案例,这个例子中没有涉及到参数的传递,那么接下来我们就来看看参数的传递要如何实现。
首先我先给我的服务提供者添加三个测试接口,如下:
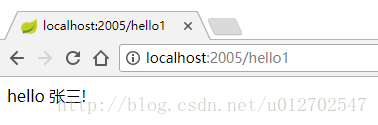
@RequestMapping(value = "/hello1", method = RequestMethod.GET)
public String hello1(@RequestParam String name) {
return "hello " + name + "!";
}
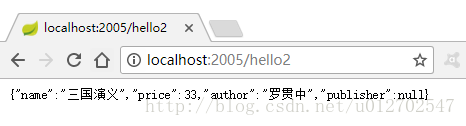
@RequestMapping(value = "/hello2", method = RequestMethod.GET)
public Book hello2(@RequestHeader String name, @RequestHeader String author, @RequestHeader Integer price) throws UnsupportedEncodingException {
Book book = new Book();
book.setName(URLDecoder.decode(name,"UTF-8"));
book.setAuthor(URLDecoder.decode(author,"UTF-8"));
book.setPrice(price);
System.out.println(book);
return book;
}
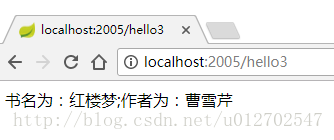
@RequestMapping(value = "/hello3", method = RequestMethod.POST)
public String hello3(@RequestBody Book book) {
return "书名为:" + book.getName() + ";作者为:" + book.getAuthor();
}hello1接口主要是接收一个String类型的参数,参数通过key-value的形式传来,然后返回一个String类型的数据;hello2接口接收到参数携带在请求头中,请求头中传递中文会乱码,所以要先编码,再解码(当然如果传递的是英文就不用这么麻烦),然后返回一个Book对象;hello3则接收一个Book对象,返回一个字符串。
测试接口写好之后,我们再来看看feign-consumer工程中的HelloService接口要怎么写,如下:
@FeignClient("hello-service")
public interface HelloService {
    @RequestMapping("/hello")
    String hello();

    @RequestMapping(value = "/hello1", method = RequestMethod.GET)
    String hello(@RequestParam("name") String name);

    @RequestMapping(value = "/hello2", method = RequestMethod.GET)
    Book hello(@RequestHeader("name") String name, @RequestHeader("author") String author, @RequestHeader("price") Integer price);

    @RequestMapping(value = "/hello3", method = RequestMethod.POST)
    String hello(@RequestBody Book book);
}
这里有一个细节需要小伙伴们注意,在SpringMVC中,@RequestParam和@RequestHeader注解,如果我们不指定value,则默认采用参数的名字作为其value,但是在Feign中,这个value必须明确指定,否则会报错。
最后添加测试接口,如下:
@RestController
public class FeignConsumerController {
    @Autowired
    HelloService helloService;

    @RequestMapping("/hello")
    public String hello() {
        return helloService.hello();
    }

    @RequestMapping("/hello1")
    public String hello1() {
        return helloService.hello("张三");
    }

    @RequestMapping(value = "/hello2")
    public Book hello2() throws UnsupportedEncodingException {
        Book book = helloService.hello(URLEncoder.encode("三国演义","UTF-8"), URLEncoder.encode("罗贯中","UTF-8"), 33);
        System.out.println(book);
        return book;
    }

    @RequestMapping("/hello3")
    public String hello3() {
        Book book = new Book();
        book.setName("红楼梦");
        book.setPrice(44);
        book.setAuthor("曹雪芹");
        return helloService.hello(book);
    }
}
运行结果如下: