原文链接:https://github.com/AlloyTeam/AlloyTouch/wiki/AlloyTouch-FullPage-Plugin
先验货

注意,虽然是扫码体验,但是AlloyTouch.FullPage特意对鼠标滚轮事件进行了兼容,所以PC上的全屏滚动页面也可以使用它来快速制作。
使用姿势
在设计全屏滚动插件的时候,希望开发者几乎:
- 不用写任何脚本快速生成精致H5
- 支持PC滚轮和移动触摸
- 酷炫的转场动效
- 灵活的时间轴管理
- 一切皆可配置
但是不写脚本肯定没有灵活性咯?!不是的。这里不仅仅可以通过在HTML配置一些参数,还可通过插件的回调函数进行一些逻辑注入。就拿上面大家扫码看到的例子的部分HTML来分析下AlloyTouch.FullPage的使用姿势:
<div id="fullpage"> <div> <div> <div class="animated" data-show="bounceInLeft" data-hide="bounceOutLeft">AlloyTouch Introduction</div> <div class="animated" data-delay="500" data-show="bounceInUp" data-hide="zoomOut"><img src="asset/alloytouch.png"></div> <div class="animated" data-delay="1200" data-show="bounceIn" data-hide="bounceOut">By AlloyTeam</div> </div> </div> <div> <div> <div class="animated" data-delay="100" data-show="flipInY" data-hide="flipOutY" >Powerful Features</div> <div class="animated" data-delay="400" data-show="zoomIn" data-hide="zoomOut"><img src="asset/power.png"></div> </div> </div> ... ... ... </div>
注意,上面只是部分HTML,而且我已经把一些和插件配置无关的HTML去掉了。下面一一进行分析:
- class="animated"符合animate.css的约定,加上了这个class代表会有动画。
- data-delay代表滚到该页面之后,被标记的DOM元素要等待多久才开始播放动画。如果开发者不标记的话默认值是0。
- data-show代表被标记的DOM元素显示的动画类型
- data-hide代表被标记的DOM元素隐藏的动画类型(这个通常用户看不到,但是为了show的时候平滑,一般设置为与data-show的相反的类型)
就这么多,配置就这么多,配置就这么多!!够简单把!! 当然你需要在js里面初始化一下:
new AlloyTouch.FullPage("#fullpage",{
        animationEnd:function () { }, leavePage: function (index) { console.log("leave"+index) }, beginToPage: function (index) { console.log("to"+index); pb.to(index / (this.length-1)); } });
- animationEnd是滚动结束之后的回调函数
- leavePage是代表离开某个页面的回调函数
- beginToPage代表打算去某个页面的回调函数
上面的pb是用来设置nav或者progress的进度,这个可以先不用管。如果有需要的话,用户可以自己封装任意的进度条组件。
原理分析
这里主要抽取了AlloyTouch.FullPage的核心代码进行分析:
new AlloyTouch({
    touch: this.parent,
    target: this.parent, property: "translateY", min: (1 - this.length) * this.stepHeight, max: 0, step: this.stepHeight, inertia: false, bindSelf : true, touchEnd: function (evt, v, index) { var step_v = index * this.step * -1; var dx = v - step_v; if (v < this.min) { this.to(this.min); } else if (v > this.max) { this.to(this.max); } else if (Math.abs(dx) < 30) { this.to(step_v); }else if (dx > 0) { self.prev(); } else { self.next(); } return false; }, animationEnd: function () { option.animationEnd.apply(this,arguments); self.moving = false; } });
- 这里触摸和运动的Dom都是fullpage的dom,也就是上面的this.parent
- 因为是上下滚动,所以运动的属性是translateY
- min可以通过window.innerHeight和总共的页数推算出来,this.stepHeight就是window.innerHeight
- max显然就是0
- step显然就是window.innerHeight,也就是this.stepHeight
- inertia: false代表把惯性运动禁止掉,也就是用户松手和不会惯性滚动
- bindSelf是意思是touchmove和touchend以及touchcancel都绑定在this.parent自己,而非window下。不设置bindSelf的话touchmove和touchend以及touchcancel都绑定在window下。
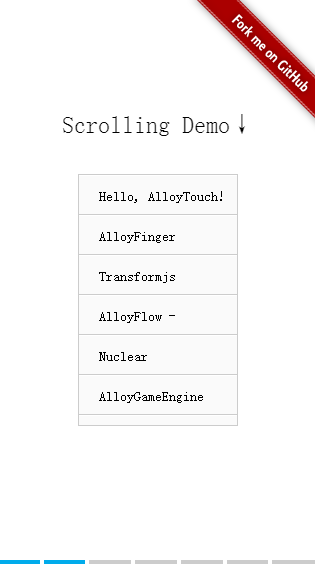
这里需要特别详细说下,这个bindSelf配置非常有用,比如很典型的应用场景就是解决AlloyTouch嵌套AlloyTouch的问题。比如你上面扫码看到的例子里面,嵌套了AlloyTouch的Demo如下所示:
这里其实是嵌套的滚动。滚动里面的会导致外面的也滚动?怎么解决?里面的滚动必须加上bindSelf并且阻止冒泡:
扫描二维码关注公众号,回复: 47984 查看本文章
 这里其实是嵌套的滚动。滚动里面的会导致外面的也滚动?怎么解决?里面的滚动必须加上bindSelf并且阻止冒泡:
且看内部滚动的详细代码:
var scroller = document.querySelector("#scroller"); Transform(scroller,true); new AlloyTouch({ touch:"#demo0", target: scroller, property: "translateY", min:250-2000, max: 0 , touchStart:function(evt){ evt.stopPropagation(); }, touchMove:function(evt){ evt.stopPropagation(); }, bindSelf:true })
这样的话,嵌套的HTML里面的嵌套的AlloyTouch就不会向上冒泡了,也就是滚动里面的就不会触发外面的滚动。
继续分析FullPage源码: touchEnd是用户手指离开屏幕之后的回调函数。里面有边界处理的逻辑:
- 超出min和max都会对应的校正会min和max。
- step校正,绝对值小于30px会复位
- step校正,绝对值大于30px且大于0会去上一页
- step校正,绝对值大于30px且小于0会去下一页
- return false代表不会去运行AlloyTouch松开手后的运动校正逻辑,这点很重要
animationEnd就是运动结束之后的回调函数,会去执行用户从AlloyTouch.FullPage传递过来的animationEnd,并且把moving设置为false