rgbd slam v2安装
rgbd slam v2是一个比较值得学习的开源深度相机视觉slam,这次安装过程仅介绍基本内容,也就是到数据集测试阶段,这个项目的安装和测试是基于ros系统的,因此安装前需要安装好ros kinetic或其他ros版本
安装ros kinetic
设置安装源:
sudo sh -c 'echo "deb http://packages.ros.org/ros/ubuntu $(lsb_release -sc) main" > /etc/apt/sources.list.d/ros-latest.list'
设置keys
sudo apt-key adv --keyserver hkp://ha.pool.sks-keyservers.net:80 --recv-key 421C365BD9FF1F717815A3895523BAEEB01FA116
更新软件源:
sudo apt-get update
推荐完整安装:
sudo apt-get install ros-kinetic-desktop-full
初始化rosdep:
sudo rosdep init
rosdep update
环境设置:
echo "source /opt/ros/kinetic/setup.bash" >> ~/.bashrc
source ~/.bashrc
安装依赖包:
sudo apt install python-rosinstall python-rosinstall-generator python-wstool build-essential
环境到这时就算是配置好了。
安装rgbd slam v2
实际上,rgbd slam v2的作者非常贴心,他在github写了一个自动安装脚本,你可以选择直接下载后自己安装,也可以选择执行脚本。选择作者的脚本进行安装可以免去安装依赖等一些问题,毕竟作者没有用官方的g2o库,而是自己做了些修改,直接下载作者的程序可能会出很多问题,因此第一次安装推荐直接执行 install.sh
这是作者的 install.sh 。
#This script installs rgbdslam_v2 and g2o in ~/Code
#This script can be downloaded individually, as it
#does not require rest of the rgbdslam repository.
#It will download all required code in the process.

#If you have a fast machine with 4GB RAM or more, increase the
#two occurences of "-j2" below to parallelize the compilation more

#Prepare System
if test ! -d /opt/ros/kinetic; then
  echo This script assumes ROS kinetic to be installed
  echo The directory /opt/ros/kinetic was not found
  exit 1
fi

SUBDIR=~/Code
echo "This script puts all code into '$SUBDIR'. Edit this script to change the location."
echo "Press enter to continue, Ctrl-C to cancel"
read
mkdir -p $SUBDIR

source /opt/ros/kinetic/setup.bash

echo
echo "Removing packages known to conflict (password required for apt-get)"
echo
sudo apt-get purge ros-kinetic-libg2o libqglviewer-dev

echo
echo "Updating ROS dependency database"
echo
rosdep update

echo "Install dependences for g2o"
sudo apt-get install libsuitesparse-dev libeigen3-dev
echo

echo
echo "Downloading, building and installing g2o"
echo
G2O_REPO_DIR=$SUBDIR/g2ofork
git clone -b c++03 https://github.com/felixendres/g2o.git $G2O_REPO_DIR
mkdir $G2O_REPO_DIR/build
cd $G2O_REPO_DIR/build
cmake .. -DCMAKE_INSTALL_PREFIX=$G2O_REPO_DIR/install -DG2O_BUILD_EXAMPLES=OFF
nice make -j2 install

echo
echo "Preparing catkin workspace for rgbdslam_v2"
echo
WORKSPACE=$SUBDIR/rgbdslam_catkin_ws
mkdir -p $WORKSPACE/src
cd $WORKSPACE/src
catkin_init_workspace
catkin_make -C $WORKSPACE
source $WORKSPACE/devel/setup.bash

echo
echo "Downloading rgbdslam_v2"
echo
#Get and build rgbdslam_v2
export G2O_DIR=$G2O_REPO_DIR/install
git clone -b kinetic https://github.com/felixendres/rgbdslam_v2.git $WORKSPACE/src/rgbdslam

#Install missing dependencies
rosdep install rgbdslam
echo
echo "Building rgbdslam_v2"
echo
nice catkin_make -C $WORKSPACE -j2
实际上,安装好ros后,直接执行 install.sh 就可以完整的安装 rgbd slam v2 了。进入你下载 install.sh 的地方,执行:
bash install.sh
会自动执行安装过程,过一会中间只需要点个enter或yes就OK了。
数据集测试
接下来是数据集测试。
下载数据集(.bag格式的数据)
下载地址:http://vision.in.tum.de/data/datasets/rgbd-dataset/download#freiburg1_xyz
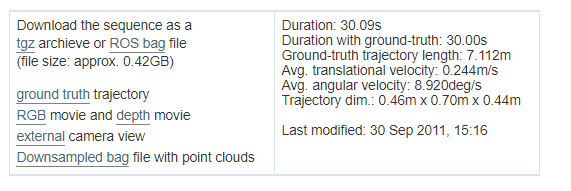
记得下载的是.bag,别下.tgz。
然后将下载好的.bag文件存放到一个位置,我的是~/Downloads/rgbd_data/
打开终端,运行roscore
roscore
新开终端(记得先source setup.bash)
roslaunch rgbdslam rgbdslam.launch
你会看到如下画面:

从rgbd slam v2启动可以看到,程序订阅的话题是:

对rgbdslam.launch进行修改,确保收听的是这两个话题,如果你按照 install.sh 安装,那么这个文件在~/Code/rgbdslam_catkin_ws/src/rgbdslam/launch,确保其中两段修改为以下内容:
    <param name="config/topic_image_mono"              value="/camera/rgb/image_color"/>
    <param name="config/topic_image_depth"             value="/camera/depth/image"/>
新开终端,进入存放数据集的文件夹,输入命令:
rosbag play 你的数据集名称.bag
如下所示:

接下来程序就开始运行数据集了,你可以看到运行结果:

rgbd slam v2是基于ros的,因此需要对ros系统有一些了解。像这一类项目作者在github介绍的非常详尽,也有很多人来一起讨论,很多问题都会被提出和解决,建议到项目github上看一下。
接下来就是使用自己的深度相机了,我会新开一个博客来介绍。