maven私服的搭建以及如何将项目上传到私服
声明:这里是Nexus搭建的Maven私服
下载地址:http://www.sonatype.org/nexus/archived/
-
第一步:安装Nexus和解释
将nexus压缩包加压


- 使用指令 nexus install 安装

- 找到nexus服务并启动

- 查看nexus的配置文件conf/nexus.properties
# Jetty section
application-port=8081  	# nexus的访问端口配置
application-host=0.0.0.0 	# nexus主机监听配置(不用修改)
nexus-webapp=${bundleBasedir}/nexus 	# nexus工程目录
nexus-webapp-context-path=/nexus	 # nexus的web访问路径
# Nexus section
nexus-work=${bundleBasedir}/../sonatype-work/nexus   # nexus仓库目录
runtime=${bundleBasedir}/nexus/WEB-INF  # nexus运行程序目录
- 访问:
http://localhost:8081/nexus/
点击右上角的Log in,输入账号和密码 登陆
使用Nexus 内置 账户:admin 密码:admin123 登陆 - 仓库类型解释
- hosted,宿主仓库,部署自己的jar到这个类型的仓库,包括releases和snapshot两部分,Releases公司内部发布版本仓库、 Snapshots 公司内部测试版本仓库
- proxy,代理仓库,用于代理远程的公共仓库,如maven中央仓库,用户连接私服,私服自动去中央仓库下载jar包或者插件。
- group,仓库组,用来合并多个hosted/proxy仓库,通常我们配置自己的maven连接仓库组。
- virtual(虚拟):兼容Maven1 版本的jar或者插件

- 第二步:从私服下载jar的过程
- 将仓库索引加入你的仓库
加入的路径:sonatype-work\nexus\indexer\central-ctx
注意:在加入索引时先关闭Nexus服务
加入后的搜索结果
在客户端的setting.xml中配置私服的仓库,由于setting.xml中没有repositories的配置标签需要使用profile定义仓库。
<profile>
	<!--profile的id-->
   <id>dev</id>
    <repositories>
      <repository>
		<!--仓库id,repositories可以配置多个仓库,保证id不重复-->
        <id>nexus</id>
		<!--仓库地址,即nexus仓库组的地址-->
        <url>http://localhost:8081/nexus/content/groups/public/</url>
		<!--是否下载releases构件-->
        <releases>
          <enabled>true</enabled>
        </releases>
		<!--是否下载snapshots构件-->
        <snapshots>
          <enabled>true</enabled>
        </snapshots>
      </repository>
    </repositories>
	 <pluginRepositories>
    	<!-- 插件仓库,maven的运行依赖插件,也需要从私服下载插件 -->
        <pluginRepository>
        	<!-- 插件仓库的id不允许重复,如果重复后边配置会覆盖前边 -->
            <id>public</id>
            <name>Public Repositories</name>
            <url>http://localhost:8081/nexus/content/groups/public/</url>
        </pluginRepository>
    </pluginRepositories>
  </profile>
- 激活仓库的配置
<activeProfiles>
    <activeProfile>dev</activeProfile>
  </activeProfiles>
- 在pom.xml的配置文件的配置,让jar从私服下载
<repositories>
    <repository>
      <releases>
        <enabled>true</enabled>
      </releases>
      <snapshots>
        <enabled>true</enabled>
      </snapshots>
      <id>public</id>
      <name>Public Repositories</name>
      <url>http://localhost:8081/nexus/content/groups/public/</url>
    </repository>
    <repository>
      <snapshots>
        <enabled>false</enabled>
      </snapshots>
      <id>central</id>
      <name>Central Repository</name>
      <url>https://repo.maven.apache.org/maven2</url>
    </repository>
  </repositories>
  <pluginRepositories>
    <pluginRepository>
      <id>public</id>
      <name>Public Repositories</name>
      <url>http://localhost:8081/nexus/content/groups/public/</url>
    </pluginRepository>
    <pluginRepository>
      <releases>
        <updatePolicy>never</updatePolicy>
      </releases>
      <snapshots>
        <enabled>false</enabled>
      </snapshots>
      <id>central</id>
      <name>Central Repository</name>
      <url>https://repo.maven.apache.org/maven2</url>
    </pluginRepository>
  </pluginRepositories>
第三步:将项目上传到私服的过程
需要在客户端即部署dao工程的电脑上配置 maven环境,并修改 settings.xml 文件,配置连接私服的用户和密码 。此用户名和密码用于私服校验,因为私服需要知道上传都 的账号和密码 是否和私服中的账号和密码 一致。
 <server>
      <id>releases</id>
      <username>admin</username>
      <password>admin123</password>
    </server>
	<server>
      <id>snapshots</id>
      <username>admin</username>
      <password>admin123</password>
    </server>
配置项目的pom.xml文件
<distributionManagement>
  	<repository>
  		<id>releases</id>
	<url>http://localhost:8081/nexus/content/repositories/releases/</url>
  	</repository>
  	<snapshotRepository>
  		<id>snapshots</id>
	<url>http://localhost:8081/nexus/content/repositories/snapshots/</url>
  	</snapshotRepository>
  </distributionManagement>
测试:先启动Nexus服务在使用deploy命令将项目发布到私服
根据自己的项目的版本,上传到不同的宿主仓库
snapshots
releases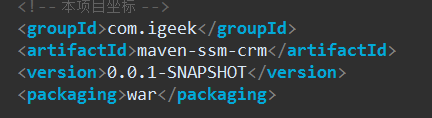

- 可以使用下面的配置引用自己的项目

- 补充:可以管理仓库组

转载来源:https://blog.csdn.net/weixin_44388207/article/details/86311021