原文链接:http://www.jb51.net/article/108786.htm
三、问题解决过程
1.打开/etc/mysql/mysql.conf.d/mysqld.cnf 文件,命令如下
| 1 |
|
2.找到[mysqld]段,并加入一行“skip-grant-tables”,如下图,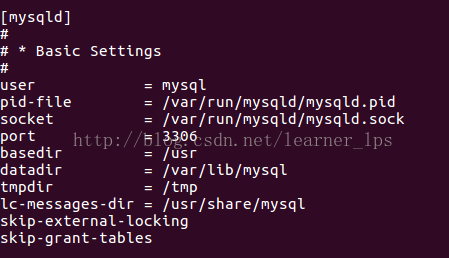
3. 重启mysql服务(sudo service mysql restart),用空密码进入mysql管理命令行(mysql -uroot -p),切换到mysql库,操作命令如下:
$ mysql
Welcome to the MySQL monitor. Commands end with ; or \g.
mysql> use mysql
Reading table information for completion of table and column names
You can turn off this feature to get a quicker startup with -A
Database changed
mysql> update mysql.user set authentication_string=password('newpass') where user='root' and Host ='localhost';
Query OK, 1 row affected, 1 warning (0.00 sec)
Rows matched: 1 Changed: 1 Warnings: 1
mysql> update user set plugin="mysql_native_password";
Query OK, 0 rows affected (0.00 sec)
Rows matched: 3 Changed: 0 Warnings: 0
mysql> flush privileges;
Query OK, 0 rows affected (0.01 sec)
mysql> quit;
Bye
此处最关键的是update mysql.user set authentication_string=password('newpass') where user='root' and Host ='localhost';
4.回到sudo vi /etc/mysql/mysql.conf.d/mysqld.cnf,把刚才加入的那一行“skip-grant-tables”注释或删除掉。
5. 再次重启mysql服务sudo service mysql restart,使用新的密码登陆,修改成功。
$ mysql -u root -p new_pass
Welcome to the MySQL monitor. Commands end with ; or \g.
mysql>
备注:要修改别的用户的密码,用root用户登陆mysql以后,在user表里面找到用户修改其密码即可