SoapUI是一个接口测试工具,也是一个巨大的可扩展的测试框架。SoapUI 可以集成Selenium Webdriver,然后在SoapUI中可以用Groovy来写自动化测试用例。

Groovy是基于Java的,会Java的使用Groovy毫无压力。 这样只使用SoapUI就既可以做到Webservice接口自动化,也可以实施GUI界面操作的自动化测试。
如何实现SoapUI集成Selenium WebDriver?
根据SoapUI版本不同,我只使用过其中两个版本SoapUI,配置略有不同。
2017-12-23更新:
最新SoapUI5.4.0 + Selenium3.8.1 :
将selenium-server-standalone-3.8.1.jar放到SOAPUI_HOME\jre\lib\ext下。如Windows中目录C:\ProgramFiles\SmartBear\SoapUI-5.4.0\jre\lib\ext。
针对SoapUI 4.5.2版本
(1)下载selenium-server-standalone-2.53.0.jar,selenium各版本下载地址:http://selenium-
release.storage.googleapis.com/index.html。(其他版本也可以,注意浏览器版本,能与浏览器版本配套即可,
如最新的Firefox 45.0.2,+ selenium2.48.2的话,好像会报错),

将selenium-server-standalone-2.53.0.jar放到SOAPUI_HOME\jre\lib\ext下。如Windows中
目录C:\ProgramFiles\SmartBear\SoapUI-5.2.1\jre\lib\ext。
如果是SoapUI4.5.2版本,那么配置已经完成,可以打开SoapUI,建工程,TestSuite,TestCase, Groovy的TestStep,开始用Groovy写自动化测试代码了。。
为什么要放在jre\lib\ext呢? 毕竟按照SoapUI的官方指导,第三方jar包如jdbc等是放在SOAPUI_HOME\bin\ext目录
下的。原因是与SoapUI的类加载器体系有关,Selenium和SoapUI都是用了某些jar包只是版本不一致,Selenium的版本更
高一些,为了使Selenium中的生效,放在这里,否则会报错,具体错误就不再细说了。
针对SoapUI5以上还需要这一步:
如果是SoapUI 5.XX等高于5.0的版本,那么麻烦一点,还需要这一步。因为SoapUI5以上版本设置Proxy代理功能发生了变化。SoapUI修改了ProxyUtils类。在Windows操作系统下会ProxySelector.setDefault( null ),Webdriver初始化启动的候会报空指针错误。
 (2)我的解决方法是:下载了SoapUI源代码,修改ProxyUtils类,然后编译ProxyUtils类,编译成
 ProxyUtils.class文件。到SOAPUI_HOME\bin下找到SoapUI-version.jar,以压缩包方式用
 WinRAR或7-zip等打开SoapUI-5.xxx.jar,找到对应目录下
 (C: \Program Files\SmartBear\SoapUI-5.2.1\bin\soapui-5.2.1.jar\com\eviware\soapui
 \impl\wsdl\support\http\)的 ProxyUtils.class,替换为自己编译的ProxyUtils.class,
 然后启动SoapUI即可。
我在stackoverflow上也回答了这个问题,不知道是不是很挫或者没人看,反正我能用了。
http://stackoverflow.com/questions/28823403/webdriver-exception-after-soapui-project-execution/35073404#35073404
所做的改动:将原类中ProxySelector.setDefault( proxySelector );行改为如下所示:
           if(proxySelector != null){
                ProxySelector.setDefault(proxySelector);
            }
           else{
               proxySelector = ProxySelector.getDefault();
           }
O(∩_∩)O,不知道是不是改得很挫,反正能用了。
在此提供一个我所做的修改后的class文件及说明的下载链接:
http://download.csdn.net/detail/wwwqjpcom/9493875
资源中的附带的文档中有点不太准确,但是已上传的资源删不了,改不了,CSDN 的这个作的真挫,
关于Selenium,我试过selenium 2.48.2和2.53.0版本。
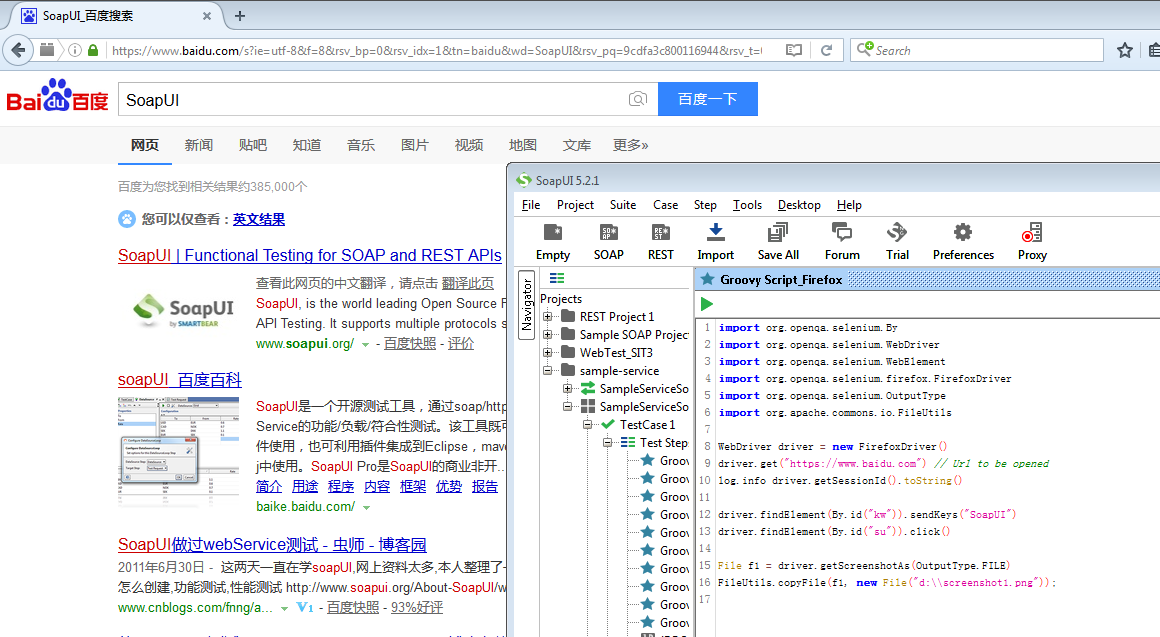
以访问百度并搜索为例
import org.openqa.selenium.By
import org.openqa.selenium.WebDriver
import org.openqa.selenium.WebElement
import org.openqa.selenium.firefox.FirefoxDriver
import org.openqa.selenium.OutputType
import org.apache.commons.io.FileUtils

WebDriver driver = new FirefoxDriver()
driver.get("https://www.baidu.com") // Url to be opened
log.info driver.getSessionId().toString()

driver.findElement(By.id("kw")).sendKeys("SoapUI")
driver.findElement(By.id("su")).click()

File f1 = driver.getScreenshotAs(OutputType.FILE)
FileUtils.copyFile(f1, new File("d:\\screenshot1.png"));