总结:
在使用缓存Canvas优化Star移动时,我的做法是在cache方法中创建缓存画布换完star
再将画布对象return出来,初衷是为了降低代码的复杂度,将代码模块化;但是好像动画卡了
(应该是和每次都创建画布有关。。。~~~~(>_<)~~~~),最后还是和原代码一样在全局上创
建缓存画布(这样写动画效果很流畅,唉之后再想想如何简化代码写法吧^_^)
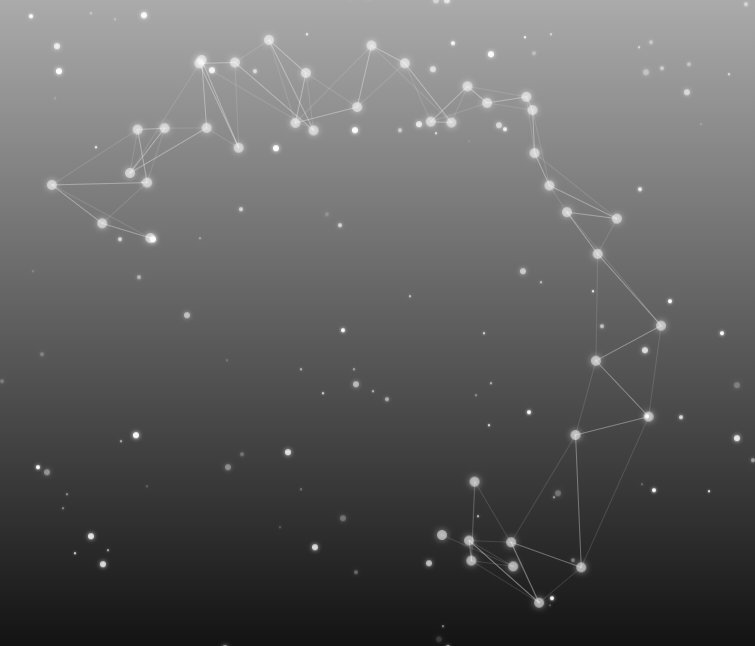
效果图:(感兴趣的还是去看小姐姐的原文吧,从canvas基础讲起很详细,真的很不错哦o.o)
<!DOCTYPE html>
<html lang="en">
<head>
    <meta charset="UTF-8">
    <meta name="viewport" content="width=device-width, initial-scale=1.0">
    <meta http-equiv="X-UA-Compatible" content="ie=edge">
    <title>canvasStar</title>
    <style>
        html,body {
            margin: 0;
            padding: 0;
            width: 100%;
            height: 100%;
            overflow: hidden;
            /* palevioletred */
            background: linear-gradient(to bottom, #dcdcdc 0%, #000 100%);
        }
        /* .filter {
            width: 100%;
            height: 100%;
            position: absolute;
            top: 0;
            left: 0;
            background: #fe5757;
            animation: colorChange 20s ease-in-out infinite;
            animation-fill-mode: both;
            mix-blend-mode: overlay;
        }
        @keyframes colorChange {
            0%, 100% {
                opacity: 0;
            }
            50% {
                opacity: .7;
            }
        } */
    </style>
</head>
<body>
    <div class="filter"></div>
    <canvas id="canvas"></canvas>
</body>
<script>
    ;(function(win, doc) {
        let maxW = win.innerWidth,
        maxH = win.innerHeight,
        maxSize = 4,
        starArr = [];

        let timer = null,
        isMoving = false,
        dotArr = [],
        mouseX = null,
        mouseY = null;

        let canvas = doc.getElementById('canvas');
        canvas.width = maxW;
        canvas.height = maxH;
        let ctx = canvas.getContext('2d');

        let CanvasStar = function(num) {
            this.num = num;
        };
        CanvasStar.prototype = {
            init: function() {
                ctx.strokeStyle = "white";
                ctx.shadowColor = "white";
                for(let i = 0; i < this.num; i++) {
                    starArr[i] = new Star(getOneRandom(maxW), getOneRandom(maxH), getOneRandom(maxSize), true);
                }
                animate();
            },

            // 绘制多边形
            polygon: function(sides) {
                // 根据边长数计算平均角度
                let step = Math.PI / sides * 2;

                ctx.beginPath();
                for (let index = 0; index < sides; index++) {
                    let x = 150 + 100 * Math.cos( index * step);
                    let y = 150 + 100 * Math.sin(index * step);
                    ctx.lineTo(x, y);
                }
                ctx.closePath();

                ctx.fillStyle = 'palevioletred';
                ctx.fill();
                ctx.strokeStyle = 'palevioletred';
                ctx.stroke();
            },
        };

        // 绘制star
        function Star(x, y, size, isCache) {
            this.x = x;
            this.y = y;
            this.r = size;
            this.isCache = isCache;
            this.cacheCanvas = doc.createElement('canvas');
            this.ctx_cache = this.cacheCanvas.getContext('2d');
            if(isCache) {
                this.cache();
            }
        };

        Star.prototype = {
            draw: function() {
                if(!this.isCache) {
                    let alpha = Math.random() + 0.1;
                    ctx.save();
                    ctx.beginPath();
                    ctx.arc(this.x, this.y, this.r, 0, 2 * Math.PI, false);
                    /**
                     * ctx.arc(x, y, radius, starAngle, endAngle, anticlockwise)
                     * x : 圆心的 x 坐标
                     * y:圆心的 y 坐标
                     * radius : 半径
                     * starAngle :开始角度
                     * endAngle:结束角度
                     * anticlockwise :是否逆时针(true)为逆时针,(false)为顺时针
                    */
                    ctx.closePath();

                    // shadowBlur:设置或返回用于阴影的模糊级别(值越大越模糊)
                    ctx.shadowColor = "#fff";
                    ctx.shadowBlur = this.r * 2;
                    ctx.fillStyle = `rgba(255, 255, 255, ${alpha})`;
                    ctx.fill();
                    ctx.restore();
                }else {
                    ctx.drawImage(this.cacheCanvas, this.x - this.r, this.y - this.r);
                }
            },

            cache: function() {
                // let cacheCanvas = doc.createElement('canvas');
                // let ctx_cache = cacheCanvas.getContext('2d');
                // 以模糊距离和圆本身的大小(2r + r = 3r)为参考,
                // 设置缓存画布的大小(2(2r + r)= 6r)直径)
                this.ctx_cache.width = this.r * 6;
                this.ctx_cache.height = this.r * 6;

                this.ctx_cache.save();
                this.ctx_cache.beginPath();
                this.ctx_cache.arc(this.r * 3, this.r * 3, this.r, 0, 2 * Math.PI);
                this.ctx_cache.closePath();

                this.ctx_cache.shadowColor = '#fff';
                this.ctx_cache.shadowBlur = this.r * 2;
                let alpha = Math.random() + 0.1;
                this.ctx_cache.fillStyle = `rgba(255, 255, 255, ${alpha})`;
                this.ctx_cache.fill();
                this.ctx_cache.restore();

                // return cacheCanvas;
            },

            move: function() {
                let speed = 0.25;
                this.y -= speed;    // 向上移动
                if(this.y <= -10) {
                    this.y += maxH + 10;    // 向下移动到距离画布下部边缘10像素的位置
                }
                this.draw();
            },

        };

        // 随鼠标移动绘制点
        function Dot(index, x, y, r, speed, isCache) {
            this.index = index;
            this.x = x;
            this.y = y;
            this.r = r;
            this.alpha = .5;
            this.dot_alpha = .5;
            this.speed = speed;
            this.dotCanvas = doc.createElement("canvas");
            this.dotCtx = this.dotCanvas.getContext("2d");
            this.dotCtx.alpha = .5;
            this.direct = getOneRandom(180) + 180;
            this.isCache = isCache;
            // 控制弧度值在 PI 到 2PI 之间(sin值为负保证y坐标向上移动,cos值正负均有 保证x坐标左右都可以移动)
            if(isCache) {
                this.cache()
            }
        }

        Dot.prototype = {
            draw: function() {
                if(!this.isCache) {
                    ctx.save();
                    ctx.beginPath();
                    ctx.arc(this.x, this.y, this.r, 0, 2 * Math.PI, false);
                    ctx.closePath();

                    ctx.shadowColor = "#fff";
                    ctx.shadowBlur = this.r * 2;
                    ctx.fillStyle = `rgba(255, 255, 255, ${this.alpha})`;
                    ctx.fill();
                    ctx.restore();
                }else {
                    ctx.drawImage(this.dotCanvas, this.x - 3 * this.r, this.y - 3 * this.r);
                }
            },

            move: function() {
                this.dot_alpha -= 0.01;
                if(this.dot_alpha <= 0) {
                    this.die(this.index)
                    return      // 终止后面代码执行
                }
                this.x = this.x + Math.cos( this.direct * Math.PI / 180 ) * this.speed;
                this.y = this.y + Math.sin( this.direct * Math.PI / 180 ) * this.speed;
                this.draw();
                this.link();
            },

            link: function() {
                if(!this.index) return;
                // 取当前点的 前四个点
                let arr = dotArr.slice(this.index - 5, this.index);
                // bug代码:let arr = dotArr.slice(this.index - 4);(复制上去即可复现,绘制的线的颜色不一样)
                // 原因:应该是连接到当前点的线重复绘制,造成比其他的线要粗
                // bug终于解决了哈哈哈哈h,昨天怎么都搞不明白,今早一敲代码立马解决了~。~开心啊
                // 真是柳暗花明又了然一bug。。。痛快
                let endIdx = arr.length - 1;
                for (let i = endIdx; i >= 0; i--) {

                    if(i == endIdx && !!arr[endIdx]) {
                        ctx.moveTo(arr[endIdx].x, arr[endIdx].y);
                        ctx.beginPath();
                        ctx.lineTo(this.x, this.y)
                    }
                    if(!!arr[i] && i !== endIdx) ctx.lineTo(arr[i].x, arr[i].y);

                }

                ctx.strokeStyle = "rgba(255, 255, 255, 0.125)";
                ctx.stroke();
                ctx.closePath();
            },

            cache: function() {
                // 6 * this.r 原因参考Star中cache的解释
                this.dotCtx.width = 6 * this.r;
                this.dotCtx.height = 6 * this.r;

                this.dotCtx.save();
                this.dotCtx.beginPath();
                this.dotCtx.arc(this.r * 3, this.r * 3, this.r, 0, 2 * Math.PI, false);
                this.dotCtx.closePath();

                // this.dotCtx.alpha -= 0.01;
                this.dotCtx.shadowColor = '#fff';
                this.dotCtx.shadowBlur = 2 * this.r;
                this.dotCtx.fillStyle = `rgba(255, 255, 255, ${this.dotCtx.alpha})`;
                this.dotCtx.fill();
                this.dotCtx.restore();
            },

            die: function(index) {
                dotArr[index] = null;
                delete dotArr[index];
            }
        }

        function drawIfMouseMoving() {
            if(!isMoving) return;

            let r = 5, speed = 0.5;
            if(!dotArr.length) {
                dotArr[0] = new Dot(0, mouseX, mouseY, r, speed, true);
                dotArr[0].draw();
                return;
            }

            // 控制点的密度
            let previousDot = dotArr[dotArr.length - 1];
            if(!!previousDot) {
                let preX = previousDot.x;
                let preY = previousDot.y;
                let diffX = Math.abs(preX - mouseX);
                let diffY = Math.abs(preY - mouseY);
                if(diffX < 5 || diffY < 5) return;
            }

            let maxDist = 50;
            let x = mouseX + getSign() * getOneRandom(50);
            let y = mouseY + getSign() * getOneRandom(50);
            dotArr[dotArr.length] = new Dot(dotArr.length, x, y, r, speed, true);
            dotArr[dotArr.length - 1].draw();
            dotArr[dotArr.length-1].link();
        };

        // 动画
        function animate() {
            ctx.clearRect(0, 0, maxW, maxH);
            for(let i in dotArr) {
                dotArr[i].move();
            }
            for(let i in starArr) {
                starArr[i].move();
            }
            drawIfMouseMoving();
            requestAnimationFrame(animate);
        };

        // 获取一个随机数
        function getOneRandom(max, min = 0) {
            return Math.floor(Math.random() * (max - min) + min);
        };

        // 获取正负号
        function getSign() {
            return Math.random() >= .5 ? -1 : 1;
        };
        win.CanvasStar = CanvasStar;

        doc.onmousemove = function(e) {
            isMoving = true;
            mouseX = e.clientX;
            mouseY = e.clientY;

            clearInterval(timer);   // 清除上一次的定时器(此时还没触发)
            timer = setInterval(function() {
                isMoving = false;
                clearInterval(timer); // 鼠标停止再清除下定时器
            }, 1000);
        };
        doc.ontouchmove = function(e) {
            isMoving = true;
            mouseX = e.clientX;
            mouseY = e.clientY;

            clearInterval(timer);   // 清除上一次的定时器(此时还没触发)
            timer = setInterval(function() {
                isMoving = false;
                clearInterval(timer); // 鼠标停止再清除下定时器
            }, 1000);
        };
    })(window, document);
</script>
<script>
    let num = 240;
    let canvasStar = new CanvasStar(num);
    // canvasStar.polygon(5); // 五边形
    canvasStar.init();

    /**总结:
     *      在使用缓存Canvas优化Star移动时,我的做法是在cache方法中创建缓存画布换完star
     * 再将画布对象return出来,初衷是为了降低代码的复杂度,将代码模块化;但是好像动画卡了
     * (应该是和每次都创建画布有关。。。~~~~(>_<)~~~~),最后还是和原代码一样在全局上创
     * 建缓存画布(这样写动画效果很流畅,唉之后再想想如何简化代码写法吧^_^)
    */
</script>
</html>