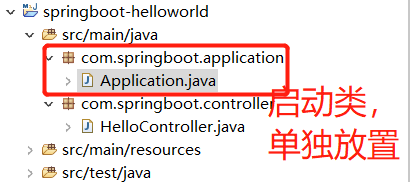
项目结构

一、开始搭建maven项目
(1)两个都勾选了,下一步(帮助生成熟悉的项目结构

(2)项目打包成jar

二、pom.xml文件添加依赖

代码:
<parent>
        <groupId>org.springframework.boot</groupId>
        <artifactId>spring-boot-starter-parent</artifactId>
        <version>1.3.3.RELEASE</version>
    </parent>
    <dependencies>
      <!--SpringBoot web 组件  -->
        <dependency>
            <groupId>org.springframework.boot</groupId>
            <artifactId>spring-boot-starter-web</artifactId>
        </dependency>
    </dependencies>
三、创建启动类
代码:
package com.springboot.application;

import org.springframework.boot.SpringApplication;
import org.springframework.boot.autoconfigure.EnableAutoConfiguration;
import org.springframework.context.annotation.ComponentScan;

@ComponentScan(basePackages = "com.springboot.controller")
@EnableAutoConfiguration
public class Application {

	public static void main(String[] args) {
		SpringApplication.run(Application.class, args);
	}
}
关键代码说明:
1. @ComponentScan(basePackages = "com.springboot.controller")
这里是包扫描注解,因为springboot是一个高度封装的框架。所以在项目启动之前就会把一系列的准备工作做好。这里扫描的 controller控制层。(一个完整的项目还需要扫描 接口层,后续再讲。)
多个包扫描格式。@ComponentScan("com.springboot.controller,XXX.XXX.XXX") ,basePackages 省略也可以。多个包,用“,”隔开。
2.@EnableAutoConfiguration
标注类Application是springboot项目的入口,并且开始对项目的准备工作,开始各种准备。
四、创建controller类,接收由浏览器向后台发送的请求。
项目结构:

代码:
package com.springboot.controller;


import org.springframework.web.bind.annotation.RequestMapping;
import org.springframework.web.bind.annotation.RestController;

@RestController
public class HelloController {

	@RequestMapping("/hello")
	public String hello() {
		return "hello springboot";
	}
	}
关键代码说明:
1.@RestController
写在类上面,标注这是一个controller类,浏览器发送请求,就找这个controller类。
这个类是一个聚合类,看一下源码:
如图
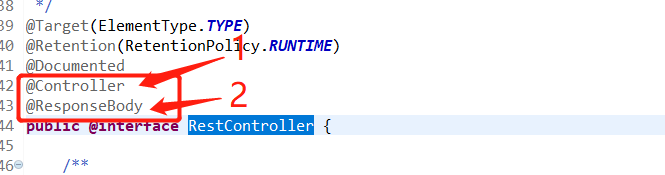
(1)说明是个controller类
(2)返回json格式的数据
2.@RequestMapping("/hello")
这个是请求路径大兄弟,当你发送请求是 127.0.0.1:8080/hello 时,走得就是 hello() 方法。
五、启动项目
六、浏览器测试

不足之处,请留言。谢谢各位沙漠之鹰~