这里讲解的使用spring支持的第三方jar包的使用来处理json数据,不包括其他的方法。
响应json数据:
这里涉及了几种比较复杂的json数据的响应;
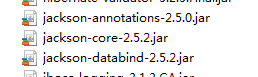
第一步导包:
第二步单纯的响应json数据:
 1 /**
 2  *
 3  */
 4 package com.sxt.controller;
 5
 6 import java.util.ArrayList;
 7 import java.util.Arrays;
 8 import java.util.HashMap;
 9 import java.util.List;
10 import java.util.Map;
11
12 import org.springframework.stereotype.Controller;
13 import org.springframework.web.bind.annotation.RequestMapping;
14 import org.springframework.web.bind.annotation.ResponseBody;
15 /**
16  * @author ASUS
17  * 利用gson响应json数据
18  *
19  *
20  */
21
22 import com.sxt.bean.User;
23 @Controller
24 public class MyController {
25     /**
26      * 响应一个map集合的数据转换成json
27      * @return
28      */
29     @RequestMapping("/fun1")
30     @ResponseBody
31     public Map<String, Object> fun1(){
32         Map<String, Object> map=new HashMap<>();
33         map.put("id", 1);
34         map.put("name", "张三");
35         map.put("age", 20);
36         map.put("address", "深圳尚学堂");
37         return map;
38     }
39     /**
40      * 响应一个list数据的
41      * @return
42      */
43     @RequestMapping("/fun2")
44     @ResponseBody
45     public List<String> fun2(){
46         System.out.println("------------");
47         return Arrays.asList("深圳","广州","上海","北京");
48     }
49     @RequestMapping("/fun3")
50     @ResponseBody
51     public User fun3() {
52         User user=new User();
53         user.setUsername("ass");
54         user.setPassword("122");
55         return null;
56     }
57     @RequestMapping("/fun4")
58     @ResponseBody
59     public Map<String, Object> fun4(){
60         Map<String, Object> map=new HashMap<>();
61         map.put("total", 20);
62         List<User> list = new ArrayList<>();
63         for(int i =0;i<5;i++){
64             User user = new User();
65             user.setUsername("aaa"+i);
66             user.setPassword("bbbb"+i);
67             list.add(user);
68         }
69         map.put("rows", list);
70         return map;
71     }
72
73 }
上面的案例中还可以把@ResponseBody添加到类的头上,这表明该类就是一个专门的响应json数据的类
二:接收json数据
controller代码:
 1 /**
 2  *
 3  */
 4 package com.sxt.controller;
 5
 6 import org.springframework.stereotype.Controller;
 7 import org.springframework.web.bind.annotation.RequestBody;
 8 import org.springframework.web.bind.annotation.RequestMapping;
 9 import org.springframework.web.bind.annotation.ResponseBody;
10
11 import com.sxt.bean.User;
12
13 /**
14  * @author ASUS
15  * 获取请求的json数据
16  *
17  */
18 @Controller
19 public class RequestJson {
20     @RequestMapping("/add")
21     @ResponseBody
22     public String add(@RequestBody User user) {
23         System.out.println(user);
24         return "/index.jsp";
25     }
26 }
注意:这里多了一个注解;该注解能把请求的json数据自动转换成对象数据
还可以用@RestController来代替@Controller和@ResponseBody的功能
jsp页面代码:
 1 <%@ page language="java" contentType="text/html; charset=UTF-8"
 2     pageEncoding="UTF-8"%>
 3     <%
 4 String path = request.getContextPath();
 5 String basePath = request.getScheme()+"://"+request.getServerName()+":"+request.getServerPort()+path+"/";
 6 %>
 7 <!DOCTYPE html>
 8 <html>
 9 <head>
10  <base href="<%=basePath%>">
11 <meta charset="UTF-8">
12 <title>Insert title here</title>
13 <script type="text/javascript" src="js/jquery.min.js"></script>
14 </head>
15 <body>
16 <input type="button" value="提交数据" onclick="fun1();">
17     <script type="text/javascript">
18         function fun1() {
19             $.ajax({
20                 type : 'POST',
21                 url : "add",
22                 contentType : "application/json",
23                 //如果想以json格式把数据提交到后台的话,这个必须有,否则只会当做表单提交
24                 data : JSON.stringify({
25                     "username" : "aaa",
26                     "password" : "bbb"
27                 }),//JSON.stringify()必须有,否则只会当做表单的格式提交
28                 dataType : "json",//期待返回的数据类型
29                 success : function(data) {
30                     alert("success:" + data);
31                 },
32                 error : function(data) {
33                     alert("error" + data);
34                 }
35             });
36         }
37     </script>
38 </body>
39 </html>
注意:如果我们在接收json数据的时候加上@RequestBody这个注解,那么它会自动将请求的json数据转换到对象中。
在我们日常的开发中,404,500这类的错误异常信息屡见不鲜;这是因为在开发中的异常信息都被我们try-catch给处理掉了,所以当某一个出现问题的就会抛出这样的界面;
这样给用户的体验很不好。在spring中有一个专门的异常处理器HandlerExceptionResolver,我们可以借助这个接口将错误的界面换成更好看的界面展示给客户。但是,这存在一个问题,也就是我们所有的异常必须往上抛,最后再controller中利用该接口展示给用户我们想让他们看到的界面。
第一步:
创建一个异常处理器实现HandlerExceptionResolver接口
代码:
 1 /**
 2  *
 3  */
 4 package com.sxt.controller;
 5
 6 import javax.servlet.http.HttpServletRequest;
 7 import javax.servlet.http.HttpServletResponse;
 8 import org.springframework.stereotype.Component;
 9 import org.springframework.web.servlet.HandlerExceptionResolver;
10 import org.springframework.web.servlet.ModelAndView;
11 /**
12  * @author ASUS
13  * 自定义的全局异常处理器
14  *
15  */
16 @Component
17 public class MyHandleException implements HandlerExceptionResolver{
18
19     /**
20      * ex就是对应的抛出的按个异常
21      */
22     @Override
23     public ModelAndView resolveException(HttpServletRequest request, HttpServletResponse response, Object handler,
24             Exception ex) {
25         // TODO Auto-generated method stub
26         System.out.println(ex);
27         System.out.println(ex.getMessage());
28         ModelAndView mc=new ModelAndView();
29         mc.setViewName("/error.jsp");
30         return mc;
31     }
32
33 }
在controller中对异常进行展示:
 1 /**
 2  *
 3  */
 4 package com.sxt.controller;
 5
 6
 7
 8 import org.springframework.stereotype.Controller;
 9 import org.springframework.web.bind.annotation.RequestMapping;
10
11 import com.sxt.bean.User;
12 import com.sxt.exception.CustomException;
13 /**
14  * @author ASUS
15  * 将异常全部抛出,最后再controller中有一个spring自带的异常处理器;如果不抛的话就没有办法知道这些异常
16  * 用户就可能见到404这样的异常信息,为了更好地体验,我们将这样的错误界面换成更好看的,这在显示生活中很常见
17  *
18  */
19 @Controller
20 public class MyController {
21     @RequestMapping("/update")
22     public String update( User user) throws CustomException {
23         System.out.println("------------");
24         System.out.println(user);
25         if("admin".equals(user.getUsername())) {
26             throw new CustomException("系统维护,请稍后访问!!");
27         }else if("root".equals(user.getUsername())) {
28             throw new CustomException("类型出错了");
29         }
30         return "/user.jsp";
31     }
32
33 }
自定义异常信息显示类:
 1 /**
 2  *
 3  */
 4 package com.sxt.exception;
 5
 6 /**
 7  * @author ASUS
 8  * 自定义异常类
 9  *
10  */
11 public class CustomException extends Exception{
12
13     /**
14      *
15      */
16     private static final long serialVersionUID = 1L;
17     private String message;
18     public String getMessage() {
19         return message;
20     }
21     public void setMessage(String message) {
22         this.message = message;
23     }
24     @Override
25     public String toString() {
26         return "CustomException [message=" + message + "]";
27     }
28
29     public CustomException(String message) {
30         super(message);
31         this.message=message;
32     }
33
34
35 }
错误界面代码:
 1 <%@ page language="java" contentType="text/html; charset=UTF-8"
 2     pageEncoding="UTF-8"%>
 3     <%
 4 String path = request.getContextPath();
 5 String basePath = request.getScheme()+"://"+request.getServerName()+":"+request.getServerPort()+path+"/";
 6 %>
 7 <!DOCTYPE html>
 8 <html>
 9 <head>
10  <base href="<%=basePath%>">
11 <meta charset="UTF-8">
12 <title>Insert title here</title>
13 </head>
14 <body>
15 错误页面!!!
16 </body>
17 </html>
配置文件信息:
 1 <?xml version="1.0" encoding="UTF-8"?>
 2 <beans xmlns="http://www.springframework.org/schema/beans"
 3     xmlns:xsi="http://www.w3.org/2001/XMLSchema-instance"
 4     xmlns:context="http://www.springframework.org/schema/context"
 5     xmlns:mvc="http://www.springframework.org/schema/mvc"
 6     xsi:schemaLocation="http://www.springframework.org/schema/mvc http://www.springframework.org/schema/mvc/spring-mvc-4.3.xsd
 7         http://www.springframework.org/schema/beans http://www.springframework.org/schema/beans/spring-beans.xsd
 8         http://www.springframework.org/schema/context http://www.springframework.org/schema/context/spring-context-4.3.xsd">
 9
10     <!-- 开启注解 -->
11     <mvc:annotation-driven ></mvc:annotation-driven>
12     <!-- 开启扫描 -->
13     <context:component-scan base-package="com.sxt.*"></context:component-scan>
14
15
16 </beans>
注意:这里使用的是注解的形式,如果在自定义异常处理器中没有使用注解,就要在spring-mvc.xml文件中配置异常处理器