SpringBoot 整合
3.1整合 Spring Data JPA
3.1.1 需求
使用 Spring Boot + Spring MVC + Spring Data JPA + EasyUI 框架组合实现部门列表查询,效果如下: 
3.1.2 环境准备
3.1.2.1 导入数据库表
在 MySQL 数据库执行以下语句:
DROP TABLE IF EXISTS `user`;
CREATE TABLE `user` (
    `id` bigint(20) NOT NULL AUTO_INCREMENT,
    `user_name` varchar(100) DEFAULT NULL COMMENT '用户名',
    `password` varchar(100) DEFAULT NULL COMMENT '密码',
    `name` varchar(100) DEFAULT NULL COMMENT '姓名',
    PRIMARY KEY (`id`)
) ENGINE=InnoDB AUTO_INCREMENT=7 DEFAULT CHARSET=utf8;
INSERT INTO `user` VALUES ('1', 'zhangsan', '123456', '张三');
INSERT INTO `user` VALUES ('2', 'lisi', '123456', '李四');
INSERT INTO `user` VALUES ('3', 'wangwu', '123456', '王五');
INSERT INTO `user` VALUES ('4', 'zhangwei', '123456', '张伟');
INSERT INTO `user` VALUES ('5', 'lina', '123456', '李娜');
INSERT INTO `user` VALUES ('6', 'lilei', '123456', '李磊');
3.1.2.2 创建 Maven 工程
在 pom.xml 中进行如下配置:
<parent>
    <groupId>org.springframework.boot</groupId>
    <artifactId>spring-boot-starter-parent</artifactId>
    <version>1.4.4.RELEASE</version>
</parent>
<dependencies>
    <dependency>
        <groupId>org.springframework.boot</groupId>
        <artifactId>spring-boot-starter-web</artifactId>
        <version>1.4.4.RELEASE</version>
    </dependency>
    <dependency>
        <groupId>org.springframework.boot</groupId>
        <artifactId>spring-boot-devtools</artifactId>
        <version>1.4.4.RELEASE</version>
    </dependency>
    <dependency>
        <groupId>org.springframework.boot</groupId>
        <artifactId>spring-boot-starter-data-jpa</artifactId>
        <version>1.4.4.RELEASE</version>
    </dependency>
    <dependency>
        <groupId>mysql</groupId>
        <artifactId>mysql-connector-java</artifactId>
        <version>5.1.6</version>
    </dependency>
</dependencies>
3.1.2.3 加入 Spring-Boot 配置文件
在 src/main/resources 下添加 application.properties 配置文件,内容如下:
#DB Configuration:
spring.datasource.driverClassName=com.mysql.jdbc.Driver
spring.datasource.url=jdbc:mysql://127.0.0.1:3306/taotao
spring.datasource.username=root
spring.datasource.password=root
#JPA Configuration:
spring.jpa.database=MySQL
spring.jpa.show-sql=true
spring.jpa.generate-ddl=true
spring.jpa.hibernate.ddl-auto=update
spring.jpa.hibernate.naming_strategy=org.hibernate.cfg.ImprovedNamingStrategy
此文件用于覆盖 Spring Boot 的默认配置,完整的配置信息参考“附录 2”
3.1.3 后端实现
3.1.3.1 创建实体类
import javax.persistence.Entity;
import javax.persistence.Id;
@Entity
public class User {
    @Id
    private Long id;
    private String userName;
    private String password;
    private String name;
    //添加 get 和 set 方法
}
3.1.3.2 创建 DAO 接口
import org.springframework.data.jpa.repository.JpaRepository;

public interface UserDao extends JpaRepository<User, Long> {
}
3.1.3.3 创建业务逻辑接口
import java.util.List;

public interface UserService {
    List<User> findAll();
}
3.1.3.4 创建业务逻辑实现类
import java.util.List;
import org.springframework.beans.factory.annotation.Autowired;
import org.springframework.stereotype.Service;

@Service
public class UserServiceImpl implements UserService {
    @Autowired
    private UserDao userDao;
    @Override
    public List<User> findAll() {
        List<User> list = this.userDao.findAll();
        return list;
    }
}
3.1.3.5 创建 Controller
import java.util.List;
import org.springframework.beans.factory.annotation.Autowired;
import org.springframework.web.bind.annotation.RequestMapping;
import org.springframework.web.bind.annotation.RestController;

@RestController
@RequestMapping("user")
public class UserControlelr {
    @Autowired
    private UserService userService;
    @RequestMapping("list")
    public List<User> queryUserAll() {
        List<User> list = this.userService.findAll();
        return list;
    }
}
3.1.3.6 创建引导类
import org.springframework.boot.SpringApplication;
import org.springframework.boot.autoconfigure.SpringBootApplication;
@SpringBootApplication
public class Application {
    public static void main(String[] args) {
        SpringApplication.run(Application.class, args);
    }
}
运行引导类 Application,打开浏览器输入 http://127.0.0.1:8080/user/list![]()
3.1.4 前端实现
把资料中的 static 文件夹, 拷贝到 src/main/resources 路径下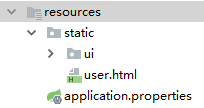
浏览器地址栏输入: http://127.0.0.1:8080/user.html, 效果如下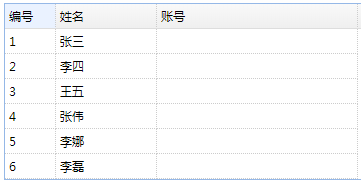
3.2整合 MyBatis
3.2.1 加入依赖
在 pom.xml 中加入以下依赖:
<!-- SpringBoot 的 Mybatis 启动器 -->
<dependency>
    <groupId>org.mybatis.spring.boot</groupId>
    <artifactId>mybatis-spring-boot-starter</artifactId>
    <version>1.1.1</version>
</dependency>
3.2.2 编写 Mapper
和之前的方式一样, 只是多了两个注解
@Mapper:声明 Mapper 接口
@Select: 声明这个接口所需要使用的 sql, 当然, 有查询的注解, 肯定就有增删改的注解。
import java.util.List;
import org.apache.ibatis.annotations.Mapper;
import org.apache.ibatis.annotations.Select;
import cn.itcast.info.pojo.User;
@Mapper
public interface UserMapper {
    @Select("select * from user where name like '%${value}%'")
    public List<User> queryUserByName(String name);
}
3.2.3 编写 Service 和 Controller
添加 Service 调用 Mapper:
@Service
public class UserServiceImpl implements UserService {
    @Autowired
    private UserDao userDao;
    @Autowired
    private UserMapper userMapper;
    @Override
    public List<User> findAll() {
        List<User> list = this.userDao.findAll();
        return list;
    }
    @Override
    public List<User> queryUserByName(String name) {
        List<User> list = this.userMapper.queryUserByName(name);
        return list;
    }
}
修改 Controller
@RestController
@RequestMapping("user")
public class UserControlelr {
    @Autowired
    private UserService userService;
    @RequestMapping("list")
    public List<User> queryUserAll() {
        List<User> list = this.userService.findAll();
        return list;
    }
    @RequestMapping("list/{name}")
    public List<User> queryUserAll(@PathVariable String name) {
        List<User> list = this.userService.queryUserByName(name);
        return list;
    }
}
3.2.4 测试
浏览器地址栏输入: http://127.0.0.1:8080/user/list/张
显示效果:![]()
3.3整合 Redis
3.3.1 注解方式实现添加缓存
需求:基于上例代码,将列表数据缓存到 Redis
3.3.2 加入依赖
在 pom.xml 加入依赖:
<!-- 配置使用 redis 启动器 -->
<dependency>
    <groupId>org.springframework.boot</groupId>
    <artifactId>spring-boot-starter-redis</artifactId>
</dependency>
3.3.2.1 修改引导类
修改开启缓存, 添加注解@EnableCaching
import org.springframework.boot.SpringApplication;
import org.springframework.boot.autoconfigure.SpringBootApplication;
import org.springframework.cache.annotation.EnableCaching;
@SpringBootApplication
@EnableCaching
public class Application {
    public static void main(String[] args) {
        SpringApplication.run(Application.class, args);
    }
}
3.3.2.2 设置实现序列化接口
需要修改实体, 让实体实现序列化接口
@Entity
public class User implements Serializable {
    @Id
    private Long id;
    private String userName;
    private String password;
    private String name;
    //getter and setter
}
3.3.2.3 实现添加/删除缓存
修改 UserServiceImpl,添加@Cacheable 注解实现缓存添加
@Override
@Cacheable(value = "userCache", key = "'user.findAll'")
public List<User> findAll() {
    System.out.println("从 Mysql 中查询");
    List<User> list = this.userDao.findAll();
    return list;
}
@Override
@CacheEvict(value = "userCache", allEntries=true)
public List<User> queryUserByName(String name) {
    System.out.println("缓存清理了! ");
    List<User> list = this.userMapper.queryUserByName(name);
    return list;
}
这 样 设 置 完 成 后 , 执 行 findAll() 方 法 就 会 使 用 缓 存 , 如 果 缓 存 没 有 就 添 加 缓 存 , 而queryUserByName(String name)方法则是删除缓存
@Cacheable:添加/使用缓存
@CacheEvict: 删除缓存
属性 value 是缓存的名字,在执行的时候, 会找叫这个名字的缓存使用/删除
属性 key 默认情况下是空串””,是 Spring 的一种表达式语言 SpEL, 我们这里可以随意指定, 但是需要注意一定要加单引号
属性 allEntries 指定是否清空整个缓存区。
3.4整合 junit
3.4.1 加入依赖
在 pom.xml 中加入测试依赖:
<!-- 配置测试启动器 -->
<dependency>
    <groupId>org.springframework.boot</groupId>
    <artifactId>spring-boot-starter-test</artifactId>
    <scope>test</scope>
</dependency>
3.4.2 编写测试类
/**
* <p>Title: SpringBootTest</p>
* <p>Description: </p>
*/
@RunWith(SpringJUnit4ClassRunner.class)
@SpringBootTest(classes=ApplicationRunner.class)
public class SpringBootJunitTest {
    @Autowired
    private IUserService userService;
    @Test
    public void test1() {
        List<User> users = userService.findAll();
        for(User user : users) {
            System.out.println(user);
        }
    }
}
SpringRunner 与 SpringJUnit4ClassRunner 是继承关系, 但是没有不同的地方,只是看起来子类SpringRunner 要短一些而已。
@SpringBootTest 注解的 class 属性要指定引导类的 class