版权声明:找不到大腿的时候,让自己变成大腿. https://blog.csdn.net/Xin_101/article/details/86647414
1 环境需求
- Ubuntu
- pip
- virtualenv
- Flask
- uwsgi
2 环境部署
2.1 pip部署
- 安装
sudo apt-get install python-pip
sudo apt-get install pyhton3-pip
- 查看版本
pip -V
pip3 -V
2.2 viurtualenv部署
- 安装
sudo apt-get install virtualenv
- 新建指定py版本虚拟环境
virtual -p /usr/bin/python2 py2env
virtual -p /usr/bin/python3 py3env
- 激活虚拟环境
cd 新建虚拟环境的路径
source py2env/bin/activate
source py3env/bin/activate
- 停用虚拟环境
deactivate
- 修改虚拟环境用户
# 进入虚拟环境文件夹
cd py2env
cd py3env
# 修改该文件夹的用户为当前用户
# 这样就可以直接pip安装文件
# 如果用sudo是全局安装,不是在虚拟环境安装
sudo chown xindq -R *
sudo chown xindq -R *
2.3 Flask部署
- 安装
(py2env)pip install flask
(py2env)pip install flask
- flask后台框架
from flask import Flask
app = Flask(__name__)

@app.route('/api', methods=[GET,POST])
def api():
	return 'Api test!'
if __name__ == '__main__':
	app.run(host='0.0.0.0', port=8080, debug=True)
- 运行
(py2env)python app.py
(py3env)python app.py
- 访问
http://127.0.0.1:8080/api
2.4 uWSGI
2.4.1 安装插件
- python2
sudo apt-get install uwsgi-plugin-python
- python3
sudo apt-get install uwsgi-plugin-python3
2.4.2 安装uWSGI
pip install uwsgi
pip3 install uwsgi
2.4.3 配置文件uwsgi.ini
[uwsgi]
# 子目录
chdir = source_path
# 主线程
master = True
py-autoreload = True
enable-threads = True
# 服务名称:app.run()
app = app
# 服务文件:test_server.py
wsgi-file = source_path/test_server.py
# 进程
process = 4
# 线程
threads = 2
# 绑定服务IP
http = 0.0.0.0:8080
# 调用服务
callable = app
# 缓存
buffer-size = 65536
2.5 supervisor部署
2.5.1 安装
#python2环境
sudo apt-get install supervisor
2.5.2 配置supervisord.conf
- /etc/supervisor/supervisord.conf
; supervisor config file

[unix_http_server]
file=/var/run/supervisor.sock   ; (the path to the socket file)
chmod=0700                       ; sockef file mode (default 0700)
[supervisord]
nodaemon=true
logfile=/var/log/supervisor/supervisord.log ; (main log file;default $CWD/supervisord.log)
pidfile=/var/run/supervisord.pid ; (supervisord pidfile;default supervisord.pid)
childlogdir=/var/log/supervisor            ; ('AUTO' child log dir, default $TEMP)
; the below section must remain in the config file for RPC
; (supervisorctl/web interface) to work, additional interfaces may be
; added by defining them in separate rpcinterface: sections
[rpcinterface:supervisor]
supervisor.rpcinterface_factory = supervisor.rpcinterface:make_main_rpcinterface
[supervisorctl]
serverurl=unix:///var/run//supervisor.sock ; use a unix:// URL  for a unix socket
; The [include] section can just contain the "files" setting.  This
; setting can list multiple files (separated by whitespace or
; newlines).  It can also contain wildcards.  The filenames are
; interpreted as relative to this file.  Included files *cannot*
; include files themselves.
[include]
;单个程序
files = /etc/supervisor/conf.d/chatbot.conf
;多个程序,同时写入conf.d文件夹中
;如有chatbot和face_recognition两个程序
;程序设计如下
;chatbot.conf和face_recognition.conf
files = /etc/supervisor/conf.d/*.conf
;注意,python中的文件后缀,可以更改
;经验:A用py2,B用py3
;使用的conf不兼容
;有后缀隔离自己配置:如*.ini, *.txt
;supervisor控制台
[inet_http_server]
# 监听的IP,形式为host:port
# 若port = *:8080报错,则使用0.0.0.0:8080
port=*:8080
username=xindaqi
password=123456
2.5.3 配置程序文件chatbot.conf
- /etc/supervisor/conf.d/chatbot.conf
# chabot为服务文件名称:chatbot.py
[program:chatbot]
#执行uwsgi命令
command = /sourcepatht/py35cpu/bin/uwsgi --ini /sourcepatht/uwsgi.ini
autostart = True
autorestart = True
#自动启动
autostart=true
#自动重启
autorestart=true
#日志
stdout_logfile = /home/SP-in-AI/xindq/uwsgi_test/logs/test.out
2.5.4 supervisor手动启用
# 关闭所有supervisord
sudo killall supervisord
#进入/etc/supervisor目录
#手动启动服务
sudo supervisord -c supervisord.conf
#查看supervisor状态
sudo supervisordctl -c supervisord.conf status
#重新载入
sudo supervisorctl -c supervisord.conf reload
#开启服务
supervisorctl -c supervisord.conf start
#关闭服务
supervisorctl -c supervisord.conf stop
2.5.6 supervisor自动启用
#重新载入
sudo supervisorctl reload
#启动
sudo service supervisor start
#重启
sudo service supervisor restart
#查看supervisor当前状态
sudo supervisorctl
#启动app
start app
#停用app
stop app
3 测试
#启动supervisor
sudo supervisord -c supervisord.conf
#查看状态
sudo supervisorctl
#启动app
start app
#启动Postman测试
# 查看supervisor状态
0.0.0.0:8080
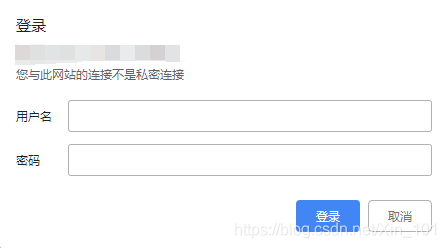
- supervisor登录
服务器IP+监听端口,如127.0.0.1:8080
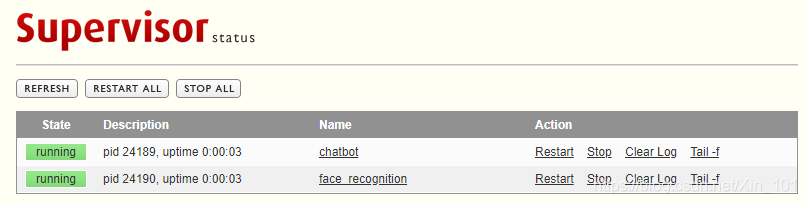
- supervisor监控界面
4 问题
4.1 plugin插件
- Error
plugin=python
open("./python_plugin.so"): No such file or directory [core/utils.c line 3721]
!!! UNABLE to load uWSGI plugin: ./python_plugin.so: cannot open shared object file: No such file or directory !!!
- Reason
pip install uwsgi安装uwsgi后包含了plugin,无需再重复使用。 - Solve
删除plugin=python
4.2 载入服务问题
- Error
no app loaded. going in full dynamic mode
no python application found, check your startup logs for errors
- Reason
wsgi-file拼错或未设置; - Solve
wsgi-file = /path/test.py
4.3 http与socket模式
4.3.1 使用http配置*.ini
- 配置
http = 0.0.0.0:8080
- 运行结果
uWSGI http bound on 0.0.0.0:8092 fd 4
uwsgi socket 0 bound to TCP address 127.0.0.1:45069 (port auto-assigned) fd 3
- 分析
先使用http绑定运行的服务地址(app.py),后使用socket绑定服务器地址,可进行访问,并返回结果。
4.3.2 使用socket配置*.ini
- 配置
socket = 127.0.0.1:8092
- 运行结果
uwsgi socket 0 bound to TCP address 127.0.0.1:8092 fd 3
- 分析
仅使用socket绑定服务器,不能正常访问。
[参考文献]
[1]https://blog.csdn.net/Xin_101/article/details/82798726
[2]https://uwsgi-docs.readthedocs.io/en/latest/WSGIquickstart.html
[3]https://www.cnblogs.com/dspace/p/5647587.html
[4]https://blog.csdn.net/sinat_29315627/article/details/73182649
[5]https://blog.csdn.net/zouyee/article/details/38419531
[6]https://www.cnblogs.com/TTyb/p/9554549.html