使用Spring Boot 和 MyBatis搭建项目
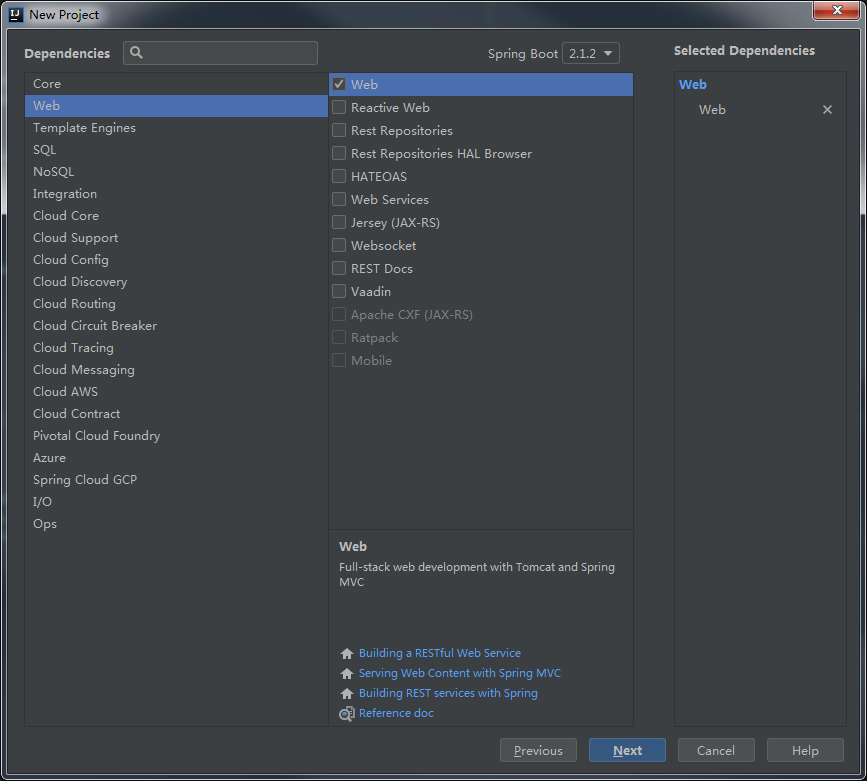
1.创建项目

默认的信息

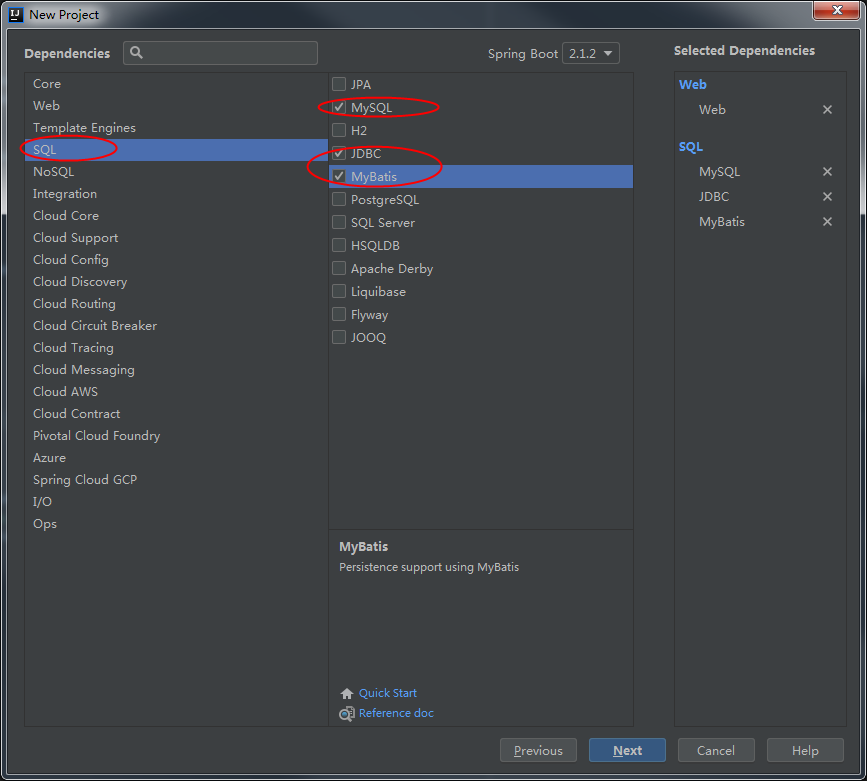
因为需要连接数据库,所以需要选择项目所需要的依赖
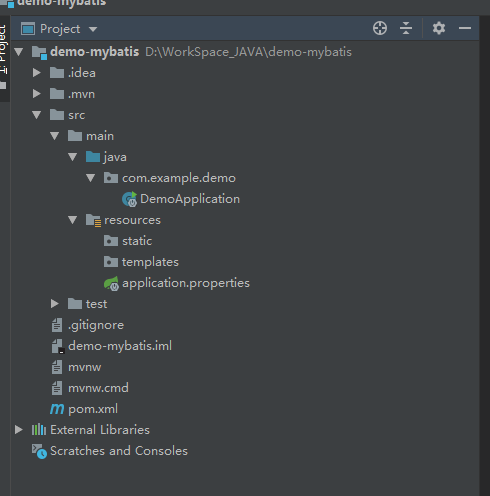
然后 Next 、Finish,最后的代码结构
由于需要使用Mybatis,需要在pom.ml添加依赖包
扫描二维码关注公众号,回复:
5133568 查看本文章


 1         <!--数据库连接池-->
 2         <dependency>
 3             <groupId>com.alibaba</groupId>
 4             <artifactId>druid</artifactId>
 5             <version>1.1.11</version>
 6         </dependency>
 7
 8         <!-- Spring Boot Mybatis 依赖 -->
 9         <dependency>
10             <groupId>org.mybatis.spring.boot</groupId>
11             <artifactId>mybatis-spring-boot-starter</artifactId>
12             <version>2.0.0</version>
13         </dependency>
14
15         <!--Mybatis generator 自动生成相关文件 依赖-->
16         <dependency>
17             <groupId>org.mybatis.generator</groupId>
18             <artifactId>mybatis-generator-core</artifactId>
19             <version>1.3.5</version>
20         </dependency>
在pom.xml中添加mybatis generator 自动生成代码插件,添加位置为<build></build>中
  <!-- mybatis generator 自动生成代码插件 -->
            <plugin>
                <groupId>org.mybatis.generator</groupId>
                <artifactId>mybatis-generator-maven-plugin</artifactId>
                <configuration>
                    <configurationFile>${basedir}/src/main/resources/generator/generatorConfig.xml</configurationFile>
                    <overwrite>true</overwrite>
                    <verbose>true</verbose>
                </configuration>
            </plugin>
使用application.yml文件配置数据库的连接
server:
  port: 8089

spring:
  datasource:
    mame:
    type: com.alibaba.druid.pool.DruidDataSource
    url: jdbc:mysql://172.0.0.1:3306/ygop_eps_commodity
    username: ygtest
    password: ygtest
    driver-class-name: com.mysql.jdbc.Driver
    filters: stat
    maxActive: 20
    initialSize: 1
    maxWait: 60000
    minIdle: 1
    timeBetweenEvictionRunsMillis: 60000
    minEvictableIdleTimeMillis: 300000
    validationQuery: select 'x'
    testWhileIdle: true
    testOnBorrow: false
    testOnReturn: false
    poolPreparedStatements: true
    maxOpenPreparedStatements: 20


#Mybatis配置
mybatis:
    mapper-locations: classpath:mybatis/mapper/**/*.xml
#    type-aliases-package: ygop.o2o.jdq.service.model.entities
    config-location: classpath:mybatis/config/mybatis-config.xml
使用mybatis generator 自动生成代码:
配置pom.xml中generator 插件所对应的配置文件 ${basedir}/src/main/resources/generator/generatorConfig.xml
 1 <?xml version="1.0" encoding="UTF-8"?>
 2 <!DOCTYPE generatorConfiguration
 3         PUBLIC "-//mybatis.org//DTD MyBatis Generator Configuration 1.0//EN"
 4         "http://mybatis.org/dtd/mybatis-generator-config_1_0.dtd">
 5 <generatorConfiguration>
 6     <!-- 数据库驱动:选择你的本地硬盘上面的数据库驱动包-->
 7     <classPathEntry  location="D:\mysql-connector-java-5.1.46.jar"/>
 8     <context id="DB2Tables"  targetRuntime="MyBatis3">
 9         <commentGenerator>
10             <property name="suppressDate" value="true"/>
11             <!-- 是否去除自动生成的注释 true:是 : false:否 -->
12             <property name="suppressAllComments" value="true"/>
13         </commentGenerator>
14         <!--数据库链接URL,用户名、密码 -->
15         <jdbcConnection driverClass="com.mysql.jdbc.Driver" connectionURL="jdbc:mysql://172.0.0.1:3306/ygop_eps_commodity" userId="ygtest" password="ygtest">
16         </jdbcConnection>
17         <javaTypeResolver>
18             <property name="forceBigDecimals" value="false"/>
19         </javaTypeResolver>
20         <!-- 生成模型的包名和位置-->
21         <javaModelGenerator targetPackage="com.example.demo.model.entities" targetProject="src/main/java">
22             <property name="enableSubPackages" value="true"/>
23             <property name="trimStrings" value="true"/>
24         </javaModelGenerator>
25         <!-- 生成映射文件的包名和位置-->
26         <sqlMapGenerator targetPackage="mybatis/mapper/auto" targetProject="src/main/resources">
27             <property name="enableSubPackages" value="true"/>
28         </sqlMapGenerator>
29         <!-- 生成DAO的包名和位置-->
30         <javaClientGenerator type="XMLMAPPER" targetPackage="com.example.demo.dao.auto" targetProject="src/main/java">
31             <property name="enableSubPackages" value="true"/>
32         </javaClientGenerator>
33         <!-- 要生成的表 tableName是数据库中的表名或视图名 domainObjectName是实体类名-->
34         <table tableName="commodity" domainObjectName="Commodity" enableCountByExample="false" enableUpdateByExample="false" enableDeleteByExample="false" enableSelectByExample="false" selectByExampleQueryId="false"></table>
35     </context>
36 </generatorConfiguration>
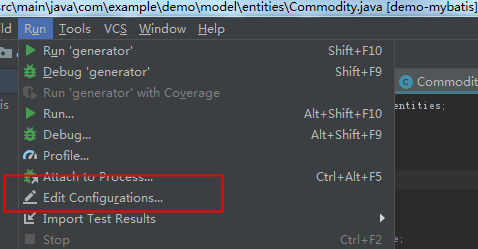
设置 Build

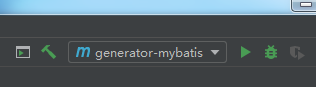
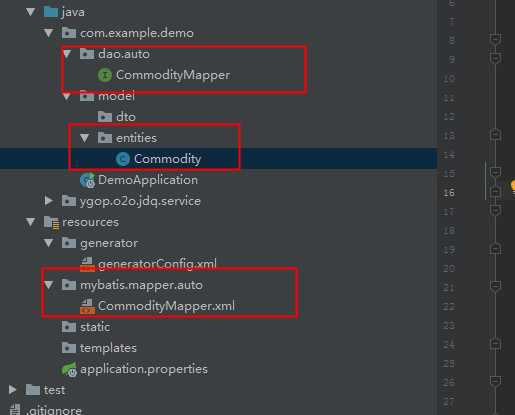
run一下就会自动生成,生成的路径都是在generatorConfig.xml中进行配置的;
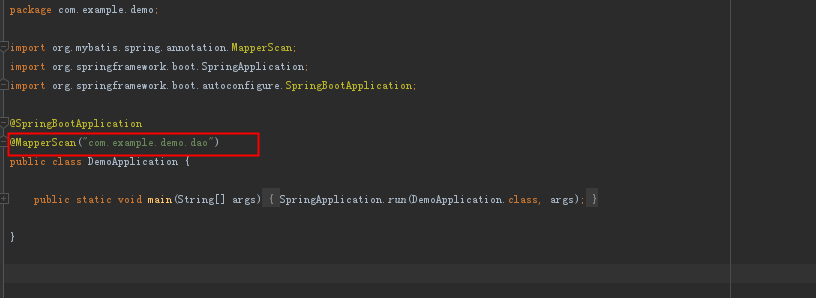
打开类DemoApplication.java,这个是springboot的启动类。我们需要添加点东西: