摘要:项目中经常会要用到大大小小的功能,所以我在这里进行一个汇总,后面会持续添加至这篇博客,希望当你遇到这个功能时,我的博客能够对你有帮助,(上一篇博客说要在收假后写一篇博客做一个年终总结,想了半天不知道写什么,文笔不好,就算了,不写了,今天是情人节,祝没有脱单的程序员赶快脱单,脱单了的永不脱发,脱发了的就当我没说......)
一.安装(npm)
图片如下:可使用npm进行安装也可以使用VSCode的终端进行安装

1.安装路由vue-router
npm install vue-router
2.安装axios
npm install --save axios
3.安装vuex
npm install vuex --save
4.安装scss
npm install --save-dev sass-loader
//sass-loader依赖于node-sass
npm install --save-dev node-sass
5.安装element-ui
npm i element-ui -S
6.main.js配置
import Vue from 'vue'
import App from './App'
import router from './router'
import axios from 'axios'
import ElementUI from 'element-ui'
import 'element-ui/lib/theme-chalk/index.css' import VueRouter from 'vue-router' import Vuex from 'vuex' Vue.use(ElementUI) Vue.use(VueRouter) Vue.use(Vuex) new Vue({ el: '#app', router, components: { App }, template: '<App/>', })
二.路由配置(index.js)
图片如下(进行路由跳转)

1.模块归纳
export default new Router({

  routes: [
    {
      path: '/',
      name: 'Login',
      component: Login,
    },
    {
        path: '/Forget',
        name: 'Forget',
        component: Forget,
    },
    {
      path: '/', component: Home, name: '用户管理', children: [ { path: '/User', component: User, name: '用户'}, { path: '/SeeEdit', component: SeeEdit, name: '用户详情'}, { path: '/Modify', component: Modify, name: '修改用户资料'}, { path: '/changepsw', component: changepsw, name: '修改密码'}, ] }, ...... ], })
2.路由切换后页面滚动位置不变bug的解决方法
export default new Router({

  routes: [
      ......
  ],
  scrollBehavior (to, from, savedPosition) {
       // console.log(to) // to:要进入的目标路由对象,到哪里去
       // console.log(from) // from:离开的路由对象,哪里来
       // console.log(savedPosition) // savePosition:会记录滚动条的坐标
       if(savedPosition) {
          return savedPosition;
       }else{
          return {x:0,y:0}
       }
  }

})
三.Cookie储存
1.建立一个cookieUtil.js的文件
//设置cookie
export function setCookie(key,value) {
    var Days = 0.6;
    var exdate = new Date(); //获取时间
    exdate.setTime(exdate.getTime() + Days*24*60*60*1000); //保存的天数
    //字符串拼接cookie
    window.document.cookie = key + "=" + value + ";path=/;expires=" + exdate.toGMTString();
  };
  //读取cookie
  export function getCookie(param) {
    var c_param = '';
    if (document.cookie.length > 0) { var arr = document.cookie.split('; '); //这里显示的格式需要切割一下自己可输出看下 for (var i = 0; i < arr.length; i++) { var arr2 = arr[i].split('='); //再次切割 //判断查找相对应的值 if (arr2[0] == param) { c_param = arr2[1]; //保存到保存数据的地方  } } return c_param; } }; function padLeftZero (str) { return ('00' + str).substr(str.length); };
2.在登录界面login.vue引用这个js
//cookie
import {setCookie,getCookie}from '../router/cookieUtil'
3.然后储存,取值
//储存用户信息
setCookie('sellerId', this.information.sellerId);
//取值用户信息
this.sellerId = getCookie("sellerId");
4.退出登录
<button @click="Signout">退出</button>
mounted () {
      this.sellerId = getCookie("sellerId");
      if (this.sellerId==undefined||this.sellerId=="") {
            this.$router.push('/')
      } else {

      }
},
methods: {
      //退出
 Signout(){ setCookie("sellerId", "", -1); this.$router.push('/') }, }
四.发送验证码
图片如下

1.html部分
<el-button :disabled="disabled" @click="sendcode" class="sendcode">{{btntxt}}</el-button>
2.js部分
export default {
        data() {
            return {
                disabled:false,
                time:0,
                btntxt:"发送验证码",
            };
        },
        methods: {
            //发送手机验证码倒计时
 timer() { if (this.time > 0) { this.time--; this.btntxt=this.time+"s后重新获取"; setTimeout(this.timer, 1000); } else{ this.time=0; this.btntxt="发送验证码"; this.disabled=false; } }, } }
五.div自适应屏幕宽高
1.像后台管理系统那种格式,有顶部导航栏和左侧导航栏,而切换的那一块盒子怎么能自适应屏幕的宽高减去顶部和左侧固定的宽高呢?
html代码:
<div v-bind:style="{width: myWidth,height: myHeight}"></div>
js代码:
export default {

        data() {
            return {
                myWidth: (window.innerWidth - 240) + 'px',
                myHeight: (window.innerHeight - 100) + 'px',
            };
        },

}
六.实时显示当前时间
图片如下(想后台系统一般都会添加一个当前时间,方便用户了解或记录时间)

html代码
<span class="time">{{nowTime}}</span>
js代码
export default {

        data() {
            return {
                nowTime:"",
                nowWeek:"",
            };
        },

        // 创建完成时
        created() {
            this.nowTimes(); }, methods: { //当前时间  timeFormate(timeStamp) { let year = new Date(timeStamp).getFullYear(); let month =new Date(timeStamp).getMonth() + 1 < 10? "0" + (new Date(timeStamp).getMonth() + 1): new Date(timeStamp).getMonth() + 1; let date =new Date(timeStamp).getDate() < 10? "0" + new Date(timeStamp).getDate(): new Date(timeStamp).getDate(); var week = timeStamp ? new Date(timeStamp) : new Date(); if(week.getDay() == 1){ this.nowWeek="周一" } else if(week.getDay() == 2){ this.nowWeek="周二" } else if(week.getDay() == 3){ this.nowWeek="周三" } else if(week.getDay() == 4){ this.nowWeek="周四" } else if(week.getDay() == 5){ this.nowWeek="周五" } else if(week.getDay() == 6){ this.nowWeek="周六" } else { this.nowWeek="周日" } let hh =new Date(timeStamp).getHours() < 10? "0" + new Date(timeStamp).getHours(): new Date(timeStamp).getHours(); let mm =new Date(timeStamp).getMinutes() < 10? "0" + new Date(timeStamp).getMinutes(): new Date(timeStamp).getMinutes(); this.nowTime = year + "/" + month + "/" + date +" "+ this.nowWeek +" "+ hh +":"+ mm ; // console.log(this.nowTime) clearInterval(this.Times); }, // 定时器函数  nowTimes(){ this.timeFormate(new Date()); this.Times=setInterval(this.nowTimes,1000); }, }, }
切记一定要清除定时器,当时作者忘记清除定时器页面一直崩溃,后来打印才发现是忘记清除定时器了,
七.自定义滚动列表
图片如下
html代码
<div class="right-select">
         <ul>
                 <li>张三1</li>
                 <li>张三2</li>
                 <li>张三3</li>
                 <li>张三4</li>
                 <li>张三5</li>
                 <li>张三6</li>
                 <li>张三7</li>
         </ul>
</div>
css代码
    .right-select{
        width: 500px;
        height: 105px;
        overflow-y: scroll;
        border: 1px solid #bbbbbb;
        border-radius: 5px;
        margin-left: 65px;
    }
    .right-select::-webkit-scrollbar {
        width: 12px;
        background-color: #fff;
    }
    .right-select::-webkit-scrollbar-thumb {
        height: 26px;
        background-color: #666;
        border-radius: 50px;
    }

    .right-select::-moz-scrollbar {
        width: 12px;
        background-color: #fff;
    }
    .right-select::-moz-scrollbar-thumb {
        height: 26px;
        background-color: #666;
        border-radius: 50px;
    }
自定义滚动条时,请记住要定义盒子的高度,不然滚动条会显示不出来
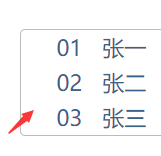
八.判断数据列表序号
图片如下
html
<ul>
<li v-for="(item,index) in list" :key="item.id" >
<p class="p1">{{ index+1>9?index+1:"0"+(index+1) }}</p>
<p class="p2">{{ item.name }} {{ item.id }} {{ item.source }}</p>
</li>
</ul>
js代码
list: [{
     name: '张一',
     id: '1241',
     source: '经销商',
},{
     name: '张二',
     id: '1242', source: '业务员', },{ name: '张三', id: '1243', source: '普通用户', },{ name: '张四', id: '1244', source: '商城', }],
九.Form表单提交
html代码
<form :model="reportForm">
        <input type="text" v-model="reportForm.name" placeholder="姓名"/>
        <input type="text" v-model="reportForm.sex" placeholder="性别"/>
        <input type="text" v-model="reportForm.age" placeholder="年龄"/>
</form>
<button @click="sub"></button>
js代码
export default {
    data() {
        return {
              reportForm: {
                  name: '',
                  sex:'',
                  age: '',
              }
        }
    },
    methods: {
       sub() {
               let reportdata = this.reportForm; console.log(reportdata) } }
}
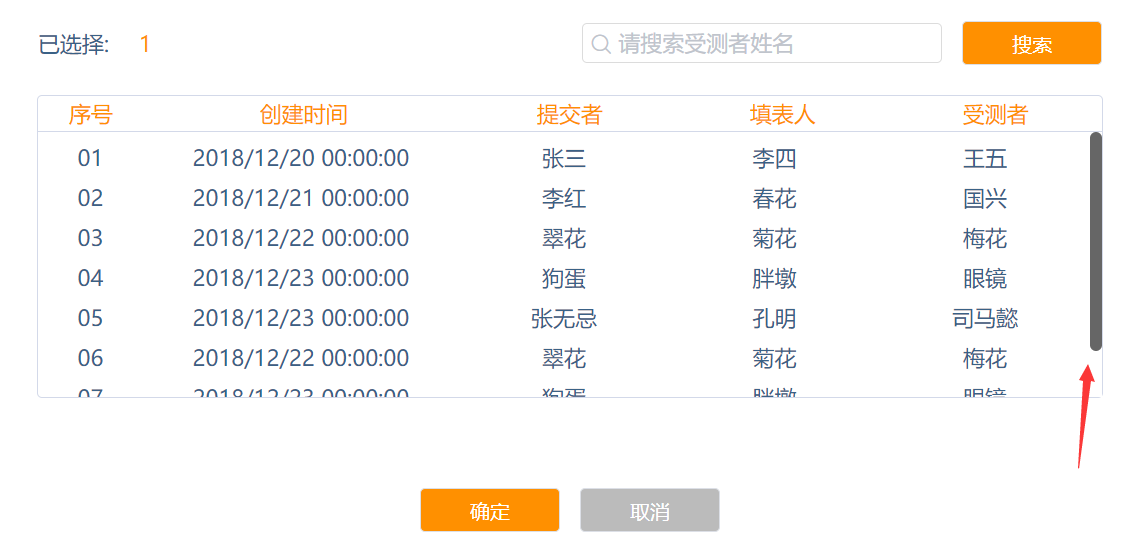
十.实现分页效果
效果图如下

该处是结合element-ui来写的,请记得安装element-ui,不知道安装的请参考第一条
html代码:
<template>
                 <table>
                       <thead>
                              <tr>
                                   <th class="sequence left-radius">序号</th>
                                   <th>姓名</th>
                                   <th>手机号</th>
                                   <th>性别</th>
                                   <th>用户等级</th>
                                   <th>上级用户</th>
                                   <th>创建日期</th>
                                   <th class="right-radius">操作</th>
                              </tr>
                       </thead>
                       <tbody>
                              <tr v-for="(item, index) in tableData.slice((currentPage-1)*pagesize,currentPage*pagesize)" :key="item.id">
                                   <td class="sequence">{{ index+1>9?index+1:"0"+(index+1) }}</td>
                                   <td>{{ item.name }}</td>
                                   <td>{{ item.phone }}</td>
                                   <td>{{ item.sex==1?"男":"女" }}</td>
                                   <td>{{ item.user }}</td>
                                   <td>{{ item.username }}</td>
                                   <td>{{ item.date }}</td>
                                   <td><a @click="See">查看</a><a @click="Edit">修改</a><a @click="Edit">删除</a></td>
                              </tr>
                       </tbody>
                 </table>

           <div class="page">
                <el-pagination
                      @size-change="handleSizeChange"
                      @current-change="handleCurrentChange"
                      :current-page="currentPage"
                      :page-sizes="[5, 10, 20, 40]"
                      :page-size="pagesize"
                      layout="total, sizes, prev, pager, next, jumper"
                      :total="tableData.length">
                </el-pagination>
           </div>

</template>
js代码:
<script>

     export default {
      data() {
        return {
          currentPage:1, //初始页
          pagesize:10,//每页的数据
          tableData: [{
            name: '张一',
            phone: '13111111111',
            sex: '1',
            user: '普通用户',
            username: '李四',
            date: '2018/11/30'
          },{
            name: '张二',
            phone: '13122222222',
            sex: '0',
            user: '特殊用户',
            username: '李四',
            date: '2018/12/30'
          },{
            name: '张三',
            phone: '13133333333',
            sex: '1',
            user: '普通用户',
            username: '李四',
            date: '2018/11/30'
          },{
            name: '张四',
            phone: '13144444444',
            sex: '0',
            user: '普通用户',
            username: '李四',
            date: '2018/11/30'
          },{
            name: '张五',
            phone: '13155555555',
            sex: '0',
            user: '特殊用户',
            username: '李四',
            date: '2018/05/14'
          },{
            name: '张六',
            phone: '13166666666',
            sex: '1',
            user: '普通用户',
            username: '李四',
            date: '2018/10/30'
          },{
            name: '张七',
            phone: '13177777777',
            sex: '1',
            user: '普通用户',
            username: '李四',
            date: '2019/01/06'
          },{
            name: '张八',
            phone: '13188888888',
            sex: '1',
            user: '特殊用户',
            username: '李四',
            date: '2018/06/17'
          },{
            name: '张九',
            phone: '13199999999',
            sex: '0',
            user: '普通用户',
            username: '李四',
            date: '2018/09/25'
          },{
            name: '张十',
            phone: '13110101010',
            sex: '1',
            user: '特殊用户',
            username: '李四',
            date: '2019/02/10'
          },{
            name: '张十一',
            phone: '13124683579',
            sex: '1',
            user: '特殊用户',
            username: '李四',
            date: '2019/02/10'
          }]
        }
      },

      methods: {
            // 初始页currentPage、初始每页数据数pagesize和数据data
            handleSizeChange: function (size) {
              this.pagesize = size;
              console.log(this.pagesize)  //每页下拉显示数据
            },
            handleCurrentChange: function(currentPage){
              this.currentPage = currentPage;
              document.documentElement.scrollTop = 0;//点击翻页的时候回到顶部
              console.log(this.currentPage)  //点击第几页
            },
      },
    }

</script>
css代码:
//分页
    /deep/.el-pagination{

      margin-bottom: 30px;
      float: right;
      font-size: 20px;
      color: #333333;
      margin-right: 55px;
      font-weight: normal;

    .el-select .el-input{
      width: 126px;
      height: 36px;
    }
    .el-select .el-input .el-input__inner{
      height: 100%;
      font-size: 20px;
      color: #333333;
    }
    .el-pagination__editor.el-input .el-input__inner{
        height: 36px;
    }
    .btn-prev,.btn-next{
      height: 36px;
    }
    .btn-prev{
      border-radius: 5px 0 0 5px;
    }
    .btn-next{
      border-radius: 0 5px 5px 0;
    }
    .el-pager li{
      line-height: 36px;
      height: 36px;
      font-size: 20px;
    }
    .el-pagination__total{
      color: #333333;
    }
     button,span:not([class*=suffix]){
      height: 36px;
      line-height: 36px;
      font-size: 20px;
      color: #333333;
    }
    .el-pagination__editor.el-input{
      font-size: 20px;
    }
  }
十一.悬浮改变图片和文字颜色
图片事例如下:
起始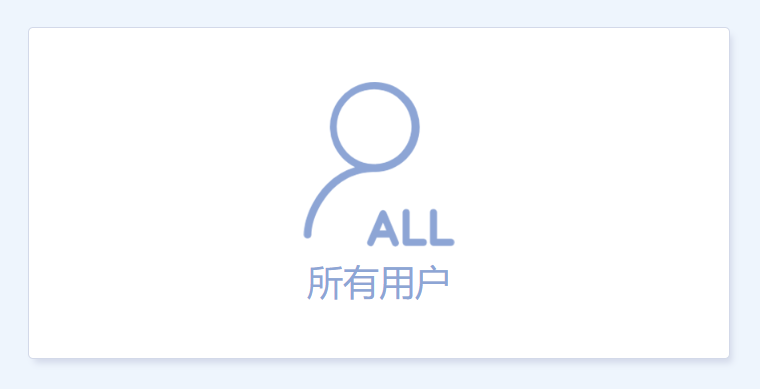 悬浮后
悬浮后
html代码:
<div class="UserChoice-listtop">
        <div class="listonebtn" @mouseenter="enter1" @mouseleave="leave1">
                 <img :src="img1" />
                 <p>所有用户</p>
        </div>
</div>
js代码:
export default {
      data() {
        return {
            img1: require('../../images/alluser.png'),
        }
      },

      methods: {
            //悬浮切换图片
            enter1: function(){
                this.img1 = require('../../images/alluser2.png');
            },
            leave1: function(){
                this.img1 = require('../../images/alluser.png');
            },
      },
    }
至于文字样式改变的话,直接用css的:hover解决就好。
十二.单选按钮控制模块显示隐藏
html如下:
<div class="attribute-radio" @change="btn">
         <el-radio v-model="radio" label="0">无</el-radio>

         <el-radio" v-model="radio" label="1">有</el-radio>
</div>

<div v-show="show"> <p>我出来了<p> </div>
js如下:
export default {
        data () {
            return {
                radio:'0',
                show:false,
            }
        }
        methods: {
            //选择代理商属性
            btn(){
                if(this.radio==="1"){
                    this.show=true;
                }else{
                    this.show=false;
                }
            },
         }
}