一、安装工作
1、下载
前往官网下载当前最新稳定版Redis安装包redis-5.0.3.tar.gz:https://redis.io/download
2、解压
通过XShell上传到Linux服务器任意目录并解压:
tar xzvf redis-5.0.3.tar.gz
3、编译
进入Redis的MakeFile脚本所在文件夹,执行make命令编译:
cd redis-5.0.3/
make
如果make命令提示缺少gcc,则安装:
yum install gcc
再执行:
make
如果出现错误:
zmalloc.h:50:31: error: jemalloc/jemalloc.h: No such file or directory
zmalloc.h:55:2: error: #error "Newer version of jemalloc required"
make[1]: *** [adlist.o] Error 1
make[1]: Leaving directory `/data0/src/redis-2.6.2/src'
make: *** [all] Error 2
原因是jemalloc重载了Linux下的ANSI C的malloc和free函数。解决办法:make时添加参数:
make MALLOC=libc
make命令编译完成后,会出现一句提示:
Hint: To run 'make test' is a good idea
即使不测试,通常也是可以使用的。但是如果执行make test ,会有如下提示:
You need tcl 8.5 or newer in order to run the Redis test
make: ***[test] Error_1
此时,需要安装TCL(Tool Command Language,工具脚本语言,是Linux内的一种语言包)
yum install tcl
4、安装
继续Redis的安装工作,进入src文件夹,将Redis安装在指定目录下:
cd src/
make install PREFIX=/usr/local/redis
5、配置文件
此时位于安装包解压路径的src文件夹下
mkdir /usr/local/redis/etc
cd ..
cp redis.conf /usr/local/redis/etc
6、开启Redis
(1)立即启动Redis
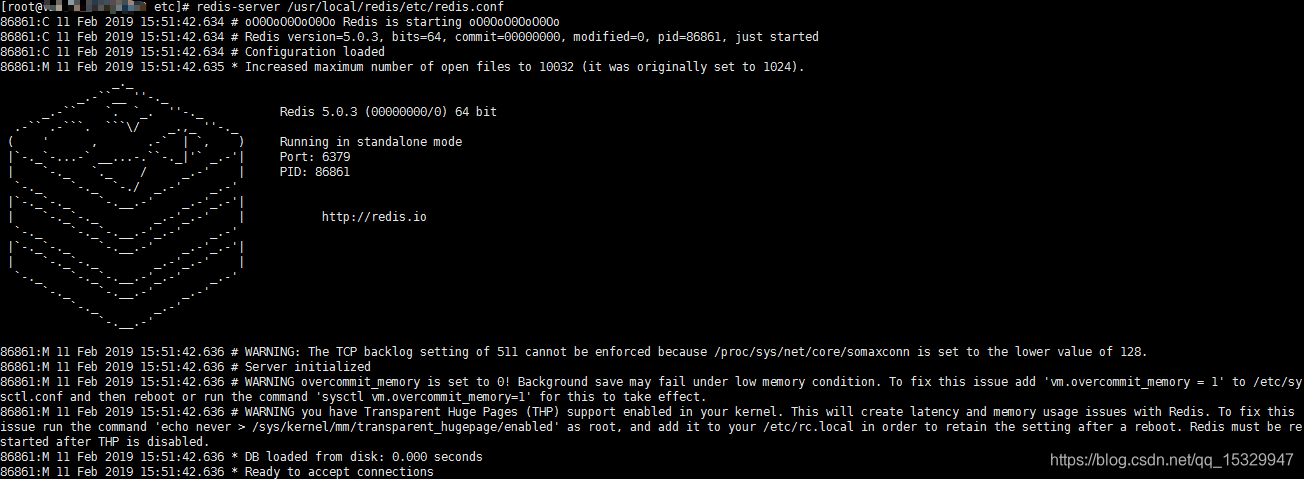
redis-server /usr/local/redis/etc/redis.conf
或
/usr/local/redis/bin/redis-server /usr/local/redis/etc/redis.conf
以上为默认的非守护进程开启Redis的方式,启动Redis后出现以下界面:
(2)设置Redis为后台启动
vim /usr/local/redis/etc/redis.conf
将daemonize no 改成daemonize yes
Redis daemonize介绍
redis.conf配置文件中daemonize守护线程,默认是NO。
daemonize是用来指定redis是否要用守护线程的方式启动。
daemonize 设置yes或者no区别
daemonize:yes
redis采用的是单进程多线程的模式。当redis.conf中选项daemonize设置成yes时,代表开启守护进程模式。在该模式下,redis会在后台运行,并将进程pid号写入至redis.conf选项pidfile设置的文件中,此时redis将一直运行,除非手动kill该进程。
daemonize:no
当daemonize选项设置成no时,当前界面将进入redis的命令行界面,exit强制退出或者关闭连接工具(putty,xshell等)都会导致redis进程退出。
redis.conf文件对daemonize的解释
By default Redis does not run as a daemon. Use ‘yes’ if you need it. Note that Redis will write a pid file in /var/run/redis.pid when daemonized.
(3)将Redis加入到开机启动
vim /etc/rc.local
加入一行:
/usr/local/redis/bin/redis-server /usr/local/redis/etc/redis.conf
二、Redis可视化
2.1 安装RedisDesktopManager
下载RedisDesktopManager并安装:
http://www.downza.cn/soft/210734.html
2.2 连接Redis服务器
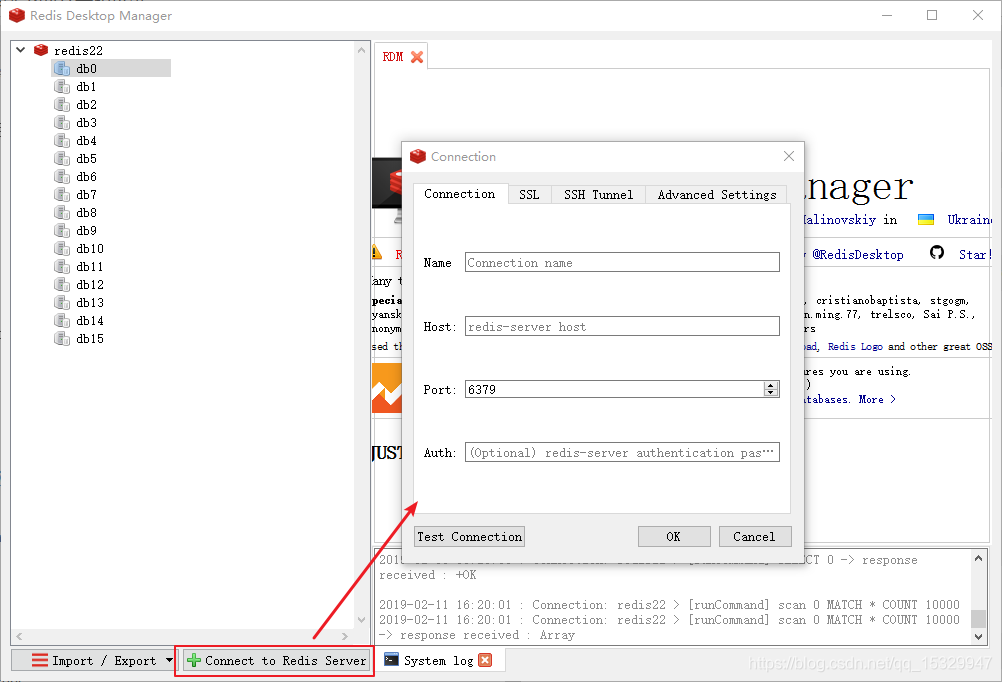 如图,如果Test Connection连接不上,需要进行如下操作:
(1)关闭防火墙
systemctl stop firewalld.service
或
service iptables stop
(2)解除绑定并关闭保护模式
vim /usr/local/redis/etc/redis.conf
注释掉bind 127.0.0.1所在行:
# bind 127.0.0.1
将protected-mode yes改为protected-mode no
redis.conf文件对bind和protected-mode的解释:
bind
By default, if no “bind” configuration directive is specified, Redis listens
for connections from all the network interfaces available on the server.
It is possible to listen to just one or multiple selected interfaces using
the “bind” configuration directive, followed by one or more IP addresses.Examples:
bind 192.168.1.100 10.0.0.1 bind 127.0.0.1 ::1
~~~ WARNING ~~~ If the computer running Redis is directly exposed to
the internet, binding to all the interfaces is dangerous and will
expose the instance to everybody on the internet. So by default we
uncomment the following bind directive, that will force Redis to
listen only into the IPv4 loopback interface address (this means Redis
will be able to accept connections only from clients running into the
same computer it is running).IF YOU ARE SURE YOU WANT YOUR INSTANCE TO LISTEN TO ALL THE INTERFACES
JUST COMMENT THE FOLLOWING LINE.
protected-mode
Protected mode is a layer of security protection, in order to avoid
that Redis instances left open on the internet are accessed and
exploited.When protected mode is on and if:
1)The server is not binding explicitly to a set of addresses using
the “bind” directive.
2) No password is configured.The server only accepts connections from clients connecting from the
IPv4 and IPv6 loopback addresses 127.0.0.1 and ::1, and from Unix
domain sockets.By default protected mode is enabled. You should disable it only if
you are sure you want clients from other hosts to connect to Redis
even if no authentication is configured, nor a specific set of
interfaces are explicitly listed using the “bind” directive.
附:Redis常用运维命令
1、启动Redis
redis-server /usr/local/redis/etc/redis.conf
2、停止Redis
pkill redis