文章目录
概述
之前总结过一篇基于Spring的 数据库切换的文章:Spring-基于Spring使用自定义注解及Aspect实现数据库切换 ,新的项目一般都直接采用SpringBoot开发了,那我们也用Spring Boot来整一版吧。
用到的东西包含: Spring Boot + Mybatis + Druid + MySql8 + lombok 等
鉴于我们是整合了Spring Boot +Mybatis , 不清楚如何整合的可以先看下
Spring Boot2.x-07Spring Boot2.1.2整合Mybatis
场景说明:读写分离
简单说下适用场景【读写分离】:数据库切换通常情况是用在项目中存在主从数据库的情况,为了减轻主库的压力,因为主从是同步的,所以读的操作我们直接取从库的数据,主库只负责写的操作。从库可以使多个,当然了主库也可以是多个,看项目架构。 这个同多数据源还是有差别的,如何支持多数据源,后面单独开篇介绍下。
废话不多说,直接撸起来吧
操作步骤
核心还是重写Spring的AbstractRoutingDataSource抽象类的determineCurrentLookupKey方法。
工程结构

Step1 自定义注解
这里我们先约定,自定义注解只能标注在方法上,如果需要也能标注在类上(因为后面的判断会有Aspect判断会所不同)请参考 Spring-基于Spring使用自定义注解及Aspect实现数据库切换
package com.artisan.annotation;

import static java.lang.annotation.ElementType.METHOD;
import static java.lang.annotation.RetentionPolicy.RUNTIME;

import java.lang.annotation.Documented;
import java.lang.annotation.Retention;
import java.lang.annotation.Target;

import com.artisan.config.DataSources;

/**
 *
 *    自定义注解,用于切换数据源,默认MASTER_DB
 * @author yangshangwei
 *
 */

@Documented
@Retention(RUNTIME)
@Target({ METHOD })
public @interface RouteDataSource {

	String value() default DataSources.MASTER_DB;

}
Step2 数据源定义
为了方便能够注解引用,直接用接口吧
package com.artisan.config;

/**
 *   数据源列表
 * @author yangshangwei
 *
 */
public interface DataSources {

	String MASTER_DB = "masterDB";

    String SLAVE_DB = "slaveDB";


}
Step3 配置文件配置数据源
我们这里采用application.yml ,注意前缀,后面要用。
# datasource  Master   前缀为自定义的datasource-master
spring:
  datasource-master:
    driver-class-name: com.mysql.cj.jdbc.Driver # JDBC连接Mysql6以上com.mysql.cj.jdbc.Driver (服务端为Mysql8)
    url: jdbc:mysql://localhost:3306/master?serverTimezone=UTC&useUnicode=true&characterEncoding=utf8&useSSL=false
    username: root
    password: root


# datasource Replication 前缀为自定义的datasource-slave
  datasource-slave:
    driver-class-name: com.mysql.cj.jdbc.Driver # JDBC连接Mysql6以上com.mysql.cj.jdbc.Driver  (服务端为Mysql8)
    url: jdbc:mysql://localhost:3306/slave?serverTimezone=UTC&useUnicode=true&characterEncoding=utf8&useSSL=false
    username: root
    password: root
Step4 数据源实例化DatasourceConfig
通过@Configuration标注为配置类。被注解的类内部包含有一个或多个被@Bean注解的方法,这些方法将会被AnnotationConfigApplicationContext或AnnotationConfigWebApplicationContext类进行扫描,并用于构建bean定义,初始化Spring容器。
application.yml中定义的前缀,别搞错了。
package com.artisan.config;

import javax.sql.DataSource;

import org.springframework.boot.context.properties.ConfigurationProperties;
import org.springframework.boot.jdbc.DataSourceBuilder;
import org.springframework.context.annotation.Bean;
import org.springframework.context.annotation.Configuration;

import com.alibaba.druid.pool.DruidDataSource;

@Configuration
public class DatasourceConfig {

	//destroy-method="close":当数据库连接不使用的时候,将该连接重新放到数据池中
    @Bean(name=DataSources.MASTER_DB,destroyMethod="close")
    @ConfigurationProperties(prefix = "spring.datasource-master")
    public DataSource dataSource() {
    	// 创建数据源
        return DataSourceBuilder.create().type(DruidDataSource.class).build();
    }

    @Bean(name=DataSources.SLAVE_DB,destroyMethod="close")
    @ConfigurationProperties(prefix = "spring.datasource-slave")
    public DataSource dataSourceSlave() {
    	// 创建数据源
        return DataSourceBuilder.create().type(DruidDataSource.class).build();
    }

}
Step5 Mybatis中配置成动态数据源
@Configuration 功能不多说了,如上。
@MapperScan 通过使用@MapperScan可以指定要扫描的Mapper类的包的路径,当然了也可以在Mapper接口上声明@Mapper , 当然是@MapperScan更方便了。
内部@Bean用到了DynamicDataSource 继承自AbstractRoutingDataSource,就是我们刚开始说的核心

package com.artisan.config;

import java.util.HashMap;
import java.util.Map;

import javax.sql.DataSource;

import org.mybatis.spring.SqlSessionFactoryBean;
import org.mybatis.spring.annotation.MapperScan;
import org.springframework.beans.factory.annotation.Autowired;
import org.springframework.beans.factory.annotation.Qualifier;
import org.springframework.boot.context.properties.ConfigurationProperties;
import org.springframework.context.annotation.Bean;
import org.springframework.context.annotation.Configuration;
import org.springframework.core.io.support.PathMatchingResourcePatternResolver;

@Configuration
@MapperScan(basePackages = { "com.artisan.dao" }) // 扫描的mybatis接口类的包名
public class MybatisConfig {

	@Autowired
	@Qualifier(DataSources.MASTER_DB)
	private DataSource masterDB;

	@Autowired
	@Qualifier(DataSources.SLAVE_DB)
	private DataSource slaveDB;

	/**
	 * 动态数据源
	 */
	@Bean(name = "dynamicDataSource")
	public DataSource dynamicDataSource() {
		DynamicDataSource dynamicDataSource = new DynamicDataSource();
		// 默认数据源
		dynamicDataSource.setDefaultTargetDataSource(masterDB);

		// 配置多数据源
		Map<Object, Object> dataSourceMap = new HashMap<Object, Object>();
		dataSourceMap.put(DataSources.MASTER_DB, masterDB);
		dataSourceMap.put(DataSources.SLAVE_DB, slaveDB);
		dynamicDataSource.setTargetDataSources(dataSourceMap);

		return dynamicDataSource;
	}

	@Bean
	@ConfigurationProperties(prefix = "mybatis")
	public SqlSessionFactoryBean sqlSessionFactoryBean() throws Exception {
		SqlSessionFactoryBean sqlSessionFactoryBean = new SqlSessionFactoryBean();
		// 配置数据源,关键配置
		sqlSessionFactoryBean.setDataSource(dynamicDataSource());
		// 解决配置到配置文件中通过*配置找不到mapper文件的问题。 如果不设置这一行,在配置文件中,只能使用数组的方式一个个的罗列出来,并且要指定具体的文件名
        sqlSessionFactoryBean.setMapperLocations(new PathMatchingResourcePatternResolver().getResources("classpath:mapper/*.xml"));
		return sqlSessionFactoryBean;
	}

}
application.yml配置文件中新增mybatis的如下配置
# mybatis
mybatis:
  # 映射文件的路径 , 这个切换数据源的场景下不能配置 * 通配符,有多个 逗号隔开,继续跟 classpath:mapper/XXX
  # mapper-locations: classpath:mapper/ArtisanMapper.xml
  # 在MybatisConfig.java#sqlSessionFactoryBean方法中通过sqlSessionFactoryBean设置classpath:mapper/*.xml ,不然每次都要改这个地方,不好维护。

  # 类型别名包配置,只能指定具体的包,多个配置可以使用英文逗号隔开
  type-aliases-package: com.artisan.domain
  # Mybatis SQL语句控制台打印
  configuration:
      log-impl: org.apache.ibatis.logging.stdout.StdOutImpl
Step6 ThreadLocal管理当前线程使用的数据源连接
package com.artisan.config;

import lombok.extern.slf4j.Slf4j;

/**
 *
 * 使用ThreadLocal管理当前线程使用的数据源连接
 *
 * @author yangshangwei
 *
 */
@Slf4j
public class DatasourceContextHolder {

	public static final String DEFAULT_DATASOURCE = DataSources.MASTER_DB;

	private static final ThreadLocal<String> contextHolder = new ThreadLocal<>();

	/**
	 * 设置数据源
	 * @param dbType
	 */
	public static void setDB(String dbType) {
		contextHolder.set(dbType);
		log.info("切换到数据源{}", dbType);
	}

	/**
	 * 获取数据源
	 */
	public static String getDB() {
		return contextHolder.get();
	}

	/**
	 * 清除数据源
	 */
	public static void clearDB() {
		contextHolder.remove();
	}
}
Step7 切面
通过Aspect 来处理自定义注解的横切逻辑。
package com.artisan.aspect;

import lombok.extern.slf4j.Slf4j;
import org.aspectj.lang.JoinPoint;
import org.aspectj.lang.annotation.After;
import org.aspectj.lang.annotation.Aspect;
import org.aspectj.lang.annotation.Before;
import org.aspectj.lang.reflect.MethodSignature;
import org.springframework.stereotype.Component;

import com.artisan.annotation.RouteDataSource;
import com.artisan.config.DatasourceContextHolder;

import java.lang.reflect.Method;

/**
 * 通过切面对自定义切库注解的方法进行拦截,动态的选择数据源
 *
 * @author yangshangwei
 *
 */

@Slf4j
@Aspect
@Component
public class DynamicDataSourceAspect {

	/**
	 * 前置增强,方法执行前,通过JoinPoint访问连接点上下文的信息
	 *
	 * @param joinPoint
	 */
	@Before("@annotation(com.artisan.annotation.RouteDataSource)")
	public void beforeSwitchDataSource(JoinPoint joinPoint) {
		// 获取连接点的方法签名对象
		MethodSignature methodSignature = (MethodSignature) joinPoint.getSignature();
		// 获取方法
		Method method = methodSignature.getMethod();
		// 设置默认的数据源为Master,防止切库出现异常执行失败的情况
		String dataSource = DatasourceContextHolder.DEFAULT_DATASOURCE;
		// 判断方法上是否标注了@RouteDataSource
		if (method.isAnnotationPresent(RouteDataSource.class)) {
			RouteDataSource routeDataSource = method.getDeclaredAnnotation(RouteDataSource.class);
			// 获取@RouteDataSource上的value的值
			dataSource = routeDataSource.value();
		}
		// 设置数据源
		DatasourceContextHolder.setDB(dataSource);
		log.info("setDB {}", dataSource);
	}

	/**
	 * 后置增强,清空DatasourceContextHolder,防止threadLocal误用带来的内存泄露
	 */
	@After("@annotation(com.artisan.annotation.RouteDataSource)")
	public void afterSwitchDataSource() {
		// 方法执行完成后,清除threadlocal中持有的database
		DatasourceContextHolder.clearDB();
		log.info("清空DatasourceContextHolder...");
	}

	/**
	@Before("@annotation(com.artisan.annotation.RouteDataSource)")
	public void beforeSwitchDataSource(JoinPoint point) {

		// 获得当前访问的class
		Class<?> className = point.getTarget().getClass();

		// 获得访问的方法名
		String methodName = point.getSignature().getName();
		// 得到方法的参数的类型
		Class[] argClass = ((MethodSignature) point.getSignature()).getParameterTypes();
		String dataSource = DatasourceContextHolder.DEFAULT_DATASOURCE;
		try {
			// 得到访问的方法对象
			Method method = className.getMethod(methodName, argClass);

			// 判断是否存在@DS注解
			if (method.isAnnotationPresent(RouteDataSource.class)) {
				RouteDataSource annotation = method.getAnnotation(RouteDataSource.class);
				// 取出注解中的数据源名
				dataSource = annotation.value();
			}
		} catch (Exception e) {
			log.error("routing datasource exception, " + methodName, e);
		}
		// 切换数据源
		DatasourceContextHolder.setDB(dataSource);
	}
	**/
}
Step 8 核心方法,重写AbstractRoutingDataSource#determineCurrentLookupKey
根据上面的AOP拦截,通过DatasourceContextHolder.getDB()动态的取出在切面里设置(DatasourceContextHolder.setDB(dataSource))的数据源即可。
package com.artisan.config;

import org.springframework.jdbc.datasource.lookup.AbstractRoutingDataSource;

import lombok.extern.slf4j.Slf4j;

@Slf4j
public class DynamicDataSource extends AbstractRoutingDataSource{

	@Override
    protected Object determineCurrentLookupKey() {
        log.info("数据源为{}", DatasourceContextHolder.getDB());
        return DatasourceContextHolder.getDB();
    }
}
测试
库表数据
Master:
-- ----------------------------
-- Table structure for artisan
-- ----------------------------
DROP TABLE IF EXISTS `artisan`;
CREATE TABLE `artisan` (
  `id` int(11) NOT NULL AUTO_INCREMENT,
  `name` varchar(255) DEFAULT NULL,
  `sex` varchar(255) DEFAULT NULL,
  PRIMARY KEY (`id`)
) ENGINE=InnoDB AUTO_INCREMENT=3 DEFAULT CHARSET=utf8;

-- ----------------------------
-- Records of artisan
-- ----------------------------
INSERT INTO `artisan` VALUES ('1', 'master', '女');
INSERT INTO `artisan` VALUES ('2', 'master2', '男');
Slave:
-- ----------------------------
-- Table structure for artisan
-- ----------------------------
DROP TABLE IF EXISTS `artisan`;
CREATE TABLE `artisan` (
`id` int(11) NOT NULL AUTO_INCREMENT,
`name` varchar(255) DEFAULT NULL,
`sex` varchar(255) DEFAULT NULL,
PRIMARY KEY (`id`)
) ENGINE=InnoDB AUTO_INCREMENT=4 DEFAULT CHARSET=utf8;
-- ----------------------------
-- Records of artisan
-- ----------------------------
INSERT INTO `artisan` VALUES ('1', 'replication1', '女');
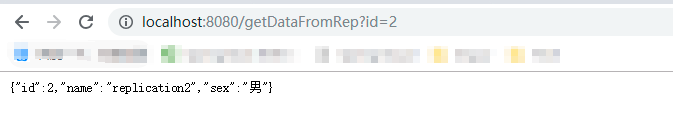
INSERT INTO `artisan` VALUES ('2', 'replication2', '男');
Domain
package com.artisan.domain;

import lombok.Data;

@Data
public class Artisan {

	private Long  id ;
	private String name ;
	private String sex;

}
Dao
package com.artisan.dao;

import org.apache.ibatis.annotations.Mapper;
import org.apache.ibatis.annotations.Param;

import com.artisan.domain.Artisan;
/**
 *
 * @author yangshangwei
 *
 * 增加@Mapper这个注解之后,Spring 启动时会自动扫描该接口,这样就可以在需要使用时直接注入 Mapper 了
 *
 * MybatisConfig中标注了@MapperScan , 所以这里的@Mapper不加也行
 */

@Mapper
public interface ArtisanMapper {

	Artisan selectArtisanById(@Param("id") int id );

}
对应的sql映射文件 ,当然了也可以使用@Select注解的方式,更简便。
<?xml version="1.0" encoding="UTF-8"?>
<!DOCTYPE mapper PUBLIC "-//mybatis.org//DTD Mapper 3.0//EN"
                    "http://mybatis.org/dtd/mybatis-3-mapper.dtd" >

<!-- 当Mapper接口和XML文件关联的时候, namespace的值就需要配置成接口的全限定名称 -->
<mapper namespace="com.artisan.dao.ArtisanMapper">
	<select id="selectArtisanById"  resultType="Artisan">
		select id , name ,sex from artisan where id= #{id}
	</select>
</mapper>
Service
接口及实现类
忽略这个方法名,忘改了。。。。事实上是根据Id获取某个Artisan.
package com.artisan.service;


import com.artisan.domain.Artisan;

public interface ArtisanService {

	Artisan getArtisanListFromMaster(int id);

	Artisan getArtisanListFromSlave(int id);
}
实现类
通过自定义注解设置主从库 ,默认是主库,@RouteDataSource(DataSources.MASTER_DB)可以省略
package com.artisan.service.impl;


import org.springframework.beans.factory.annotation.Autowired;
import org.springframework.stereotype.Service;

import com.artisan.annotation.RouteDataSource;
import com.artisan.config.DataSources;
import com.artisan.dao.ArtisanMapper;
import com.artisan.domain.Artisan;
import com.artisan.service.ArtisanService;

@Service
public class ArtisanServiceImpl implements ArtisanService {

	@Autowired
	private ArtisanMapper artisanMapper;


	@Override
	@RouteDataSource(DataSources.MASTER_DB)
	public Artisan getArtisanListFromMaster(int id) {
		return artisanMapper.selectArtisanById(id);
	}

	@Override
	@RouteDataSource(DataSources.SLAVE_DB)
	public Artisan getArtisanListFromSlave(int id) {
		return artisanMapper.selectArtisanById(id);
	}

}
Controller
package com.artisan.controller;


import org.springframework.beans.factory.annotation.Autowired;
import org.springframework.web.bind.annotation.GetMapping;
import org.springframework.web.bind.annotation.RestController;

import com.artisan.domain.Artisan;
import com.artisan.service.ArtisanService;

@RestController
public class ArtisanController {

	@Autowired
	private ArtisanService artisanService ;

	@GetMapping("/getDataFromMaster")
	public Artisan getDataFromMaster(int id) {
		return artisanService.getArtisanListFromMaster(id);
	}

	@GetMapping("/getDataFromRep")
	public Artisan getDataFromRep(int id) {
		return artisanService.getArtisanListFromSlave(id);
	}

}
启动Spring Boot 工程
为了验证功能,我们从主从库均是查询操作吧。
访问主库:
http://localhost:8080/getDataFromMaster?id=1

访问从库:
http://localhost:8080/getDataFromRep?id=2
附
为了方便用application.properties的童鞋,代码如下,验证通过
#master
spring.datasource-master.driver-class-name=com.mysql.cj.jdbc.Driver
spring.datasource-master.url=jdbc:mysql://localhost:3306/master?serverTimezone=UTC&useUnicode=true&characterEncoding=utf8&useSSL=false
spring.datasource-master.username=root
spring.datasource-master.password=root
spring.datasource-master.type=com.alibaba.druid.pool.DruidDataSource


#slave
spring.datasource-slave.driver-class-name=com.mysql.cj.jdbc.Driver
spring.datasource-slave.url=jdbc:mysql://localhost:3306/slave?serverTimezone=UTC&useUnicode=true&characterEncoding=utf8&useSSL=false
spring.datasource-slave.username=root
spring.datasource-slave.password=root
spring.datasource-slave.type=com.alibaba.druid.pool.DruidDataSource

#mybatis
#mybatis.mapper-locations=classpath:mapper/ArtisanMapper.xml
mybatis.type-aliases-package=com.artisan.domain
pom.xml
<?xml version="1.0" encoding="UTF-8"?>
<project xmlns="http://maven.apache.org/POM/4.0.0"
	xmlns:xsi="http://www.w3.org/2001/XMLSchema-instance"
	xsi:schemaLocation="http://maven.apache.org/POM/4.0.0 http://maven.apache.org/xsd/maven-4.0.0.xsd">
	<modelVersion>4.0.0</modelVersion>
	<parent>
		<groupId>org.springframework.boot</groupId>
		<artifactId>spring-boot-starter-parent</artifactId>
		<version>2.1.2.RELEASE</version>
		<relativePath /> <!-- lookup parent from repository -->
	</parent>
	<groupId>com.artisan</groupId>
	<artifactId>RoutingDataSource</artifactId>
	<version>0.0.1-SNAPSHOT</version>
	<name>RoutingDataSource</name>
	<description>Artisan </description>

	<properties>
		<project.build.sourceEncoding>UTF-8</project.build.sourceEncoding>
		<project.reporting.outputEncoding>UTF-8</project.reporting.outputEncoding>
		<java.version>1.8</java.version>
	</properties>

	<dependencies>

		<dependency>
			<groupId>org.springframework.boot</groupId>
			<artifactId>spring-boot-starter-web</artifactId>
		</dependency>

		<dependency>
			<groupId>org.mybatis.spring.boot</groupId>
			<artifactId>mybatis-spring-boot-starter</artifactId>
			<version>1.3.2</version>
		</dependency>

		<dependency>
			<groupId>mysql</groupId>
			<artifactId>mysql-connector-java</artifactId>
			<scope>runtime</scope>
		</dependency>

		<dependency>
			<groupId>org.springframework.boot</groupId>
			<artifactId>spring-boot-configuration-processor</artifactId>
			<optional>true</optional>
		</dependency>

		<dependency>
			<groupId>org.projectlombok</groupId>
			<artifactId>lombok</artifactId>
			<optional>true</optional>
		</dependency>

		<dependency>
			<groupId>com.alibaba</groupId>
			<artifactId>druid-spring-boot-starter</artifactId>
			<version>1.1.10</version>
		</dependency>

		<dependency>
			<groupId>org.springframework.boot</groupId>
			<artifactId>spring-boot-starter-aop</artifactId>
		</dependency>

		<dependency>
			<groupId>org.springframework.boot</groupId>
			<artifactId>spring-boot-devtools</artifactId>
			<optional>true</optional>
		</dependency>
	</dependencies>

	<build>
		<plugins>
			<plugin>
				<groupId>org.springframework.boot</groupId>
				<artifactId>spring-boot-maven-plugin</artifactId>
			</plugin>
		</plugins>
	</build>

</project>