1、国内一般使用阿里云仓库:
在setting.xml文件中加入:
<mirrors>
    <mirror>
      <id>alimaven</id>
      <name>aliyun maven</name>
    <url>http://maven.aliyun.com/nexus/content/groups/public/</url>
      <mirrorOf>central</mirrorOf>
    </mirror>
</mirrors>
一般情况下,即使可以直接在浏览器中打开默认中央仓库的地址(http://mvnrepository.com/),在项目中更新时也会出现失败的情况。
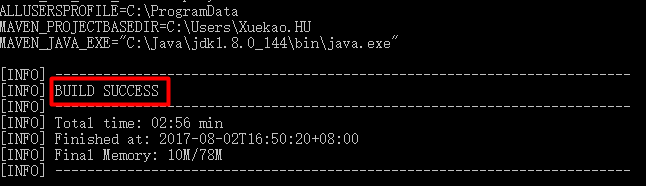
2、下载Maven,配置M2_HOME以及Path,然后在DOS中,执行:mvn help:system,就会看到有文件在下载,最后,显示成功:

Dos中进入当前目录(项目中包含pom文件)后,执行:
mvn compile // 自动编译
mvn test // 自动测试
mvn clean
mvn package
依赖的范围:
1、test范围指的是,测试范围有效,在编译和打包时都不会使用这个依赖
2、compile范围指的是编译范围有效,在编译和打包时都会将依赖存储进去。
3、provided依赖:在编译和测试的过程有效,最后生成war包时不会加入,诸如,Servlet-api,因为Servlet-api,tomcat等web服务已经存在了,如果在打包会冲突。
4、runtime在运行的是候依赖,在编译的时候不依赖。
默认的依赖范围是compile。
3、中央仓库网址:http://mvnrepository.com/
中央仓库的设置:在安装路径下apache-maven-3.3.9\lib\maven-model-builder-3.3.9.jar\org\apache\maven\model\pom-4.0.0.xml中:26行——36行(左右)原文如下:
  <repositories>
    <repository>
      <id>central</id>
      <name>Central Repository</name>
      <url>https://repo.maven.apache.org/maven2</url>
      <layout>default</layout>
      <snapshots>
        <enabled>false</enabled>
      </snapshots>
    </repository>
  </repositories>
4、命令行中创建骨架:(不常用)
mvn archetype:generate
mvn archetype:generate -DgroupId=hu.maven -DartifactId=maven-ch03 -Dversion=0.0.1-SNAPSHOT
5、POM——Build常用选项
<build>
   <!-- 默认goal -->
   <defaultGoal>package</defaultGoal>

   <!-- 输出目标目录,构建的目录 -->
   <directory>Debug</directory>

   <!--  buid出来的文件命名,不设置的情况下,会根据artifactid和version自动生成-->
<!—一旦设置了该选项,则build出来文件名,或者zip文件名都是设置后的 -->
   <finalName>测试工具${project.artifactId}-${project.version}</finalName>

   <!-- 代码路径,原生maven工程其实不需要单独设置,java工程转换而来的最好设置一下 -->
   <sourceDirectory>src</sourceDirectory>

   <resources>
       <resource>

           <!-- 资源路径,原生maven工程其实不需要单独设置,java工程转换而来的需要设置,否则找不到,
               因为maven是典型的约定编程,遵循约定优于配置 -->
           <directory>${basedir}/resources</directory>

           <!-- 资源打包后在jar中的路径,这里比较坑爹,之前没设置,结果生成到了jar的根路径下,
               而在访问的时候仍然使用的是directory的路径 -->
           <targetPath>resources</targetPath>
       </resource>
   </resources>
……
</build>
6、设置项目默认编译器(JDK)版本等
在项目POM文件中添加:
	<properties>
		<maven.compiler.source>1.8</maven.compiler.source>
		<maven.compiler.target>1.8</maven.compiler.target>
		<maven.compiler.compilerVersion>1.8</maven.compiler.compilerVersion>
		<!-- 设置web版本 -->
		<webVersion>3.0</webVersion>
	</properties>
除了通过指定属性外还可以借助于Maven强大的插件机制:
<plugin>
    <groupId>org.apache.maven.plugins</groupId>
    <artifactId>maven-compiler-plugin</artifactId>
    <configuration>
        <source>1.8</source>
        <target>1.8</target>
        <encoding>${project.build.sourceEncoding}</encoding>
    </configuration>
</plugin>
另外,如果想进行全局设定,就需要对setting.xml文件进行修改,setting.xml文件中有个<profile>标签就是用来启用不同的运行环境的(更详细的用法可以自行搜索)。
<profile>
    <id>jdk1.8</id>
    <activation>
    <activeByDefault>true</activeByDefault>
    <jdk>1.8</jdk>
    </activation>
    <properties>
           <maven.compiler.source>1.8</maven.compiler.source>
        <maven.compiler.target>1.8</maven.compiler.target>
        <maven.compiler.compilerVersion>1.8</maven.compiler.compilerVersion>
    </properties>
</profile>
经过以上配置后,一定要选中项目——右键——Maven——Update Maven Project才能生效。