集成thymeleaf
thymeleaf是springboot官方推荐使用的模板引擎,因此当然是最重要的啦,很简单
一、添加依赖
<!-- 前端模板 thymeleaf 依赖-->
        <dependency>
            <groupId>org.springframework.boot</groupId>
            <artifactId>spring-boot-starter-thymeleaf</artifactId>
        </dependency>
二、配置application.properties
# thymeleaf
spring.thymeleaf.mode=HTML5
spring.thymeleaf.suffix=.html
spring.thymeleaf.prefix=classpath:/templates/
三、 编写测试Controller
/**
 * @Author: 水越帆
 */
@Controller
public class HelloController {
    private String hello;

    @RequestMapping("/index")
    public String helloJsp(Map<String,Object> map){
        System.out.println("HelloController.helloJsp().hello=hello");
        map.put("hello", hello);
        return "index";
    }
}
四、编写测试页面
<!DOCTYPE html>
<html xmlns="http://www.w3.org/1999/xhtml" xmlns:th="http://www.thymeleaf.org"
xmlns:sec="http://www.thymeleaf.org/thymeleaf-extras-springsecurity3">
<head>
<title>Hello World!</title>
</head>
<body>
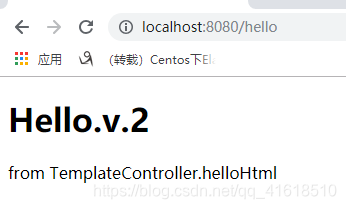
<h1 th:inline="text">Hello.v.2</h1>
<p th:text="${hello}"></p>
</body>
</html>
最后启动项目测试
集成freemarker
很多人习惯了用freemaker模板,spring boot集成freemaker和thymeleaf是一样的,并且两者可以并存使用(亲测)
一、添加依赖
       <dependency>
            <groupId>org.springframework.boot</groupId>
            <artifactId>spring-boot-starter-freemarker</artifactId>
        </dependency>
二、配置application.properties
#freemarker静态资源配置
# 设定ftl文件路径
spring.freemarker.tempalte-loader-path=classpath:/templates
#关闭缓存,及时刷新,上线生产环境需要修改为true
spring.freemarker.cache=false
spring.freemarker.charset=UTF-8
spring.freemarker.check-template-location=true
spring.freemarker.content-type=text/html
spring.freemarker.expose-request-attributes=true
spring.freemarker.expose-session-attributes=true
spring.freemarker.request-context-attribute=request
spring.freemarker.suffix=.ftl
三、编写测试controller
@Controller
public class HelloController {

    @RequestMapping("/helloFtl")
    public String helloFtl(Map<String,Object> map){
        map.put("hello","from TemplateController.helloFtl");
        return "helloFtl";
    }

}
四、编写测试页面.ftl文件
<!DOCTYPE html>
<html>
<head>
<title>Hello World!</title>
</head>
<body>
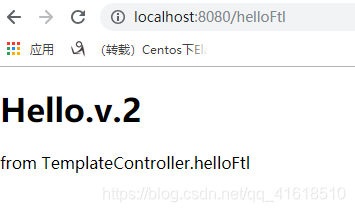
<h1>Hello.v.2</h1>
<p>${hello}</p>
</body>
</html>
启动项目
集成jsp
虽然springboot的官方文档上明确指出不提倡使用jsp进行前端开发,但是有时候就是用JSP写的也没办法,写一下集成过程,以防遇到。
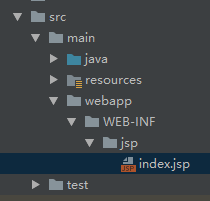
一、在IDEA工程源文件夹src/main/下创建web资源文件夹webapp,目录结构如图
二、添加相关依赖
 <!-- web支持: 1、web mvc; 2、restful; 3、jackjson支持; 4、aop ........ -->
        <dependency>
            <groupId>org.springframework.boot</groupId>
            <artifactId>spring-boot-starter-web</artifactId>
        </dependency>

        <!-- servlet 依赖. -->
        <dependency>
            <groupId>javax.servlet</groupId>
            <artifactId>javax.servlet-api</artifactId>
            <scope>provided</scope>
        </dependency>
    <!--JSTL(JSP Standard Tag Library,JSP标准标签库)是一个不断完善的开放源代码的JSP标签库,是由apache的jakarta小组来维护的-->
        <dependency>
            <groupId>javax.servlet</groupId>
            <artifactId>jstl</artifactId>
        </dependency>

        <!-- tomcat 的支持.-->
        <dependency>
            <groupId>org.springframework.boot</groupId>
            <artifactId>spring-boot-starter-tomcat</artifactId>
            <scope>provided</scope>
        </dependency>
        <dependency>
            <groupId>org.apache.tomcat.embed</groupId>
            <artifactId>tomcat-embed-jasper</artifactId>
            <scope>provided</scope>
        </dependency>


        <dependency>
            <groupId>org.springframework.boot</groupId>
            <artifactId>spring-boot-starter-web</artifactId>
</dependency>•特别说明:针对el表达式,类似${hello} 这个对于servlet的版本是有限制的,2.4版本版本以下是不支持的,是无法进行识别的,请注意。
三、配置application.properties
# 页面默认前缀目录
spring.mvc.view.prefix=/WEB-INF/jsp/
# 响应页面默认后缀
spring.mvc.view.suffix=.jsp
四、编写测试Controller
/**
 * @Author: 水越帆
 */
@Controller
public class HelloController {
    private String hello;

    @RequestMapping("/index")
    public String helloJsp(Map<String,Object> map){
        System.out.println("HelloController.helloJsp().hello=hello");
        map.put("hello", hello);
        return "index";
    }
}
五、编写jsp测试页面
<%@ page language="java" contentType="text/html; charset=UTF-8"
         pageEncoding="UTF-8"%>
<!DOCTYPE html PUBLIC "-//W3C//DTD HTML 4.01 Transitional//EN" "http://www.w3.org/TR/html4/loose.dtd">
<html>
<head>
    <meta http-equiv="Content-Type" content="text/html; charset=UTF-8">
    <title>Insert title here</title>
</head>
<body>
hello  Jsp
<hr>
${hello}

</body>
</html>
最后启动项目进行测试
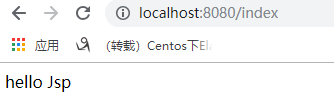
成功