前言
最近这几年,前端变化非常大,各种新框架应接不暇,从最开始几个html,css,js文件就搞定了前端,到现在前端的模块化,工程化,旨在构建出易于维护的前端系统。目前为止,前端三大框架Vue/React/Angular(Vue官网:https://cn.vuejs.org/index.html,
React官网:https://reactjs.org/,Angular官网:https://angularjs.org/),身为一个前端开发人员,不了解这些框架,感觉都out了。个人比较喜欢React,主要是jsx语法很灵活,以及其强大的生态系统,但React的资料国内非常的少,关于使用webpack4构建React开发环境就更少了,本文章将带来读者使用webpack4(目前是最新的,webpack官网:https://webpack.js.org/)从零构建一个React + React-router + Redux + Scss/Css的开发环境,如果是刚入门weboack4的读者,也不要紧,本文尽量使用最浅显易懂的方式告诉你webpack是干什么的,以及如何写webpack配置文件,对于React-router,Redux其实也不是什么高大上的东西,文章后面都会详细介绍。
在构建过程中,会介绍基本的loader如处理jsx/js的babel-loader(babel的具体内容请查看官网:https://babeljs.io/),处理css/scss(Scss的内容请查看官网:https://sass-lang.com/)的css-loader和scss-loader,以及处理静态资源文件(png/jpg/gif)的url-loader,以及做css兼容处理的postcss-loader(postcss的内容请查看官网:https://postcss.org/),然后会介绍一些插件,比如并行压缩代码插件,css压缩插件,以及肯会使用happypack来加速打包。
文章可能比较长,请一定要耐心看,一步一步跟着做,我会把每一步的webpack配置文件都发出来,保证每一个webpack配置文件都是能用的,当自己亲手搭建完一个React开发环境,自己也会有成就感,本项目已经放github欢迎下载:https://github.com/sundial-dreams/ReactRedux/tree/master(不介意的话,给个star也行)。
yarn安装
webpack4介绍
项目目录结构
项目搭建
使用babel-loader处理js/jsx文件
使用css-loader以及sass-loader处理css/scss文件
使用webpackDevServer
使用postcss
使用url-loader处理资源文件(图片等)
使用webpack插件
优化部分
使用happlypack优化打包速度(webpack4已经不需要它了)
别名配置
React,React-router,Redux的介绍和使用
yarn安装
使用webpack4构建的过程中,可能涉及到很多包的安装,强烈建议使用yarn来安装包(用npm安装包也是一样的),yarn是 Facebook 提供的替代 npm 的工具,可以加速 node 模块的下载,跟npm相比,快的不是一点点(并行下载),而且会缓存下载过的包,所以下载过的包,都无需重新下载。
首先设置npm镜像
npm config set registry https://registry.npm.taobao.org --global
npm config set disturl https://npm.taobao.org/dist --global使用npm安装yarn(当然设置了npm镜像的话,安装速度也不算太慢)
npm install -g yarn安装完 yarn 后同理也要设置镜像源
yarn config set registry https://registry.npm.taobao.org --global
yarn config set disturl https://npm.taobao.org/dist --global
yarn的使用也很简单
初始化一个新项目
yarn init

#等价于npm init 不过他生成的是package.json和yarn.lock的文件
添加依赖包
yarn add [package]
yarn add [package] --dev 添加到devDependencies 等价于npm install [package] --save-dev
yarn add [package] --peer 添加到peerDependencies
yarn add [package] --optional 添加到optionalDependencies
升级依赖包
yarn upgrade [package]

#upgrade这个单词是升级的意思
移除依赖包
yarn remove [package]安装项目的全部依赖
yarn 或者 yarn installwebpack介绍
这里我简单介绍一下webpack,3个月前,我也不知道webpack是什么鬼,不过随着自己对前端认识越来越深,现在看来webpack真是个无所不能的打包工具,不仅使前端有了模块化,工程化的概念,而且在前后端分离方面也有很大的贡献。简单来说webpack可以让前端代码可以向后端那样模块化,通过import 或 require方式可以导入模块,export 或 exports可以导出模块(分别对应es6和nodejs的模块系统),像后端一样,所有的导入肯定有一个入口点,这就类似于后端的主模块一样(想想主模块一定会把所有依赖的模块给导进来),webpack就是从这个入口点出发开始打包,一直找通过import等方式导入的模块,打包到一起,最后输出html+css+js+png等静态文件。
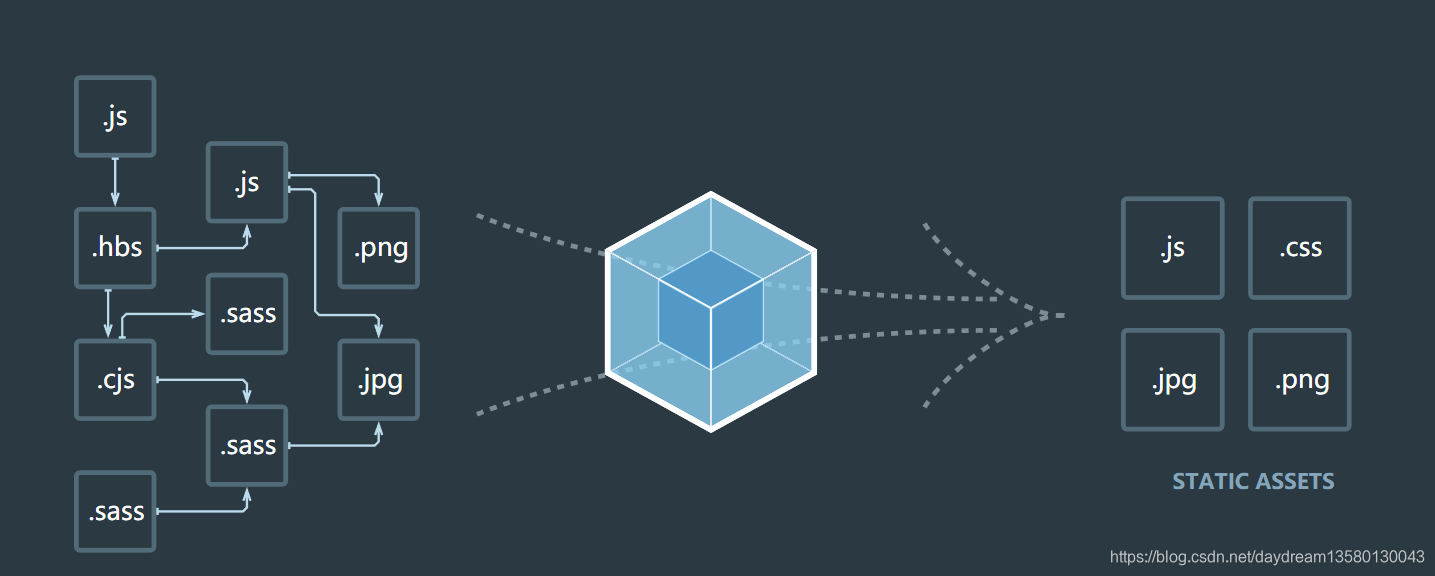
这是官网给的图,其实也很好理解,从入口(左上角)一直找依赖(import 进来的东西),最后把它们一起打包输出成js+css+jpg+png,因为什么文件都可以通过import来导入,所以就必须得对每一种文件进行处理,import 了 css文件就必须得对css文件进行处理,故就要用css-loader 其他文件也是一样的,说到这里,想信对webpack也能有一定的理解了吧 ,如果没有理解,可以试着跟着下面慢慢做,写着写着就理解了。
目录结构
接下来我们可以开始我们的构建了项目了,首先来看我们最终的目录结构长什么样
目录结构如下
ReactTest
|___ dist 打包目录
|___ assets 静态,公共资源目录
|___ public 静态,公共资源目录
|___ index.html 入口
|___ src
|___ components 组件目录
|___ Button 组件Button
|___ button.jsx 组件文件
|___ button.scss 样式文件 或者是button.css
|___ pages 页面目录
|___ Index 首页
|___ index.jsx 首页
|___ index.scss 样式文件
|___ reduxs 存储redux状态,action,reducer目录
|___ actions 存放redux action目录
|___ action.js
|___ reducer 存放redux reducer目录
|___ reduce.js
|___ router 路由目录
|___ router.js
|___ index.jsx 入口
|___ .babelrc babel配置文件
|___ postcss.config.js postcss配置文件
|___ webpack.common.config.js webpack公共配置文件
|___ webpack.config.js webpack配置文件 打包时使用
|___ webpack.dev.config.js webpack配置文件 开发时使用
项目搭建
先建个项目目录ReactTest(名随便起),然后在当前项目下打开终端输入命令yarn init初始化项目,然后一路回车,最后应该会在项目目录下出现package.json文件,新建src文件夹,dist文件夹,public文件夹
然后安装webpack
yarn add webpack --dev在项目目录下新建webpack.config.js,src下新建index.jsx,public下新建index.html其中index.jsx和index.html为入口
//webpack.config.js
const {resolve,join} = require("path");
const paths = {
  src: resolve(__dirname, "src"),
  dist: resolve(__dirname, "dist"),
  public: resolve(__dirname,"public")
};
module.exports = {
  entry: [
      join(paths.public,"index.html"),
      join(paths.src,"index.jsx")
  ],
  output: {
    path: paths.dist,
    filename: "[name].js"
  }
};
现在webpack还不能跑,jsx和html文件没有处理,首先处理jsx文件,我们要使用babel-loader(关于webpack配置文件里得写些啥,可以参考这里https://webpack.docschina.org/configuration/#%E9%80%89%E9%A1%B9)
使用babel-loader处理js/jsx文件
首先安装babel的东西,
@babel/core  # babel 核心的东西
@babel/preset-react # 转换 JSX 语法并去除类型注释
@babel/preset-env # 转换es6语法  如for of 箭头函数等等
@babel/plugin-transform-runtime  # 复用插件 具体可以看这里https://babel.docschina.org/docs/en/babel-plugin-transform-runtime#docsNav
@babel/runtime
@babel/polyfill # 转换es6的新函数或对象如Promise,Set,Map,Array.from等
使用yarn安装以上包
yarn add @babel/core @babel/preset-react @babel/preset-env @babel/plugin-transform-runtime @babel/polyfill @babel/runtime --dev 安装babel-loader
yarn add babel-loader --dev
现在还要处理入口的html文件,需要html-loader,以及html-webpack-plugin插件
安装html-loader和html-webpack-plugin
yarn add html-webpack-plugin html-loader --dev然后修改webpack.config.js
//webpack.config.js
const {resolve, join} = require("path");
const HtmlWebpackPlugin = require("html-webpack-plugin");
const paths = {
  src: resolve(__dirname, "src"),
  dist: resolve(__dirname, "dist"),
  public: resolve(__dirname, "public")
};
module.exports = {
  mode: "development",
  entry: [
    join(paths.public, "index.html"),
    "@babel/polyfill",
    join(paths.src, "index.jsx"),

  ],
  output: {
    path: paths.dist,
    filename: "[name].js"
  },
  module: {
    rules: [
      {
        //处理jsx,js
        test: /\.(jsx?)$/,
        exclude: /node_modules/,
        include: resolve(__dirname, "src"),
        use: {
          loader: "babel-loader",
          options: {
            cacheDirectory: true
          }
        }
      },
      {
        ///处理html
        test: /\.html?/,
        exclude: /node_modules/,
        include: resolve(__dirname, "public"),
        use: {
          loader: "html-loader",
          options: {
            minimize: true  //压缩html代码
          }
        }
      }
     ]
    }
   ]
  },
  plugins: [
    new HtmlWebpackPlugin({
      template: join(paths.public, "index.html"),
      filename: "index.html",
      title: "Caching"
    })
  ]
};
在项目目录下新建.babelrc,代码如下
{
  "presets": [
    "@babel/env",
    "@babel/preset-react"
  ],
  "plugins": [
    "@babel/plugin-transform-runtime"
  ]
}
好了,现在我们的webpack能处理jsx和html文件了,接下来就是安装react,react-dom了
yarn add react react-dom --dev
然后在index.jsx中写点东西
//index.jsx

import React, {Component} from "react";
import ReactDOM from "react-dom";

class App extends Component {
  constructor(props) {
    super(props);
  }

  render() {
    return (
      <div className="app">
        <h1>hello , I am ok</h1>
      </div>
    )
  }
}

ReactDOM.render(<App/>, document.getElementById("root"));
此时我们还需要webpack-cli才能打包项目,使用yarn安装webpack-cli
yarn add webpack-cli --dev然后添加个运行脚本,修改package.json文件
{
...省略
"scripts": {
    "build": "./node_modules/.bin/webpack -p"
  }
 ...
}
加了这个后,打包只需要yarn run build就ok了,轻松简单
然后看看打包结果
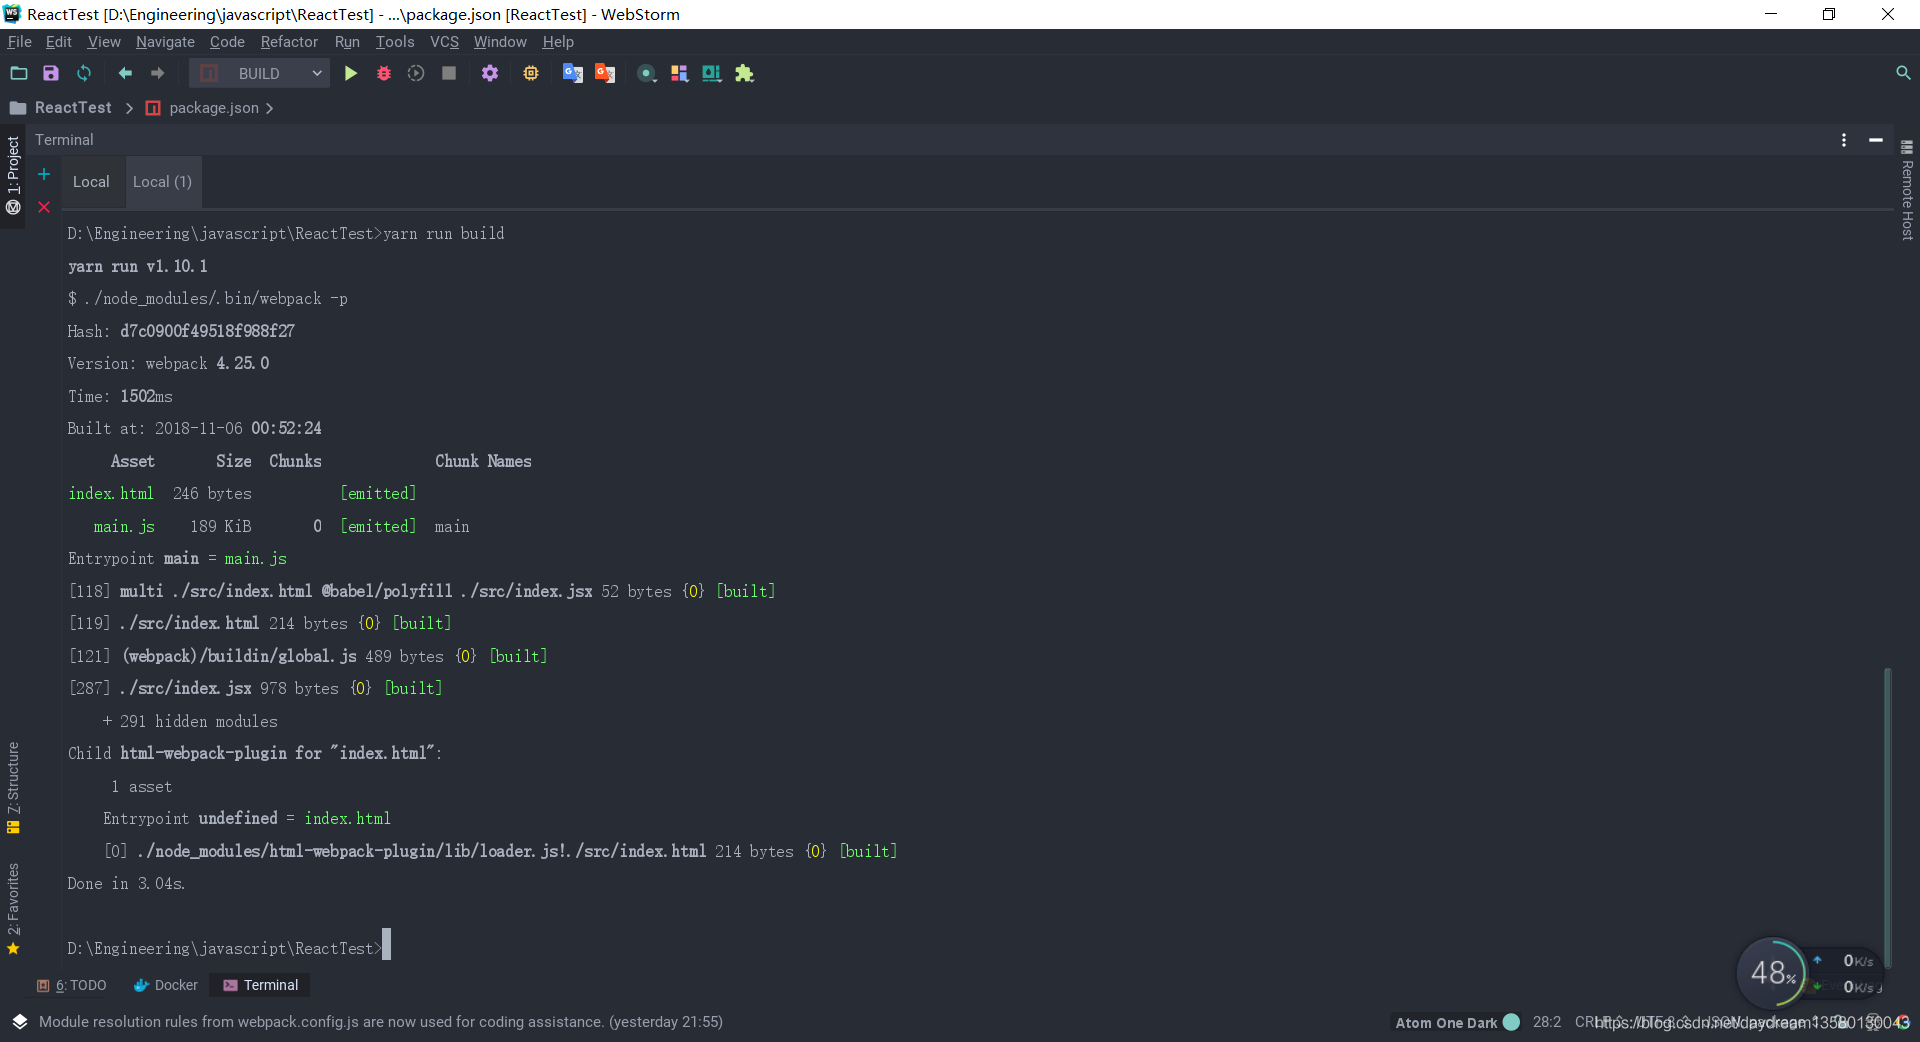
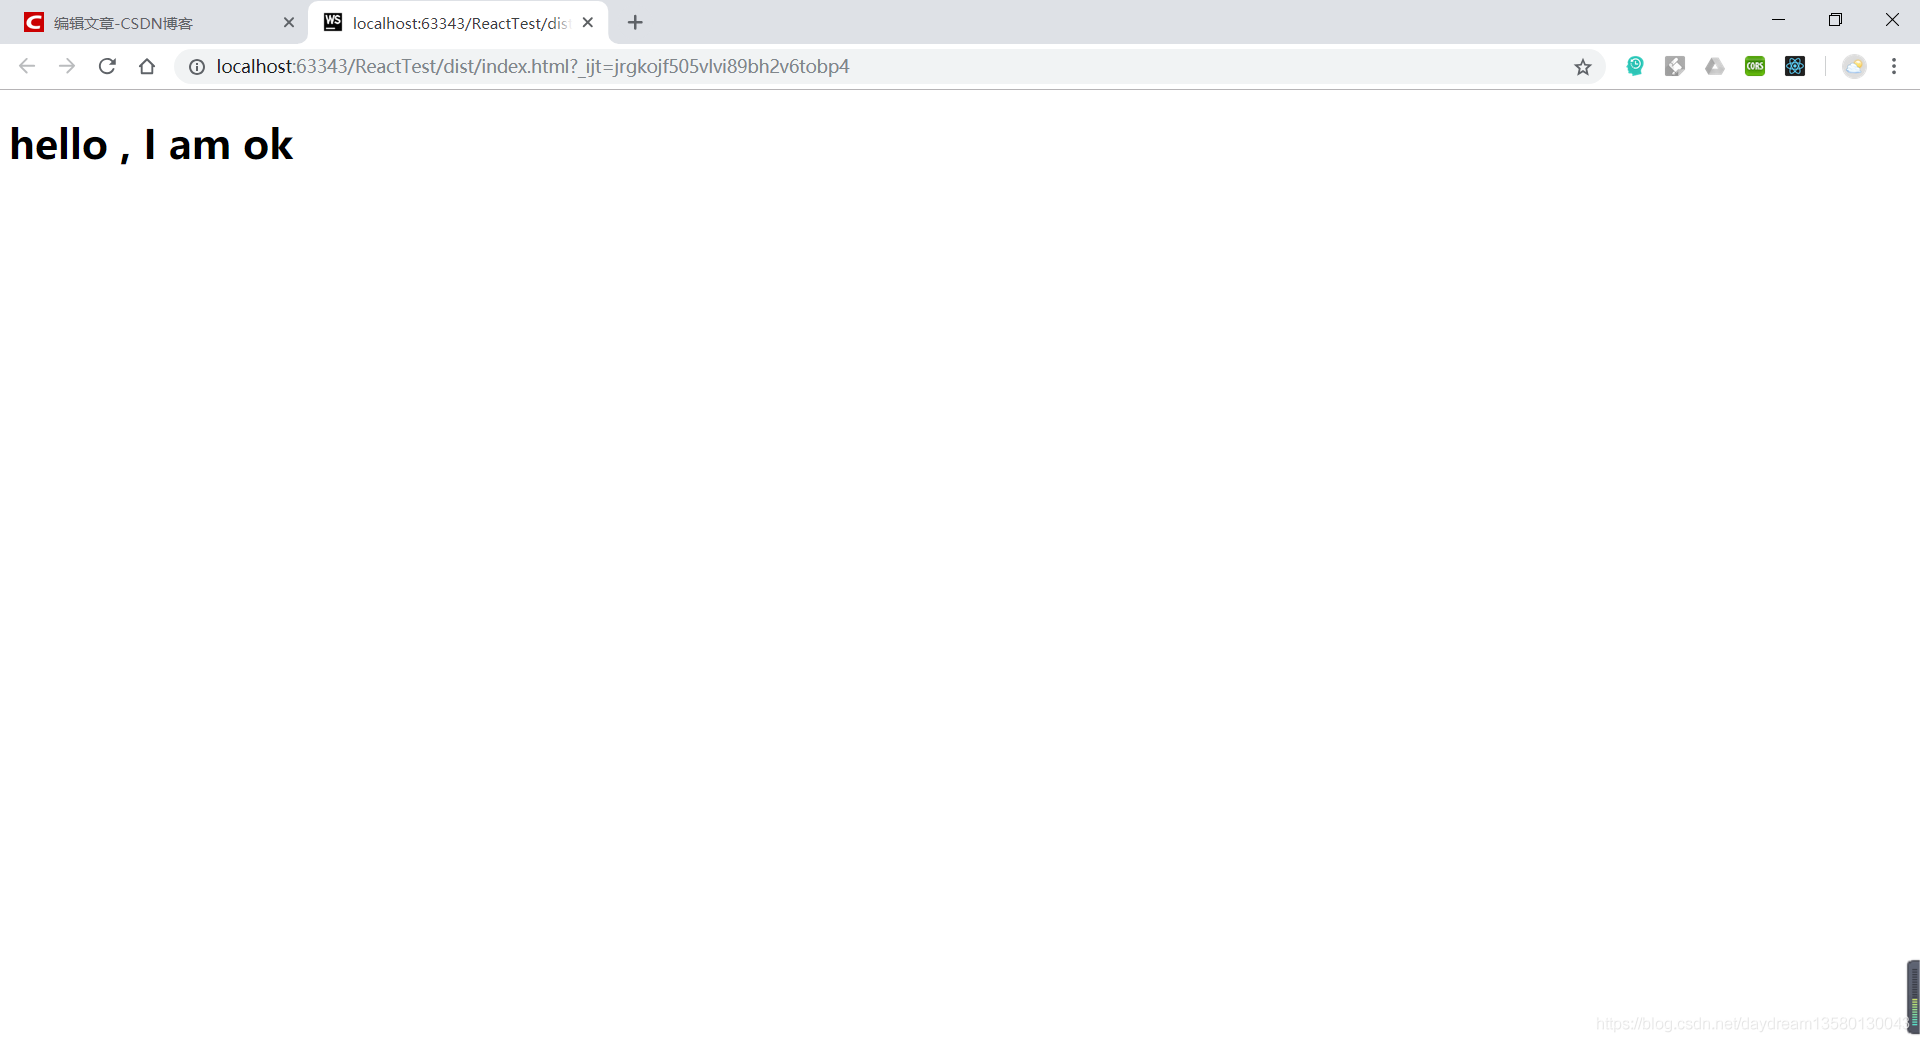
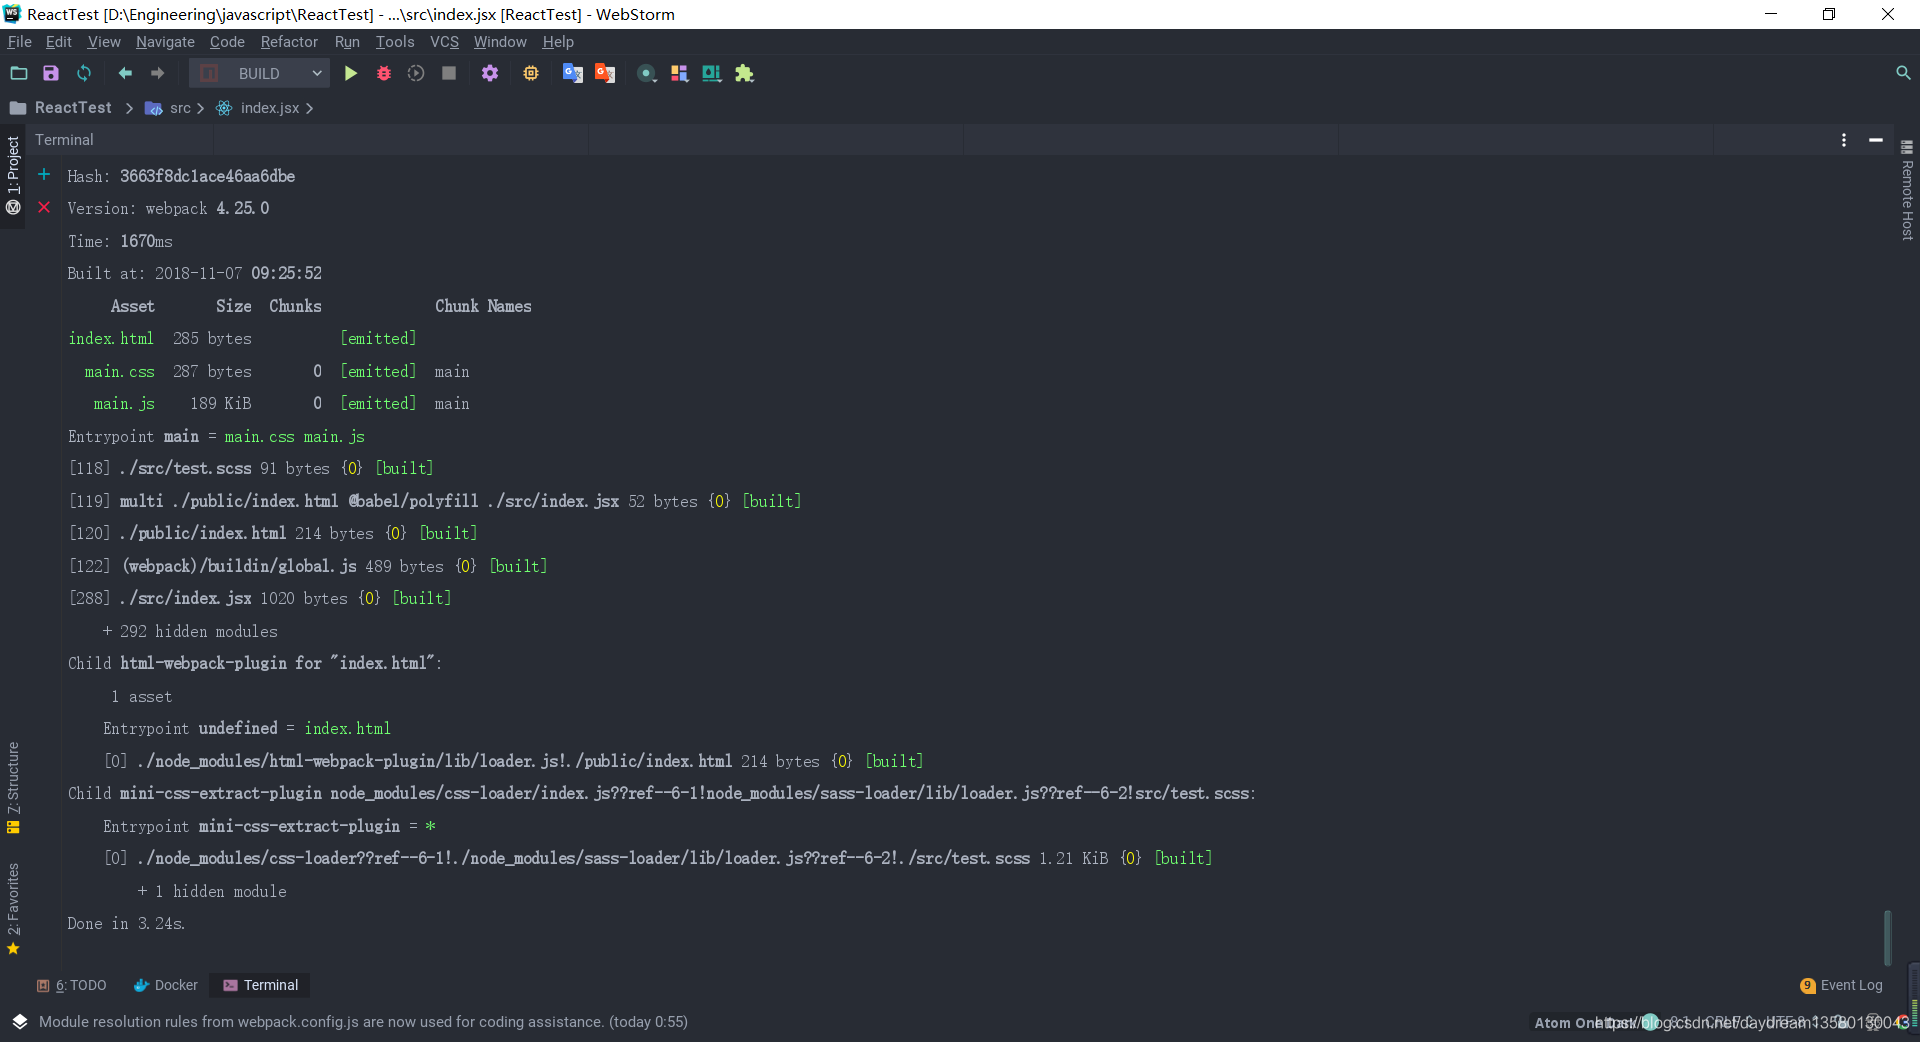
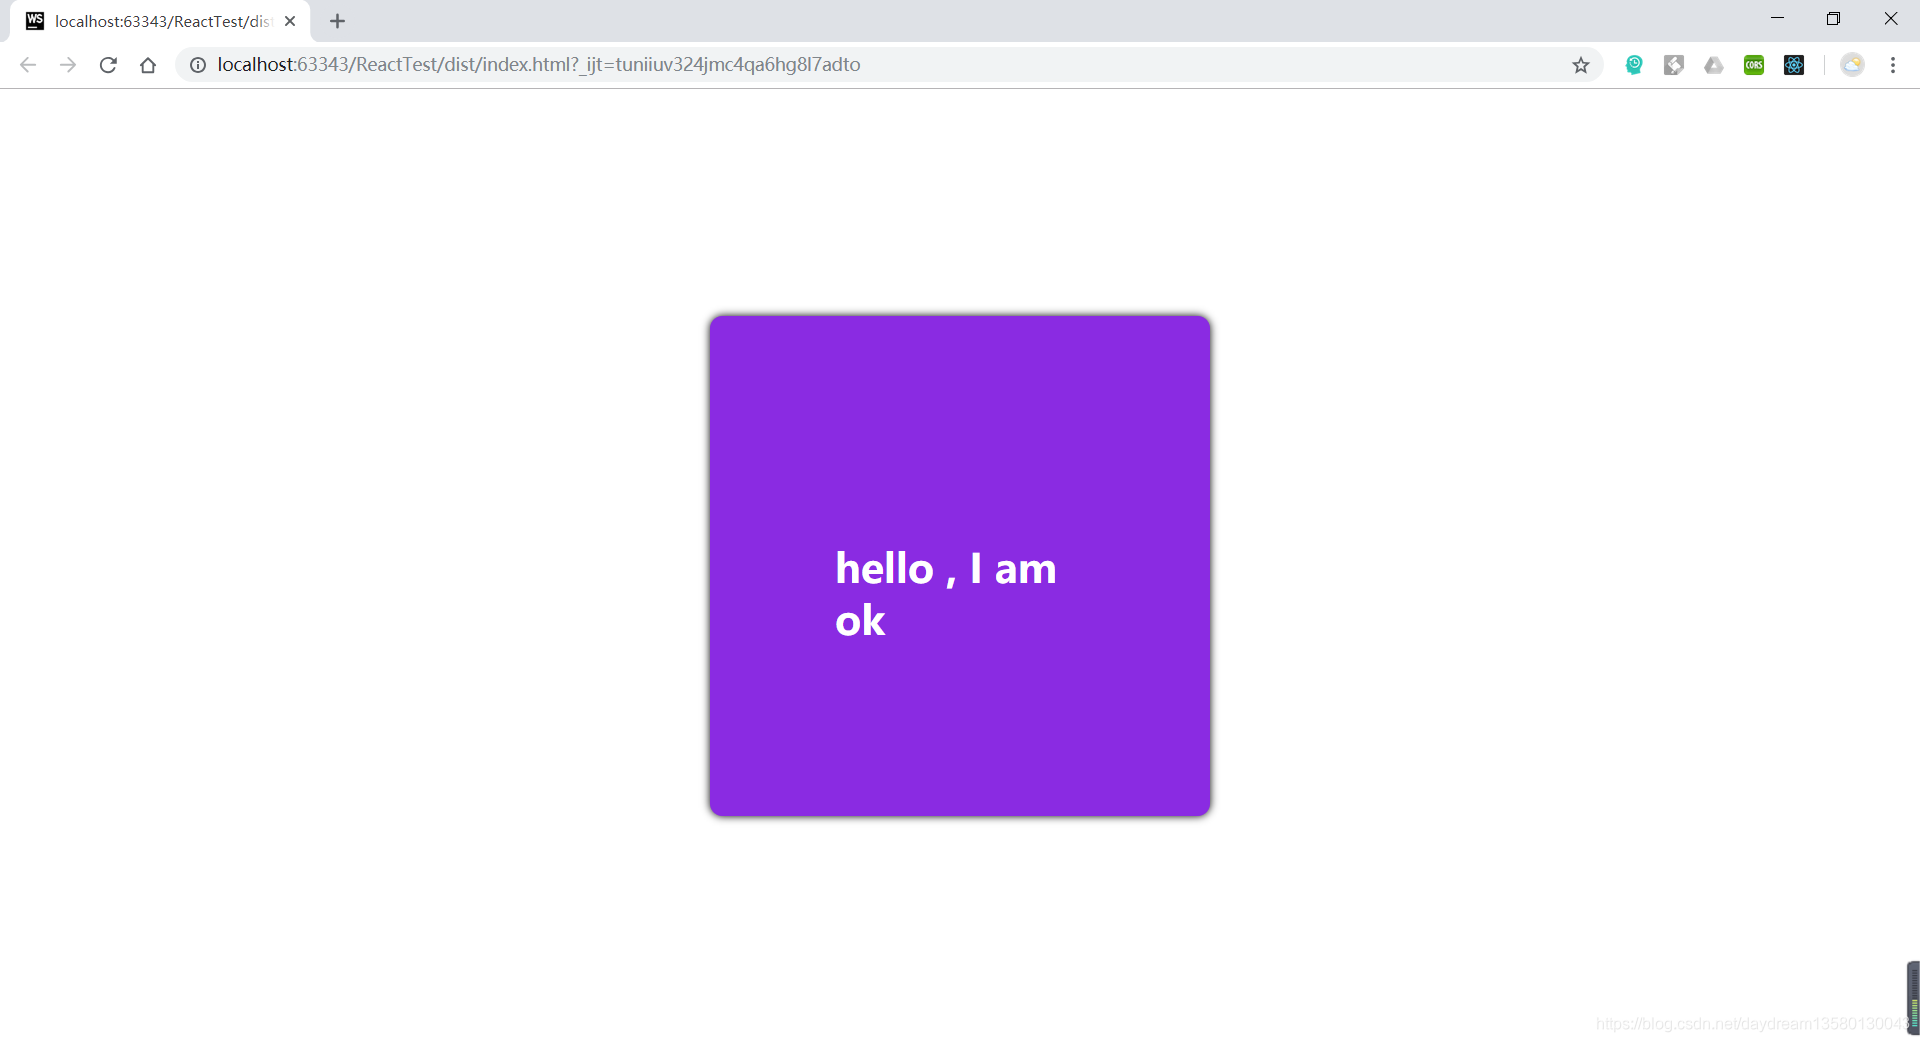
没有报错,一切ok,然后可以看到dist目录下打包出来了index.html和main.js文件,浏览器打开index.html文件
关于jsx这块算是差不多完事了,关于优化的部分后面将会涉及到
使用css-loader以及sass-loader处理css/scss文件
处理完js,jsx接下来就是处理scss或css文件了,处理scss前我们得先安装node-sass包,这是一个专门处理scss或sass的包,更多详情可以看这里https://github.com/sass/node-sass
使用yarn安装
yarn add node-sass --dev然后安装css-loader和sass-loader处理css/sass/scss文件
yarn add css-loader sass-loader --dev然后再安装最后一个mini-css-extract-plugin,能将css单独提取到一个文件里,支持动态导入等,我觉得直接点这里能更清楚这是干嘛的https://github.com/webpack-contrib/mini-css-extract-plugin
yarn add mini-css-extract-plugin --dev一切准备就绪,然后开始继续写我们的webpack文件
//webpack.config.js
const {resolve, join} = require("path");
const HtmlWebpackPlugin = require("html-webpack-plugin");
const MiniCssExtractPlugin = require("mini-css-extract-plugin");
const paths = {
  src: resolve(__dirname, "src"),
  dist: resolve(__dirname, "dist"),
  public: resolve(__dirname, "public")
};
module.exports = {
  mode: "development",
  entry: [
    join(paths.public, "index.html"),
    "@babel/polyfill",
    join(paths.src, "index.jsx"),

  ],
  output: {
    path: paths.dist,
    filename: "[name].js"
  },
  module: {
    rules: [
      {
        //处理jsx,js
        test: /\.(jsx?)$/,
        exclude: /node_modules/,
        include: resolve(__dirname, "src"),
        use: {
          loader: "babel-loader",
          options: {
            cacheDirectory: true
          }
        }
      },
      {
        ///处理html
        test: /\.html?/,
        exclude: /node_modules/,
        include: resolve(__dirname, "public"),
        use: {
          loader: "html-loader",
          options: {
            minimize: true  //压缩html代码
          }
        }
      },
      {
        //处理css/scss/sass
        test:/\.(css|scss|sass)$/,
        exclude: /node_modules/,
        include: resolve(__dirname, "src"),
        loaders:[
          MiniCssExtractPlugin.loader,
          {
            loader: "css-loader",
            options: {
              sourceMap:true,  //资源映射
              modules:true,    //是否允许模块
              importLoaders:20
            }
          },
          {
            loader: "sass-loader",
            options:{
              sourceMap:true
            }
          }
        ]
      }
    ]
  },
  plugins: [
    new HtmlWebpackPlugin({
      template: join(paths.public, "index.html"),
      filename: "index.html",
      title: "Caching"
    }),
    new MiniCssExtractPlugin({
      filename:"[name].css",
      chunkFilename:"[id].css"
    })
  ]
};
需要提一下sourceMap这个东西,很多地方都能写sourceMap那么这到底是啥东西呢,其实再部署前端的时候,我们会对代码压缩打包来减少代码大小,提高访问速度,那么问题就来了,压缩的代码报错了咋办,这时候浏览器出来的报错信息基本上都不是人看的,这时就需要source map 来还原真实的出错位置。
接下来,我们在src下新建一个test.scss看看好不好使
//test.scss
$width: 400px;
$height: 400px;
@mixin Size($width,$height) {
  width: $width;
  height: $height;
}

@mixin Center() {
  position: absolute;
  left: 50%;
  top: 50%;
  transform: translate(-50%, -50%);
}

.app {
  @include Size($width, $height);
  border-radius: 10px;
  background: blueviolet;
  box-shadow: 0 0 10px;
  @include Center();
  h1 {
    color: white;
    @include Center();
  }
}
在index.jsx中导入,以及使用
import React, {Component} from "react";
import ReactDOM from "react-dom";
import style from "./test.scss"; //导入
class App extends Component {
  constructor(props) {
    super(props);
  }

  render() {

    return (                      //使用
      <div className={style.app}>
        <h1>hello , I am ok</h1>
      </div>
    )
  }
}

ReactDOM.render(<App/>, document.getElementById("root"));
运行webpack,使用命令yarn run build
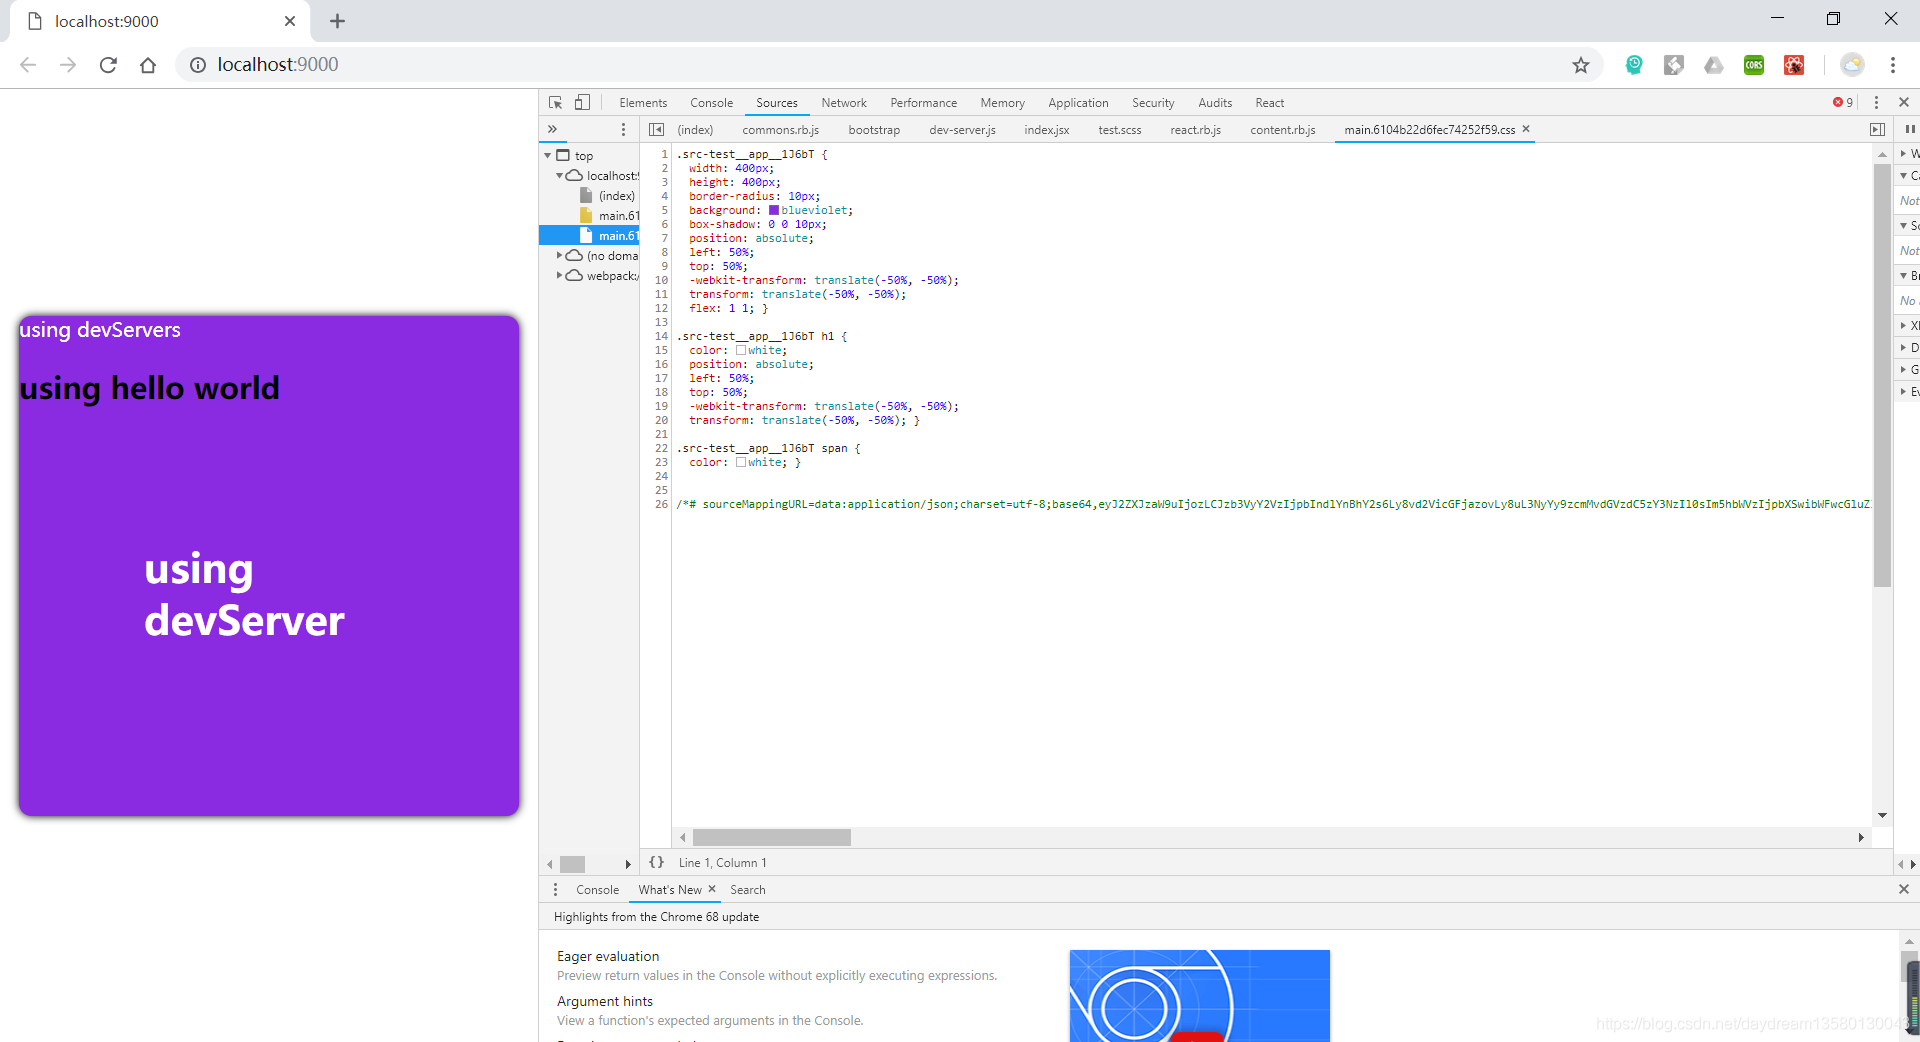
ok没报错,这时可以看到,dist目录下多了main.css文件,在浏览器打开index.html
处理scss这部分就告一段落了,读者有兴趣的话,也可以写css文件来试试
使用webpackDevServer
仔细想想,每改一处代码,就要yarn run build 重新打包一遍,这显然是不可取的,所以我们使用devServer来监听所有文件的修改,当有文件修改时,则自动执行打包,在项目目录下新建webpack.dev.config.js,这是开发时使用的webpack配置文件,理论上跟webpack.config.js差不多,只要把webpack.config.js复制粘贴过来就ok了,然后再改改不一样的地方,比如多了devServer这一项,而且少部分地方也有不一样的, 那么如果这么做的话,如果我后面修改了webpack.dev.config.js,比如加个处理图片的rule,这时webpack.config.js也要跟着改,似乎有点不划算,原本只要改一配置文件,现在要改两个,所以我们把webpack.config.js和webpack.dev.config.js的公共部分给抽出来放到webpack.common.config.js就好了,现在项目里新建一个webpack.common.config.js,将之前在webpack.config.js写的内容拷贝过去,然后区分开发环境和生产环境,故修改webpack.common.config.js
先安装webpack-dev-server,
yarn add webpack-dev-server --dev然后修改webpack.common.config.js
//webpack.common.config.js
const {resolve, join} = require("path");
const HtmlWebpackPlugin = require("html-webpack-plugin");
const MiniCssExtractPlugin = require("mini-css-extract-plugin");
const paths = {
  src: resolve(__dirname, "src"),
  dist: resolve(__dirname, "dist"),
  public: resolve(__dirname, "public")
};

const evn = process.argv.pop();//获取当前的环境,生产或开发
const EVN = {
  pro: "production",
  dev: "development"
};

module.exports = {
  entry: [
    join(paths.public, "index.html"),
    "@babel/polyfill",
    join(paths.src, "index.jsx"),
  ],
  output: {
    path: paths.dist,
    chunkFilename: evn === EVN.dev ? "[name].[hash].js" : "[name].js",
    filename: evn === EVN.dev ? "[name].[hash].js" : "[name].js",
    publicPath: resolve(__dirname, "assets")
  },
  module: {
    rules: [
      {
        //处理jsx,js
        test: /\.(jsx?)$/,
        exclude: /node_modules/,
        include: resolve(__dirname, "src"),
        use: {
          loader: "babel-loader",
          options: {
            cacheDirectory: evn === EVN.dev,
            sourceMap: evn === EVN.dev
          }
        }
      },
      {
        ///处理html
        test: /\.html?/,
        exclude: /node_modules/,
        include: resolve(__dirname, "public"),
        use: {
          loader: "html-loader",
          options: {
            minimize: evn === EVN.dev,  //压缩html代码
            sourceMap: evn === EVN.dev  //生产环境可以不用资源映射
          }
        }
      },
      {
        //处理css/scss/sass
        test: /\.(css|scss|sass)$/,
        exclude: /node_modules/,
        include: resolve(__dirname, "src"),
        loaders: [
          MiniCssExtractPlugin.loader,
          {
            loader: "css-loader",
            options: {
              sourceMap: evn === EVN.dev,  //资源映射
              modules: true,    //是否允许模块
              importLoaders: 20,
              localIdentName: evn === EVN.dev ? "[path][name]__[local]--[hash:base64:5]" : ""
            }
          },
          {
            loader: "sass-loader",
            options: {
              sourceMap: evn === EVN.dev //生产环境没必要使用sourceMap了
            }
          }
        ]
      }
    ]
  },
  plugins: [
    new HtmlWebpackPlugin({
      template: join(paths.public, "index.html"),
      filename: "index.html",
      title: "react"
    }),
    new MiniCssExtractPlugin({
      filename: evn === EVN.dev ? "[name].[hash].css" : "[name].css",
      chunkFilename: evn === EVN.dev ? "[id].[hash].css" : "[id].css"
    }),
  ]
};
因为涉及到webpack的合并,所以我们使用webpack官方的webpack.merge(传送门:https://www.npmjs.com/package/webpack-merge)来合并
安装
yarn add webpack-merge --dev修改webpack.dev.config.js如下(关于devServer更详细的内容:https://webpack.js.org/configuration/dev-server)
//webpack.dev.config.js
const common = require("./webpack.common.config");
const {resolve} = require("path");
const merge = require("webpack-merge");
const webpack = require("webpack");

module.exports = merge(common, {   //合并两个webpack文件
  devServer: {
    port: 9000,
    contentBase: [resolve(__dirname, "public"),resolve(__dirname,"dist")], //找public下的index.html
    compress: true,
    hot: true,                     //模块热加载
    inline: true,
    open: 'Chrome',                //构建完成时自动打开浏览器
    openPage: ""
  },
  devtool: "inline-source-map",      //方便调试,将src目录下的资源映射到浏览器中
  mode: "development",
  plugins: [
    new webpack.HotModuleReplacementPlugin(), //使用模块热加载插件
  ]
});
修改webpack.config.js如下
//webpack.config.js
const common = require("./webpack.common.config");
const merge = require("webpack-merge");
module.exports = merge(common, {
  devtool: "none",
  mode:"production"
});
在package.json中添加start脚本
{
....
"scripts": {
"build": "./node_modules/.bin/webpack --mode production",
"start": "./node_modules/.bin/webpack-dev-server --config ./webpack.dev.config.js --process --color --mode development"
}
....
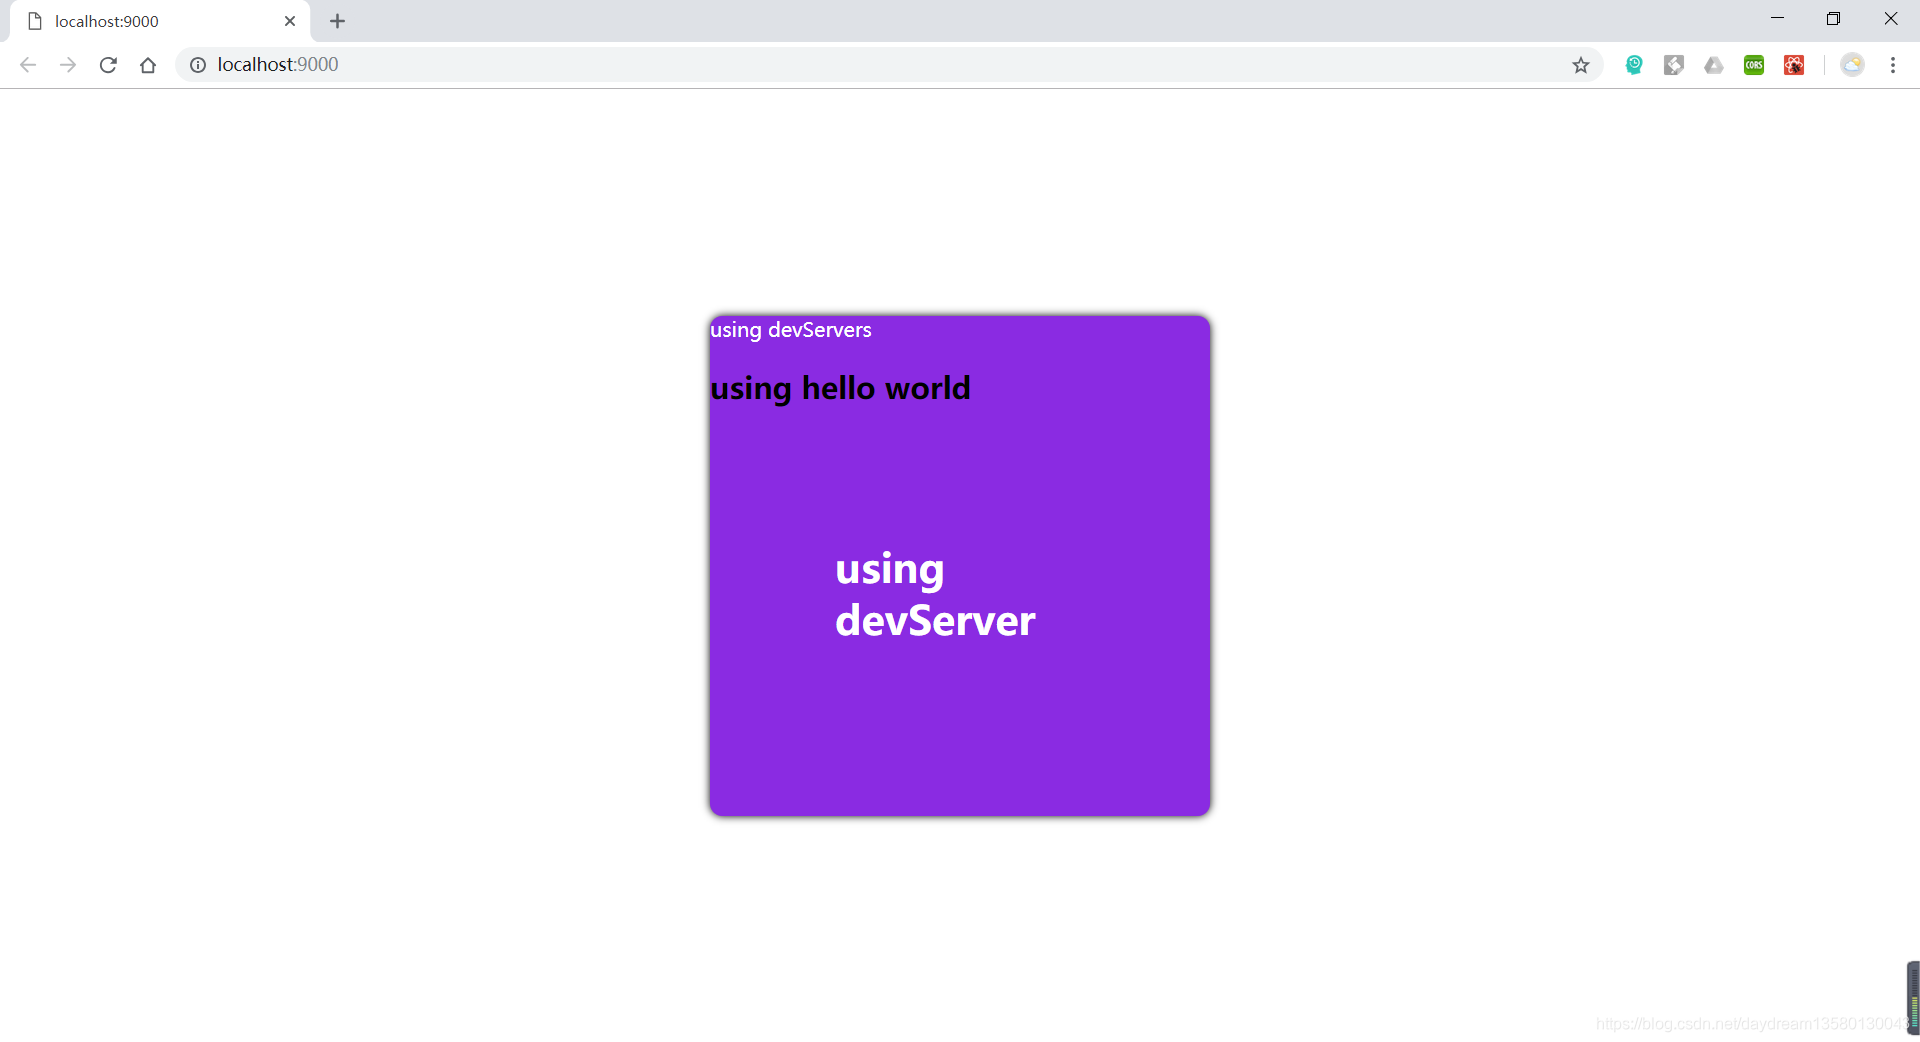
}一切都准备ok,我们输入yarn run start 运行起来
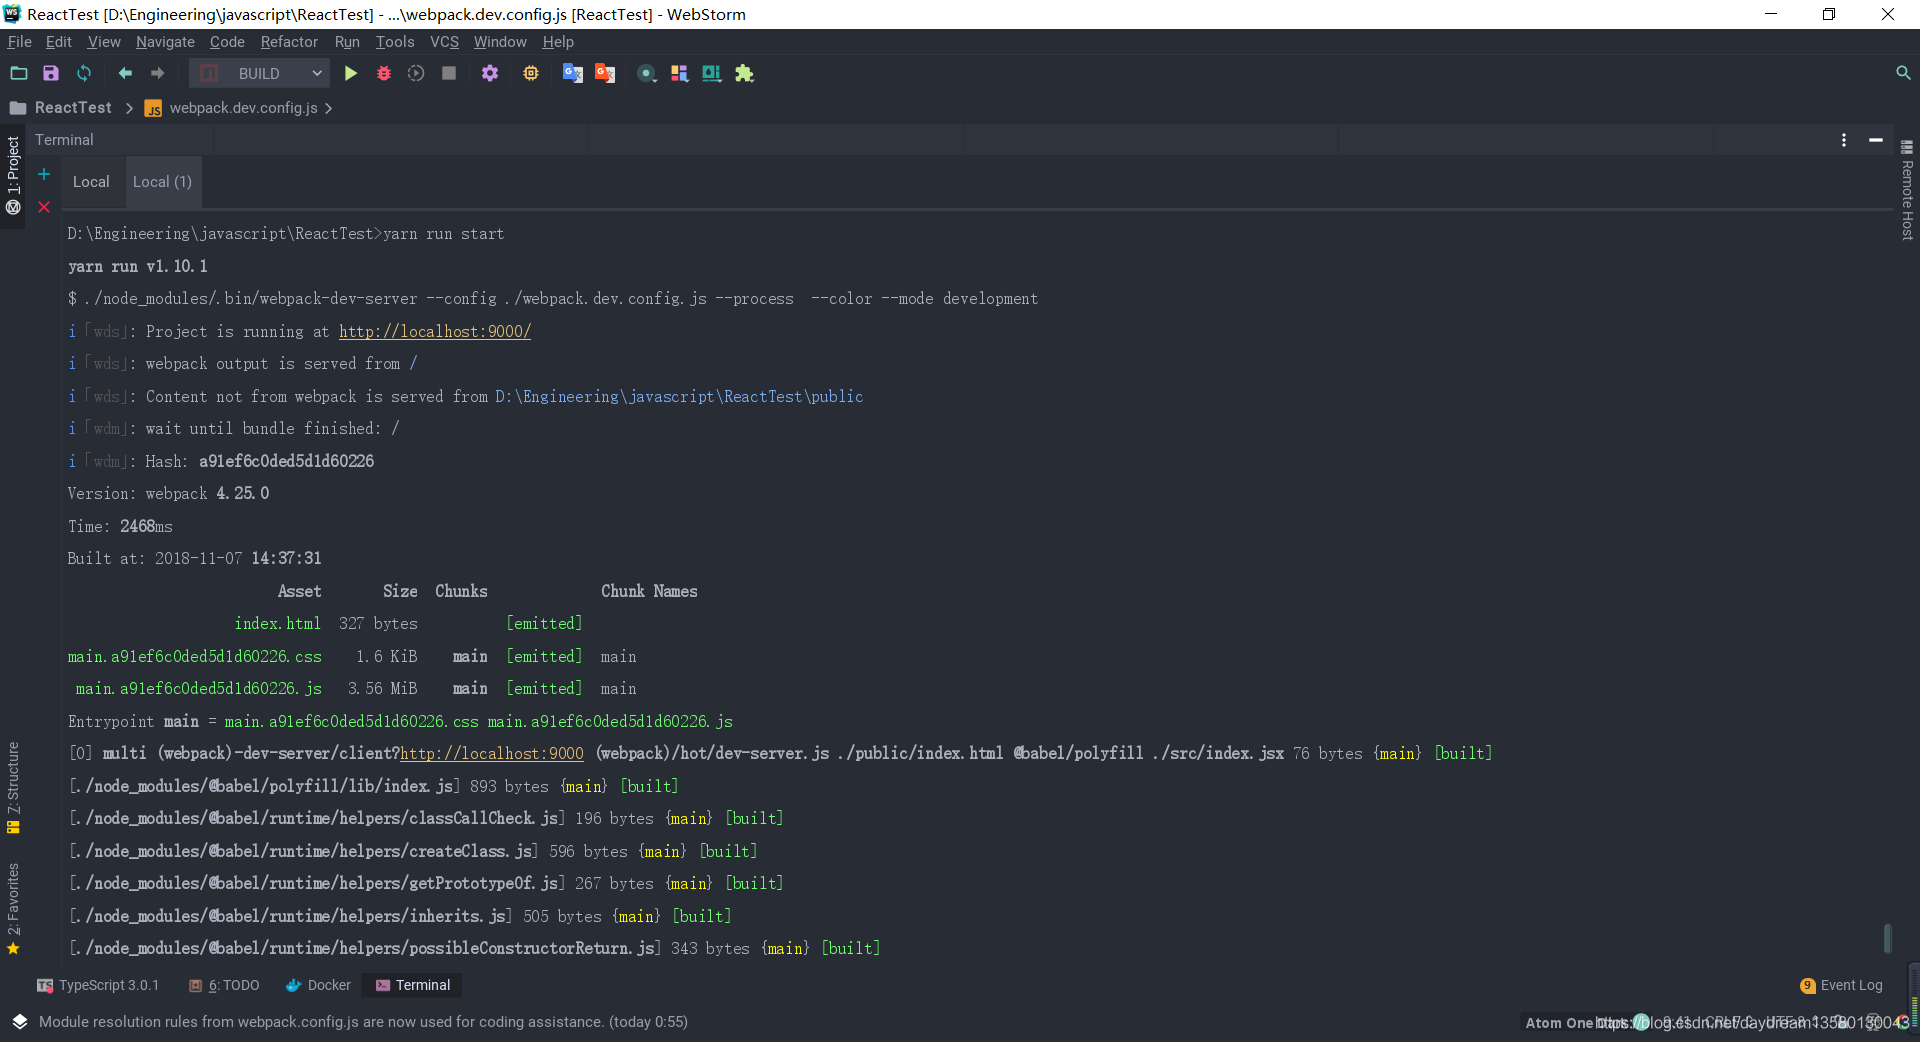
跑起来没有任何问题,而且还自动打开google浏览器(自己修改index.jsx看看能不能自动编译)
顺便一提,devServer打包的东西是放到内存里的(所以就比较快一点),不是放到某个文件夹下(如dist),所以dist文件夹下不会出现任何打包的文件,如果你开发完了,那么你就可以使用yarn run build 将所有文件打包到dist文件夹下,然后再进行部署。
使用postcss
简单来说postcss就是做css转换和兼容处理的,比如自动添加css前缀,还能转换最新的css属性,如果还不明白,请看官网https://postcss.org/
废话不多说,先安装postcss以及对应的webpack loader即postcss-loader
yarn add postcss postcss-loader --dev然后还需要安装几个postcss的插件
postcss-preset-env # 使用明天的css,可以使用css变量等新属性
autoprefixer # 自动加前缀
postcss-scss # scss语法
postcss-flexbugs-fixes # 解决flex问题的插件
precss # 让编译后的css更好看
postcss-nested #处理jsx里面的css
astroturf   #处理jsx里面的css

postcss-syntax #自动根据扩展名切换语法
postcss-safe-parser # 查找css中的错误,并修补
postcss-sass # sass语法
postcss-scss # scss语法(更多postcss的插件可以查看这里https://www.npmjs.com/package/postcss)
使用yarn安装以上插件
yarn add postcss-preset-env autoprefixer postcss-scss postcss-flexbugs-fixes precss postcss-nested astroturf --devyarn add postcss-syntax postcss-safe-parser postcss-sass postcss-scss --dev修改webpack.common.config.js
//webpack.common.config.js
const {resolve, join} = require("path");
const HtmlWebpackPlugin = require("html-webpack-plugin");
const MiniCssExtractPlugin = require("mini-css-extract-plugin");
const paths = {
  src: resolve(__dirname, "src"),
  dist: resolve(__dirname, "dist"),
  public: resolve(__dirname, "public")
};

const env = process.argv.pop();//获取当前的环境,生产或开发

const ENV = {
  pro: "production",
  dev: "development"
};

const isDev = env === ENV.dev;

module.exports = {
  entry: [
    join(paths.public, "index.html"),
    "@babel/polyfill",
    join(paths.src, "index.jsx"),
  ],
  output: {
    path: paths.dist,
    chunkFilename: isDev ? "[name].[hash].js" : "[name].js",
    filename: isDev ? "[name].[hash].js" : "[name].js",
  },
  module: {
    rules: [
      {
        //处理jsx,js
        test: /\.(jsx?)$/,
        exclude: /node_modules/,
        include: resolve(__dirname, "src"),
        loaders: [
          {
            loader: "babel-loader",
            options: {
              cacheDirectory: isDev,
              sourceMap: isDev
            }
          },
          {//处理jsx里面的css
            loader: 'astroturf/loader',
            options: {extension: '.scss'},
          }
        ]
      },
      {
        ///处理html
        test: /\.html?/,
        exclude: /node_modules/,
        include: resolve(__dirname, "public"),
        use: {
          loader: "html-loader",
          options: {
            minimize: isDev,  //压缩html代码
            sourceMap: isDev  //生产环境可以不用资源映射
          }
        }
      },
      {
        //处理css/scss/sass
        test: /\.(css|scss|sass)$/,
        exclude: /node_modules/,
        include: resolve(__dirname, "src"),
        loaders: [
          MiniCssExtractPlugin.loader,
          {
            loader: "css-loader",
            options: {
              sourceMap: isDev,  //资源映射
              modules: true,    //是否允许模块
              importLoaders: 20,
              localIdentName: isDev ? "[path][name]__[local]__[hash:base64:5]" : ""
            }
          },
          {
            loader: "sass-loader",
            options: {
              sourceMap: isDev //生产环境没必要使用sourceMap了
            }
          },
          {//使用postcss
            loader: "postcss-loader",
            options: {
              sourceMap: isDev
            }
          },
        ]
      }
    ]
  },
  plugins: [
    new HtmlWebpackPlugin({
      template: join(paths.public, "index.html"),
      filename: "index.html",
      title: "react"
    }),
    new MiniCssExtractPlugin({
      filename: isDev ? "[name].[hash].css" : "[name].css",
      chunkFilename: isDev ? "[id].[hash].css" : "[id].css"
    })
  ]
};
在项目目录下新建个postcss.config.js文件
//postcss.config.js
const flexbugsFixes = require("postcss-flexbugs-fixes");
const presetEnv = require("postcss-preset-env");
const autoprefixer = require("autoprefixer");
const precss = require("precss");
const nested = require("postcss-nested");
//根据文件扩展名来选择语法
const syntax = require("postcss-syntax")({
  sass: require("postcss-sass"),
  css: "postcss-safe-parser",
  scss: "postcss-scss"
});
module.exports = {
  syntax: syntax,
  //插件
  plugins: [
    flexbugsFixes,
    presetEnv({
      autoprefixer: {
        flexbox: 'no-2009',
      },
      stage: 3,
    }),
    autoprefixer({grid: true}),
    precss,
    nested,
  ]
};
使用yarn run start 运行一下
可以看到,css文件里确实有加前缀,而且flex也有做兼容,不信读者可以自己试试。
关于postcss的部分就到此为止了,上面使用了很多插件,有兴趣的读者可以自己去查一查。
使用url-loader处理资源文件(图片等)
现在我们已经处理了css/scss/sass,js/jsx,html文件了,还差资源文件没有处理,如图像等
处理资源文件,我们使用url-loader
使用yarn 安装url-loader
yarn add url-loader --dev
然后准备回滚的loader(url-loader处理不了的文件)
我使用responsive-loader(file-loader也行,默认就是file-loader,如果要使用file-loader只要安装上file-loader就可以了,当url-loader处理不了的时候会自动调f用ile-loader),
安装responsive-loader,另外还得安装jimp(responsive-loader依赖了这个)
yarn add responsive-loader jimp --dev然后继续修改webpack.common.config.js
 //前面的都一样,只要在module下的rules下加上这一条规则就好了
  {//处理图片文件
        test: [/\.bmp$/, /\.gif$/, /\.jpe?g$/, /\.png$/],
        exclude: /node_modules/,
        include: resolve(__dirname, "src"),
        loader: require.resolve("url-loader"),
        options:{
          limit: 8192,//图片在这个范围内,会将图片变成base64减少http请求
          fallback: "responsive-loader" //回退的loader
        }
   }
ok我们来试试好不好使,在index.jsx目录那里放一张图片,然后修改index.jsx
//index.jsx
import React, {Component} from "react";
import ReactDOM from "react-dom";
import style from "./test.scss";
import image from "./a.jpg";//导入图片
class App extends Component {
  constructor(props) {
    super(props);
  }

  render() {
    return (
      <div className={style.app}>
        <img src={image}/>
      </div>
    )
  }
}

ReactDOM.render(<App/>, document.getElementById("root"));
顺便在改改样式
$width: 400px;
$height: 400px;
@mixin Size($width,$height) {
  width: $width;
  height: $height;
}

@mixin Center() {
  position: absolute;
  left: 50%;
  top: 50%;
  transform: translate(-50%, -50%);
}

.app {
  @include Size($width, $height);
  box-shadow: 0 0 10px;
  @include Center();
  flex: 1;
  overflow: hidden;
  img {
    width: 100%;
    height: 100%;
  }
  h1 {
    color: white;
    @include Center();
  }
  span {
    color: white;
  }
}
运行一下,yarn run start
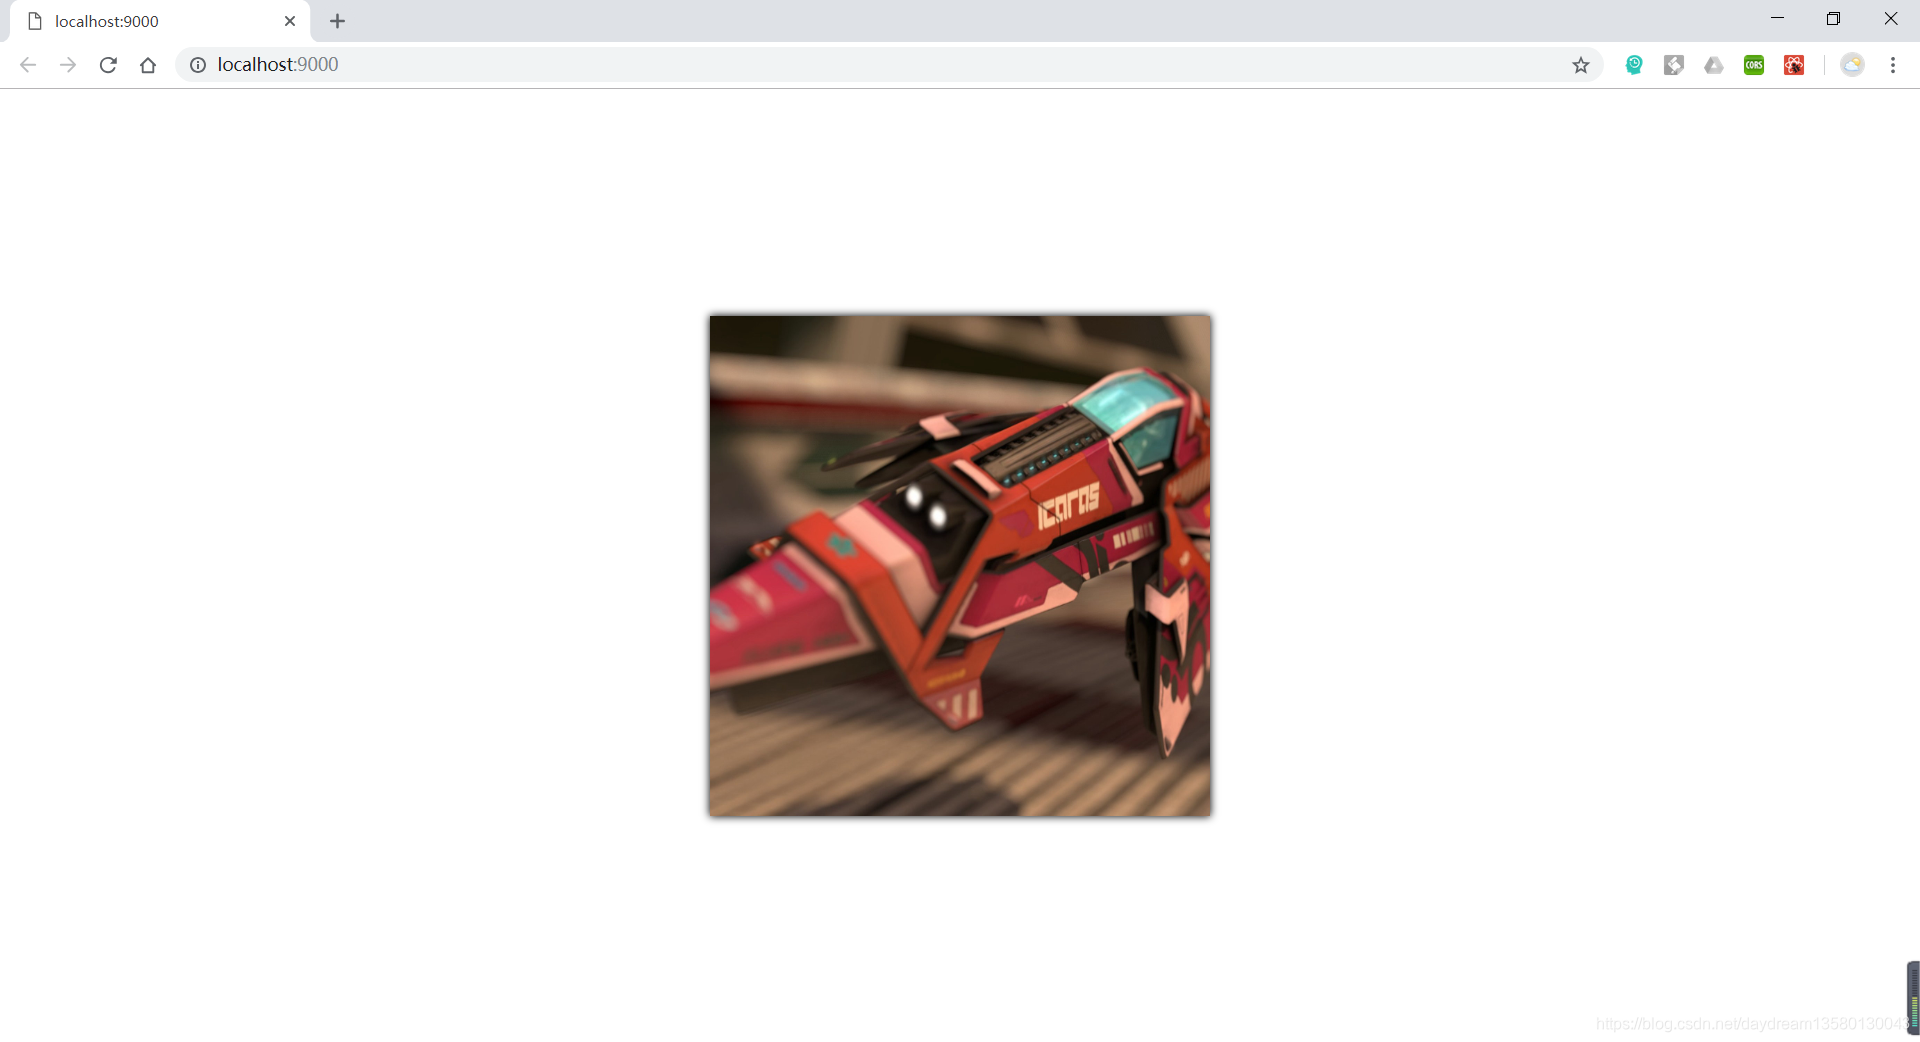
可以看到,图片能被正常加载,图片这一块就算完事了。
使用webpack插件
webpack插件是非常有用的东西(更多插件信息请查看这里:https://webpack.docschina.org/plugins/commons-chunk-plugin),我使用2个插件来进行打包优化
uglifyjs-webpack-plugin #压缩js代码插件
SourceMapDevToolPlugin # 对 source map 进行更细粒度的控制
这里只需要安装uglifyjs-webpack-plugin即可,其余的webpack自带
使用yarn安装
yarn add uglifyjs-webpack-plugin --dev然后修改webpack.common.config.js
//webpack.common.config.js
const {resolve, join} = require("path");
const HtmlWebpackPlugin = require("html-webpack-plugin");
const MiniCssExtractPlugin = require("mini-css-extract-plugin");
const webpack = require("webpack");
const UglifyjsPlugin = require("uglifyjs-webpack-plugin");
const os = require("os");

const paths = {
  src: resolve(__dirname, "src"),
  dist: resolve(__dirname, "dist"),
  public: resolve(__dirname, "public")
};

const env = process.argv.pop();//获取当前的环境,生产或开发

const ENV = {
  pro: "production",
  dev: "development"
};

const isDev = env === ENV.dev;

module.exports = {
  entry: [
    join(paths.public, "index.html"),
    require.resolve("@babel/polyfill"),
    join(paths.src, "index.jsx"),
  ],
  output: {
    path: paths.dist,
    chunkFilename: isDev ? "[name].[hash].chunk.js" : "[name].chunk.js",
    filename: isDev ? "[name].[hash].js" : "[name].js",
  },
  module: {
    rules: [
      {
        //处理jsx,js
        test: /\.(jsx?)$/,
        exclude: /node_modules/,
        include: paths.src,
        loaders: [
          {
            loader: require.resolve("babel-loader"),
            options: {
              cacheDirectory: isDev,
              sourceMap: isDev
            }
          },
          {//处理jsx里面的css
            loader: require.resolve("astroturf/loader"),
            options: {extension: ".scss"},
          }
        ]
      },
      {
        ///处理html
        test: /\.html?/,
        exclude: /node_modules/,
        include: paths.public,
        use: {
          loader: require.resolve("html-loader"),
          options: {
            minimize: isDev,  //压缩html代码
            sourceMap: isDev  //生产环境可以不用资源映射
          }
        }
      },
      {
        //处理css/scss/sass
        test: /\.(css|scss|sass)$/,
        exclude: /node_modules/,
        include: paths.src,
        loaders: [
          MiniCssExtractPlugin.loader,
          {
            loader: require.resolve("css-loader"),
            options: {
              sourceMap: isDev,  //资源映射
              modules: true,    //是否允许模块
              importLoaders: 20,
              localIdentName: isDev ? "[path][name]__[local]__[hash:base64:5]" : ""
            }
          },
          {
            loader: require.resolve("sass-loader"),
            options: {
              sourceMap: isDev //生产环境没必要使用sourceMap了
            }
          },
          {//使用postcss
            loader: require.resolve("postcss-loader"),
            options: {
              sourceMap: isDev
            }
          },
        ]
      },
      {//处理图片文件
        test: [/\.bmp$/, /\.gif$/, /\.jpe?g$/, /\.png$/],
        exclude: /node_modules/,
        include: paths.src,
        loader: require.resolve("url-loader"),
        options: {
          limit: 8192,//图片在这个范围内,会将图片变成base64减少http请求
          fallback: require.resolve("responsive-loader") //回退的loader
        }
      }
    ]
  },
  //插件项
  plugins: [
    new HtmlWebpackPlugin({
      template: join(paths.public, "index.html"),
      filename: "index.html",
      inject: true,
      minify: isDev ? false : {
        removeComments: true,
        collapseWhitespace: true,
        removeRedundantAttributes: true,
        useShortDoctype: true,
        removeEmptyAttributes: true,
        removeStyleLinkTypeAttributes: true,
        keepClosingSlash: true,
        minifyJS: true,
        minifyCSS: true,
        minifyURLs: true,
      },
    }),
    new MiniCssExtractPlugin({
      filename: isDev ? "[name].[hash].css" : "[name].css",
      chunkFilename: isDev ? "[id].[hash].chunk.css" : "[id].chunk.css"
    }),
    //资源映射
    new webpack.SourceMapDevToolPlugin({
      filename: "[name].js.map",
      exclude: ['vendor.js']
    }),
    //js压缩插件
    new UglifyjsPlugin({
      test: /\.jsx?/,
      include: paths.src,
      exclude: /node_modules/,
      cache: true,
      parallel: os.cpus().length,
      sourceMap: true,
      uglifyOptions: {
        ie8: true,
      }
    }),
  ]
};
插件的话目前这几个就够了,以后要是缺什么可以在安什么。
优化部分
webpack4里面已经把优化的内容集成在了一起,即 optimization选项,更多内容可以参考官网https://webpack.docschina.org/configuration/optimization/
我们需要安装两个插件
terser-webpack-plugin # 使用这个插件来优化压缩js
optimize-css-assets-webpack-plugin # 优化css
使用yarn安装上述插件
yarn add terser-webpack-plugin optimize-css-assets-webpack-plugin --dev我们继续修改webpack.common.config.js
//webpack.common.config.js
const {resolve, join} = require("path");
const HtmlWebpackPlugin = require("html-webpack-plugin");
const MiniCssExtractPlugin = require("mini-css-extract-plugin");
const webpack = require("webpack");
const UglifyjsPlugin = require("uglifyjs-webpack-plugin");
const TerserPlugin = require("terser-webpack-plugin");
const OptimizeCssAssetsPlugin = require("optimize-css-assets-webpack-plugin");
const SafeParser = require("postcss-safe-parser");
const os = require("os");

const paths = {
  src: resolve(__dirname, "src"),
  dist: resolve(__dirname, "dist"),
  public: resolve(__dirname, "public")
};

const env = process.argv.pop();//获取当前的环境,生产或开发

const ENV = {
  pro: "production",
  dev: "development"
};

const isDev = env === ENV.dev;

module.exports = {
  entry: [
    join(paths.public, "index.html"),
    require.resolve("@babel/polyfill"),
    join(paths.src, "index.jsx"),
  ],
  output: {
    path: paths.dist,
    chunkFilename: isDev ? "[name].[hash].chunk.js" : "[name].chunk.js",
    filename: isDev ? "[name].[hash].js" : "[name].js",
  },
  module: {
    rules: [
      {
        //处理jsx,js
        test: /\.(jsx?)$/,
        exclude: /node_modules/,
        include: paths.src,
        loaders: [
          {
            loader: require.resolve("babel-loader"),
            options: {
              cacheDirectory: false,
              sourceMap: isDev
            }
          },
          {//处理jsx里面的css
            loader: require.resolve("astroturf/loader"),
            options: {extension: ".scss"},
          }
        ]
      },
      {
        ///处理html
        test: /\.html?/,
        exclude: /node_modules/,
        include: paths.public,
        use: {
          loader: require.resolve("html-loader"),
          options: {
            minimize: isDev,  //压缩html代码
            sourceMap: isDev  //生产环境可以不用资源映射
          }
        }
      },
      {
        //处理css/scss/sass
        test: /\.(css|scss|sass)$/,
        exclude: /node_modules/,
        include: paths.src,
        loaders: [
          MiniCssExtractPlugin.loader,
          {
            loader: require.resolve("css-loader"),
            options: {
              sourceMap: isDev,  //资源映射
              modules: true,    //是否允许模块
              importLoaders: 20,
              localIdentName: isDev ? "[path][name]__[local]__[hash:base64:5]" : ""
            }
          },
          {
            loader: require.resolve("sass-loader"),
            options: {
              sourceMap: isDev //生产环境没必要使用sourceMap了
            }
          },
          {//使用postcss
            loader: require.resolve("postcss-loader"),
            options: {
              sourceMap: isDev
            }
          },
        ]
      },
      {//处理图片文件
        test: [/\.bmp$/, /\.gif$/, /\.jpe?g$/, /\.png$/],
        exclude: /node_modules/,
        include: paths.src,
        loader: require.resolve("url-loader"),
        options: {
          limit: 8192,//图片在这个范围内,会将图片变成base64减少http请求
          fallback: require.resolve("responsive-loader") //回退的loader
        }
      }
    ]
  },
  //优化

  optimization: {
    minimize: !isDev,//是否压缩
    minimizer: [
     // 优化css
      new OptimizeCssAssetsPlugin({
        cssProcessorOptions: {
          parser: SafeParser,
          map: {inline: false, annotation: true},
        }
      }),

      new TerserPlugin({
        test:/\.jsx?/,
        include:paths.src,
        exclude:/node_modules/,
        terserOptions: {
          parse: {
            ecma: 8
          },
          compress: {
            ecma: 5,
            warning: false,
            comparisons: false,
            inline: 2
          },
          mangle: {
            safari10: true
          },
          output: {
            ecma: 5,
            comment: false,
            ascii_only: true
          },
          parallel: os.cpus().length,
          cache: true,
          sourceMap: isDev
        }
      })
    ],
    namedModules: true,
    namedChunks: true,
    removeAvailableModules: true,
    removeEmptyChunks: true,
    mergeDuplicateChunks: true,
    moduleIds: "hashed",
    splitChunks: {
      chunks: "async",
      name: true,
      cacheGroups: {
       vendor: {
         test:/[\\/]node_modules[\\/]/,
         name: "vendors",
         chunks:"all"
       }
      }
    },
    runtimeChunk: true
  },
  //插件项
  plugins: [
    new HtmlWebpackPlugin({
      template: join(paths.public, "index.html"),
      filename: "index.html",
      inject: true,
      minify: isDev ? false : {
        removeComments: true,
        collapseWhitespace: true,
        removeRedundantAttributes: true,
        useShortDoctype: true,
        removeEmptyAttributes: true,
        removeStyleLinkTypeAttributes: true,
        keepClosingSlash: true,
        minifyJS: true,
        minifyCSS: true,
        minifyURLs: true,
      },
    }),
    new MiniCssExtractPlugin({
      filename: isDev ? "[name].[hash].css" : "[name].css",
      chunkFilename: isDev ? "[id].[hash].chunk.css" : "[id].chunk.css"
    }),
    //资源映射
    new webpack.SourceMapDevToolPlugin({
      filename: "[name].js.map",
      exclude: ['vendor.js']
    }),
    //js压缩插件
    new UglifyjsPlugin({
      test: /\.jsx?/,
      include: paths.src,
      exclude: /node_modules/,
      cache: true,
      parallel: os.cpus().length,
      sourceMap: true,
      uglifyOptions: {
        ie8: true,
      }
    }),
  ]
};
优化部分结束,使用yarn run start 打包,一切ok。
使用happlypack优化打包速度(webpack4已经不需要它了)
webpack4打包速度已经够快了,故已经不需要happlypack来加速打包了,如果对happypack有兴趣的读者,可以查看这里
https://github.com/amireh/happypack
别名配置
到目前为止,项目的搭建已经接近尾声,现在可以开始建文件夹,准备开发了
首先在src下新建components,router,pages,reduxs目录,每个目录是干嘛的上面已经提到了。
现在假设index.jsx要导入这些目录下的jsx或js文件,肯定要这么写
import Xxx from "./components/Button/button.jsx";我们不仅要写 ./ 还要写具体的文件名如.jsx,那么我们可不可以这么写呢
import Xxx from "components/Button/button"答案是可以的,不过我们得在webpack下简单配置
在webpack.common.config.js中添加
//webpack.common.config.js
...省略
//添加别名映射
const devPaths = {
  components: resolve(paths.src,"components"),
  pages: resolve(paths.src,"pages"),
  reduxs: resolve(paths.src,"reduxs"),
  router: resolve(paths.src,"router")
};


module.exports = {
  ...省略
  resolve: {
    extensions: ["*",".jsx",".js"], //加上扩展名
    alias:devPaths //别名
  },
  ...省略

};
到此为止项目的搭建工作已经基本完成,剩下的后期缺什么补什么。
React,React-router,Redux的介绍和使用
由于篇幅原因,这一部分内容我决定在下一篇博客上讲。
本项目已经放到github里: https://github.com/sundial-dreams/ReactRedux/tree/master (如果对你有帮助,别忘了给我个star哦)