版权声明:Arno https://blog.csdn.net/yu342107056/article/details/87895970
先创建两个spring boot 的项目,然后在pom中添加依赖,一个用来发送消息一个用来接收
发送消息
pom.xml 文件中添加依赖
<project xmlns="http://maven.apache.org/POM/4.0.0" xmlns:xsi="http://www.w3.org/2001/XMLSchema-instance"
  xsi:schemaLocation="http://maven.apache.org/POM/4.0.0 http://maven.apache.org/maven-v4_0_0.xsd">
  <modelVersion>4.0.0</modelVersion>
  <groupId>com.arno</groupId>
  <artifactId>springboot-rabbitmq1</artifactId>
  <packaging>war</packaging>
  <version>0.0.1-SNAPSHOT</version>
  <name>springboot-rabbitmq1</name>
  <url>http://maven.apache.org</url>
  <parent>
  	<groupId>org.springframework.boot</groupId>
  	<artifactId>spring-boot-starter-parent</artifactId>
  	<version>1.5.2.RELEASE</version>
  	<relativePath>/</relativePath>
  </parent>
  <dependencies>
   <dependency>
    	<groupId>org.springframework.boot</groupId>
    	<artifactId>spring-boot-starter-web</artifactId>
    </dependency>
    <!-- rabbitmq  添加这个依赖即可 -->
	<dependency>
		<groupId>org.springframework.boot</groupId>
		<artifactId>spring-boot-starter-amqp</artifactId>
  	</dependency>
  </dependencies>
</project>
在application.properties中添加rabbitmq的配置
server.port=9000
server.context-path=/


#Rabbitmq
spring.rabbitmq.host=10.42.91.22
spring.rabbitmq.port=5672
spring.rabbitmq.username=admin
spring.rabbitmq.password=123456
spring.rabbitmq.virtualHost=/admin
创建RabbitMQConfig.java文件
因为无法知道是生产端先启动还是消费端先启动,所以在两边都声明一下队列,防止队列不存在引发问题。
package com.arno.config;

import org.springframework.amqp.core.Binding;
import org.springframework.amqp.core.BindingBuilder;
import org.springframework.amqp.core.DirectExchange;
import org.springframework.amqp.core.Queue;
import org.springframework.context.annotation.Bean;
import org.springframework.context.annotation.Configuration;

@Configuration
public class RabbitMQConfig {
	//声明队列
	@Bean
	public Queue queue01(){
		return new Queue("springboot-queue01");
	}
	@Bean
	public Queue queue02(){
		return new Queue("springboot-queue02");
	}
}
创建MessageController.java 进行发送信息测试
声明了两个队列,所以此处有两个方法,分别发送信息到两个队列中
package com.arno.controller;

import org.springframework.amqp.rabbit.core.RabbitTemplate;
import org.springframework.beans.factory.annotation.Autowired;
import org.springframework.stereotype.Controller;
import org.springframework.web.bind.annotation.RequestMapping;
import org.springframework.web.bind.annotation.ResponseBody;

@Controller
public class MessageController {


	//springboot通过application.properties内的配置创建rabbitmq连接的模板对象,封装了connection和channel
	//各种底层api实现的内容
	@Autowired
	private RabbitTemplate rabbitTemplate;

	@RequestMapping("/sendMessage1")
	@ResponseBody
	public String sendMessage1(String content){
		//发送一条测试信息
		rabbitTemplate.convertAndSend("springboot-queue01",content);
		return "springboot-queue01";

	}
	@RequestMapping("/sendMessage2")
	@ResponseBody
	public String sendMessage2(String content){
		//发送一条测试信息
		rabbitTemplate.convertAndSend("springboot-queue02",content);
		return "springboot-queue02";

	}
}
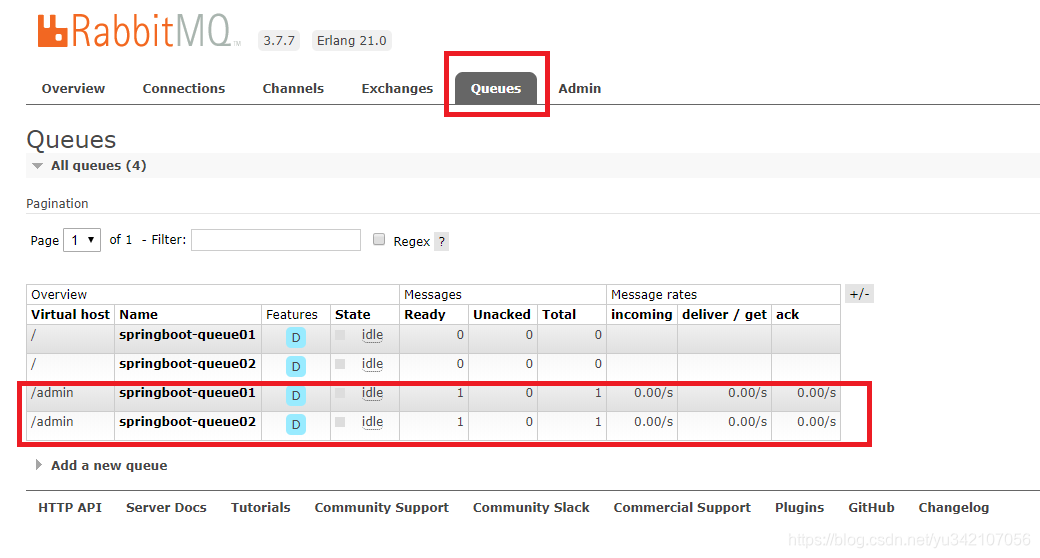
分别用两个请求,请求不同的接口发送数据
http://localhost:9000/sendMessage1?content=1111111111111
http://localhost:9000/sendMessage2?content=222222222
通过RabbitMQ可以看到两个队列中各有一条消息
接收消息
pom.xml、application.properties和RabbitMQConfig.java 文件和发送端一模一样
新建MessageReceive.java 用来处理接收消息
package com.arno.rabbit;

import org.springframework.amqp.rabbit.annotation.RabbitListener;
import org.springframework.stereotype.Component;
//队列的消费端(监听)
@Component
public class MessageService {
	//实现底层的异步监听,将绑定消费者的队列消息传递给本方法的参数
	@RabbitListener(queues="springboot-queue01")
	private void process01(String msg){
		System.out.println("消费者01接受的消息"+msg);
	}
	@RabbitListener(queues="springboot-queue02")
	private void process02(String msg){
		System.out.println("消费者02接受的消息"+msg);
	}
}
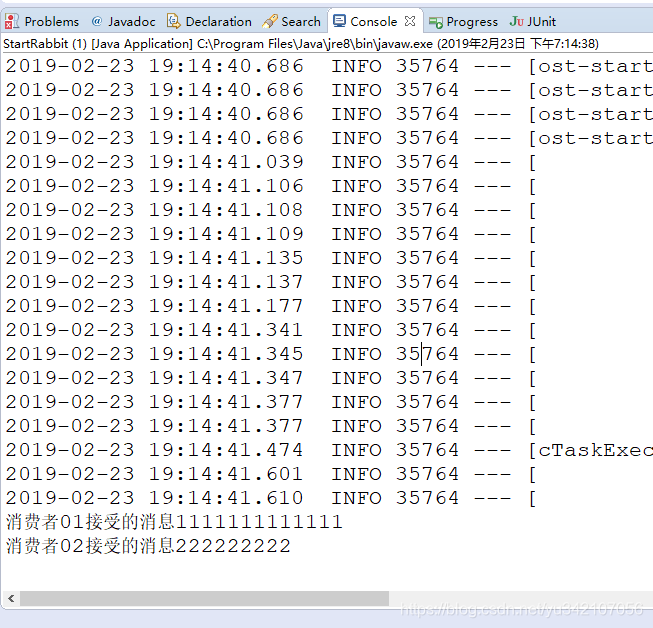
启动项目,监听到队列中有消息未处理,接收消息进行处理。
同理。可以声明交换机,配合交换机和队列做消息处理
	//声明交换机
	@Bean
	public DirectExchange ex(){
		return new DirectExchange("springboot-dirEx");
	}

	//绑定关系,生成绑定的对象binding
	@Bean
	public Binding bingding01(){
		return BindingBuilder.
				bind(queue01()).to(ex()).with("item.#");
	}