2.用互斥量同步
互斥量的作用犹如给某个对象加上一把锁,每次只允许一个线程去访问它。如果想对代码关键部分的访问进行控制,可以在进入这段代码之前锁定一个互斥量,完成操作后再解开它。使用互斥量要用到的基本函数如下:
int pthread_mutex_init(pthread_mutex_t *mutex,const pthread_mutexattr_t *mutexattr);
int pthread_mutex_lock(pthread_mutex_t *mutex);
int pthread_mutext_unlock(pthread_mutex_t *mutex);
int pthread_mutex_destory(pthread_mutex_t *mutex);
参数说明:
- mutex:指向互斥量的数据结构
pthread_mutex_t的指针 - mutexattr:定义互斥量属性的
pthread_mutexattr_t结构的指针,默认类型为fast
如果对一个已经加了锁的互斥量调用pthread_mutex_lock()函数,那么程序本身就会被阻塞。而因为拥有互斥量的那个线程现在也是被阻塞的线程之一,所以互斥量就永远打不开,程序将进入死锁状态。
要避免死锁有两种做法:
- 让它检测有可能发生死锁的这种现象并返回一个错误
- 让它递归操作,允许同一个线程加上好几把锁,但前提是以后必须有同等数量的解锁钥匙。
下例对互斥量操作进行演示:
#include<iostream>
#include<unistd.h>
#include<cstdlib>
#include<cstring>
#include<pthread.h>
#include<semaphore.h>

using std::cin;
using std::cout;
using std::endl;
using std::cerr;
void* thread_function(void* arg);
pthread_mutex_t work_mutex;
const int WORK_SIZE=1024;
char work_area[WORK_SIZE];
int time_to_exit=1;

int main()
{
	int res;
	pthread_t a_thread;
	void* thread_result;
	res=pthread_mutex_init(&work_mutex,NULL);
	if(res!=0)
	{
		cerr<<"初始化互斥量失败"<<endl;
		exit(EXIT_FAILURE);
	}
	res=pthread_create(&a_thread,NULL,thread_function,NULL);
	if(res!=0)
	{
		cerr<<"线程创建失败"<<endl;
		exit(EXIT_FAILURE);
	}
	pthread_mutex_lock(&work_mutex);
	cout<<"请输入要传送的信息,输入end退出"<<endl;
	while(time_to_exit)
	{
		cin.getline(work_area,WORK_SIZE);
		pthread_mutex_unlock(&work_mutex);
		while(1)
		{
			pthread_mutex_lock(&work_mutex);
			if(work_area[0]!='\0')             //判断公共内存空间是否为空
			{
				pthread_mutex_unlock(&work_mutex);
				sleep(1);
			}
			else
				break;
		}
	}
	pthread_mutex_unlock(&work_mutex);
	cout<<"\n等待线程结束...\n";
	res=pthread_join(a_thread,&thread_result);
	if(res!=0)
	{
		cerr<<"线程结束失败"<<endl;
		exit(EXIT_FAILURE);
	}
	cout<<"线程结束"<<endl;
	pthread_mutex_destroy(&work_mutex);
	exit(EXIT_SUCCESS);
}

void* thread_function(void* arg)
{
	sleep(1);
	pthread_mutex_lock(&work_mutex);
	while(strncmp("end",work_area,3)!=0)
	{
		cout<<"收到"<<strlen(work_area)-1<<"个字符"<<endl;
		work_area[0]='\0';
		pthread_mutex_unlock(&work_mutex);
		sleep(1);
		pthread_mutex_lock(&work_mutex);
		while(work_area[0]=='\0')
		{
			pthread_mutex_unlock(&work_mutex);
			sleep(1);
			pthread_mutex_lock(&work_mutex);
		}
	}
	time_to_exit=0;
	work_area[0]='\0';
	pthread_mutex_unlock(&work_mutex);
	pthread_exit(0);
}
运行结果如下图所示:
在程序的开始,首先建立互斥量和公共内存空间,对循环控制表示time_to_exit进行定义。互斥量初始化后,启动新线程,新线程首先试图对互斥量进行加锁。如果当时互斥量已经被锁定,调用会被阻塞,直到互斥量被解除锁定。
新线程获得访问权时,先会检查是否有退出程序的请求,如果有就将循环控制符time_to_exit设置为0,然后清除公共空间内的数据并退出线程。如果没有收到退出请求,则统计公共空间内的字符个数,接下来对互斥量进行解锁并等待原有线程的运行。
实际上,原有线程的运行和新线程的运行时交叉进行的。

五 取消线程
有些时候需要让一个线程能够请求另外一个线程结束,可使用pthread_cancle()函数发送一个要求取消线程的信号。
int pthread_cancel(pthread_t thread);
参数中指定的线程在收到取消请求后,会对自己稍作一些处理,然后结束。在线程函数中可使用
int pthread_setcancelstate(int state,int* oldstate);
参数说明:
- state:状态的设定值,可以是一个枚举常量,定义有
- PTHREAD_CANCEL_ENABLE:允许线程接收取消请求
- PTHREAD_CANCEL_DISABLE:屏蔽取消请求
- oldstate:线程的取消状态,该状态的定义与创建线程的函数相同,如果没有特殊要求可传送NULL
如果取消请求被接受,线程会进入第二个控制层次,用pthread_setcanceltype()函数设置取消类型。
int pthread_setcanceltype(int type,int* oldtype);
参数说明:
- type:可以有两种取值
- PTHREAD_CANCEL_ASYNCHRONOUS:表示线程接受取消请求后立即采取行动
- PTHREAD_CANCEL_DEFERRED:表示在接收到取消请求之后,采取实际行动之前,先执行如下操作:
pthread_join()pthread_cond_wait()pthread_cond_tomewait()pthread_testcancel()sem_wait()sigwait()- 等
下例演示线程取消方法:
#include<iostream>
#include<unistd.h>
#include<cstdlib>
#include<pthread.h>

using std::cin;
using std::cout;
using std::endl;
using std::cerr;

void* thread_function(void* arg);

int main()
{
	int res;
	pthread_t a_thread;
	void* thread_result;
	res=pthread_create(&a_thread,NULL,thread_function,NULL);
	if(res!=0)
	{
		cerr<<"线程创建失败"<<endl;
		exit(EXIT_FAILURE);
	}
	sleep(3);
	cout<<"取消线程...\n";
	res=pthread_cancel(a_thread);
	if(res!=0)
	{
		cerr<<"线程取消失败"<<endl;
		exit(EXIT_FAILURE);
	}
	cout<<"等待线程结束..\n";
	res=pthread_join(a_thread,&thread_result);
	if(res!=0)
	{
		cerr<<"线程结束失败"<<endl;
		exit(EXIT_FAILURE);
	}
	exit(EXIT_SUCCESS);
}

void* thread_function(void* arg)
{
	int i,res;
	res=pthread_setcancelstate(PTHREAD_CANCEL_ENABLE,NULL);
	if(res!=0)
	{
		cerr<<"定义线程状态失败"<<endl;
		exit(EXIT_FAILURE);
	}
	res=pthread_setcanceltype(PTHREAD_CANCEL_DEFERRED,NULL);
	if(res!=0)
	{
		cerr<<"定义线程结束失败"<<endl;
		exit(EXIT_FAILURE);
	}
	cout<<"线程函数正在运行"<<endl;
	for(i=0;i<10;i++)
	{
		cout<<"线程正在运行"<<i<<endl;
		sleep(1);
	}
	pthread_exit(0);
}
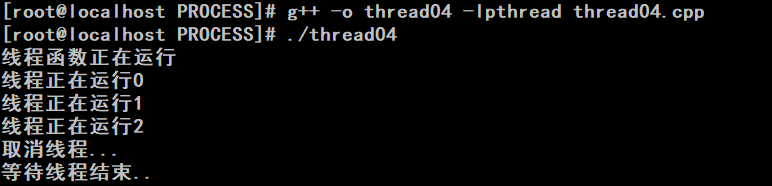
执行结果如下:
上述程序中,原有线程在睡眠3s后,发出一个结束新线程的请求。新线程的取消状态被设置为允许取消,取消的类型为延迟取消。当新线程收到取消请求后,至少执行了pthread_join()函数。这样原有线程就能收到新线程已经取消的消息了。
六 多线程的实现
程序运行时创建的线程可以被当做主线程。主线程可以创建多个线程,而新创建的线程里也能再创建线程。如下例:
#include<iostream>
#include<unistd.h>
#include<cstdlib>
#include<pthread.h>

using std::cin;
using std::cout;
using std::endl;
using std::cerr;
const int NUM_THREADS=6;
void* thread_function(void* arg);

int main()
{
	int res;
	pthread_t a_thread[NUM_THREADS];
	void* thread_result;
	int lots_of_threads;
	for(lots_of_threads=0;lots_of_threads<NUM_THREADS;lots_of_threads++)
	{
		res=pthread_create(&(a_thread[lots_of_threads]),NULL,thread_function,(void*)&lots_of_threads);
		if(res!=0)
		{
			cerr<<"线程创建失败"<<endl;
			exit(EXIT_FAILURE);
		}
		sleep(1);
	}
	cout<<"等待线程结束..\n";
	for(lots_of_threads=NUM_THREADS-1;lots_of_threads>=0;lots_of_threads--)
	{
		res=pthread_join(a_thread[lots_of_threads],&thread_result);
		if(res==0)
			cout<<"结束一个线程\n";
		else
			cerr<<"线程结束失败\n";
	}
	cout<<"线程全部结束\n";
	exit(EXIT_SUCCESS);
}

void* thread_function(void* arg)
{
	int my_number=*(int*) arg;
	int rand_num;
	cout<<"线程函数已运行,参数为:"<<my_number<<endl;
	rand_num=1+(int)(9.0*rand()/(RAND_MAX+1.0));
	sleep(rand_num);
	cout<<"第"<<my_number<<"个线程结束"<<endl;
	pthread_exit(NULL);
}
执行结果如下:
程序中定义了一个线程数组,然后创建多个线程,并将线程的标识符保存在线程数组里。主线程依次等待每个线程的结束。线程函数中,每个线程获得随机的睡眠时间,然后结束。主线程收到所有线程结束的消息后结束。
