前后端分离的开发模式已经越来越流行,但是前后端的开发进度并不能完全保持一致,当前端需要调用后端尚未开发的RESTful接口时不得不等待后端开发完毕,这将影响并行开发的效率。http://wiremock.org就是一款用于解决这个问题的开源框架。WireMock可以快速的伪造RESTful接口并返回伪造的JSON数据。这里简单记录下WireMock的使用方法。
搭建WireMock服务器
我们在本地搭建一个WireMock服务器。通过http://repo1.maven.org/maven2/com/github/tomakehurst/wiremock-standalone/2.18.0/wiremock-standalone-2.18.0.jar下载wiremock-standalone-x.xx.xx.jar,然后使用java -jar命令运行
1 |
java -jar wiremock-standalone-2.18.0.jar --port=8080 |
启动界面: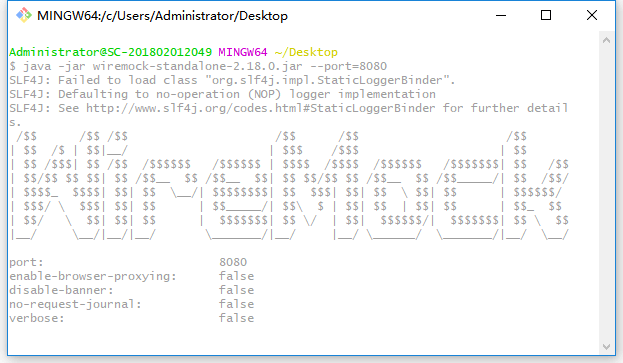
WireMock的简单使用
为了方便,我们在Spring Boot环境里进行编写。
在项目中引入WireMock依赖:
<dependency>

  <groupId>com.github.tomakehurst</groupId>

  <artifactId>wiremock</artifactId>

  <version>2.18.0</version>

</dependency>新建一个MockServer类,包含main方法,并引入com.github.tomakehurst.wiremock.client.WireMock的所有静态方法:
import static com.github.tomakehurst.wiremock.client.WireMock.*;
public class MockService {
public static void main(String[] args) {
// 配置WireMock服务器的地址 http://localhost:8080
configureFor("127.0.0.1", 8080);
// 清除WireMock服务器里之前的配置
removeAllMappings();
//伪造一个get请求,请求地址为 /user/1,然后返回体包含JSON数据,状态为200
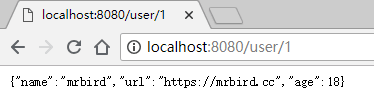
stubFor(get(urlEqualTo("/user/1"))
.willReturn(aResponse()
.withBody("{\"name\":\"mrbird\",\"url\":\"https://mrbird.cc\",\"age\":18}")
.withStatus(200)));
}
}上面代码主要分为三个步骤:
-
使用
configureFor方法配置WireMock服务器的地址为http://localhost:8080; -
调用
removeAllMappings清除WireMock服务器里所有配置; -
调用
stubFor打桩,并模拟了一个HTTP GET请求,然后返回200状态码,返回报文头部包含JSON信息。这里URL使用方法urlEqualTo全匹配,WireMock也提供了正则表达式匹配URL的方法。
在配置完了后运行main方法,就可以将我们的配置写到WireMock服务器里,这时候在浏览器中调用http://localhost:8080/user/1便能看到我们模拟的输出结果:
这里推荐个在线JSON编辑器:https://www.bejson.com/jsoneditoronline/。
简单封装
我们可以对上面的代码进行简单的封装,方便重用:
import org.apache.commons.io.FileUtils;

import org.apache.commons.lang3.StringUtils;

import org.springframework.core.io.ClassPathResource;

private static void getMock(String url, String file) throws IOException {

  ClassPathResource resource = new ClassPathResource("mock/response/" + file);

  String content = StringUtils.join(FileUtils.readLines(resource.getFile(), "UTF-
     8").toArray(), "\n");

 stubFor(get(urlPathEqualTo(url)).willReturn(aResponse().withBody(content).withStatus(200)));

}我们在src/main/resource/mock/response目录下创建一个user.json文件:上面代码封装了一个getMock方法,用于处理get类型的Mock,参数为模拟URL和模拟JSON文件。
{

"name": "mrbird",

"url": "https://mrbird.cc",

"age": 18

}
后面我们只需要像下面这样调用就行了:
1 |
getMock("/user/1", "user.json"); |
WireMock还提供了许多别的功能,具体可以参考官方文档 http://wiremock.org/docs/。