Maven
- Maven是一款项目管理工具,与ant和gradle同是主流的项目管理工具,博主只会maven,后续学习后出两篇文章看看。
Maven安装
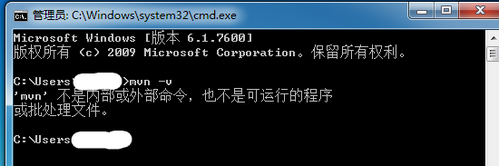
1. 命令行模式下输入mvn -v提示如下图即为电脑未安装maven。
2. 下载maven
- 官方链接:https://maven.apache.org/download.cgi
- 私人链接:https://pan.baidu.com/s/14a8QhdVqnpA97NyM8OR6hA 提取码:kpq9
apache-maven-3.6.0-bin.zip 支持jdk1.7以上
3. 配置环境变量
- 高级系统变量路径:计算机-右键-属性。(这一步只针对电脑小白,微笑脸)
- M2_HOME:maven安装目录环境变量(名称可自定义,一般叫M2_HOME或Maven_HOME)
- path: 系统路径全局变量(;%M2_HOME%\bin)


4. 测试
- 输入mvn -v或mvn -version如有下图提示表示安装成功。

Maven pom.xml
Dependencies(依赖库)通过groupId,artifactId,version确定唯一依赖,如同依赖库中的坐标。
- groupId:组织的唯一标识。
- artifactId:项目唯一标识。
- version:项目版本。
下图代码作为pom.xml模板可供一览。
<project xmlns="http://maven.apache.org/POM/4.0.0" xmlns:xsi="http://www.w3.org/2001/XMLSchema-instance" xsi:schemaLocation="http://maven.apache.org/POM/4.0.0 http://maven.apache.org/xsd/maven-4.0.0.xsd">
  <modelVersion>4.0.0</modelVersion>
  <groupId>com.genghb</groupId>
  <artifactId>mavenTest</artifactId>
  <version>0.0.1-SNAPSHOT</version>

  <!-- 自定义配置变量 -->
  <properties>
  	<fastjosn-version>1.2.56</fastjosn-version>
  </properties>

  <!-- 项目依赖 -->
  <dependencies>
	<dependency>
	    <groupId>com.alibaba</groupId>
	    <artifactId>fastjson</artifactId>
	    <version>${fastjosn-version}</version>
	</dependency>
  </dependencies>

  	<!-- 编译插件 -->
	<build>
		<plugins>
			<plugin>
				    <groupId>org.apache.maven.plugins</groupId>
				    <artifactId>maven-compiler-plugin</artifactId>
				    <version>3.8.0</version>
					<configuration>
						<source>1.7</source>
						<target>1.7</target>
					</configuration>
			</plugin>
		</plugins>
	</build>
</project>
Maven运作方式
- 个人理解:Maven通过%M2_HOME%\conf文件夹下的setting.xml文件中的mirrors标签配置的中心库链接到对应的中心库,然后根据pom.xml文件中的Dependencies标签查找到对应的Dependency下载到本地setting.xml文件中的localRepository标签中的本地地址。
Tips:一般Dependency可在maven中心库找到,找不到jar包如果能下载到jar包也可选择手动导入工程。
setting.xml模板如下:
<?xml version="1.0" encoding="UTF-8"?>
<settings xmlns="http://maven.apache.org/SETTINGS/1.0.0"
          xmlns:xsi="http://www.w3.org/2001/XMLSchema-instance"
          xsi:schemaLocation="http://maven.apache.org/SETTINGS/1.0.0 http://maven.apache.org/xsd/settings-1.0.0.xsd">
<!-- 本地仓库地址-->
  <localRepository>D:\software\.m2\</localRepository>

  <pluginGroups>
  </pluginGroups>

  <proxies>
  </proxies>

  <servers>
  </servers>

<!-- 镜像地址-->
  <mirrors>
	 <mirror>
      <id>alimaven</id>
      <name>aliyun maven</name>
      <url>http://maven.aliyun.com/nexus/content/groups/public/</url>
      <mirrorOf>central</mirrorOf>
    </mirror>
  </mirrors>

  <profiles>
  </profiles>

</settings>
Maven工程设置setting.xml(默认eclipse)
- 设置路径:windows-->preferences-->maven-->user Settings,User Settings设置完后,local Repository会自动引入上图settings.xml中的local Repository路径,应用即可。如下图所示。

- 测试:保存后可去local Repository路径下看是否有导入jar包文件夹或者看工程maven dependencies下看是否有jar包引入。如果没有可试着右键工程-maven-update project-ok即可。(一般有个force Update of Snapshots/Releases(强制更新)按钮,可选。)
