一、服务端渲染
1.基本概念
Vue.js 是构建客户端应用程序的框架。默认情况下,可以在浏览器中输出 Vue 组件,进行生成 DOM 和操作 DOM。然而,也可以将同一个组件渲染为服务器端的 HTML 字符串,将它们直接发送到浏览器,最后将这些静态标记"激活"为客户端上完全可交互的应用程序。
2.为什么要使用服务端渲染
优点:
(1)更好的 SEO,由于搜索引擎爬虫抓取工具可以直接查看完全渲染的页面。
(2)更快的内容到达时间(time-to-content),特别是对于缓慢的网络情况或运行缓慢的设备。无需等待所有的 JavaScript 都完成下载并执行,才显示服务器渲染的标记,所以你的用户将会更快速地看到完整渲染的页面。
缺点:
(1)开发条件有限
(2)涉及构建设置和部署的更多要求
(3)更多的服务器端负载
3.服务器渲染和预渲染
少数页面静态化,预渲染效果更好。页面很多,需求量比较大的话可以直接选择SSR
二、开发环境搭建
1.npm init
2.cnpm install vue express vue-server-renderer --save
3.cat>>server.js
4.在server.js编辑如下:
/* server.js */
const Vue = require('vue')
const express = require('express')()
const renderer = require('vue-server-renderer').createRenderer()
// 创建Vue实例
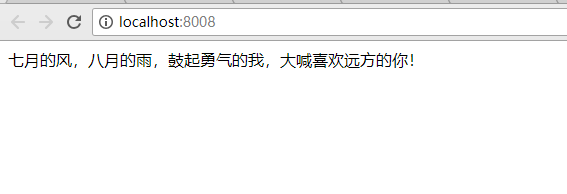
const app = new Vue({
template: '<div>七月的风,八月的雨,鼓起勇气的我,大喊喜欢远方的你!</div>'
})
// 响应路由请求
express.get('/', (req, res) => {
renderer.renderToString(app, (err, html) => {
if (err) { return res.state(500).end('运行时错误') }
res.send(`
<!DOCTYPE html>
<html lang="en">
<head>
<meta charset="UTF-8">
<title>Vue2.0 SSR渲染页面</title>
</head>
<body>
${html}
</body>
</html>
`)
})
})
// 服务器监听地址
express.listen(8008, () => {
console.log('SSR服务器已启动!')
});
5.启动node服务:nodemon serber.js ,成功后打印如下:
[nodemon] 1.17.5
[nodemon] to restart at any time, enter `rs`
[nodemon] watching: *.*
[nodemon] starting `node server.js`
SSR服务器已启动!
6.浏览器地址输入: http://localhost:8008 ,页面展示如下

三、VUE服务端项目构建 (为了SEO优化,以及静态页面输出)
1.目录结构如下:

2.package.json依赖安装情况如下:
{
  "name": "ssr",
  "version": "1.0.0",
  "description": "",
  "main": "index.js",
  "scripts": {
    "server": "webpack --config ./webpack/webpack.server.js",
    "client": "webpack --config ./webpack/webpack.client.js"
  },
  "author": "",
  "license": "ISC",
  "dependencies": {
    "axios": "^0.16.0",
    "babel": "^6.23.0",
    "babel-plugin-transform-runtime": "^6.23.0",
    "babel-polyfill": "^6.26.0",
    "babel-preset-env": "^1.7.0",
    "body-parser": "^1.18.3",
    "compression": "^1.7.2",
    "express": "^4.15.4",
    "express-http-proxy": "^1.2.0",
    "gulp": "^3.9.1",
    "gulp-shell": "^0.6.5",
    "http-proxy-middleware": "^0.18.0",
    "less": "^3.0.4",
    "less-loader": "^4.1.0",
    "shell": "^0.5.0",
    "superagent": "^3.8.3",
    "vue": "^2.2.2",
    "vue-meta": "^1.5.0",
    "vue-router": "^2.2.0",
    "vue-server-renderer": "^2.2.2",
    "vue-ssr-webpack-plugin": "^3.0.0",
    "vuex": "^2.2.1",
    "vuex-router-sync": "^4.2.0"
  },
  "devDependencies": {
    "babel-core": "^6.26.3",
    "babel-loader": "^6.4.1",
    "babel-preset-es2015": "^6.24.1",
    "css-loader": "^0.28.4",
    "style-loader": "^0.18.2",
    "vue-loader": "^11.3.4",
    "vue-template-compiler": "^2.2.4",
    "webpack": "^2.7.0"
  }
}
3.编辑main.js这个入口脚本文件,如下:
import Vue from 'vue'
import createRouter from './routes.js'
import App from './app.vue'


// export 一个函数,用于创建新的vue实例
export function createVM(){

    const router = createRouter();

    const vm = new Vue({
        router,
        render: h => h(App)
    });

    return vm;
}
4.编辑routes.js,如下:
import Vue from 'vue'
import Router from 'vue-router'

Vue.use(Router);

const routes = [
    { alias: '/', path: '/mv', component: require('./routes/mv.vue') },
    { path: '/lyric', component: require('./routes/lyric.vue') },
    { path: '/song', component: require('./routes/song.vue') }
];

export default function createRouter(){

   let vueRouter = new Router({
        mode: 'history',
        routes
   });

   return vueRouter;
}
5.编辑组件文件,如下:
<template>
    <section class="lyric">
        lyric
    </section>
</template>


<script scoped>
    export default {

    }
</script>

<style stylus="less" scoped>

</style>
四、SSR服务端构建
1.新增目录文件结构

2.babel配置文件.babelrc配置如下:
{
      "presets": [
            "babel-preset-env"
      ],
      "plugins": [
            "transform-runtime"
      ]
}
3.server.js编辑如下:
/* server.js */
const exp = require('express')
const express = require('express')()
const renderer = require('vue-server-renderer').createRenderer()
const createApp = require('./dist/bundle.server.js')['default']


// 响应路由请求
express.get('*', (req, res) => {

    const context = { url: req.url }


    // 创建vue实例,传入请求路由信息
    createApp(context).then(app => {
        renderer.renderToString(app, (err, html) => {
            if (err) { return res.state(500).end('运行时错误') }
            res.send(`
                <!DOCTYPE html>
                <html lang="en">
                    <head>
                        <meta charset="UTF-8">
                        <title>Vue2.0 SSR渲染页面</title>
                    </head>
                    <body>
                        <div id="app">
                            ${html}
                        </div>
                    </body>
                </html>
            `)
        })
    }, err => {
        if(err.code === 404) { res.status(404).end('所请求的页面不存在') }
    })
})


// 服务器监听地址
express.listen(8008, () => {
    console.log('SSR服务器已启动!')
});
4.entry-server.js 编辑如下:
import { createVM } from '../src/main.js'

export default context => {
    return new Promise((resolve, reject) => {
        const vm = createVM();

        // 切换路由
        vm.$router.push(context.url);

        // 获取响应路由下的组件,注:router.getMatchedComponents(location?) 返回目标位置或是当前路由匹配的组件数组 (是数组的定义/构造类,不是实例)。通常在服务端渲染的数据预加载时
        const matchedComponent = vm.$router.getMatchedComponents();

        //如果没有组件,则说明该路由不存在,报错404
        if(matchedComponent.length <= 0){
            return reject({code:404});
        }

        resolve(vm);

    })
}
5.webpack.server.js 编辑如下:
const path = require('path');
const rootPath = path.resolve(__dirname,'..');
// const VueLoaderPlugin = require('vue-loader/lib/plugin');

module.exports = {

    target: 'node', // 此处告知 server bundle 使用 Node 风格导出模块(Node-style exports)
    entry: ['babel-polyfill', path.join(rootPath, 'entry/entry-server.js')],
    output: {
        libraryTarget: 'commonjs2',
        path: path.join(rootPath,'dist'),
        filename: 'bundle.server.js'
    },
    module: {
        rules: [
            {
                test: /\.vue$/,  // 注意千万不要加引号,不然会报错
                loader: 'vue-loader'
            },
            {
                test: /\.js$/,
                loader: 'babel-loader',
                include: rootPath,
                exclude: /node_modules/,
                options: {
                    presets: ['es2015']
                }
            },
            {
                test: /\.less$/,
                loader: 'style-loader!css-loader!less-loader'
            }
        ]
    },
    plugins: [
        // make sure to include the plugin!
        // new VueLoaderPlugin()
    ],
    resolve: {
        alias: {
            'vue$': 'vue/dist/vue.runtime.esm.js'
        }
    }

};
6. 运行如下,报错信息如下:
Module parse failed: D:\me\vue\vue-ssr\src\routes\song.vue Unexpected token (1:0)
You may need an appropriate loader to handle this file type.
| <template>
|     <section class="song">
|         song
 @ ./src/routes.js 9:32-60
 @ ./src/main.js
 @ ./entry/entry-server.js
 @ multi babel-polyfill ./entry/entry-server.js
7. 解决办法如下:
花了几个小时终于找到错误:test后面的正则表达式,不需要加引号,我加了个单引号,一直报错,无法解析.vue文件,让我配vue-loader,绝望到无语,最终删除单引号即可。
注意:但是在vue-loader版本高于15.x.x依旧会报错,因为需要引入plugins
const VueLoaderPlugin = require('vue-loader/lib/plugin');

plugins: [
    // make sure to include the plugin!
    new VueLoaderPlugin()
]
8. 成功后打印如下:
D:\me\vue\vue-ssr>npm run server

> [email protected] server D:\me\vue\vue-ssr
> webpack --config ./webpack/webpack.server.js

(node:16172) DeprecationWarning: loaderUtils.parseQuery() received a non-string value which can be problematic, see https://github.com/webpack/loader-utils/issues/56
parseQuery() will be replaced with getOptions() in the next major version of loader-utils.
Hash: 29143afec7a32af59f62
Version: webpack 2.7.0
Time: 2578ms
           Asset    Size  Chunks                    Chunk Names
bundle.server.js  617 kB       0  [emitted]  [big]  main
 [166] ./entry/entry-server.js 967 bytes {0} [built]
 [167] ./~/[email protected]@babel-polyfill/lib/index.js 833 bytes {0} [built]
 [172] ./src/main.js 704 bytes {0} [built]
 [174] ./~/[email protected]@babel-runtime/core-js/promise.js 88 bytes {0} [built]
 [175] ./~/[email protected]@core-js/fn/regexp/escape.js 108 bytes {0} [built]
 [398] ./~/[email protected]@core-js/modules/es7.symbol.async-iterator.js 43 bytes {0} [built]
 [399] ./~/[email protected]@core-js/modules/es7.symbol.observable.js 40 bytes {0} [built]
 [400] ./~/[email protected]@core-js/modules/es7.system.global.js 144 bytes {0} [built]
 [401] ./~/[email protected]@core-js/modules/es7.weak-map.from.js 113 bytes {0} [built]
 [402] ./~/[email protected]@core-js/modules/es7.weak-map.of.js 109 bytes {0} [built]
 [403] ./~/[email protected]@core-js/modules/es7.weak-set.from.js 113 bytes {0} [built]
 [404] ./~/[email protected]@core-js/modules/es7.weak-set.of.js 109 bytes {0} [built]
 [408] ./~/[email protected]@core-js/shim.js 8.22 kB {0} [built]
 [409] ./~/[email protected]@regenerator-runtime/runtime.js 24.4 kB {0} [built]
 [419] multi babel-polyfill ./entry/entry-server.js 40 bytes {0} [built]
    + 405 hidden modules
9. 运行node服务:node server.js ,成功启动服务,如下图:

五、SSR客户端构建(为了正常无刷新切换路由组建)
1.构建目录文件,如下图:

2. 在页面植入客户端脚本
/* server.js */

//...

// 新增 +
const clientBoundleFileUrl = '/bundle.client.js'

// 新增 + 设置静态文件目录
express.use('/', exp.static(__dirname + '/dist'))


// 响应路由请求
express.get('*', (req, res) => {

    const context = { url: req.url }

    // 创建vue实例,传入请求路由信息
    createApp(context).then(app => {
        renderer.renderToString(app, (err, html) => {
            if (err) { return res.state(500).end('运行时错误') }
            res.send(`
                <!DOCTYPE html>
                <html lang="en">
                    <head>
                        <meta charset="UTF-8">
                        <title>Vue2.0 SSR渲染页面</title>

                        <!-- 新增脚本引入 -->
                        <script src="${clientBoundleFileUrl}"></script>

                    </head>
                    <body>
                        <div id="app">
                            ${html}
                        </div>
                    </body>
                </html>
            `)
        })
    }, err => {
        if(err.code === 404) { res.status(404).end('所请求的页面不存在') }
    })
})


// ...
3. 配置客户端脚本入口文件
/* entry-client.js */
import { createVM } from '../src/main'

const vm = createVM()

// 绑定app根元素
window.addEventListener('load',(e) => {
    vm.$mount('#app');
});
4. 客户端webpack打包配置
const path = require('path');
const rootPath = path.resolve(__dirname,'..');


module.exports = {
    entry: ['babel-polyfill', path.join(rootPath, 'entry/entry-client.js')],
    output: {
        path: path.join(rootPath, 'dist'),
        filename: 'bundle.client.js',
    },
    module: {
        rules: [{
                    test: /\.vue$/,
                    loader: 'vue-loader'
              },
              {
                    test: /\.js$/,
                    loader: 'babel-loader',
                    include: rootPath,
                    exclude: /node_modules/,
                    options: {
                          presets: ['es2015']
                    }
              }
        ]
    },
    plugins: [],
    resolve: {
        alias: {
              'vue$': 'vue/dist/vue.runtime.esm.js'
        }
    }
};
5. 打包运行,成功如下图
npm run server
npm run client
node server.js
接下来就可以,客户端无刷新切换路由及组件了;而且定位页面地址时,出现的也是当前路由下面的静态页面。而且客户端服务端,基本上互不干扰。只是刷新页面的时候,才回去服务器拉取,当前路由对应下面的静态内容渲染到页面。
六、进阶,实现完整的服务端渲染
在上面两个小例子,我们只实现了静态页面的渲染,并没有相关的异步加载渲染页面和vuex植入的情况,所以接下来我们需要解决这个问题,实现完全的服务端渲染,还等什么呢? Let’s Go !
1.修改服务端入口文件
服务端需要在渲染阶段前获取到相关的请求信息,然后将信息写入到vue实例当中,再通过vue渲染器渲染成字符串,插入到html文件中
修改entry-server.js如下,在返回的Promise中,遍历组建内部的请求,且执行所有的请求,最终返回vue实例对象
import { createVM } from '../src/main.js'

export default context => {
    return new Promise((resolve, reject) => {
        const vm = createVM();

        // 切换路由
        vm.$router.push(context.url);

        // 获取响应路由下的组件,注:router.getMatchedComponents(location?) 返回目标位置或是当前路由匹配的组件数组 (是数组的定义/构造类,不是实例)。通常在服务端渲染的数据预加载时
        const matchedComponent = vm.$router.getMatchedComponents();

        //如果没有组件,则说明该路由不存在,报错404
        if(matchedComponent.length <= 0){
            return reject({code: 404});
        }

        //新增+ :遍历路由下所有的组件,如果有请求则执行请求
        Promise.all(matchedComponent.map(v => {
            if (v.sendRequest) {
                return v.sendRequest(vm.$store)
            }
        })).then(() => {
            context.state = vm.$store.state;
            resolve(vm);
        }).catch(reject);

    })
}
2.新增store.js ,且在组建内部实现vuex数据绑定
(1)新增store.js
/* store.js */

import Vue from 'vue'
import Vuex from 'vuex'
import axios from 'axios'

Vue.use(Vuex)

export default function createStore() {

    let store = new Vuex.Store({
        state:{
            info: ''
        },
        actions:{
            getInfo({ commit }) {
                return axios.get('http://localhost:8008/api/info').then(res => {
                    commit('setInfo' , res.data.data)
                })
            }
        },
        mutations: {
            setInfo(state, res) {
                state.info = res;
            }
        }
    })

    return store
}
(2)在mv.vue该组件中,绑定state属性
<template>
    <section class="mv">
        mv
        <div>{{mvInfo}}</div>
    </section>
</template>


<script scoped>
    export default {
        sendRequest(store){
            return store.dispatch('getInfo');
        },
        computed: {
            mvInfo(){
                return this.$store.state.info;
            }
        }
    }
</script>

<style stylus="less" scoped>

</style>
(3)在main.js中引入store.js
import Vue from 'vue'
import createRouter from './routes.js'
import createStore from './vuex/store.js'
import App from './app.vue'

// export 一个函数,用于创建新的vue实例
export function createVM(){

    const router = createRouter();
    const store = createStore();

    const vm = new Vue({
        router,
        store,
        render: h => h(App)
    });

    return vm;
}
3.在server.js服务其文件中新增api路由,返回测试数据
express.get('/api/info', (req, res) => {
    res.json({code:0, data:'This"s my mv info.It"s name is 《 way back home 》.'});
});
4.重新打包,启动服务
npm run server
node server.js
5.运行成功,执行效果如下:

七、最后一步,同步服务端客户端数据
在第六部完成后,基本可以实现服务端的完全渲染了,但是还有一个问题就是,客户端的vue实例和服务端的vue实例并非一个,所以说内置属性值,当然不一样,所以需要桥接的方式同步服务端和客户端的数据
1.修改entry-server.js,新增如下:
import { createVM } from '../src/main.js'

export default context => {
    return new Promise((resolve, reject) => {
        const vm = createVM();

        // 切换路由
        vm.$router.push(context.url);


        const matchedComponent = vm.$router.getMatchedComponents();

        //如果没有组件,则说明该路由不存在,报错404
        if(matchedComponent.length <= 0){
            return reject({code: 404});
        }

        //新增:遍历路由下所有的组件,如果有请求则执行请求
        Promise.all(matchedComponent.map(v => {
            if (v.sendRequest) {
                return v.sendRequest(vm.$store)
            }
        })).then(() => {
            // 新增+
            context.state = vm.$store.state;
            resolve(vm);
        }).catch(reject);

    })
}
2.在server.js,渲染字符串的时候新增全局属性 __INTRIAL_STATE__,植入到script脚本字符串中
//...
res.send(`
    <!DOCTYPE html>
    <html lang="en">
        <head>
            <meta charset="UTF-8">
            <title>Vue2.0 SSR渲染页面</title>
            <script> window.__INITIRAL_STATE__ = ${JSON.stringify(context.state)} </script>
            <script src="${clientBoundleFileUrl}"></script>
        </head>
        <body>
            <div id="app">
                ${html}
            </div>
        </body>
    </html>
`)
//...
3.在entry-client.js中新增数据赋值,把全局属性 __INTRIAL_STATE__ 的值赋值给客户端vue实例上挂载的vm.$store.state上
//...

//同步服务端数据信息
if(window.__INITIRAL_STATE__){
    console.log(window.__INITIRAL_STATE__);
    vm.$store.replaceState(JSON.parse(window.__INITIRAL_STATE__));
}

//...
4.客服端、服务端重新打包,node重启服务
npm run client
npm run server
node server.js
运行成功后显示:

注:github源码地址:https://github.com/RiversCoder/vue-ssr