版权声明:欢迎转载,转载请注明出处哦! https://blog.csdn.net/qq_41647999/article/details/88891253
目录直通车
1) 通过 MultipartFile img 拿到图片文件的流
3、 通过配置 WebMvcConfigurerAdapter 映射本地文件到URL
1、 导入依赖包:
<!-- https://mvnrepository.com/artifact/commons-io/commons-io -->
<dependency>
    <groupId>commons-io</groupId>
    <artifactId>commons-io</artifactId>
    <version>2.6</version>
</dependency>
2、 使用 springmvc 中的 mulitypart
1) 通过 MultipartFile img 拿到图片文件的流
2) 使用 IOUtils 将图片保存到本地
这里的JSONResult是使用代码生成工具规范的一个JSON格式而已。
 @RequestMapping("/addSubmit.do")
    public JSONResult addSubmit(String name,String description,Long schoolid
                          , String remark, MultipartFile img) {
        Sport model=new Sport();
        model.setName(name);
        model.setDescription(description);
        model.setSchoolid(schoolid);
        model.setStatus(false);
        model.setRemark(remark);
        InputStream inputStream = null;
        FileOutputStream outputStream = null;
        if(img!=null&&img.getSize()>0) {
            String imgName = UUID.randomUUID().toString() + img.getOriginalFilename();
            try {
                inputStream = img.getInputStream();
                outputStream = new FileOutputStream(new File(imgPath + "/" + imgName));
                IOUtils.copy(inputStream, outputStream);
                //图片名imgName
                model.setImg(imgName);
            } catch (IOException e) {
                e.printStackTrace();
            }
        }
        service.addSubmit(model);
        return JSONResult.ok("添加成功");
    }
3、 通过配置 WebMvcConfigurerAdapter 映射本地文件到URL
import org.springframework.context.annotation.Configuration;
import org.springframework.web.servlet.config.annotation.ResourceHandlerRegistry;
import org.springframework.web.servlet.config.annotation.WebMvcConfigurerAdapter;

@Configuration
public class MyWebMvcConfiguration extends WebMvcConfigurerAdapter {
    //配置本地文件映射到url上
    @Override
    public void addResourceHandlers(ResourceHandlerRegistry registry) {
        //重写方法
        //修改tomcat 虚拟映射
        registry.addResourceHandler("/images/**").
                addResourceLocations("file:D:/img/");//定义图片存放路径
    }

}
我的图片存放地址如下:

访问地址使用:URL+ / images /xxx.jpg ,示例如下:

4、 通过PostMan测试上传是否成功
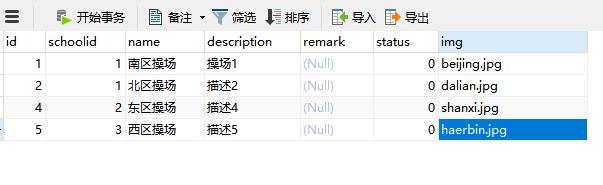
下面是数据库的字段:
使用PostMan提交数据:

上传图片:

Send之后查看服务器上存放的文件夹目录:

上传成功!
这篇文章仅提供思路而已。