上一篇文章>Django安装及基础配置
一、本机环境
操作系统:Red Hat Enterprise Linux Server release 7.3 (Maipo)
Python版本:python3.6
Django版本:Django-2.1.5
[root@python _Django]# tree Dream
Dream
├── app
│   ├── admin.py
│   ├── apps.py
│   ├── __init__.py
│   ├── migrations
│   │   └── __init__.py
│   ├── models.py
│   ├── tests.py
│   └── views.py
├── db.sqlite3
├── Dream
│   ├── __init__.py
│   ├── __pycache__
│   │   ├── __init__.cpython-36.pyc
│   │   ├── settings.cpython-36.pyc
│   │   ├── urls.cpython-36.pyc
│   │   └── wsgi.cpython-36.pyc
│   ├── settings.py
│   ├── urls.py
│   └── wsgi.py
├── manage.py
├── static
│   └── jquery-1.12.4.min.js
└── templates
二、Django视图
1、radio获取值(一个)
(1)配置urls.py
[root@python Dream]# vim Dream/urls.py
from django.contrib import admin
from django.urls import path
from app import views
urlpatterns = [
    path('admin/', admin.site.urls),
    path('index/', views.index),
    path('test/', views.test),
]
(2)配置views.py
[root@python Dream]# vim app/views.py
from django.shortcuts import render
from django.shortcuts import HttpResponse
from django.shortcuts import redirect

def index(request):
    return HttpResponse('Index')

def test(request):
    if request.method == "GET":
            return render(request,'test.html')
    elif request.method == "POST":
        v = request.POST.get('gender')
        print (v)
        return render(request, 'test.html')
    else:
        return redirect('/index/')
(3)配置HTML
[root@python Dream]# vim templates/test.html
<!DOCTYPE html>
<html lang="en">
<head>
    <meta charset="UTF-8">
    <title>Title</title>
</head>
<body>
<form action="/test/" method="POST">
    <p>
        <div>gender:</div>
        男:<input type="radio" name="gender" value="1" />
        女:<input type="radio" name="gender" value="2" />
    </p>
    <input type="submit" value="提交" />
</form>
</body>
</html>
(4)访问
[root@python Dream]# python manage.py runserver 10.10.10.111:8000
http://10.10.10.111:8000/test/         ###浏览器访问
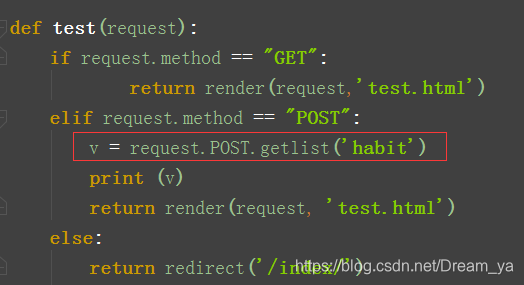
2、checkbox获取多个值
获取的结果为一个列表!!!
(1)配置views.py
[root@python Dream]# vim app/views.py
(2)配置HTML
[root@python Dream]# vim templates/test.html
<!DOCTYPE html>
<html lang="en">
<head>
    <meta charset="UTF-8">
    <title>Title</title>
</head>
<body>
<form action="/test/" method="POST">
    <p>
        <div>gender:</div>
        男:<input type="radio" name="gender" value="1" />
        女:<input type="radio" name="gender" value="2" />
    </p>
    <p>
        <div>habit:</div>
        篮球:<input type="checkbox" name="habit" value="11" />
        足球:<input type="checkbox" name="habit" value="22" />
        桌球:<input type="checkbox" name="habit" value="33" />
    </p>
    <input type="submit" value="提交" />
</form>
</body>
</html>
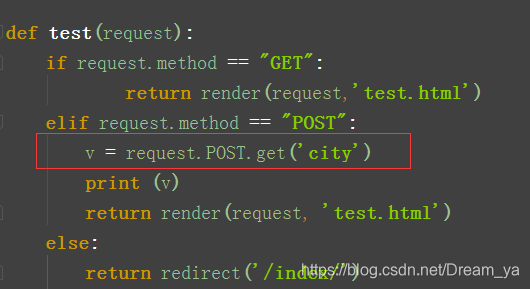
3、select
(1)获取一个值
<1> 配置views.py
[root@python Dream]# vim app/views.py
<2> 配置HTML
[root@python Dream]# vim templates/test.html
<!DOCTYPE html>
<html lang="en">
<head>
    <meta charset="UTF-8">
    <title>Title</title>
</head>
<body>
<form action="/test/" method="POST">
    <p>
        <div>gender:</div>
        男:<input type="radio" name="gender" value="1" />
        女:<input type="radio" name="gender" value="2" />
    </p>
    <p>
        <div>habit:</div>
        篮球:<input type="checkbox" name="habit" value="11" />
        足球:<input type="checkbox" name="habit" value="22" />
        桌球:<input type="checkbox" name="habit" value="33" />
    </p>
    <p>
        <select name="city">
            <option value="sc">四川</option>
            <option value="cq">重庆</option>
            <option value="zj">浙江</option>
        </select>
    </p>
    <input type="submit" value="提交" />
</form>
</body>
</html>
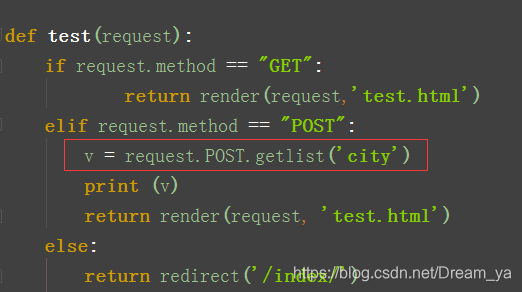
(2)获取多个值
<1>配置views.py
[root@python Dream]# vim app/views.py
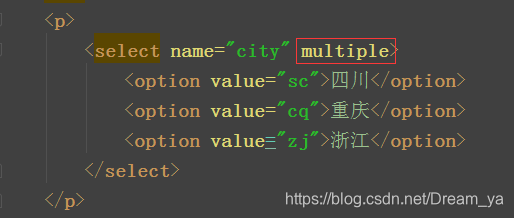
<2> 配置HTML
[root@python Dream]# vim templates/test.html
4、上传文件
(1)说明
### form标签做特殊处理
obj = request.FILES.get('uploadFile')
print (obj,type(obj),obj.name)
filePath = os.path.join('upload',obj.name)
with open(filePath, mode='wb') as f:
    for i in obj.chunks():
        f.write(i)
(2)配置views.py
[root@python Dream]# vim app/views.py
from django.shortcuts import render
from django.shortcuts import HttpResponse
from django.shortcuts import redirect
import os

def index(request):
    return HttpResponse('Index')

def test(request):
    if request.method == "GET":
            return render(request,'test.html')
    elif request.method == "POST":
        obj = request.FILES.get('uploadFile')
        print (obj,type(obj),obj.name)
        filePath = os.path.join('upload',obj.name)
        with open(filePath, mode='wb') as f:
            for i in obj.chunks():
                f.write(i)
        return render(request, 'test.html')
    else:
        return redirect('/index/')
(3)配置HTML
[root@python Dream]# vim templates/test.html
<!DOCTYPE html>
<html lang="en">
<head>
    <meta charset="UTF-8">
    <title>Title</title>
</head>
<body>
<!--enctype:指定上传的为文件-->
<form action="/test/" method="POST" enctype="multipart/form-data">
    <p>
        <div>gender:</div>
        男:<input type="radio" name="gender" value="1" />
        女:<input type="radio" name="gender" value="2" />
    </p>
    <p>
        <div>habit:</div>
        篮球:<input type="checkbox" name="habit" value="11" />
        足球:<input type="checkbox" name="habit" value="22" />
        桌球:<input type="checkbox" name="habit" value="33" />
    </p>
    <p>
        <select name="city" multiple>
            <option value="sc">四川</option>
            <option value="cq">重庆</option>
            <option value="zj">浙江</option>
        </select>
    </p>
    <p>
        <input type="file" name="uploadFile">
    </p>
    <input type="submit" value="提交" />
</form>
</body>
</html>
可以发现
upload目录下面多了我们上传的文件!!!
三、FBV、CBV和dispatch
1、介绍
function base view
	urls.py
		index -->> 函数名
	views.py
		def 函数(request):
			...

CBV:
	index -->> 类
2、FBV
可以发现我们刷新页面就会打印GET,点击提交就会打印POST!!!
(1)配置urls.py
[root@python Dream]# vim Dream/urls.py
from django.contrib import admin
from django.urls import path
from app import views
urlpatterns = [
    path('admin/', admin.site.urls),
    path('index/', views.index),
    path('test/', views.test),
    path('home/', views.Home.as_view()),
]
(2)配置views.py
[root@python Dream]# vim app/views.py
from django.shortcuts import render
from django.shortcuts import HttpResponse
from django.shortcuts import redirect
import os

def index(request):
    return HttpResponse('Index')

def test(request):
    if request.method == "GET":
            return render(request,'test.html')
    elif request.method == "POST":
        obj = request.FILES.get('uploadFile')
        print (obj,type(obj),obj.name)
        filePath = os.path.join('upload',obj.name)
        with open(filePath, mode='wb') as f:
            for i in obj.chunks():
                f.write(i)
        return render(request, 'test.html')
    else:
        return redirect('/index/')

### 加入下面这段
from django.views import View
class Home(View):
    def get(self,request):
        print (request.method)
        return render(request, 'home.html')
    def post(self,request):
        print (request.method)
        return render(request, 'home.html')
(3)配置HTML
[root@python Dream]# vim templates/home.html
<!DOCTYPE html>
<html lang="en">
<head>
    <meta charset="UTF-8">
    <title>Title</title>
</head>
<body>
<form action="/home/" method="post">
    <input type="text" name="user">
    <input type="submit">
</form>
</body>
</html>
(4)访问
http://10.10.10.111:8000/home/
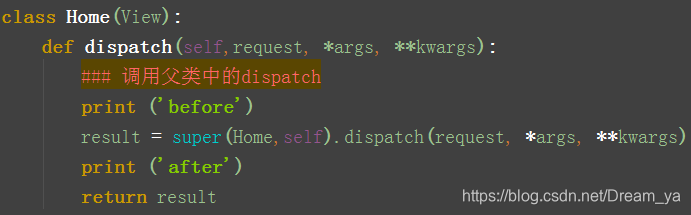
3、自定义dispatch
可以发现我们可以通过在dispatch中加入我们想要的效果,有点类似装饰器的效果!!!
[root@python Dream]# vim app/views.py
def dispatch(self,request, *args, **kwargs):
    ### 调用父类中的dispatch
    print ('before')
    result = super(Home,self).dispatch(request, *args, **kwargs)
    print ('after')
    return result
四、路由系统URL
1、方式一(正常获取)
(1)配置urls.py
[root@python Dream]# vim Dream/urls.py
(2)配置views.py
[root@python Dream]# vim app/views.py
from django.shortcuts import render
from django.shortcuts import HttpResponse
from django.shortcuts import redirect
import os
...
### 加入下面
USER_DICT = {
'1':{'name':'dream','age':22,'gender':'男'},
'2':{'name':'dreamya','age':21,'gender':'男'},
'3':{'name':'dream1','age':23,'gender':'男'},
}
### 修改之前的index
def index(request):
return render(request,'index.html',{'userDict':USER_DICT})
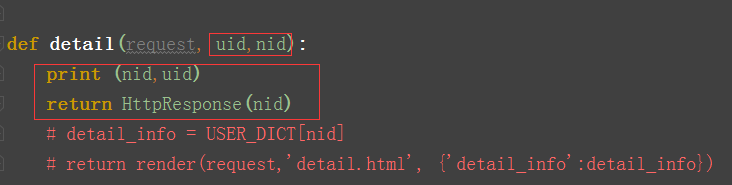
def detail(request):
nid = request.GET.get('nid')
detail_info = USER_DICT[nid]
return render(request,'detail.html', {'detail_info':detail_info})
(3)配置HTML
<1>配置index.html
[root@python Dream]# vim templates/index.html
<!DOCTYPE html>
<html lang="en">
<head>
    <meta charset="UTF-8">
    <title>Title</title>
</head>
<body>
    <ul>
        {% for index,value in userDict.items %}
        <li><a target="_blank" href="/detail/?nid={{ index }}">{{ value.name }}</a></li>
        {% endfor %}
    </ul>
</body>
</html>
<2> 配置detail.html
[root@python Dream]# vim templates/detail.html
<!DOCTYPE html>
<html lang="en">
<head>
    <meta charset="UTF-8">
    <title>Title</title>
</head>
<body>
    <h1>info:</h1>
    <h5>用户名:{{ detail_info.name }}</h5>
    <h5>年龄:{{ detail_info.age }}</h5>
    <h5>性别:{{ detail_info.gender }}</h5>
</body>
</html>
2、方式二(网址加上数字)
我们会觉得上面的那种方式不好看,我们介绍另外一种方式,访问地址变为数字加html!!!
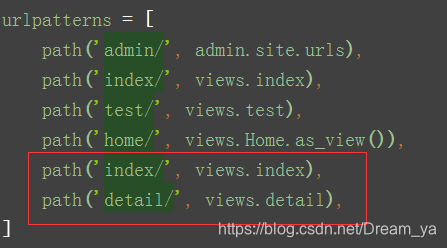
(1)配置urls.py
[root@python Dream]# vim Dream/urls.py
from django.contrib import admin
from django.urls import path
from app import views
### 写正则Django2需要导入此模块
from django.urls import re_path
urlpatterns = [
    path('admin/', admin.site.urls),
    path('index/', views.index),
    path('test/', views.test),
    path('home/', views.Home.as_view()),
    path('index/', views.index),
    # path('detail/', views.detail),
    re_path(r'^detail-(\d+).html', views.detail),
]
(2)配置views.py
[root@python Dream]# vim app/views.py

(2)配置HTML
[root@python Dream]# vim templates/detail.html
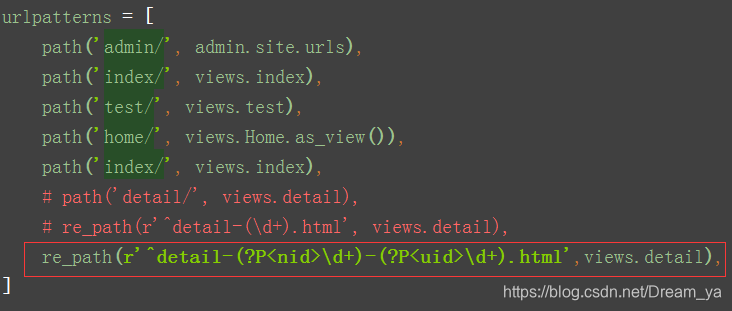
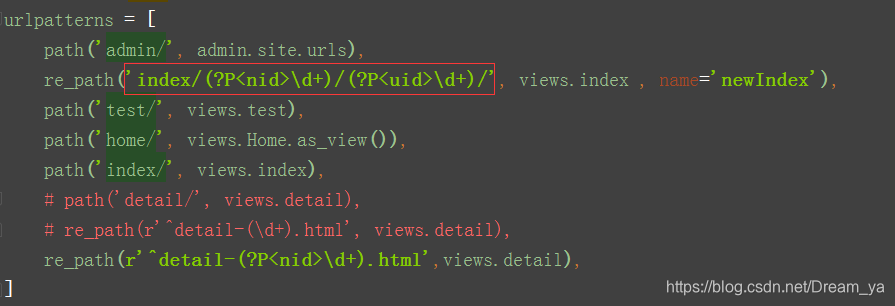
3、方式三(通过正则)
(1)配置urls.py
[root@python Dream]# vim Dream/urls.py
re_path(r'^detail-(?P<nid>\d+)-(?P<uid>\d+).html',views.detail),
(2)配置views.py
可以发现我们直接获取nid不用管上面的顺序!!!
[root@python Dream]# vim app/views.py
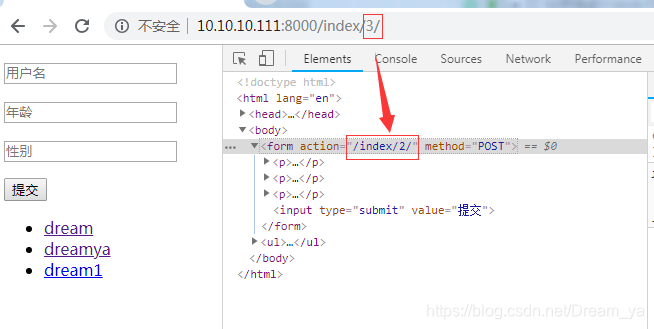
4、方式四(name)
优点:方便修改url地址
我们可以发现form表单的地址自动进行修改!!!
(1)配置urls.py
[root@python Dream]# vim Dream/urls.py

(2)配置views.py
[root@python Dream]# vim app/views.py      ###恢复views
from django.shortcuts import render
from django.shortcuts import HttpResponse
from django.shortcuts import redirect
import os

def index(request):
    return HttpResponse('Index')

def test(request):
    if request.method == "GET":
            return render(request,'dict.html')
    elif request.method == "POST":
        obj = request.FILES.get('uploadFile')
        print (obj,type(obj),obj.name)
        filePath = os.path.join('upload',obj.name)
        with open(filePath, mode='wb') as f:
            for i in obj.chunks():
                f.write(i)
        return render(request, 'dict.html')
    else:
        return redirect('/index/')

from django.views import View
class Home(View):
    def dispatch(self,request, *args, **kwargs):
        ### 调用父类中的dispatch
        print ('before')
        result = super(Home,self).dispatch(request, *args, **kwargs)
        print ('after')
        return result

    def get(self,request):
        print (request.method)
        return render(request, 'home.html')
    def post(self,request):
        print (request.method)
        return render(request, 'home.html')

USER_DICT = {
    '1':{'name':'dream','age':22,'gender':'男'},
    '2':{'name':'dreamya','age':21,'gender':'男'},
    '3':{'name':'dream1','age':23,'gender':'男'},
}
def index(request):
    return render(request,'index.html',{'userDict':USER_DICT})

def detail(request, nid):
    detail_info = USER_DICT[nid]
    return render(request,'detail.html', {'detail_info':detail_info})
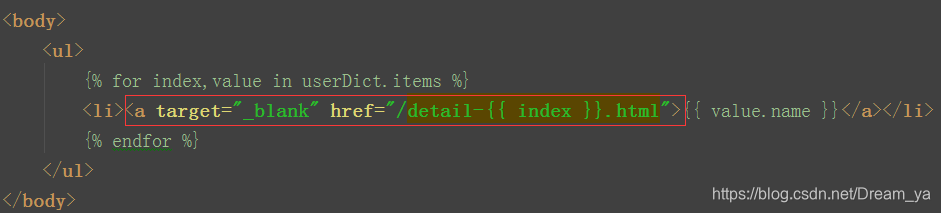
(3)配置HTML
[root@python Dream]# vim templates/index.html
<!DOCTYPE html>
<html lang="en">
<head>
    <meta charset="UTF-8">
    <title>Title</title>
</head>
<body>
    <form action="{% url 'newIndex' %}" method="POST">
        <p><input type="text" name="user" placeholder="用户名"></p>
        <p><input type="text" name="age" placeholder="年龄"></p>
        <p><input type="text" name="gender" placeholder="性别"></p>
        <input type="submit" value="提交">
    </form>
    <ul>
        {% for index,value in userDict.items %}
        <li><a target="_blank" href="/detail-{{ index }}.html">{{ value.name }}</a></li>
        {% endfor %}
    </ul>
</body>
</html>
(4)提交到一个固定的网页
<1> 配置urls.py
[root@python Dream]# vim Dream/urls.py
from django.contrib import admin
from django.urls import path
from app import views
### 写正则Django2需要导入此模块
from django.urls import re_path
urlpatterns = [
    path('admin/', admin.site.urls),
    re_path('index/(\d+)/', views.index , name='newIndex'),
    path('test/', views.test),
    path('home/', views.Home.as_view()),
    path('index/', views.index),
    # path('detail/', views.detail),
    # re_path(r'^detail-(\d+).html', views.detail),
    re_path(r'^detail-(?P<nid>\d+).html',views.detail),
]
<2> 配置HTML
[root@python Dream]# vim templates/index.html
<!DOCTYPE html>
<html lang="en">
<head>
    <meta charset="UTF-8">
    <title>Title</title>
</head>
<body>
    <form action="{% url 'newIndex' 2 %}" method="POST">
        <p><input type="text" name="user" placeholder="用户名"></p>
        <p><input type="text" name="age" placeholder="年龄"></p>
        <p><input type="text" name="gender" placeholder="性别"></p>
        <input type="submit" value="提交">
    </form>
    <ul>
        {% for index,value in userDict.items %}
        <li><a target="_blank" href="/detail-{{ index }}.html">{{ value.name }}</a></li>
        {% endfor %}
    </ul>
</body>
</html>
<3> 配置views.py
[root@python Dream]# vim app/views.py

<4> 访问
http://10.10.10.111:8000/index/3/
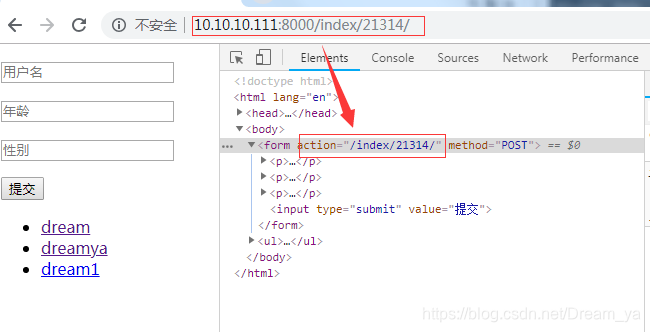
5、获取当前URL
action传入地址修改为:
request.path_info即可!!!
[root@python Dream]# vim templates/index.html
<!DOCTYPE html>
<html lang="en">
<head>
    <meta charset="UTF-8">
    <title>Title</title>
</head>
<body>
    <form action="{{ request.path_info }}" method="POST">
        <p><input type="text" name="user" placeholder="用户名"></p>
        <p><input type="text" name="age" placeholder="年龄"></p>
        <p><input type="text" name="gender" placeholder="性别"></p>
        <input type="submit" value="提交">
    </form>
    <ul>
        {% for index,value in userDict.items %}
        <li><a target="_blank" href="/detail-{{ index }}.html">{{ value.name }}</a></li>
        {% endfor %}
    </ul>
</body>
</html>
6、通过reverse获取网页
导入模块方法:from django.urls import reverse
(1)reverse
<1> 配置views.py
[root@python Dream]# vim app/views.py      ###修改index
def index(request,nid):
    from django.urls import reverse
    v = reverse('newIndex', args=(10,))
    print (v)
    return render(request,'index.html',{'userDict':USER_DICT})
<2> 访问
http://10.10.10.111:8000/index/13/ ###可以发现虽然访问的13,但是访问的是10
(2)reverse(kwargs)
<1> 配置urls.py
[root@python Dream]# vim Dream/urls.py
<2> 配置views.py
[root@python Dream]# vim app/views.py
def index(request,nid,uid):
    from django.urls import reverse
    v = reverse('newIndex', kwargs={'nid':1,'uid':2,})
    print (v)
    return render(request,'index.html',{'userDict':USER_DICT})
<3> 配置HTML
[root@python Dream]# vim templates/index.html

<4> 访问
http://10.10.10.111:8000/index/1/4/
7、路由分发(include)
(1)建立一个新app(app01)
[root@python Dream]# python manage.py startapp app01
(2)配置urls.py
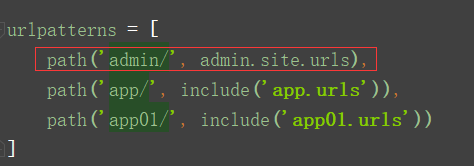
[root@python Dream]# vim Dream/urls.py
from django.contrib import admin
from django.urls import path
from django.urls import re_path
from django.urls import include
urlpatterns = [
    path('app/',include('app.urls')),
    path('app01/',include('app01.urls'))
]
(3)配置urls.py
[root@python Dream]# vim app/urls.py
from django.contrib import admin
from django.urls import path
from app import views
from django.urls import re_path

urlpatterns = [
    path('includeapp/', views.includeapp),
]
(4)配置views.py
[root@python Dream]# vim app/views.py ###添加includeapp
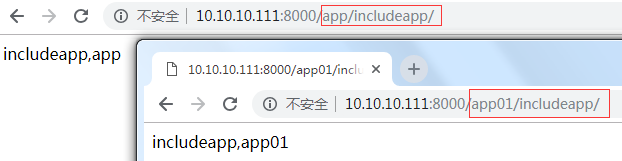
def includeapp(request):
return HttpResponse('includeapp,app')
(5)配置app01的urls.py
[root@python Dream]# vim app01/urls.py
from django.contrib import admin
from django.urls import path
from app01 import views
from django.urls import re_path

urlpatterns = [
    path('includeapp/', views.includeapp),
]
(6)配置配置app01的/views.py
[root@python Dream]# vim app01/views.py            ###添加includeapp
from django.shortcuts import render
from django.shortcuts import HttpResponse
def includeapp(request):
    return HttpResponse('includeapp,app01')
五、ORM操作
1、安装Mariadb并连接
(1)安装Mariadb
其他操作:https://blog.csdn.net/Dream_ya/article/details/79246862
[root@python ~]# yum install -y mariadb-server
[root@python ~]# systemctl restart mariadb
[root@python ~]# systemctl enable mariadb

[root@python Dream]# mysql_secure_installation       ###初始化
...
Enter current password for root (enter for none):    ###回车
Set root password? [Y/n] y
New password:                ###输入新密码
Re-enter new password:       ###重新输入
...
Remove anonymous users? [Y/n] y
...
Disallow root login remotely? [Y/n] y
...
Remove test database and access to it? [Y/n] y
...
Reload privilege tables now? [Y/n] y
...
(2)设置中文
[root@python Dream]# mysql -uroot -p1                 ###账户:root,密码:1
MariaDB [(none)]> show variables like '%char%';       ###查看之前数据库字符
+--------------------------+----------------------------+
| Variable_name            | Value                      |
+--------------------------+----------------------------+
| character_set_client     | utf8                       |
| character_set_connection | utf8                       |
| character_set_database   | latin1                     |
| character_set_filesystem | binary                     |
| character_set_results    | utf8                       |
| character_set_server     | latin1                     |
| character_set_system     | utf8                       |
| character_sets_dir       | /usr/share/mysql/charsets/ |
+--------------------------+----------------------------+
[root@python Dream]# vim /etc/my.cnf         ###在mysqld那一块下面加入
character_set_server=utf8
init_connect='SET NAMES utf8'

### 重启数据库即可,当然我们之前创建的数据库还是无法写入中文,但是我们新建的库可以实现中文的写入!!!
MariaDB [(none)]> show variables like '%char%';
+--------------------------+----------------------------+
| Variable_name            | Value                      |
+--------------------------+----------------------------+
| character_set_client     | utf8                       |
| character_set_connection | utf8                       |
| character_set_database   | utf8                       |
| character_set_filesystem | binary                     |
| character_set_results    | utf8                       |
| character_set_server     | utf8                       |
| character_set_system     | utf8                       |
| character_sets_dir       | /usr/share/mysql/charsets/ |
+--------------------------+----------------------------+
(3)创建数据库并授权
[root@python Dream]# mysql -uroot -p1     ###账户:root,密码:1
MariaDB [(none)]> create database django;
MariaDB [(none)]> show databases;
+--------------------+
| Database           |
+--------------------+
| information_schema |
| django             |
| mysql              |
| performance_schema |
+--------------------+

MariaDB [(none)]> GRANT ALL PRIVILEGES ON *.* TO 'root'@'%' IDENTIFIED BY '1';
(4)测试远程登陆
[root@server ~]# mysql -h 10.10.10.111 -uroot -p1
2、Django连接数据库
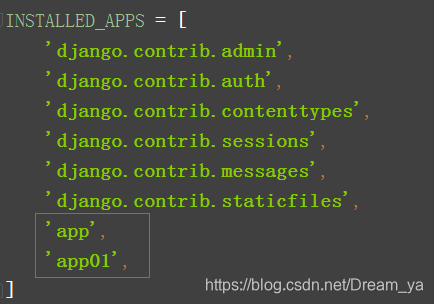
(1)配置settings.py
添加我们新建的app名字!!!
[root@python Dream]# vim Dream/settings.py
(2)配置models.py
[root@python Dream]# vim app/models.py
from django.db import models
### 表名app_userinfo
class UserInfo(models.Model):
    ### id列,自增,主键
    ### 用户名列,字符串类型,指定长度
    username = models.CharField(max_length=32)
    password = models.CharField(max_length=64)
(3)修改配置文件settings.py
[root@python Dream]# vim Dream/settings.py     ###修改此处,NAME:数据库名
DATABASES = {
    # 'default': {
    #     'ENGINE': 'django.db.backends.sqlite3',
    #     'NAME': os.path.join(BASE_DIR, 'db.sqlite3'),
    # }
    'default': {
        'ENGINE': 'django.db.backends.mysql',
        'NAME': 'django',
        'USER': 'root',
        'PASSWORD': '1',
        'HOST': '10.10.10.111',
        'PORT': '3306',

        'OPTIONS': {
            'autocommit': True,
            # 数据校验
            'init_command': "SET sql_mode='STRICT_TRANS_TABLES'",
        }
    }
}
(4)运行报错
<1> 报错
django.core.exceptions.ImproperlyConfigured: Error loading MySQLdb module.
Did you install mysqlclient?
<2> 解决方案
在python2.x,大家是用:MySQLdb 。但是python3.x的玩家已经不用这个了。用:pymysql。
(5)安装pymysql
<1> 下载地址
https://github.com/PyMySQL/PyMySQL/
https://github.com/PyMySQL/PyMySQL/releases
<2> 下载安装
[root@python ~]# wget https://github.com/PyMySQL/PyMySQL/archive/v0.9.3.tar.gz
[root@python ~]# tar xf v0.9.3.tar.gz
[root@python ~]# cd PyMySQL-0.9.3/
[root@python PyMySQL-0.9.3]# python setup.py install
<3> 测试
[root@python mysql]# python
Python 3.6.0 (default, Jan  8 2019, 01:08:29)
[GCC 4.8.5 20150623 (Red Hat 4.8.5-11)] on linux
Type "help", "copyright", "credits" or "license" for more information.
>>> import pymysql
<4> 调用pymysql
### 当前项目调用
[root@python Dream]# vim Dream/__init__.py       ###项目的项目名下的__init__.py,(其他项目还要写入)
import pymysql
pymysql.install_as_MySQLdb()

### 此方法所有都会调用
[root@python ~]# vim /usr/local/lib/python3.6/site-packages/Django-2.1.5-py3.6.egg/django/db/backends/mysql/__init__.py
import pymysql
pymysql.install_as_MySQLdb()
(5)运行项目
<1> 生成数据到数据库中
[root@python Dream]# python manage.py makemigrations
Migrations for 'app':
  app/migrations/0001_initial.py
    - Create model UserInfo

[root@python Dream]# ls app/migrations/
0001_initial.py  __init__.py  __pycache__

[root@python Dream]# python manage.py migrate
[root@python Dream]# python manage.py runserver 10.10.10.111:8000
<2> 查看数据库中数据
[root@python Dream]# mysql -uroot -p1
MariaDB [(none)]> use django;
MariaDB [django]> show tables;
+----------------------------+
| Tables_in_django           |
+----------------------------+
| app_userinfo               |             ###我们生成app_userinfo表
| auth_group                 |
| auth_group_permissions     |
| auth_permission            |
| auth_user                  |
| auth_user_groups           |
| auth_user_user_permissions |
| django_admin_log           |
| django_content_type        |
| django_migrations          |
| django_session             |
+----------------------------+

MariaDB [django]> desc app_userinfo;
+----------+-------------+------+-----+---------+----------------+
| Field    | Type        | Null | Key | Default | Extra          |
+----------+-------------+------+-----+---------+----------------+
| id       | int(11)     | NO   | PRI | NULL    | auto_increment |
| username | varchar(32) | NO   |     | NULL    |                |
| password | varchar(64) | NO   |     | NULL    |                |
+----------+-------------+------+-----+---------+----------------+
对于对数据库操作不够熟悉的,可以通过
Navicat来实现对数据库的可视化!!!
3、创建数据
(1)配置urls.py
[root@python Dream]# vim app/urls.py

(2)二种写法
[root@python Dream]# vim app/views.py
from django.shortcuts import render
from django.shortcuts import HttpResponse
from django.shortcuts import redirect
import os

from app import models
def orm(request):
    ### 第一种,推荐
    # models.UserInfo.objects.create(
    #     username='dream',
    #     password='123',
    # )
    d = {'username': 'dream', 'password': '123', }
    models.UserInfo.objects.create(**d)
    ### 第二种
    # obj = models.UserInfo(username='dream',password='123',)
    # obj.save()
    return HttpResponse('insert ok!!!')
(3)访问
http://10.10.10.111:8000/app/orm/ ###浏览器访问
(4)查看数据库数据
[root@python ~]# mysql -uroot -p1
MariaDB [(none)]> select * from django.app_userinfo;
+----+----------+----------+
| id | username | password |
+----+----------+----------+
|  1 | dream    | 123      |
+----+----------+----------+
4、查询
[root@python Dream]# vim app/views.py         ###注释到之前的
from django.shortcuts import render
from django.shortcuts import HttpResponse
from django.shortcuts import redirect
import os

from app import models
def orm(request):
    ### 查询
    res = models.UserInfo.objects.all()    ###查询所有
    #res = models.UserInfo.objects.filter(username='dream')    ###查找username为dream
    # res,QuerySet(Django) ==>> []
    # <QuerySet [<UserInfo: UserInfo object (1)>, <UserInfo: UserInfo object (2)>]>
    # print (res)
    for i in res:
        print (i.id, i.username, i.password)
    return HttpResponse('ok!!!')
http://10.10.10.111:8000/app/orm/ ###浏览器访问
5、删除
(1)在数据库加入数据
### 我们刚插入了2条数据
MariaDB [django]> select * from app_userinfo;
+----+----------+----------+
| id | username | password |
+----+----------+----------+
|  1 | dream    | 123      |
|  2 | dreamya  | 456      |
+----+----------+----------+
(2)配置views.py
[root@python Dream]# vim app/views.py         ###注释到之前的
from app import models
def orm(request):
    ### 删除
    models.UserInfo.objects.filter(password='456').delete()
    return HttpResponse('ok!!!')
6、更新数据
(1)配置views.py
[root@python Dream]# vim app/views.py      ###注释到之前的,所有的密码都修改为111
from app import models
def orm(request):
    ### 更新
    models.UserInfo.objects.all().update(password='111')
    return HttpResponse('ok!!!')
(2)对输入进行限制
[root@python Dream]# vim app/models.py
### 表名app_userinfo
class UserInfo(models.Model):
    ### id列,自增,主键
    ### 用户名列,字符串类型,指定长度
    username = models.CharField(max_length=32)
    password = models.CharField(max_length=64)
    email = models.EmailField(max_length=20, null=True)
(3)执行后,可以发现多了eamil这列
[root@python Dream]# python manage.py makemigrations
[root@python Dream]# python manage.py migrate
[root@python Dream]# python manage.py runserver 10.10.10.111:8000
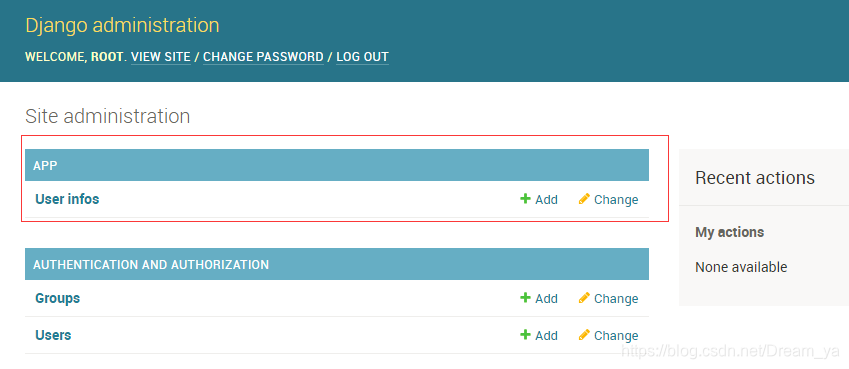
(4)我们可以在admin中查看到
<1> 配置admin.py
[root@python Dream]# vim app/admin.py
from django.contrib import admin
from app import models
admin.site.register(models.UserInfo)
<2> 配置urls.py
[root@python Dream]# vim Dream/urls.py
<3> 访问
###如果没有创建用户:python manage.py createsuperuser
http://10.10.10.111:8000/admin
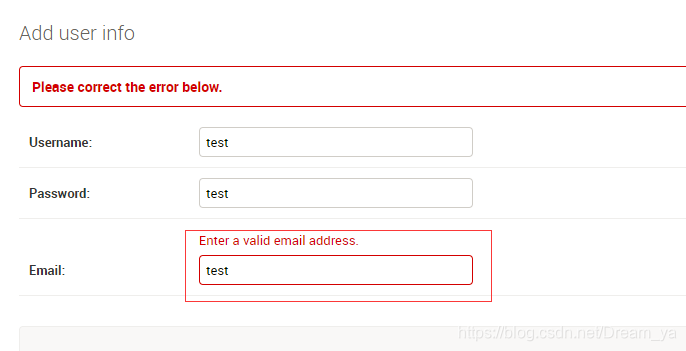
<4> 点击Add必须邮箱格式
7、配置自增
(1)配置models.py
自增(primary_key=True)
[root@python Dream]# vim app/models.py
from django.db import models
class UserGroup(models.Model):
    ### 自增id
    uid = models.AutoField(primary_key=True)
    caption = models.CharField(max_length=16)

# Create your models here.
### 表名app_userinfo
class UserInfo(models.Model):
    ### id列,自增,主键
    ### 用户名列,字符串类型,指定长度
    username = models.CharField(max_length=32)
    password = models.CharField(max_length=64)
    email = models.EmailField(max_length=20, null=True)
[root@python Dream]# python manage.py makemigrations
[root@python Dream]# python manage.py migrate
[root@python Dream]#  python manage.py runserver 10.10.10.111:8000
(2)字段参数
null                  ###db是否可以为空
default               ### 默认值
primary_key           ### 主键
db_column             ### 列名
db_index              ### 索引
unique			      ###唯一索引
unique_for_date       ###时间索引
unique_for_month      ###月索引
unique_for_year       ###年索引
auto_now_add          ###创建时,自动生成时间
auto_now              ###更新时,自动更新为当前时间
	# obj = UserGroup.objects.filter(id=1).update(caption='CEO')    ###这样不会更新
	###下面的才会更新
	# obj = UserGroup.objects.filter(id=1).first()
	# obj.caption = "dream"
	# obj.save()
choices			      ###django admin中显示下拉框,避免连表查询
blank                 ###django admin是否可以为空
verbose_name          ###django admin显示字段中文
editable              ###django admin是否可以被编辑
error_messages        ###错误信息,error_messages={'required': '用户名不能为空'}
help_text             ###django admin提示
validators		      ###django form ,自定义错误信息
8、时间auto
(1)配置admin.py
[root@python Dream]# vim app/admin.py
from django.contrib import admin
from app import models
admin.site.register(models.UserInfo)
admin.site.register(models.UserGroup)
(2)配置models.py
[root@python Dream]# vim app/models.py
from django.db import models
class UserGroup(models.Model):
    ### 自增id
    uid = models.AutoField(primary_key=True)
    caption = models.CharField(max_length=16, unique=True)
    ctime = models.DateTimeField(auto_now_add=True, null=True)
    uptime = models.DateTimeField(auto_now=True, null=True)

### 表名app_userinfo
class UserInfo(models.Model):
    ### id列,自增,主键
    ### 用户名列,字符串类型,指定长度
    username = models.CharField(max_length=32)
    password = models.CharField(max_length=64)
    email = models.EmailField(max_length=20, null=True)
(3)访问
http://10.10.10.111:8000/admin/ ###访问后usergoups中添加
(4)数据库中查看
MariaDB [(none)]> select * from django.app_usergroup;
+-----+---------+----------------------------+----------------------------+
| uid | caption | ctime                      | uptime                     |
+-----+---------+----------------------------+----------------------------+
|   1 | dream   | 2019-01-17 06:43:46.114803 | 2019-01-17 06:43:46.114844 |
+-----+---------+----------------------------+----------------------------+
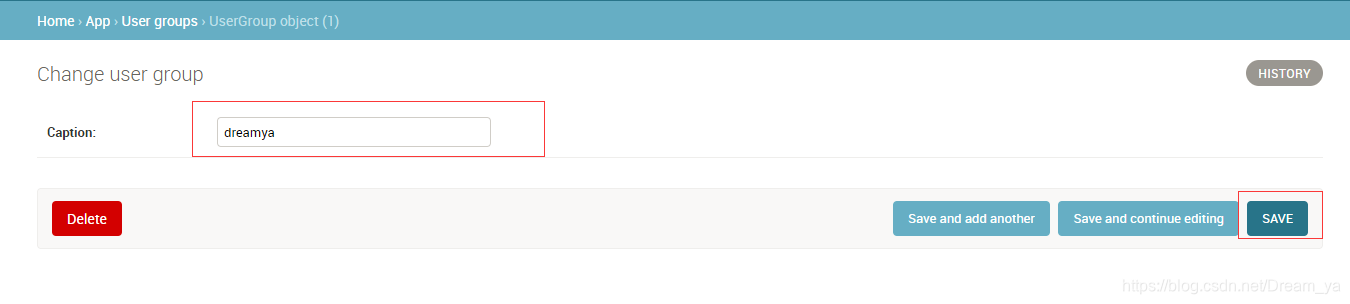
(5)在页面进行修改后
MariaDB [(none)]> select * from django.app_usergroup;
+-----+---------+----------------------------+----------------------------+
| uid | caption | ctime                      | uptime                     |
+-----+---------+----------------------------+----------------------------+
|   1 | dreamya | 2019-01-17 06:43:46.114803 | 2019-01-17 06:48:42.964696 |
+-----+---------+----------------------------+----------------------------+
9、choices
(1)配置/models.py
[root@python Dream]# vim app/models.py
from django.db import models
class UserGroup(models.Model):
### 自增id
uid = models.AutoField(primary_key=True)
caption = models.CharField(max_length=16, unique=True)
ctime = models.DateTimeField(auto_now_add=True, null=True)
uptime = models.DateTimeField(auto_now=True, null=True)
### 表名app_userinfo
class UserInfo(models.Model):
### id列,自增,主键
### 用户名列,字符串类型,指定长度
username = models.CharField(max_length=32)
password = models.CharField(max_length=64)
email = models.EmailField(max_length=20, null=True)
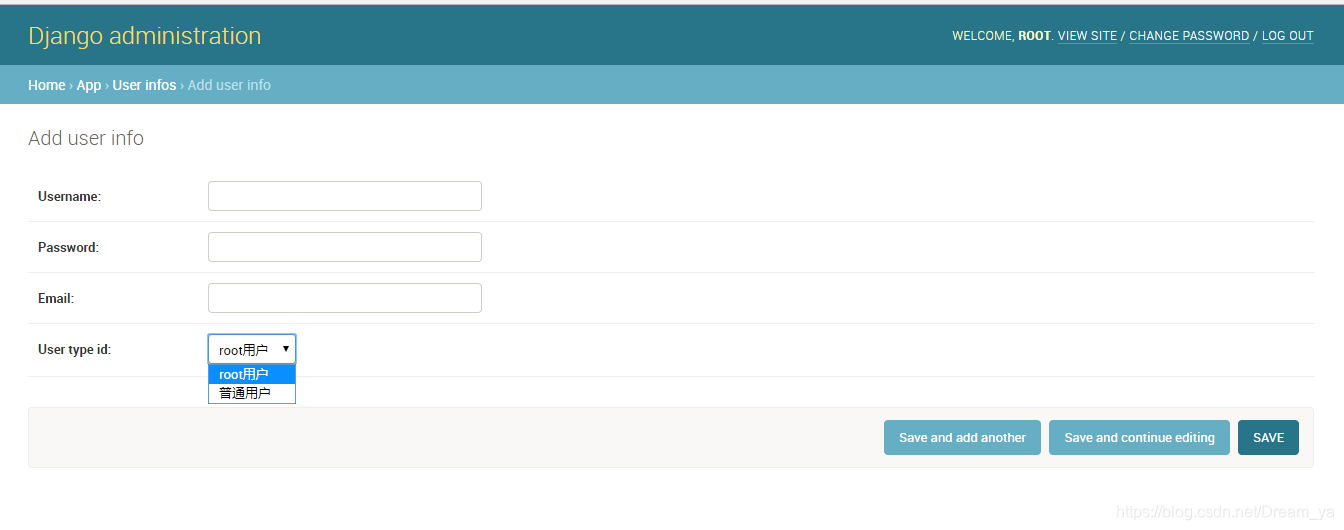
user_type_choice = (
(1, 'root用户'),
(2, '普通用户'),
)
user_type_id = models.IntegerField(choices=user_type_choice, default=1)
(2)运行访问
[root@python Dream]# python manage.py makemigrations
[root@python Dream]# python manage.py migrate
[root@python Dream]# python manage.py runserver 10.10.10.111:8000
http://10.10.10.111:8000/admin/app/userinfo/add/
10、外键(ForeignKey)
[root@python Dream]# vim app/models.py
class UserInfo(models.Model):
    ### id列,自增,主键
    ### 用户名列,字符串类型,指定长度
    username = models.CharField(max_length=32)
    password = models.CharField(max_length=64)
    email = models.EmailField(max_length=20, null=True)
    ### user_group_id数字,在django2中需要on_delete=models.CASCADE否则会报错
    user_group = models.ForeignKey('UserGroup', on_delete=models.CASCADE, to_field='uid', default=1)
    user_type_choice = (
        (1, 'root用户'),
        (2, '普通用户'),
    )
    user_type_id = models.IntegerField(choices=user_type_choice, default=1)

user_list = UserInfo.objects.all()
for row in user_list:
    print (row)
    print (row.user_group_id)
    print (row.user_group.uid)
    print (row.user_group.caption)
    print (row.user_group.ctime)
    print (row.user_group.uptime)