
详细代码demo,在这里→https://download.csdn.net/download/qq_28582847/10344437
准备工作:
1.搭建一个springboot+maven开发环境,参考网址:https://blog.csdn.net/qq_28582847/article/details/79891695
2.
在IDEA中安装
actiBPM插件 或者
在eclipse中安装activiti插件(eclipse对activiti画图集成较好,本文使用这个)
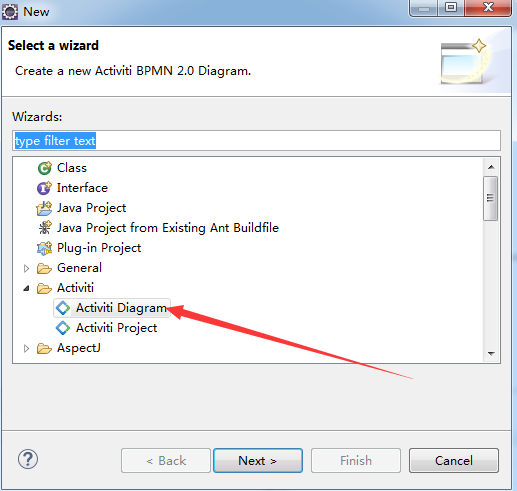
1.画工作流程图
安装好插件后,使用eclipse新建空项目,右键→new→other,选择activiti Diagram→命名为demo2.bpmn→finish
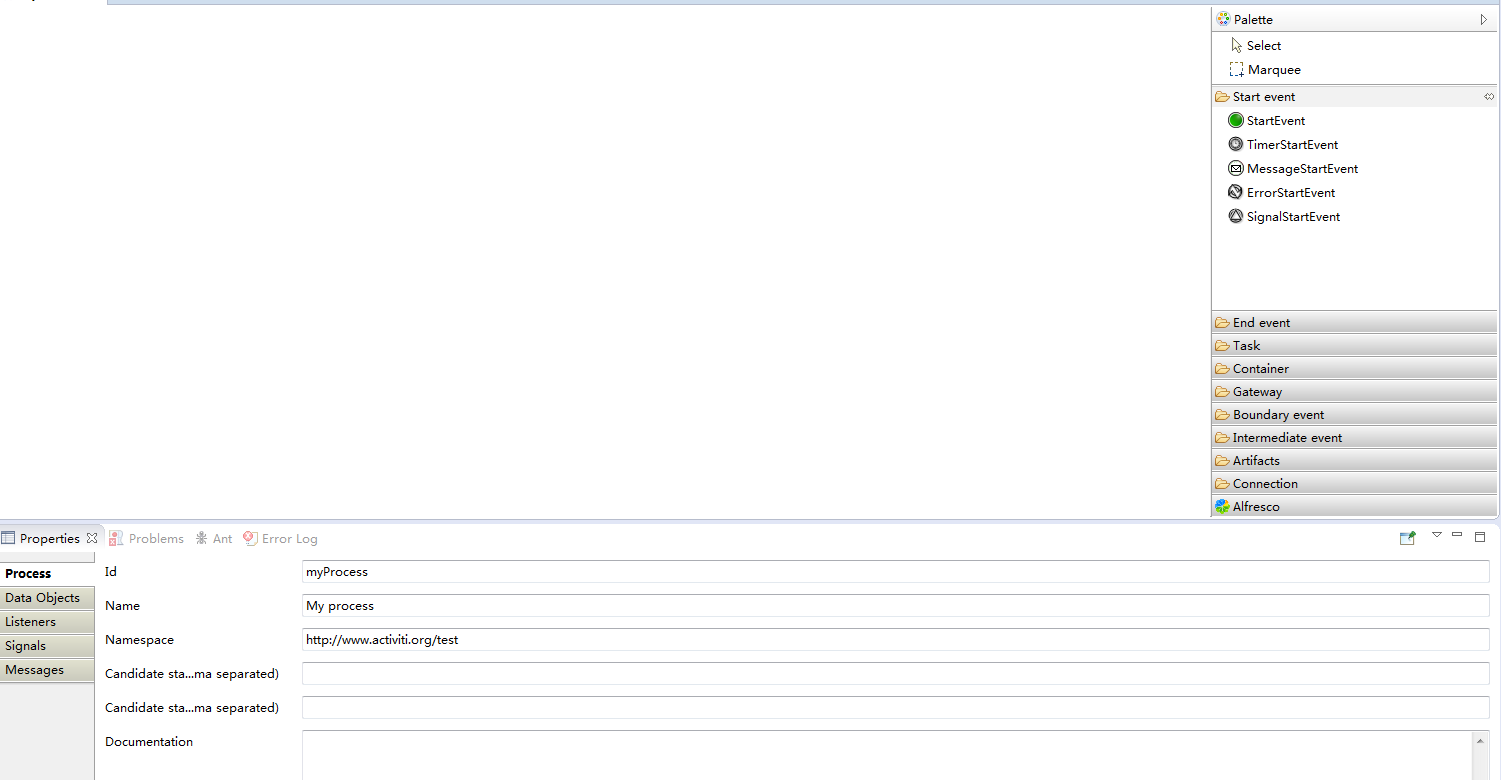
本文不教怎么手动画流程图,直接使用xml方式生成,我们使用xml方式打开
将下列代码复制进去
<?xml version="1.0" encoding="UTF-8" standalone="yes"?>
<definitions xmlns="http://www.omg.org/spec/BPMN/20100524/MODEL" xmlns:activiti="http://activiti.org/bpmn" xmlns:bpmndi="http://www.omg.org/spec/BPMN/20100524/DI" xmlns:omgdc="http://www.omg.org/spec/DD/20100524/DC" xmlns:omgdi="http://www.omg.org/spec/DD/20100524/DI" xmlns:tns="http://www.activiti.org/test" xmlns:xsd="http://www.w3.org/2001/XMLSchema" xmlns:xsi="http://www.w3.org/2001/XMLSchema-instance" expressionLanguage="http://www.w3.org/1999/XPath" id="m1523330736616" name="" targetNamespace="http://www.activiti.org/test" typeLanguage="http://www.w3.org/2001/XMLSchema">
  <process id="demo2" isClosed="false" isExecutable="true" name="My process" processType="None">
    <startEvent id="startevent1" name="Start"/>
    <userTask activiti:exclusive="true" id="usertask1" name="请假"/>
    <userTask activiti:exclusive="true" id="usertask2" name="审批"/>
    <endEvent id="endevent1" name="End"/>
    <sequenceFlow id="flow1" sourceRef="usertask2" targetRef="endevent1"/>
    <sequenceFlow id="flow2" sourceRef="usertask1" targetRef="usertask2"/>
    <sequenceFlow id="flow3" sourceRef="startevent1" targetRef="usertask1"/>
  </process>
  <bpmndi:BPMNDiagram documentation="background=#FFFFFF;count=1;horizontalcount=1;orientation=0;width=842.4;height=1195.2;imageableWidth=832.4;imageableHeight=1185.2;imageableX=5.0;imageableY=5.0" id="Diagram-_1" name="New Diagram">
    <bpmndi:BPMNPlane bpmnElement="demo2">
      <bpmndi:BPMNShape bpmnElement="startevent1" id="Shape-startevent1">
        <omgdc:Bounds height="32.0" width="32.0" x="130.0" y="180.0"/>
        <bpmndi:BPMNLabel>
          <omgdc:Bounds height="32.0" width="32.0" x="0.0" y="0.0"/>
        </bpmndi:BPMNLabel>
      </bpmndi:BPMNShape>
      <bpmndi:BPMNShape bpmnElement="usertask1" id="Shape-usertask1">
        <omgdc:Bounds height="55.0" width="105.0" x="271.0" y="170.0"/>
        <bpmndi:BPMNLabel>
          <omgdc:Bounds height="55.0" width="105.0" x="0.0" y="0.0"/>
        </bpmndi:BPMNLabel>
      </bpmndi:BPMNShape>
      <bpmndi:BPMNShape bpmnElement="usertask2" id="Shape-usertask2">
        <omgdc:Bounds height="55.0" width="105.0" x="471.0" y="170.0"/>
        <bpmndi:BPMNLabel>
          <omgdc:Bounds height="55.0" width="105.0" x="0.0" y="0.0"/>
        </bpmndi:BPMNLabel>
      </bpmndi:BPMNShape>
      <bpmndi:BPMNShape bpmnElement="endevent1" id="Shape-endevent1">
        <omgdc:Bounds height="32.0" width="32.0" x="690.0" y="180.0"/>
        <bpmndi:BPMNLabel>
          <omgdc:Bounds height="32.0" width="32.0" x="0.0" y="0.0"/>
        </bpmndi:BPMNLabel>
      </bpmndi:BPMNShape>
      <bpmndi:BPMNEdge bpmnElement="flow1" id="BPMNEdge_flow1" sourceElement="usertask2" targetElement="endevent1">
        <omgdi:waypoint x="576.0" y="197.5"/>
        <omgdi:waypoint x="690.0" y="196.0"/>
        <bpmndi:BPMNLabel>
          <omgdc:Bounds height="-1.0" width="-1.0" x="-1.0" y="-1.0"/>
        </bpmndi:BPMNLabel>
      </bpmndi:BPMNEdge>
      <bpmndi:BPMNEdge bpmnElement="flow2" id="BPMNEdge_flow2" sourceElement="usertask1" targetElement="usertask2">
        <omgdi:waypoint x="376.0" y="197.5"/>
        <omgdi:waypoint x="471.0" y="197.5"/>
        <bpmndi:BPMNLabel>
          <omgdc:Bounds height="-1.0" width="-1.0" x="-1.0" y="-1.0"/>
        </bpmndi:BPMNLabel>
      </bpmndi:BPMNEdge>
      <bpmndi:BPMNEdge bpmnElement="flow3" id="BPMNEdge_flow3" sourceElement="startevent1" targetElement="usertask1">
        <omgdi:waypoint x="162.0" y="196.0"/>
        <omgdi:waypoint x="271.0" y="197.5"/>
        <bpmndi:BPMNLabel>
          <omgdc:Bounds height="-1.0" width="-1.0" x="-1.0" y="-1.0"/>
        </bpmndi:BPMNLabel>
      </bpmndi:BPMNEdge>
    </bpmndi:BPMNPlane>
  </bpmndi:BPMNDiagram>
</definitions>
注意:id="demo2"保持和文件名一致
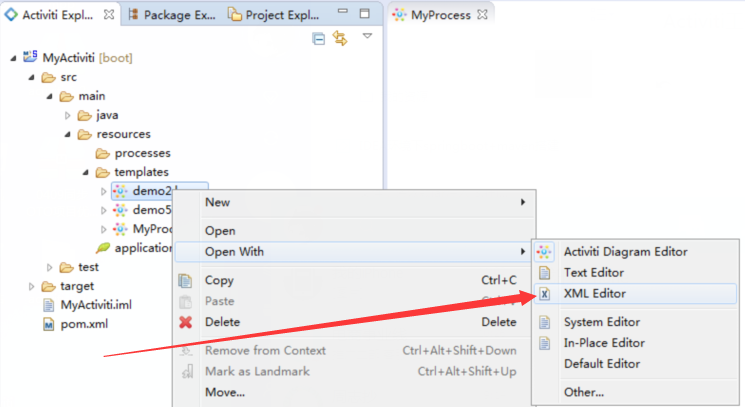
重新右键demo2.bpmn→open with→Activiti Diagram Editor打开

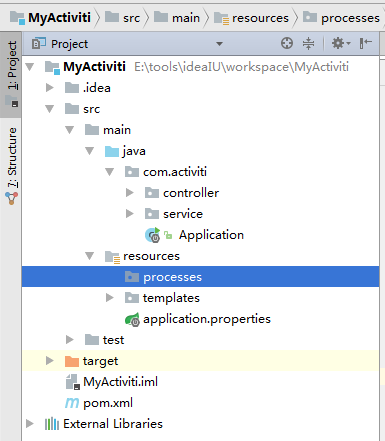
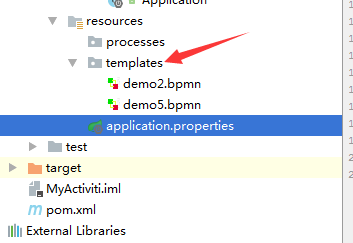
2.搭建springboot+maven的项目,结构如下
1)修改pom.xml文件,代码如下:
<?xml version="1.0" encoding="UTF-8"?>
<project xmlns="http://maven.apache.org/POM/4.0.0"
         xmlns:xsi="http://www.w3.org/2001/XMLSchema-instance"
         xsi:schemaLocation="http://maven.apache.org/POM/4.0.0 http://maven.apache.org/xsd/maven-4.0.0.xsd">
    <modelVersion>4.0.0</modelVersion>

    <groupId>com.activiti</groupId>
    <artifactId>MyActiviti</artifactId>
    <version>1.0-SNAPSHOT</version>

    <parent>
        <groupId>org.springframework.boot</groupId>
        <artifactId>spring-boot-starter-parent</artifactId>
        <version>1.2.6.RELEASE</version>
    </parent>

    <dependencies>
        <dependency>
            <groupId>org.springframework.boot</groupId>
            <artifactId>spring-boot-starter-web</artifactId>
        </dependency>
        <dependency>
            <groupId>org.activiti</groupId>
            <artifactId>activiti-spring-boot-starter-basic</artifactId>
            <version>5.22.0</version>
        </dependency>

        <dependency>
            <groupId>org.springframework.boot</groupId>
            <artifactId>spring-boot-starter-data-jpa</artifactId>
        </dependency>
        <dependency>
            <groupId>org.springframework.boot</groupId>
            <artifactId>spring-boot-starter-thymeleaf</artifactId>
        </dependency>
        <dependency>
            <groupId>org.springframework.boot</groupId>
            <artifactId>spring-boot-starter-web</artifactId>
        </dependency>

        <dependency>
            <groupId>mysql</groupId>
            <artifactId>mysql-connector-java</artifactId>
            <scope>runtime</scope>
        </dependency>
        <dependency>
            <groupId>org.springframework.boot</groupId>
            <artifactId>spring-boot-starter-jdbc</artifactId>
        </dependency>
        <dependency>
            <groupId>org.springframework.boot</groupId>
            <artifactId>spring-boot-starter-tomcat</artifactId>
        </dependency>
        <dependency>
            <groupId>org.springframework.boot</groupId>
            <artifactId>spring-boot-starter-test</artifactId>
            <scope>test</scope>
        </dependency>
        <dependency>
            <groupId>org.springframework.boot</groupId>
            <artifactId>spring-boot-devtools</artifactId>
            <optional>true</optional><!-- optional=true,依赖不会传递,该项目依赖devtools;之后依赖myboot项目的项目如果想要使用devtools,需要重新引入 -->
        </dependency>
    </dependencies>
    <build>
        <plugins>
            <plugin>
                <groupId>org.springframework.boot</groupId>
                <artifactId>spring-boot-maven-plugin</artifactId>
            </plugin>
        </plugins>
    </build>
</project>
2)在application.properties增加数据库连接(程序启动后,表都是系统自建)
spring.datasource.url=jdbc:mysql://127.0.0.1:3306/activitiy?characterEncoding=utf8&useSSL=true
spring.datasource.username=root
spring.datasource.password=
spring.datasource.driver-class-name=com.mysql.jdbc.Driver
spring.datasource.max-idle=10
spring.datasource.max-wait=10000
spring.datasource.min-idle=5
spring.datasource.initial-size=5
server.context-path=/workFlow
server.session.timeout=10
spring.http.encoding.force=true
spring.http.encoding.charset=UTF-8
spring.http.encoding.enabled=true
server.tomcat.uri-encoding=UTF-8
server.port=8081
spring.activiti.check-process-definitions=false
3)将demo2.bpmn文件放入到resources/templates目录下
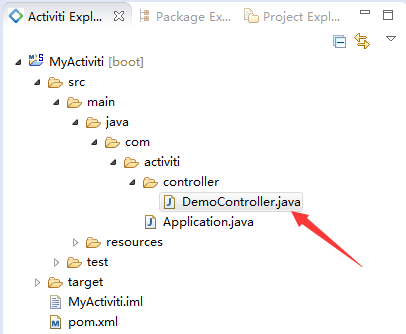
4)编写一个controller类
代码如下:
@RestController
@RequestMapping("/demo")
public class DemoController {
    @Autowired
    private RepositoryService repositoryService;
    @Autowired
    private RuntimeService runtimeService;
    @Autowired
    private TaskService taskService;

    @RequestMapping("/firstDemo")
    public void firstDemo() {

        //根据bpmn文件部署流程
        Deployment deployment = repositoryService.createDeployment().addClasspathResource("templates/demo2.bpmn").deploy();
        //获取流程定义
        ProcessDefinition processDefinition = repositoryService.createProcessDefinitionQuery().deploymentId(deployment.getId()).singleResult();
        //启动流程定义,返回流程实例
        ProcessInstance pi = runtimeService.startProcessInstanceById(processDefinition.getId());
        String processId = pi.getId();
        System.out.println("流程创建成功,当前流程实例ID:"+processId);

        Task task=taskService.createTaskQuery().processInstanceId(processId).singleResult();
        System.out.println("第一次执行前,任务名称:"+task.getName());
        taskService.complete(task.getId());

        task = taskService.createTaskQuery().processInstanceId(processId).singleResult();
        System.out.println("第二次执行前,任务名称:"+task.getName());
        taskService.complete(task.getId());

        task = taskService.createTaskQuery().processInstanceId(processId).singleResult();
        System.out.println("task为null,任务执行完毕:"+task);
    }
}
5)启动application.java类,访问
http://localhost:8081/workFlow/demo/firstDemo
,查看控制台
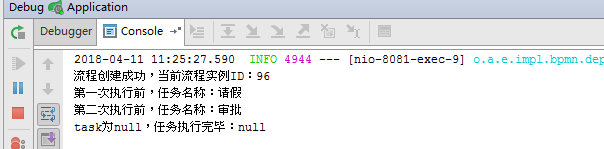
讲解:从代码上我们可以知道runtimeService.startProcessInstanceById该方法启动了流程,通过获取 Task task=taskService.createTaskQuery().processInstanceId(processId).singleResult();节点的信息后,我们进行taskService.complete(task.getId());完成该节点,从而流程走到下一节点,直到流程走完。