对接openstack
一、使用rbd方式提供存储如下数据:
(1)image:保存glanc中的image;
(2)volume存储:保存cinder的volume;保存创建虚拟机时选择创建新卷;

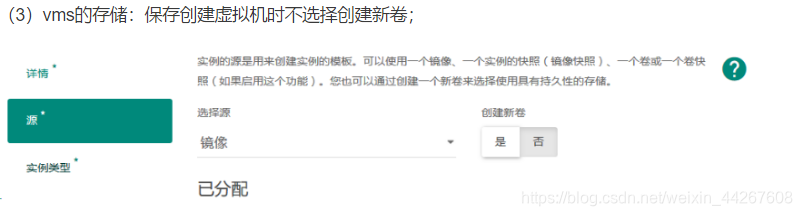
(3)vms的存储:保存创建虚拟机时不选择创建新卷;
二、实施步骤:
(1)客户端也要有cent用户:
useradd cent && echo “123” | passwd --stdin cent
echo -e ‘Defaults:cent !requiretty\ncent ALL = (root) NOPASSWD:ALL’ | tee /etc/sudoers.d/ceph
chmod 440 /etc/sudoers.d/ceph
(2)openstack要用ceph的节点(比如compute-node和storage-node)安装下载的软件包:
yum localinstall ./* -y
或者:每个节点安装 clients(要访问ceph集群的节点):
yum install python-rbd
yum install ceph-common
如果先采用上面的方式安装客户端,其实这两个包在rpm包中早已经安装过了
(3)部署节点上执行,为openstack节点安装ceph:
ceph-deploy install controller
ceph-deploy admin controller
(4)客户端执行
sudo chmod 644 /etc/ceph/ceph.client.admin.keyring
(5)create pools,只需在一个ceph节点上操作即可:
ceph osd pool create images 1024
ceph osd pool create vms 1024
ceph osd pool create volumes 1024
显示pool的状态
ceph osd lspools
(6)在ceph集群中,创建glance和cinder用户, 只需在一个ceph节点上操作即可:
ceph auth get-or-create client.glance mon 'allow r' osd 'allow class-read object_prefix rbd_children, allow rwx pool=images'

ceph auth get-or-create client.cinder mon 'allow r' osd 'allow class-read object_prefix rbd_children, allow rwx pool=volumes, allow rwx pool=vms, allow rx pool=images'

nova使用cinder用户,就不单独创建了
(7)拷贝ceph-ring, 只需在一个ceph节点上操作即可:
ceph auth get-or-create client.glance > /etc/ceph/ceph.client.glance.keyring
ceph auth get-or-create client.cinder > /etc/ceph/ceph.client.cinder.keyring
注:使用scp拷贝到其他节点(ceph集群节点和openstack的要用ceph的节点比如compute-node和storage-node,本次对接的是一个all-in-one的环境,所以copy到controller节点即可 )
(8)更改文件的权限(所有客户端节点均执行)
chown glance:glance /etc/ceph/ceph.client.glance.keyring
chown cinder:cinder /etc/ceph/ceph.client.cinder.keyring
(9)更改libvirt权限(只需在nova-compute节点上操作即可,每个计算节点都做)
uuidgen
940f0485-e206-4b49-b878-dcd0cb9c70a4
在/etc/ceph/目录下(在什么目录没有影响,放到/etc/ceph目录方便管理):
<secret ephemeral='no' private='no'>
<uuid>940f0485-e206-4b49-b878-dcd0cb9c70a4</uuid>
<usage type='ceph'>
 <name>client.cinder secret</name>
</usage>
</secret>
EOF
将 secret.xml 拷贝到所有compute节点,并执行:
virsh secret-define --file secret.xml
ceph auth get-key client.cinder > ./client.cinder.key
virsh secret-set-value --secret 940f0485-e206-4b49-b878-dcd0cb9c70a4 --base64 $(cat ./client.cinder.key)
最后所有compute节点的client.cinder.key和secret.xml都是一样的, 记下之前生成的uuid:940f0485-e206-4b49-b878-dcd0cb9c70a4
(10)配置Glance, 在所有的controller节点上做如下更改:
vim /etc/glance/glance-api.conf修改以下选项
[DEFAULT]
default_store = rbd

[glance_store]
stores = rbd
default_store = rbd
rbd_store_pool = images
rbd_store_user = glance
rbd_store_ceph_conf = /etc/ceph/ceph.conf
rbd_store_chunk_size = 8
在所有的controller节点上做如下操作
systemctl restart openstack-glance-api.service
systemctl status openstack-glance-api.service
创建image验证:
[root@controller ~]# openstack image create "cirros"   --file cirros-0.3.3-x86_64-disk.img.img   --disk-format qcow2 --container-format bare --public

[root@controller ~]# rbd ls images
9ce5055e-4217-44b4-a237-e7b577a20dac
(11)配置 Cinder:
vim /etc/cinder/cinder.conf修改以下选项
[DEFAULT]
enabled_backends = ceph

[ceph]
volume_driver = cinder.volume.drivers.rbd.RBDDriver
rbd_pool = volumes
rbd_ceph_conf = /etc/ceph/ceph.conf
rbd_flatten_volume_from_snapshot = false
rbd_max_clone_depth = 5
rbd_store_chunk_size = 4
rados_connect_timeout = -1
glance_api_version = 2
rbd_user = cinder
rbd_secret_uuid = 940f0485-e206-4b49-b878-dcd0cb9c70a4
volume_backend_name=ceph
重启cinder服务:
systemctl restart openstack-cinder-api.service openstack-cinder-scheduler.service openstack-cinder-volume.service
systemctl status openstack-cinder-api.service openstack-cinder-scheduler.service openstack-cinder-volume.service
创建volume验证:
[root@controller gfs]# rbd ls volumes
volume-43b7c31d-a773-4604-8e4a-9ed78ec18996
(12)配置Nova:
vim /etc/nova/nova.conf修改以下选项
[libvirt]
virt_type=qemu
images_type = rbd
images_rbd_pool = vms
images_rbd_ceph_conf = /etc/ceph/ceph.conf
rbd_user = cinder
rbd_secret_uuid = 940f0485-e206-4b49-b878-dcd0cb9c70a4