自动化配置实现
我们在上章编写入门案例的时候,我们使用的是Spring Mvc 作为我们的表现层框架,但是我们都知道我们要使用Spring Mvc 我们就需要在web.xml文件中配置Spring Mvc 的前端控制器DispatcherServlet。但是我们在编写入门案例的时候,我们并没有去做任何的配置,那么我们为什么可以使用呢?原因是Spring Boot 给我们做了自动化配置,下面我们学习一下Spring Boot 中自动化配置的原理。
- 入口类和
@SpringBootApplication
— Spring Boot 项目一般都会有*Application的入口类, 入口类中会有main方法,这是一个标准的Java应用程序的入口方法。Spring Boot 会自动扫描@SpringBootApplication所在类的同级包及其下级包中的Bean(如果是jpa项目还会自动扫描标注@Entity的实体类)@SpringBootApplication注解是Spring Boot的核心注解。
//
// Source code recreated from a .class file by IntelliJ IDEA
// (powered by Fernflower decompiler)
//

package org.springframework.boot.autoconfigure;

import java.lang.annotation.Documented;
import java.lang.annotation.ElementType;
import java.lang.annotation.Inherited;
import java.lang.annotation.Retention;
import java.lang.annotation.RetentionPolicy;
import java.lang.annotation.Target;
import org.springframework.boot.SpringBootConfiguration;
import org.springframework.boot.context.TypeExcludeFilter;
import org.springframework.context.annotation.ComponentScan;
import org.springframework.context.annotation.FilterType;
import org.springframework.context.annotation.ComponentScan.Filter;
import org.springframework.core.annotation.AliasFor;

@Target({ElementType.TYPE})
@Retention(RetentionPolicy.RUNTIME)
@Documented
@Inherited
@SpringBootConfiguration
@EnableAutoConfiguration
@ComponentScan(
    excludeFilters = {@Filter(
    type = FilterType.CUSTOM,
    classes = {TypeExcludeFilter.class}
), @Filter(
    type = FilterType.CUSTOM,
    classes = {AutoConfigurationExcludeFilter.class}
)}
)
public @interface SpringBootApplication {
    @AliasFor(
        annotation = EnableAutoConfiguration.class
    )
    Class<?>[] exclude() default {};

    @AliasFor(
        annotation = EnableAutoConfiguration.class
    )
    String[] excludeName() default {};

    @AliasFor(
        annotation = ComponentScan.class,
        attribute = "basePackages"
    )
    String[] scanBasePackages() default {};

    @AliasFor(
        annotation = ComponentScan.class,
        attribute = "basePackageClasses"
    )
    Class<?>[] scanBasePackageClasses() default {};
}
通过源码我们发现在@SpringBootApplication这个注解上又定义了一些其他的注解,如:@SpringBootConfiguration、@EnableAutoConfiguration,我们把这样的注解称为组合注解,组合注解的作用就是简化我们的注解使用,我们在某一个类上使用了@SpringBootApplication那么就相当于在该类上使用了该注解上定义的其他的三个注解。
@SpringBootConfiguration注解
— 看到Configuration注解,就想到它的作用就是用来替换配置文件的。而@SpringBootConfiguration注解是做什么的?我们看下它的源码。
//
// Source code recreated from a .class file by IntelliJ IDEA
// (powered by Fernflower decompiler)
//
package org.springframework.boot;
import java.lang.annotation.Documented;
import java.lang.annotation.ElementType;
import java.lang.annotation.Retention;
import java.lang.annotation.RetentionPolicy;
import java.lang.annotation.Target;
import org.springframework.context.annotation.Configuration;

@Target({ElementType.TYPE})
@Retention(RetentionPolicy.RUNTIME)
@Documented
@Configuration
public @interface SpringBootConfiguration {
}
通过源码,我们发现@SpringBootConfiguration注解也是组合注解,它的另一个注解就是 @Configuration ,SpringBoot 推荐我们使用该注解来替换配置文件。
-
@EnableAutoConfiguration支持自动化配置注解 -
DispatcherServlet 自动化配置分析
— DispatcherServlet 自动化配置源码解析
— 入门案例中我们只是加入了spring-boot-starter-web这个依赖,就可以实现DispatcherServlet相关配置。这是为什么?注意当我们加入了spring-boot-starter-web的依赖以后,根据maven的依赖传递特性,会自动将一些包加入到我们的项目中。比如会自动添加tomcat 和springmvc的依赖。
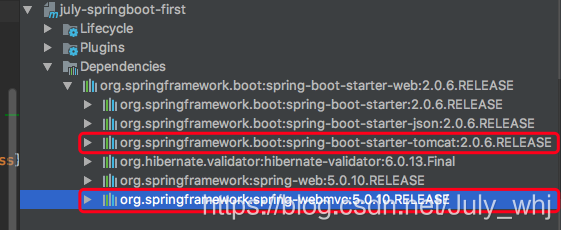
那么这些依赖包的确加入到我们的项目中,那么怎么完成自动配置?因为加入
spring-boot-starter-web依赖的时候,会自动将另外的一个依赖加入进来,这个依赖包就是spring-boot-autoconfigure:2.0.6.RELEASE这个包定义了很多技术点的自动配置。
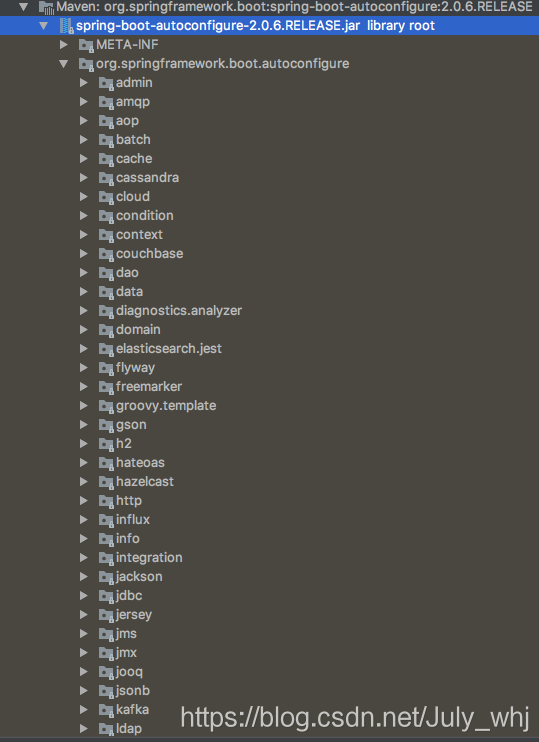
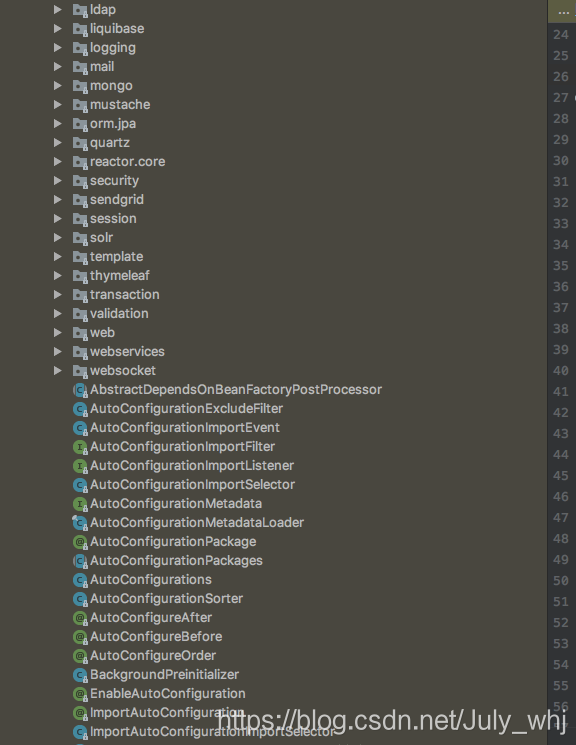
找到这个jar后,让我们揭开DispatcherServlet自动化注解的神秘面纱。首先找到org.springframework.boot.autoconfigure.web.servlet包下的DispatcherServletAutoConfiguration类。由于源码太多,这里不贴全部源码。看下源码信息:
@AutoConfigureOrder(Ordered.*HIGHEST_PRECEDENCE*)
@Configuration
@ConditionalOnWebApplication(type = Type.*SERVLET*)
@ConditionalOnClass(DispatcherServlet.class)
@AutoConfigureAfter(ServletWebServerFactoryAutoConfiguration.class)
@EnableConfigurationProperties(ServerProperties.class)
public class DispatcherServletAutoConfiguration {
	/*
	 * The bean name for a DispatcherServlet that will be mapped to the root URL "/"
	 */
	public static final String *DEFAULT_DISPATCHER_SERVLET_BEAN_NAME*= "dispatcherServlet";
我们通过源码可以看到DispatcherServletAutoConfiguration类上面有6个注解,包括我们最熟悉的@Configuration注解,下面我们一一分析下注解的含义:
— @AutoConfigureOrder注解:指定自动注解顺序。取值为int的最小值,优先级最高。
— @Configuration注解:这个大家都不陌生了,是指定该类为配置类。类似我们定义的applicationContext.xml文件。
— @ConditionalOnWebApplication:这是一个新注解,为条件注解,表示当前项目是一个web环境的条件下。
— @ConditionalOnClass:判断当前路径下有指定的类的条件下。
— @ AutoConfigureAfter:定义该配置类的载入顺序;该类表示后于ServletWebServerFactoryAutoConfiguration.class载入。
— 其实实现自动化配置主要是依据条件注解来完成的,有了条件注解了以后,就会根据这些条件,来判断是否启用这些配置。
- 以下是些条件注解的总结:
@ConditionaOnBean-> 当容器中存在指定Bean的条件下
@ConditionaOnClass-> 当类路径下存在指定类的条件下
@ConditionaOnMissingBean-> 当容器中不存在指定Bean的条件下
@ConditionaOnMissingClass-> 当类路径下不存在指定类的条件下
@ConditionaOnProperty-> 指定的属性是否存在指定的值
@ConditionaOnResource-> 类路径下是否存在指定的值
@ConditionaOnWebApplication-> 是web环境的条件下
@ConditionaOnNotWebApplication-> 不是web环境的条件下
以上是些常用的条件注解,先总结到这里。
入门项目传送门:Springboot 入门(一):入门案例 - July_whj - CSDN博客
项目源码传送门:https://download.csdn.net/download/july_whj/10791990
#springboot/02自动化配置实现